Estimated reading time: 12 minute(s) How to measure room acoustics? What equipment is needed to take measurements? Let's talk a little about these issues now, but there are no plans to take measurements today.
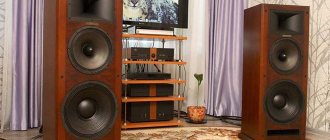
All rooms where music is listened to make a certain “contribution” to the sound quality. The acoustic properties of rooms are so varied and unpredictable that there are no clear solutions in the struggle for high-quality sound.
Not everyone has the opportunity to equip “special rooms” intended exclusively for installing their own audio equipment, much less high-end ones.
But for most of those who listen to music in a regular living room, there are many tips and notes. Using even some of these tips, you can optimize the sound of your existing audio equipment. We have already discussed some of them earlier. Now let's talk about a technical way to measure room acoustics.
What equipment is needed to measure room acoustics?
Microphone stand
To measure the acoustics of a room, the first thing you need is a regular microphone stand.
Any tripod will do, with the ability to mount the microphone in a horizontal position at a level of approximately 90-100 centimeters from the floor. It is not entirely technically correct to hold the microphone in your hands while taking measurements. Why does the microphone need to be installed at this particular height? Typically, at this height is the head and ears of a music listener sitting in his chair or on a sofa in front of the acoustics. Rarely does anyone listen to music while standing in front of speakers.
Measurement microphone
You will also need a measuring microphone. Without it there is no way to take measurements. Judging by the large number of “for” votes and good reviews from those who have carried out such measurements of room acoustics many times, we will choose the Behringer ECM 8000 microphone for work. The microphone is not very expensive, but it is quite good in quality.
But you can also buy Dayton Audio EMM-6 (calibration analog measurement microphone), miniDSP UMIK-1 (calibration measurement USB microphone).
Although, having understood the program, you can conduct several experiments with any inexpensive condenser microphone, a lavalier for example. And the results can be quite decent and sufficient for assessing the acoustics of the room. But don’t forget to adjust the microphone.
Below, we’ll look at microphones in a little more detail – what types of microphones there are and which one is preferable to use when measuring the acoustics of rooms and acoustic systems. Let's briefly look at the advantages and characteristics.
Microphone amplifier
The third component is the microphone amplifier. There are not many options for which amplifier to use, but all amplifiers are quite expensive (more than 150 “green pieces of paper”) and not everyone can afford to buy such a device for a one-time measurement of their acoustics in a room.
List of recommended devices - microphone amplifiers for measuring room acoustics:
- Steinberg UR22 MkII USB audio interface
- miniDSP 2×4 HD DSP / Equalizer / USB DAC / crossove
- Focusrite Scarlett Solo USB audio interface
My opinion on the microphone amplifier
Many people carry out measurements without using amplifiers specially purchased for measurements. They take measurements by connecting a microphone directly to the microphone input of a laptop or computer.
In other words, they use the capabilities of the computer’s sound card. But this is not always a good option, since not every computer has a good sound card or a chip suitable for these purposes.
I believe that a microphone amplifier is needed to measure the acoustics of rooms and acoustic systems. There is a lot of talk on forums about the use of microphone amplifiers: use a special amplifier or a simple homemade one is enough.
One can argue, but by making a homemade amplifier you can achieve the desired result for little money. But to buy a special amplifier and not bother with finding a circuit, parts, soldering and tuning - you can pay for it.
Who is capable and ready for what: spend money on a good ready-made amplifier or build your own for a specifically chosen microphone. There is a choice!
Measurement programs
We need to measure the acoustics of the room. To carry out such measurements and obtain visual graphs on a computer, you can use any program - there are a lot of them. Most of them are professional, very sophisticated and only paid.
Below is a very small list of programs that many professionals use to measure acoustics and rooms:
- ULYSSES is a program designed to quickly and accurately assess and simulate the acoustic parameters of rooms. https://www.ifbsoft.de
- ODEON – Room Acoustics Software. Professional program https://www.odeon.dk
- EASE v3.0 program for acoustic modeling of large spaces (stadiums, churches, arenas, theaters, etc.). Designed for installers, architects, engineers, builders. https://www.renkus-heinz.com
- PRAXIS is a sophisticated measuring system that takes advantage of the extensive capabilities of Windows. Designed for professionals. https://www.libinst.com/PraxisMoreInfo.htm
- Room EQ Wizard. This is room acoustics analysis software Contents: tools for generating audio test signals;
- performing SPL and impedance measurements;
- measurements of frequency and impulse characteristics;
- distortion measurement;
- creating phase, group delay and spectral attenuation graphs;
- creating real-time analyzer (RTA) graphs;
- calculation of reverberation time;
- calculation of Thiel-Small parameters;
- determination of frequencies and decay times of modal resonances;
Here is the last one on the list - a program that is used by almost everyone who is interested in acoustics and high-quality sound at home. It is intuitive and has enough tools to provide comprehensive information.
This is not an advertisement for the program, but simply on numerous forums people write and ask questions about this particular program.
Room EQ Wizard
You can and should download the measurement program from the official website of Room EQ Wizard. It is distributed free of charge and is available for any operating system. On the main page, download the required version of the application (for any operating system)
The Room EQ Wizard application is designed to analyze the acoustic parameters of a room and obtain the data necessary to correct frequency characteristics.
Let's launch the program. First, you need to calibrate the microphone itself so that it gives the readings correctly. Then you can take measurements.
The generator test signal turns on. The speakers reproduce the entire spectrum of frequencies. The microphone listens to this signal, the program records and displays the results in the form of a frequency response graph.
This is a very short description of working with the program, because not everything is so simple and cannot be explained in a nutshell. Lots of fine adjustments. There are many videos on the Internet that talk about the intricacies of microphone calibration, program settings, its capabilities and advantages.
Probably, later, an article will be written to address this issue, and maybe more than one. But in the existing videos, the explanations for working with the program are more visual and clearer. It only costs the right search engine.
Reasoning about microphones
Professional measurement microphones come in directional and omnidirectional types. The terms “Directional”, “Cardioid”, “Omnidirectional” characterize their polar patterns, although these terms are sometimes used too loosely. The directivity of all microphones is frequency dependent and becomes spherical (omnidirectional) as frequency decreases.
Below are approximate polar patterns of sensitive zones of microphones.
Omnidirectional microphone
Receives sound almost equally from any direction. In the figure, its radiation pattern is highlighted in red. Measuring microphones are almost always made omnidirectional.
Cardioid microphone
In the figure it is indicated in green. The most common radiation pattern. These microphones typically have a proximity effect that colors and enhances the bass range of vocals at close range. Often used in studios at radio stations and recording studios.
Supercardioid microphone
Blue Pattern - This is an extended version of the cardioid mic, having a slight second zone behind the mic and the main zone being more directional.
Hypercardioid microphone
The diagram is purple. This is an extended version of the supercardioid microphone, which has a more extended pattern.
Bi-directional microphone
The bi-directional figure-of-eight microphone, yellow, picks up sound equally well from both the front and rear, but suppresses sound coming from the sides (as well as above, below, etc.).
Microphone
There is a lot that can be said about narrow-beam microphones; the material could be collected into a separate article, which we won’t do now. There is no directional pattern on the diagrams.
But this diagram can be described in a few words. Such a microphone hears sounds only in front of it and in a fairly narrow “corridor”. Therefore, measuring microphones are placed directly in front of the acoustic system, a few tens of centimeters. Basically, this distance is considered ideal for taking measurements and is made at one meter.
Here below again is my personal opinion-reasoning, and it probably coincides with the opinion of many about the location of the microphone.
Typically, shotgun microphones have long bodies and have an extremely narrow polar pattern. They perceive sound only in the immediate vicinity of the directional axis of the microphone.
These microphones are used for local audio recording (for film or television). With their help, they record sounds of nature, as well as in any other place where very precise positioning is required.
Practice - real results
Examples
Smooth frequency response, recognized in studios for full-size headphones
More unevenness can be observed in the upper mids and lower highs.
Smooth frequency response, recognized in home systems for full-size headphones
Here the frequency response is close to direct and there are no complaints from listeners about the subjective increase in the range in region 3. How do the opinions obtained in studios and home systems reconcile, where the alternative is high-end speaker systems with fairly flat frequency response? The fact is that in the studio the headphones are listened to at high volume, and at home at low volume. Based on the curves of equal loudness, at higher volumes, the region around 3 kHz is perceived louder, so when choosing headphones, you need to take into account the volume at which they will be listened to.
Smooth frequency response for in-ear headphones with high noise insulation in the low frequency region
Thanks to good noise insulation, at low volume the headphones can reproduce the entire spectrum of frequencies and artificial dips and rises in the frequency response are not required.
Preferred frequency response for in-ear headphones with low noise insulation in the low frequency region.
In the subway and other transport, the low-frequency hum is high enough to drown out the low-frequency component in a musical composition. For this reason, bass models are more popular and are perceived as smooth. The parameters sometimes indicate the level of noise insulation, but, as a rule, in the mid and high frequency range.
Brief summary of microphones
Electret microphone capsules, similar to those in the picture, are not expensive, but this does not mean their quality is poor. They are very often installed in the highest quality measurement microphones.
They are also used in microphones for recording nature and in other places where high sensitivity is required. These microphones have a relatively low noise level and at the same time a wide frequency range.
“True” condenser (aka “capacitor”) microphones are usually superior in quality and performance to most electret microphones.
However, no microphone can match the price of an electret capsule. And it’s no secret that electret capsules are very common today and are used in expensive, even professional equipment for monitoring and measuring sound.
This may indicate that they are no longer “cheap toys for entertainment purposes,” as previously thought.
So, let's return to the question - is it possible to make your own equipment for measuring the acoustics of a room and acoustic systems? Yes, it’s quite possible!
And it is very likely that the quality of measurements through a home-made microphone amplifier and a hand-made microphone will give excellent results. And in terms of costs it will be much cheaper than buying a ready-made microphone and amplifier for it.
But again, if you have the head, knowledge, hands and all the raw materials - good luck in your business! And when you don’t have the skill, but want to comprehend this science, then it’s better to buy ready-made and proven equipment. Again – there is a choice and it is yours!
Theory
Ideally, the frequency response should be direct when the source is an acoustic system, such as computer speakers, home theater speakers or studio monitors. The location of the headphones relative to our ears is completely different; they are not located at 60 degrees relative to the axis of the ear, but without deviation at 0 degrees. Try an experiment and listen to the speakers in an equilateral triangle and on an axis. The sound will differ noticeably not only in the construction of the stage, but also in the perception of different frequency ranges. All this is the influence of the structure of the auricle and auditory canal. The on-axis speakers will become “brighter” in the high-frequency region and sound different in the mid-frequency region.
Headphones are not only located on the axis, they are located next to the ear, or even inserted into the ear canal (in the case of “plugs”). All this significantly affects the perception of the frequency range and for each person individually
Ideal frequency response from speakers
The ideal frequency response from a speaker is a straight line, indicating that all frequencies are reproduced equally loudly.
If the headphone speaker is placed in the ear near the eardrum, then the frequency response that corresponds to the red or yellow line will be perceived as smooth.
It is precisely this frequency response of headphones that is subjectively “direct”. Unfortunately, you cannot completely rely on them, because... Each person has their own ear structure and, accordingly, there is a wide range of deviations from the “ideal”. Another point is that the location of the sources near the ear gives a different psychological perception of the frequency response than when listening to sources at a remote distance. In this regard, some publications, after measurements, make a “universal” correction for the measured frequency response (correction for their measuring equipment), but as a rule there is no great benefit from this. In the case of headphones, one can only draw general conclusions. By the way, the location of the microphone in the dummy’s ear can be either at the location of the eardrum or at the entrance to the ear canal (for measurements of full-size and on-ear headphones). Scientists have not yet reliably determined what gives a more adequate result. Our laboratory uses a mannequin with a microphone located at the entrance to the ear canal. The second factor that reduces the usefulness of the compensation curve is the different perception of the frequency response depending on the volume level. As a result, for quiet listening the dip in the upper mids and lower treble should be minimal, but for loud playback the dip should be significant.
Examples
Over-ear headphones
If the graph shows dips in the region of 2-5 kHz, then these headphones can provide good compensation towards the perception of a flat frequency response. The roll-off at high frequencies compensates for the location of the headphones on the axis of the ear.
Lilac – conditionally ideally flat frequency response. The red graph shows the rise of low frequencies - these headphones are bassy. Green – on the contrary, a decrease in low frequencies; this sound is closer to the sound of speaker systems, where there is a natural roll-off in the low frequency region (in systems without a powerful subwoofer). Orange – headphones with possible sibilance, emphasizing the “sss” sounds. Blue – rise in the high frequency region.
On-ear headphones
In over-ear headphone measurements, a roll-off can be observed in the low-frequency region. This may be caused by the use of foam ear pads or a loose fit to the ears. When any air gap occurs, the low frequency level is reduced. In this case, measuring through a special flat stand, with a softness that replicates human skin (in our case Soft Flat Stand - SFS), helps to assess the bass level.
In-ear headphones
In-ear headphones are inserted directly into the ear canal, and those that have minimal dips in the upper mids and lower trebles, and a fairly significant dip in the highs, will be perceived as smooth. For in-ear headphones, the roll-off in the high-frequency region should be even higher than that of full-size headphones, because there are fewer obstacles responsible for the natural reduction of the high-frequency range. The green and lilac graphs refer to “flat frequency response”, their difference is in the different dip in the level of the upper middle and lower high frequencies, where the sensitivity of the ear is maximum. The larger the dip, the higher the volume the headphones will be perceived as smooth, and vice versa, the smaller the dip, the lower the volume the sound will be subjectively smooth. The red graph shows headphones with bass, and the blue graph shows bright headphones in the high frequencies.
Resonances
On the graphs of in-ear headphones, you can see peaks in the high frequency region; as a rule, these are resonances that arise in the closed space of the sound guide and ear canal. Resonance frequencies depend on the seating depth of the earphone and the shape of the ear canal. On-ear and full-size headphones have much more resonances, but they have smaller amplitudes and are thus reflected in the frequency response as a slight unevenness. In over-ear and full-size headphones, resonances are formed mainly by reflections in the auricle and often create three-dimensional sound.
Where to point the measuring microphone?
Another question. Where and why exactly should you point the microphone? Let's try to figure it out briefly. Conclusions at the end. And you need to take into account what kind of microphone is used, what directional pattern it has.
In the first case , imagine that the microphone is installed at the level of the tweeter at a distance of 1 meter. This is, as it were, an ideal option for measuring the frequency response of acoustics in general and this speaker specifically.
We take readings, then turn the microphone just a little to the side, a few degrees. We take readings again. And the frequency response readings change dramatically. Humps may emerge and gaps may appear.
Next option . We place the microphone at a point that implies the listener's position.
There probably won’t be that “necessary meter” here anymore. And the microphone will already “listen to two acoustic systems (here we are no longer talking about measuring the frequency response of the speakers). The microphone hears both channels at one point. Plus reflected signals.
Now let’s move the microphone a little to the left and let the microphone “listen” now. Significant “distortions” that were not present at the “ideal” point will again appear. What were we listening to here, acoustic speakers or room acoustics?
The third option is an example of measuring room acoustics. Otherwise there is no way I can understand it. The same microphone is installed in the opposite corner of the room from the speaker systems.
What will the microphone “hear” now? It turns out that he will “listen” to the acoustics of the room itself and not everything, but only at the point where he is.
I'll try to summarize
I repeat that these are purely my thoughts and thoughts. I don't prove or argue anything. I'm trying to figure it out and understand.
What have we come to? What results did we expect? What kind of microphone did we use, what directionality (after all, the field that we wanted to measure depends on this)? What did we measure anyway? Even more questions arose.
What kind of microphone is needed to see the frequency response of the sound from the speakers, exactly in the place where we sit and listen? Is it a narrow field microphone or a cardioid one?
You need to point it strictly at the speaker(s) in order to “hear” (see the frequency response from the acoustics). Or should the microphone be directed in the direction where our ear “listens”, where all the sound components emitted by the speaker system come from?
After all, in the place where our ear “listens” there is a lot of reflected signal, resonating factors that the microphone simply cannot hear when it looks strictly at the acoustics.
What is frequency response in sound
A complex sound is a series of vibrations of different frequencies. It stores steps between frequency levels, which can be measured and visually displayed using a graph. This will be the amplitude-frequency characteristic. Thus, the frequency response in sound is a graph of the dependence of the amplitude of the output and output signal on the frequency, expressed in decibels.
Frequency response is also considered as a filter that weakens or enhances the signal, distorting it. In this case, on the frequency response line of the original signal there will be periodic amplitude protrusions of different sizes, which indicates a non-ideal frequency response. The speakers of devices with this response play sounds in a smaller or larger range than they should. This affects the perception of sound. It may be accompanied by hum or noise, and the performer's sound may fade or become distorted.
A person hears sounds not in an infinite range of frequencies, but in the range from 20 Hz to 20 kHz. Depending on the frequency level, high, low and medium frequencies are distinguished. The frequency response determines which of them the sound will be correct, and where something needs to be changed. In programs for measuring frequency response, when describing the parameters of audio equipment, the scientific literature uses a general classification of frequencies:
- lower, middle and upper bass (Low, Mid, Upper Bass) – from 20 to 160 Hz;
- lower, central and upper midrange frequencies (Lower, Middle, Upper Midrange) – from 160 to 1280 Hz;
- lower, middle, upper high frequencies (Lower, Middle, Upper Treble) – from 1.28 kHz to 10.2 kHz;
- top octave (Top Octave) – from 10.2 kHz to 20.4 kHz.
In order for the sound to be correctly perceived by the human ear, the volume level of each device has certain values for the corresponding frequency range. The wrong choice of acoustics leads to poor sound - with interference, noise, sharply changing high or low sounds, etc. One of the parameters for choosing a technology is a smooth frequency response. But since this is rare, it is interesting to study the reasons that explain changes in the shape of the graph. These include:
- low-quality materials from which the elements of the acoustic circuit are made;
- heating of the cable due to a mismatch between the rated and supplied power (an increase in temperature causes minor changes in the graph, but sometimes sound distortion is quite significant, for example, when amplitude fluctuations are frequent);
- Incorrect digital filter (DF) settings when speakers reproduce sounds at frequencies not intended for them.
To select and properly configure equipment, it is advisable to be able to correctly plot the frequency response graph. Its purpose is to reflect information about the features of signal reproduction and its perception by the human ear.