A modern acoustic system (AS) is an integral attribute of a whole range of audio equipment. The purpose of acoustic systems is to convert an electrical impulse into a sound signal. And throughout the development of speakers, the desire of the creators was aimed at reducing distortion and obtaining the highest quality sound possible.
This is what gave rise to two main types of speakers, which differ in their connection to the amplifier. If the amplifier is directly built into the system, then such a speaker system is called active, but if the amplifier is external, then it is passive. In addition, there are ceiling and floor systems with different dimensions. The price range of speakers consists of budget variations, Hi-Fi and Hi-End classes.
But if at the dawn of their development acoustic systems, ordinary horn loudspeakers did not have a housing at all, then with the advent of paper diffusers, the approach to creating high-quality speakers has changed.
Why choose materials for your speaker cabinet?
All the components of the acoustic system began to be placed in special frame structures. Considering that until the mid-twentieth century, electronic circuits were based on lamps, they needed to be cooled. All this dictated the design of the first speaker enclosures.
But even then, many speaker developers noticed that the housing material has a certain effect on the formation of sound in structures. Thus, different walls of the speaker cabinet (front/rear) emitted sound of different phases, which significantly affected the sound quality. That is why the relevance of both the design itself and the material used to manufacture the speaker cabinet has greatly increased.
Increasing attention has been paid to the acoustic properties of a wide variety of materials that could be used in the manufacture of enclosures.
The process of assembling DIY computer speakers
The material chosen for the housing of home speakers is 16 mm chipboard, MDF costs 4 times more, but there will be no difference, and if there is no difference, then why pay more?
If you use a thicker sheet of chipboard, the weight of the case will be too large, and the speakers will become too heavy to lift. It is better to immediately draw a diagram for cutting a sheet of chipboard in order to saw it directly from the seller, and not do this at home, avoiding unnecessary noise and dust, literally.
In this case, a tower shape was chosen to raise the speakers higher off the floor.
Spacers are installed inside the speaker housing to increase the rigidity of the structure (inside the spacers are tightened with self-tapping screws and secured with “liquid nails”).
The case can either be painted or covered with a self-adhesive film, such as Oracal - in this case, it was decided to choose film! Before gluing, it is necessary to cover all the gaps, cracks, holes from screws and raw edges of the chipboard with a layer of putty, let it dry, and only after that proceed to gluing (or painting, if you decide to paint the body).
It is necessary to glue padding polyester or special damping material for homemade speakers to the walls of the case, but the quality of speakers for home use will not improve much from this filler.
Each speaker housing has its own amplifier, as well as each speaker’s own power supply, that is, they are completely independent and can be connected to the computer either in pairs or individually. The power connectors are used like the power supply of a computer system unit, which is quite convenient when you need to connect someone else’s system unit brought to you “for a visit” - you simply remove the power cord from one speaker and connect it.
Volume controls can be placed in the 3.5-inch drive bay
To “connect sound”, the speakers use an “audio Jack 6.5 mm” connector; one of the advantages is that you can connect an electric guitar directly to the speaker. There was hope that Jack 6.5 mm was more reliable than Jack 3.5 mm, but no, thick connectors break just like thin ones...
This is what happened in the end
Minimizing speaker distortion
Regardless of what type of acoustic design, as well as what material was used, the main objective of the research was to minimize the distortion of the emitted sound signal. Timbre, voice tones, various sound effects - everything is important, so the most stringent requirements began to be placed on speaker cabinets.
An ideal acoustic system should not only guarantee the minimization of sound errors, but also allow high-quality reproduction of the entire sound range accessible to the human ear, often (20–20,000 Hz). Moreover, this applies to both mono-channel and stereophonic sound. The housings of modern acoustic systems must satisfy the consumer not only with sound, but also with aesthetic appearance.
Most modern manufacturers of acoustic systems highlight wood as the most acceptable material for the enclosures of acoustic systems. In a broad sense, wood-derived materials are also included: plywood, MDF and chipboard. Less commonly, but also used are stone, ordinary and organic glass, laminated wood, and metal. Let's take a closer look at the sounded acoustic materials and exclusive solutions.
DIY making
The process of making home speakers involves the use of one pair of speakers that reproduce mid-range frequencies. High-end acoustics usually have several bands and include a number of components: mid-range and tweeters, as well as a subwoofer.
Home speaker
An acoustic system for the home can be made from car speakers with a power of 3W each. To do this, you need to perform a certain sequence of actions.
- Strip the ends of the wires and solder them to the sound amplifier. Remember where the plus and minus are.
- Observing polarity, separate the wires into left and right channels, solder them to the speakers, and then wrap them with electrical tape to secure them together.
- Solder two wires to the amplifier to connect power and determine where the plus and minus are.
- Strip the wires of the cable with the USB plug and solder one of the ends to the power button. Then, observing the polarity, solder one of the power wires connected to the amplifier to the second contact of the button, and connect the remaining wire to the free wire of the USB plug. Insulate the wires with heat shrink.
- Solder a three-wire cable to the 3.5 mm plug. Then solder the free ends of the wire to the audio amplifier, observing the order of the channels. Make insulation using heat shrink and hot glue.
- Draw a rectangle on a sheet of plywood or other selected material, cut it out and divide it into two identical squares. In each of them, draw a circle and cut holes, thus making seats for the speakers.
- Cut two trapezoidal side panels and two more rectangular ones of longer length (top and bottom edges).
- Assemble the frame.
- Mount the amplifier on the front panel. To do this, you need to drill a hole to the size of the part, and make a small recess from the inside for the board. Attach the front panel to the frame with self-tapping screws.
- Sand the body.
- Install speakers and amplifier. The first are fastened with self-tapping screws, the second - using a built-in nut.
- Cut out a seat for the power button and a recess for the wire outlet.
- Make the back cover and close the case. Now you can start checking your homemade home computer acoustics.
High class speakers
To make high-end two-way or three-way acoustics at home, it is recommended to first search the Internet for ready-made projects and photos of such equipment and download drawings of speakers with dimensions. This is necessary so as not to independently calculate the required dimensions, internal volume of acoustics and other parameters. Having decided what power and type of speakers are needed (for example, a 2.1 system with a total power of 50 watts), you can find the appropriate template and work directly with it.
Next, when the project is selected, you need to select a suitable material (MDF or another), transfer the drawings onto it and cut out the parts yourself or, for greater accuracy, give it to wood carvers. Then you should assemble the body, seal all joints and finish it with soundproofing material. The next step is to install speakers, an amplifier and other components inside the case. After assembling the structure, all joints and cracks, as well as the speaker installation locations, are sealed with sealant. That's it, you can start checking the speaker system.
Plastic is cheap, but resonates
Plastic, which also includes composites, is often used in the production of budget speakers, those that are still Chinese. The plastic body is lightweight, significantly expands the possibilities of designers; thanks to casting, almost any shape can be realized.
Different types of plastics differ greatly in their acoustic properties.
Plastic speakers can be very good, but the main thing is to choose the appropriate plastic for the housing.
Plastic is very popular when creating wearable speaker systems that operate via Bluetooth, such as JBL. At the same time, manufacturers managed to solve the problem of resonance.
Wireless speaker Philips SB500A
Just a few years ago, plastic was not very popular in the production of high-quality home acoustics.
But at the moment it is in demand for professional samples, where low weight and mobility of the device are important.
Amplifier for homemade speakers
The LM3886 chip was chosen as an amplifier for these homemade speakers, as the easiest way to get Hi-Fi sound quality literally “on your knees” without overpaying!
According to the RMAA analyzer, the LM3886 is an order of magnitude better than what is required by the Hi-Fi sound standard, that is, the sound distortion in the amplifier on this chip will be 100 times less than the human ear can hear.
It is worth noting that some handy fans manage to create DIY amplifiers based on this microcircuit that allow only 0.0002% distortion. Although even 1% distortion is very difficult for the average person to hear.
To cool the resulting amplifier, a regular aluminum processor radiator (without a fan) was used. Such a homemade amplifier will operate at a power of no more than 5 W and such cooling is quite enough for it. But even if overheating occurred, the overheating protection built into the circuit would not allow it to burn out, simply turning it off.
To be able to improve the amplifier, it can initially be assembled on a circuit board according to the following diagram:
Having built everything on the circuit board, you can replace certain parts, upgrading the amplifier circuit, wiring, etc., while measuring the necessary parameters with the RMAA program.
After it was possible to optimize the amplifier circuit, a regular printed circuit board was made (LUT - laser-iron technology), but the quality of the amplifier did not fundamentally change, according to the analysis in RMAA, it was concluded that circuit boards for home DIY electronics are quite suitable !
Chipboard: Chipboard
This material is based on glued shavings. As a result of pressing, a flat surface with a loose core is obtained. Chipboard, allowing sound to pass through, dampens vibrations, but is afraid of moisture, as it tends to swell and collapse. The choice of chipboard for creating speaker cabinets is explained by the fact that the product does not create resonance and does not distort loud sound.
Image source: stoyki-pro.ru.
Sound absorption is non-uniform and low- and mid-frequency resonances are possible, although the likelihood of their occurrence is lower than with plastic.
You should pay attention, both in the case of plastic and in the case of chipboard, to the properties of a particular board.
It is important to take into account the density and humidity of the material, since different chipboards have different parameters.
Thick (> 22 mm) and dense chipboards are used to create studio monitors.
The chipboard construction will not add any additional sounds to the sound. And delamination under the influence of moisture is minimized by putty, special painting and various materials used as cladding.
The most significant problem of chipboard is low strength, with a fairly high mass of material.
To create an AC, chipboard with a density of more than 650–820 kg/m³ (with a board thickness of 16–18 mm, more is possible) and a humidity of up to 6–7% is suitable.
Failure to comply with these conditions will affect the sound quality and reliability of the speaker system.
How to put content inside?
First you need to select the side that will be the “front”, and drill a hole in it for the speaker, then insert it into this hole and screw it (glue it, nail it, if desired). It is advisable to place the remaining insides so that none of the wires are bent or pressed, and small parts do not emit play. If the size was chosen correctly, everything will fit. The final step is to attach the last plate that will close the box.
Subscribe to our Social networks
Lined or laminated chipboard
Another option for chipboard is chipboard, with one-sided/double-sided veneer or plastic (laminate) with a decorative pattern. Everything is fixed with special glue.
Image source: tehnari.ru
The disadvantage is the need for additional processing of edges and corners. If the saw is poorly sharpened, the laminate may chip.
Rubber boat
Rubber is also a fairly common material in the manufacture of homemade boats. A rubber boat is famous for its large load capacity and low budget costs in its manufacture.
Making a rubber boat yourself is a very responsible matter, because one careless move and all your finances and efforts will go down the drain.” Therefore, it is best to buy a ready-made boat without any risks, since the price for such boats is quite reasonable, rather than having to go through the hassle of making it yourself
Therefore, it is best to buy a ready-made boat without any risks, since the price for such boats is quite reasonable, rather than having to go through the hassle of making it yourself.
Still, if you decide to take a risk and make a rubber boat yourself, then everything also starts primarily from the drawing.
Joiner's plate
The blockboard is made from double-sided veneer or plywood. A filler of bars, slats and other material is placed inside between the two surfaces. The outside of this material is lined with veneer or plywood.
Image source: stroy-podskazka.ru
The resulting material is easy to process and lightweight.
Impact sound insulation
In order to protect your home from impact noise, you need to prepare the floor surface. It is worth understanding that such work will help not only you, but also your neighbors on the lower floor. The main requirement for insulating impact noise is to use a lining material that will help absorb vibration without transmitting it inside the room. Vibration-insulating building materials can be considered foamed propylene, foamed polyethylene, etc.
The peculiarity of the installation of such insulation is that all elements of the frame structure must have a backing made of the presented materials. The vibration passes into the middle, but does not go further. Having eliminated vibration problems, you can move on to the next stage of sound insulation.
Cork rubber backing
This underlay option is optimal for use when laying laminate flooring. There are several bedding options that differ in their area of application and you can select the most appropriate composition. The canvas is made exclusively from natural raw materials, so it can be used in a residential area.
@ProAntiShum
As for the cork rubber lining, it is made with the addition of rubber. Thanks to the addition of rubber, the substrate is not afraid of moisture and can be used in rooms with high humidity. Plus, the rubber base makes it possible to use the product as a vibration-proofing layer when installing floor coverings. The only drawback of the lining is that it is expensive, and not everyone will want to install it during repairs.
Polyethylene foam
This type of insulation is considered one of the most profitable, since the cost is low. The foam base effectively absorbs sound waves. This building material must be used as a substrate or soundproofing layer. The thickness of such a product is low, due to which it is used as a substrate for linoleum, laminate and other materials. In addition to sound insulation, the material provides vibration protection.
@ProAntiShum
Bitumen-cork substrate
This insulating version of the substrate is used in conditions of high humidity. Due to its quality, the material also provides waterproofing. The coating is capable of leveling surfaces, providing reliable protection from noise and vibrations on the floor.
@ProAntiShum
Extruded polystyrene foam
This type of building material is distinguished by its sound and thermal insulation qualities. When making slabs, granules saturated with air bind together, forming a layer of continuous bubbles. This insulation is one of the most effective, since ninety-eight percent consists of air, and the remaining two are a binding component.
@ProAntiShum
Such a slab can easily surpass other materials in terms of heat and sound insulation characteristics. Lightweight slabs can be installed independently without the involvement of specialists or craftsmen. Today, this material is especially popular, since the buyer gets all the best for a low cost.
Composite material
A special feature of this product is its durability. Strength is achieved due to a multi-layer base. Using various components, it is possible to produce a multilayer structure that will meet all requirements and characteristics. Today, this material is rarely used in construction due to the complexity of working with it. Manufacturers are currently developing a simplified technology for manufacturing composite materials.
@ProAntiShum
Sheet pressed from natural cork chips
Cork sheets are excellent insulation for various types of noise. The canvas is made from cork chips, which makes it resistant to mechanical stress. Such products are often used in the form of sound insulation, as they have excellent characteristics. Speaking about the advantages, it is worth noting that the products are suitable for residential premises. Poor thermal conductivity allows the lining to be used as thermal insulation for the home.
@ProAntiShum
OSB: oriented strand board
In other words, multi-layer glued plywood, consisting of recycled wood waste.
The texture of OSB is very beautiful, but uneven. Irregularities are sanded and varnished.
The resulting material absorbs sound well and is quite resistant to vibrations.
These properties are necessary for acoustic screens when creating a Schroeder panel. An acoustic screen located at a given point emits in antiphase and dampens an acoustic wave of a certain length.
Cons : formaldehyde evaporation and pungent odor.
Safety precautions
As with any electrical tool, electrical safety precautions should be followed. Do not work in rooms with high humidity. When installing the machine outdoors, it is advisable to build at least a temporary canopy over the workplace to protect it from precipitation.
Like any cutting tool, an angle grinder, even one mounted in a machine, requires strict adherence to safety precautions. It is absolutely unacceptable to work without a protective casing around the disk. It is also necessary to use protective glasses or a transparent shield.
Many people neglect gloves - and completely in vain. The sparks flying out from under the saw stone only seem small and harmless. Crumbs of abrasive and processed material fly like bullets and can penetrate deep into the skin.
You can learn more about how to make a metal stand for an angle grinder with your own hands.
MDF: fine fraction (fibreboard)
Material of different thicknesses (from 10 to 22 mm) with a smooth surface, allowing you to create a wide variety of speaker cabinet configurations.
The reasonable cost of MDF, affordable processing and gluing of the material make it one of the most popular when creating the most fancy speakers, due to its high level of mechanical strength. The finished product looks more reliable, stronger and more expensive, for example in varnish.
The material resonates well, and it is what is most often used for the manufacture of factory cases.
Choose the thickness of the MDF sheet according to a simple rule: AC volume up to 3 liters - 10mm, up to 10 liters - 16mm, for large volumes choose more than 19mm.
But it is worth remembering the ability of fiberboard to absorb moisture, which can lead to delamination and a decrease in quality indicators.
The process of assembling DIY computer speakers
The material chosen for the housing of home speakers is 16 mm chipboard, MDF costs 4 times more, but there will be no difference, and if there is no difference, then why pay more? If you use a thicker sheet of chipboard, the weight of the case will be too large, and the speakers will become too heavy to lift.
It is better to immediately draw a diagram for cutting a sheet of chipboard in order to saw it directly from the seller, and not do this at home, avoiding unnecessary noise and dust, literally.
In this case, a tower shape was chosen to raise the speakers higher off the floor.
Spacers are installed inside the speaker housing to increase the rigidity of the structure (inside the spacers are tightened with self-tapping screws and secured with “liquid nails”).
The case can either be painted or covered with a self-adhesive film, such as Oracal - in this case, it was decided to choose film! Before gluing, it is necessary to cover all the gaps, cracks, holes from screws and raw edges of the chipboard with a layer of putty, let it dry, and only after that proceed to gluing (or painting, if you decide to paint the body).
It is necessary to glue padding polyester or special damping material for homemade speakers to the walls of the case, but the quality of speakers for home use will not improve much from this filler.
Each speaker housing has its own amplifier, as well as each speaker’s own power supply, that is, they are completely independent and can be connected to the computer either in pairs or individually. The power connectors are used like the power supply of a computer system unit, which is quite convenient when you need to connect someone else’s system unit brought to you “for a visit” - you simply remove the power cord from one speaker and connect it.
Volume controls can be placed in the 3.5-inch drive bay
To “connect sound”, the speakers use an “audio Jack 6.5 mm” connector; one of the advantages is that you can connect an electric guitar directly to the speaker. There was hope that Jack 6.5 mm was more reliable than Jack 3.5 mm, but no, thick connectors break just like thin ones...
This is what happened in the end
Plywood speaker cabinets
One of the best absorbers of sound vibrations and sound retention in the speaker cabinet is plywood. This is due to the structure of the plywood itself: several compressed layers of wood veneer are glued perpendicular to the direction of the fibers.
The fairly strong structure of plywood is more difficult to process, so initially high precision cutting of the workpieces is required. The result is lightweight speaker designs.
Processing plywood is much more difficult than MDF. Therefore, at the stage of cutting out parts you should be more careful.
Column device
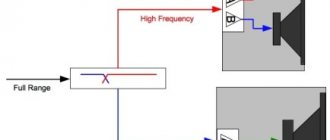
The simplest floor-standing speaker is a box or box in which one full-range or several narrow-band speakers are located. One speaker will not need a crossover filter. Two or more are consistent across the spectrum (subrange) of audio frequencies. To improve the low-frequency response, the speaker is equipped with a bass reflex - a channel with a circular cross-section into which the lowest frequencies are reflected.
Portable speakers, in addition to Bluetooth communication, are equipped with a device for reading data from flash drives and memory cards, a simple FM receiver with a scanning setting, an LED strip with color music (or a matrix with a running line) and a number of other functions. They are often equipped with a carrying handle.
Stone AC enclosures
In terms of stone use, the first place material for columns is slate. The reason is the ease of processing and the ability of slate to absorb vibration. However, processing requires special tools and appropriate specialist experience. Sometimes, to simplify things, only the front panel of the speaker is made of slate.
A natural disadvantage of stone speakers is their weight. For comparison, an OSB column weighs 6 kg, and a slate body will “pull” 54 kg. The sound quality is excellent, but the weight of the structure is quite serious.
Marble and granite are also used. For example, the MARBLE SOUND SYSTEM project.
Marble acoustics MARBLE SOUND SYSTEM
There are hobbyists who make speakers from concrete.
Speaker enclosures made of concrete
What do you need for a subwoofer?
It won't work without a quality box. Surround sound is created by air moving inside the box. Moreover, the air drives the speaker diffuser. This means you need to make a closed box with one hole for air to escape. Since you are making speakers for your computer with your own hands, there is no need to use huge speakers that are used for car audio. The ideal option is a car speaker used as a standard one, which is installed in the front part. Small-diameter speakers, rubberized diffusers, soft and elastic. This is exactly what is required for a subwoofer.
Of course, it will not create strong air pressure, but for a small room it will be enough to emphasize low frequencies. You will also need a low-frequency amplifier; there are many of these on the radio market. If possible, you can remove it from an old car stereo. The output power should be at least 20 watts, and the power supply to the microcircuit should preferably be unipolar. But the most important thing is a low-pass filter (LPF), because you won’t be able to make a speaker with a subwoofer yourself without this unit. You should not clutter the design with complex low-pass filters on microcircuits and operational amplifiers. A passive filter made up of resistors and capacitors is sufficient. Depending on their parameters, frequencies are cut off.
Organic glass
The use of plexiglass for the manufacture of speaker cabinets is due to the desire to see the “insides” of the speaker. However, it is necessary to seriously consider quality insulation. Otherwise the sound quality will be very poor.
Glamorous home cinema
Or the well-known computer acoustics Harman/Kardon SoundSticks III:
Computer speakers Harman/Kardon SoundSticks III
Homemade wireless audio speakers
I ordered a wireless module for audio equipment from China; I wanted to install it in a burnt-out JBL portable speaker, but unfortunately I ordered the wrong thing. The module does not have a built-in amplifier and is powered by at least 6V.
I've been waiting for the module for about a month and it's such a failure, but the good stuff won't go to waste. I decided to install the module in my BBK 7800 speakers.
These speakers were 5.1 for a home theater, but after a bunch of alterations they became 2.1 and the last alteration will be the installation of a new Bluetooth module.
A package arrived from China with the following equipment: a module, a remote control, three cables for power and a stereo input, stereo output, plugs for screws
Bluetooth module for speakers Bluetooth module remote control for speakers
Bluetooth module for speakers
The module operates in several modes: Bluetooth 4.0, line input, FM radio, SD USB flash drive. There is an equalizer of 5 modes for every taste. In general, the module is not bad, I ordered it here for only 226 rubles.
Now we need to somehow adapt this module to the speakers. I remove the cover from the subwoofer and look for something to connect it to. Well, let’s say where to send the signal is clear, directly to the amplifiers, the subwoofer channel is connected through a divider from each channel. With a total resistance of 56 kOhm. By the way, the amplifiers there are TDA2030A, I don’t remember what the subwoofer channel was assembled on.
Now what should the module itself be powered from? The voltage should be at least 6V. The power supply circuit has a bipolar supply +- 12V, to power the low-pass filter, so I’ll connect to the positive arm. I did a test run and everything works.
Well, since everything works, you need to cut the case and bring it to the front panel. The wires were lengthened accordingly
That's all, now you can get rid of unnecessary wires. Edward
Loading…
Glued wood
With all the advantages of wooden speaker cabinets, it is necessary to know the nature of wood fibers. When air humidity is high, wood fibers expand and contract in dry air spaces.
When attaching the wooden walls of the speaker cabinet, the latter are glued on all sides. When humidity fluctuates, wooden blocks can crack, which will inevitably lead to a drop in sound quality.
Wooden speakers MIN7
Details
What is needed for making
To create a subwoofer you will need chipboard plywood, you can use the remains of unnecessary furniture, a speaker, screws and wire, nails, and the required dimensions.
You will need to cut out square parts of the following sizes. Parts in the amount of 4 pieces, dimensions 355 mm X 203 mm X 20 millimeters from chipboard, two pieces of parts measuring 360 mm x 360 mm x 20 mm, make one from plywood measuring 330 mm x 330 mm x 25 milliliters. Also, make 8 parts from chipboard measuring 20 mm x 20 mm x 196 mm.
Process
The next step is to cut out the wall, bottom and lid. It is advisable to prepare chipboard with a thickness of 20 millimeters, which has a special laminate coating. A subwoofer needs dense chipboard, this is necessary for the box. The box will have dimensions of 360 mm x 360 mm x 200 mm.
The next step will be gluing and nailing the walls and bottom. To do this, you need to lay out the four sides and apply enough glue to each cutout in the corner. The far edges need to be inserted into the pumps of the adjacent board with glue. After this, you need to drive three nails with a tongue and groove at the end of the adjacent side. This is required on all four corners. As a result of all manipulations, you will get an open box.
Gluing
Next, you should apply a sufficient amount of glue to one side of the box, which is open, and put a square piece measuring 360 x 360 mm on it. Now you have a box with one side closed.
Next, use glue to attach pieces of chipboard measuring 20 x 20 x 180 mm. This will allow the corners to be stronger, the plywood will be more secure, and will be useful for installing the speaker. In this case, the plywood, which measures 330 mm x 330 mm, will be flush with the top of the box. After this, you can begin installing the terminal blocks.
The next step in making the speakers is to start marking and cutting out the plywood. On the plywood piece you should draw the letter X diagonally, this is a piece measuring 330 mm x 330 mm. The same should be done for the remaining squares measuring 360 mm x 360 mm. Next, you need to correlate the drawn diagonal lines with the holes for installing the speaker; if you do this, you will see that the speaker will be in the center. On two pieces of plywood you need to draw a circle around the speaker frame.
Frame
The next step is to complete the cabinet manufacturing and speaker installation process. It is necessary to apply a small amount of glue to the plywood and place a smaller piece in the place where it is supposed to be fastened.
After this, glue is applied to the entire area, on the back side of the large part, after which you need to put it in place and use nails to walk around the perimeter with them.
When the glue dries, the wires need to be soldered from the terminal block to the speaker. You will need an acoustic wire, you can choose a size of 1.3 mm.
Metal speaker enclosures
The priority choice among metals is aluminum alloys. The reason for the preference is the simultaneous lightness and rigidity of the resulting speaker enclosures. There is a noticeable reduction in resonance and improved sound transmission at high frequencies. And if all-metal enclosures are not yet welcome, then the manufacture of upper and lower panels of speaker enclosures and rigid partitions is quite acceptable.
Wall acoustics Gallo Acoustics Micro Single Droplet Stainless Steel
As you can see, there are quite a lot of materials used to make speaker cabinets. It is also problematic to examine the sound quality of such speakers using special equipment. The only and natural analyzer of products should be the human ear. Emotional perception will tell you whether the sound emitted by such a speaker can give you maximum pleasure.
Sound card for computer speakers
When looking for a sound card for a computer for future speakers, the initial choice fell on the X-Fi Xtreme Audio sound card from Creative; at that moment there was no point in buying more expensive, but it only seemed so.
Looking ahead, it should be noted that the quality of this sound card left much to be desired, and tinkering with the settings did not help - the default settings turned out to be optimal.
Looking even further, it should be noted that when trying to squeeze the maximum and ideal out of it, the card burned out, so I had to buy a new one. This time I bought a more expensive audio speaker - ESI [email protected] , with a maximum DAC/ADC frequency of 192 kHz/192 kHz and a DAC/ADC dynamic range of 112 dB/114 dB.
It’s impossible to say that the more expensive card worked a miracle; the effect from it was not much better than from the cheaper Creative; moreover, both of these PCI cards worked almost the same as the audio system integrated into the motherboard. This was confirmed by testing two external cards and a built-in one using the RMAA program - there was no significant superiority of these sound cards over the “sound” integrated into the motherboard.
So don’t rush to buy a separate sound card if you plan to assemble DIY speakers for your computer; the “sound” integrated into the motherboard may be quite enough to get excellent sound.
Unusual materials for speaker systems
Recycled paper
Eco music lovers will adore TAU acoustics for their environmental composition.
Acoustics made from recycled paper TAU
Cardboard
One user decided to make a joke and, thanks to his “crazy hands,” made speakers from cardboard and other improvised materials. I called them iColumns.
Cardboard acoustics iSpeakers
Application
Blackout dims the lighting and serves to decorate the room. Blackout fabrics are classified as interior textiles; clothes are not made from this material. This is a practical, durable material that serves to decorate a room and, of course, protects from bright sun and dims lighting. Blackout is used in the following areas:
- production of curtains of various types and designs (roller, Japanese, Roman, scalloped, lambrequins, classic);
- textile elements for photo studios (drapes, curtains, decor);
- theatrical stage design (curtains, scenery);
- decor of garden and street furniture, gazebos, verandas, balconies;
- decoration of walls in residential premises, in cafes - here the blackout acts as a trellis;
- handicrafts (patchwork, appliques).
Blackout curtains are most widely used in the following rooms:
- in apartments and houses, in bedrooms, halls, children's rooms, living rooms;
- due to its practicality, the material is also suitable for use in public places - in offices, cafes, various salons and studios;
- in hotels and inns;
- in cinemas;
- the material is used for business and educational conference rooms, especially when using a projector, when darkness is required during the day to display slides or videos.
A little history
Until the beginning of the twentieth century, the sound of the device was reproduced through a loudspeaker horn.
Until the 50s, models of cases were produced whose back wall was missing. This made it possible to cool the lamp equipment of that time. It was then that it was noticed that the case performed not only protective and design functions - it also influenced the sound of the device. Different parts of the speaker had different radiation phases, so the presence of the box walls affected the interference strength.
The search and research began on the acoustic properties of raw materials suitable for creating boxes capable of housing speakers and delivering good sound to the public. Often, in pursuit of ideal sound, boxes were produced at a cost exceeding the equipment they contained.
Today, the production of enclosures in factories takes place with precise calculations of the density, thickness and shape of the material, and its ability to influence vibration and sound is taken into account.
Progress
If you do not have in-depth knowledge in this area, then we advise you to arm yourself with the Internet and useful literature on wood drawings.
If you have programs that support building models in 3D, for example 3D Paint, then this can also be used for drawings and rough design of all models.
As you already understand, the drawing is the main component of your work. After all, once a drawing has been created, doing everything that is indicated there correctly and without errors is no longer difficult.
If you cannot or for some reason are not confident in your drawing, then it is better not to risk it and turn to specialists.
In addition to the drawing, you will need a standard set of carpentry tools that everyone knows (hammer, nails, etc.)
The main thing is a competent and correct drawing, and the rest will go like clockwork and you will already understand how to make a boat yourself.
Equipment used.
CNC router Milling table
Slitting machine
Thermal vacuum press for veneer veneering
Professional hand tools
Paint booth (rich experience in piano lacquer painting)
Radio installation
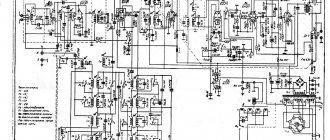
The homemade receiver circuit board is made to match the original circuit and has already been modified in the field to prevent self-excitation. The board is installed on the chassis using hot melt adhesive. To shield the L3 inductor, an aluminum shield connected to a common wire is used. The magnetic antenna in the first versions of the chassis was installed in the upper part of the receiver. But periodically, metal objects and cell phones were placed on the receiver, which disrupted the operation of the device, so I placed the magnetic antenna in the basement of the chassis, simply gluing it to the panel. The KPI with an air dielectric is installed using screws on the scale panel, and the volume control is also fixed there. The output transformer is used ready-made from a tube tape recorder; I assume that any transformer from a Chinese power supply will be suitable for replacement. There is no power switch on the receiver. Volume control is required. At night and with “fresh batteries,” the receiver begins to sound loud, but due to the primitive design of the ULF, distortion begins during playback, which is eliminated by lowering the volume. The receiver scale was made spontaneously. The appearance of the scale was compiled using the VISIO program, followed by converting the image into a negative form. The finished scale was printed on thick paper using a laser printer. The scale must be printed on thick paper; if there is a change in temperature and humidity, the office paper will go in waves and will not restore its previous appearance. The scale is completely glued to the panel. Copper winding wire is used as an arrow. In my version, this is a beautiful winding wire from a burnt-out Chinese transformer. The arrow is fixed on the axis with glue. The tuning knobs are made from soda caps. The handle of the required diameter is simply glued to the lid using hot glue.
Board with elements
Receiver assembly
