In this article we will look at how to properly connect speakers to an amplifier, and what to consider when selecting the components of the amplifier - speaker cable - speaker system.
If you have any questions, ask them here.
AuI ConverteR 48×44 - HD audio converter for high-resolution music files FLAC, WAV, WAV/BWF, WAV/RF64, AIF, AIFF, AIFF/sowt, ALAC, mp3, OGG, AAC, WMA, DTS, AC3 CD ripper ( for Mac OS X and Windows)
How to choose and buy an acoustic cable for speakers.
Diagram for connecting a receiver or amplifier to speakers.
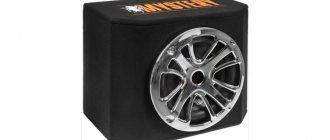
Connecting a subwoofer. Installation, configuration.
Receiver or amplifier?
What do speaker characteristics mean?
What do amplifier characteristics mean?
Theory and practice - how to select speakers for an amplifier, matching the amplifier and speakers
Which speakers to choose (types of speakers, simple techniques for listening to speakers and multi-channel systems [5.1, 6.1, 7.1], correct installation in the room)
Sound cards for music (how to choose and connect to an amplifier or receiver)
Connection diagram of the receiver or amplifier to the speakers
Let's look at how to properly connect a stereo audio amplifier for speakers to passive speaker systems. Connecting multi-channel systems is carried out in the same way. The only difference is the number of columns. By
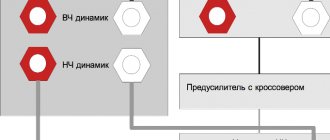
Biamping and bi-waring
Bi-amping is the connection of high-frequency and mid-low-frequency speakers to two separate amplifiers. Allows in some cases to better match the speaker and amplifier by increasing the load on the amplifier. In the case of a standard (parallel) connection of both speakers of a speaker, their total resistance (total resistance of the speaker) is less than the resistance of any of the speakers. A positive result is not guaranteed.
Bi-amping is the connection of each speaker speaker system to its own amplifier. A crossover allows you to more accurately place amplifiers and speaker speakers exactly in the specific area where they will work in tandem with the best performance. A similar circuit is used in studio monitors (the amplifiers are built into the monitor body)
Bi-wiring is the connection of high-frequency and mid-low-frequency speakers to one amplifier with two separate wires. Allows in some cases to better match the speaker and amplifier by reducing the resistance of the wires (relative to the resistance of the speaker). A positive result is not guaranteed.
Bi-wiring (bi-waring) we connect each speaker with its own wire to the amplifier. Very controversial sound improvement
Low volume, equalization and compression
The founding fathers of modern film sound decided that every AV receiver and speaker system should be calibrated to a base level of 85 dB. But most people at home set the volume lower. As a rule of thumb, when decibels fall below the reference level, human hearing naturally changes. As a result, dialogue becomes harder to hear, background sounds disappear, and the sound field collapses. Additionally, it's likely that the sources connected to the receiver's rear panel produce different input volumes, requiring constant, annoying manual adjustments.
When quality doesn't matter
Simplify what happens if you ever need to move your installation, or if something goes offline.
Before you start, it's a good idea to plan out where all your speakers will go. Check out the basic step-by-step description of how to get your system up and running quickly and smoothly. Choose a location for your receiver where cables connecting other components can easily reach it. Keep in mind that the receiver needs room to breathe or it may overheat, so be sure to leave enough room for the heat to burn off. Our additional information on this important topic. While you're setting everything up, it helps to have the receiver in an open position - either sitting on a cabinet or stand pulled from the wall, or on the floor in front of your office. This allows cables to be routed through the back panel and easily connected to the receiver.
Technologies have emerged to combat these problems. THX Loudness Plus (part of Select2 Plus and THX Ultra2 Plus), Dolby Volume and Audyssey Dynamic EQ strive to maintain consistent tonal balance, impact and ambience at lower volumes. Dolby Volume and Audyssey Dynamic Volume also have the ability to equalize different signal levels from different sources or TV shows and commercials. Both technologies are capable of performing advanced dynamic range compression within a specific program. It's like a more sophisticated version of the night listening mode of receivers of yesteryear (unfortunately, they're often incompatible with modern surround sound codecs). Audyssey Dynamic EQ and Dynamic Volume systems are built on the basis of Audyssey MultEQ/2EQ automatic tuning and room correction technology. When you enable dynamic volume, the dynamic equalizer is always activated. However, it is not tied to the overall volume set by Dynamic Volume. All of these technologies greatly improve quiet listening. It is advisable to have at least one such system.
Step 3: Follow the onscreen instructions
This will allow you to view any on-screen setup guides that the receiver might have built-in.
Most receivers no longer include printed manuals. Instead, most offer a helpful on-screen setup guide. These guides will walk you through the process from start to finish. Be sure to disconnect the receiver before connecting speakers. Take a look at the speaker wire and notice the differences in coloring on both halves. Split the wire down the center at the end, using cutting tools to trim the insulation from the end. Automatic adjustment and room correction are two convenient functions for beginners, which, as a rule, go together. They can be either licensed or branded.
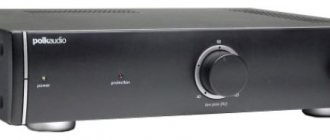
What to choose: receiver or amplifier?
A receiver is an amplifier additionally equipped with a radio receiver and a decoder (decoder) of multi-channel signals encoded in different formats (Dolby D, DTS, etc.).
If we are going to watch a movie , then we can either take a receiver, or take a decoder and several (according to the total number of channels) stereo or mono amplifiers.
There is an opinion that to listen to music . It introduces less distortion with all sorts of additional devices. But it is not always the case. Here, as usual, the question is price. The cost of an amplifier/receiver should be approximately (not a truism) 40 - 100% of the cost of a set of acoustics (not including a subwoofer).
Connecting sources
So, you have found the receiver of your dreams. Congratulations! Now you can start connecting sources.
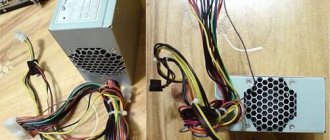
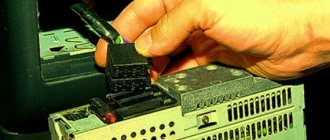
The panel of connectors on the back panel of any receiver is intimidating in their number and variety - but once you spend time connecting, you won’t have to contact them again.
We recommend turning off the unit before connecting speakers, subwoofer and sources. This will avoid loud clicks, short circuits and other possible troubles for your system.
Almost all receivers have labeled inputs. Some, such as Denon models, have color-coded outputs that make it easy to connect five or more speakers. Connectors for additional rear, height or front speakers can also be used for Atmos speakers; they may be labeled "assignable", "5.1.2" or "Extra SP".
If you'll be playing 4K HDR content, look for the "HDCP2.2" label above the HDMI input. Some models only have a pair of HDMI ports that are HDCP2.2 certified; The 4K Blu-ray player should be connected to them.
You may also notice that each HDMI input has a source assigned to it: Blu-ray, DVD, CD, game console, cable/satellite, media player, and so on. This is not just friendly advice. This means that the manufacturer has optimized the characteristics of these inputs for certain sources. The input for a Blu-ray player, for example, may have the shortest signal path to the processor, resulting in maximum playback quality.
For example, the award-winning Sony STR-DN1080 receiver has two HDMI inputs (labeled BD/DVD and CD/SACD) that are optimized for the highest possible sound quality, and it is better to connect the corresponding sources to them.
It is worth noting two more connection options: we always recommend choosing a wired connection via Ethernet - it is more stable and reliable compared to Wi-Fi.
The front USB port is for playing files from a flash drive, but we mostly use it to charge smartphones (make sure the receiver allows this).
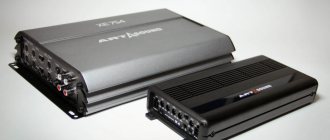
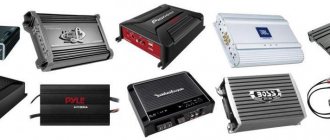
Amplifier Specifications
In this article (when we are talking about connecting speakers to an amplifier) we are talking about power amplifiers. They are characterized by the following parameters:
1) Maximum output power is the achievable output power of the amplifier at a non-standardized nonlinear distortion factor.
2) Nominal output power is the power level at which the amplifier provides the specified total harmonic distortion.
3) Nonlinear distortion factor - the level of parasitic signals mixed with the original (clean) signal when passing through the amplifier.
Manufacturers play with these values in promotional materials, so it will be useful to know the types of powers that are found in the description of amplifiers:
I) RMS (Root Mean Squared) - power value (rms or root - this is a way of measuring power with electrical measuring instruments) at a given nonlinear distortion factor . The measurement is usually carried out on a 1 kHz signal. The power is pumped until the THD reaches 10%. Before reaching maximum power, the nonlinear distortion factor is usually very small, and after reaching it it increases sharply.
II) PMPO (Peak Music Power Output) - the maximum permissible peak (pulse) value of the signal, regardless of distortion, for a minimum period of time (usually 10 milliseconds). This parameter has no meaning for practical use, because The measurement is carried out over a very short period of time and does not take into account distortions. For example, in boomboxes PMPO can reach 100 and 1000 W. But this is not “honest” power. RMS can be 3-10 W.
III) DIN POWER ( IEJA ) - the value of the maximum power at a real load at a given nonlinear distortion factor . Measurements are carried out for 10 minutes for a sinusoidal signal with a frequency of 1000 Hz with a nonlinear distortion coefficient not exceeding 1%.
IHF is the same, with a total harmonic distortion of 0.1%.
This type of power measurement most “correctly” characterizes the amplifier from the consumer’s point of view.
4) Frequency range is the values of the lowest and highest frequencies of the amplifier’s output signal, at which the level of this signal fluctuates within specified limits (for hi-fi, about +/- 0.5-1 dB).
Steps to Connect a Preamp to the Receiver
Connecting a preamp to an AV receiver is easy if it has an HT Bypass or Direct In input. However, there are some very simple steps you need to follow when setting up your system to avoid damaging your speakers or your hearing.
1 Turn everything off
The first thing you need to do is turn off all your audio equipment, especially the AV receiver. This doesn't require you to disable anything. You just want to make sure your speakers aren't on when you're setting things up.
You know that popping sound your speakers make when you plug something in while they're on? This is the sound of a power surge pushing your speaker's cone in a way it was not intended to. Turn off the equipment whenever you connect or disconnect from the network.
2 Connect your audio device(s) to the preamplifier.
If you have the option, it is highly recommended that you connect any music playback devices through an external preamp that is designed for audio rather than video.
This typically produces better tone and gain for music than those designed for home theater systems. This will also ensure that you get the correct stereo mix in which the music is recorded, rather than trying to transfer it to a 3.x or higher system.
3 Connect the preamp to the receiver.
Once all your audio devices are connected to the preamp, connect the preamp output or Phono Out directly to the AV receiver's HT Bypass or Direct input.
This will most likely require a pair of RCA cables. Make sure you connect red to red and white to white to get the desired right/left separation.
4 Turn on the preamp and turn the volume all the way down.
When you pass through HT Bypass or Direct In, you bypass all of your AV receiver's internal volume controls. This way, whatever you send through HT Bypass or Direct In will come out of your speakers at the full volume that goes into them.
Before turning on the AV receiver, it is very important to turn down the preamp volume completely, otherwise you risk damaging your speakers or your hearing.
5 Turn on the receiver and adjust the preamp volume.
Now that you have the volume all the way down on your preamp, you are ready to turn on the receiver. Play audio through a preamp that has the full range of sound you expect from your listening experience.
While playing music, slowly adjust the preamp volume until you reach a comfortable listening level.
6 Adjust the preamp gain.
If the sound is creaky or thin, it may mean you need to adjust the preamp gain. The gain effect is similar to volume, except that volume adjusts the volume of the output signal, while gain amplifies the volume of the input signal before being processed by the preamp.
To adjust the gain, turn the volume down a little and increase the gain a little until it's back to a comfortable listening level, and repeat until you get a sound you like.
Too much gain will distort the sound, so be careful. If you get to this point and still don't like the sound, you can try adjusting the preamp's EQ settings.
All is ready!
The last thing you might want to do is individually adjust the output volume of your audio sources so that they play at the same level when switching audio channels. Otherwise you should be fine!
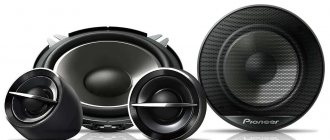
How to choose speakers for an amplifier (practice)
Home acoustics
Buyers of audio equipment select passive acoustics, wires, and amplifiers by ear. But this is more of an art than a precise method. And the optimal result of such a selection (for home acoustics) is not an even volume across all frequencies, but an acceptable (pleasant to the ear) sound.
If you look at the technical characteristics of the amplifier and speakers, you need to consider the following:
1) If you have chosen speaker systems, then the amplifier must be designed to work with speakers with the same input impedance.
Amplifiers usually have mechanical or electronic speaker impedance (resistance) switches. Before using the speakers, they must be moved to a position that matches the impedance of your speaker systems.
What can result from a discrepancy between the speaker impedance and the nominal (for which the amplifier is designed) load (connected speakers) of the amplifier? In the worst case, the amplifier fails. And in the usual case, to much worse sound quality. Because The frequency matching of the amplifier and speaker systems deteriorates.
2) The receiver amplifier must provide a power of at least 33% of the maximum power of the speakers. The thicker the wires, the better (with a cross-section of at least 1.5 mm2). And the rest is selected solely by ear.
Studio equipment
For musical (studio) equipment—studio monitors—a different method is predominantly used. Mainly active (with built-in amplifier) acoustics are used. This allows you to completely get rid of speaker cables and, in the factory, to maximally equalize the frequency response of the speaker system (speaker + amplifier).
The technique is approximately as follows:
In an anechoic soundproof room, the frequency response of the pressure is measured using a verified (tested and certified by the relevant authorities) sound pressure meter and signal generator. Sound pressure is measured at different sound frequencies at a constant signal level at the amplifier input. By selecting radio elements of the amplifier circuit and frequency filters of the active acoustic system, as well as adjusting the settings, it is possible to achieve the same sound pressure at different frequencies.
Why do I need a preamp?
Let's say you're an audiophile. Actually, if you're reading an article about preamps, you're probably an audiophile. Let's say you want to use your home theater system as a listening room.
The problem you'll run into is that a home theater sound system is designed for movies and shows, not music. Because of this, your AV receiver's internal preamp will not be calibrated for music quality.
For this reason, some high-quality AV receivers have an HT Bypass or Direct In input, which bypasses the AV receiver's internal preamplifier and feeds the signal directly. There are several cases where a preamp can come in handy.
Reasons to use an external preamp
First, of the AV receivers that have HT Bypass or Direct In, most only have one, so if you want to connect more than one audio source, you'll need a multi-channel preamp.
Second, if your audio source does not have an internal volume control, you will need a preamp as HT Bypass or Direct In feeds the signal at full volume because part of bypassing the AV receiver's internal preamp means bypassing its volume matching stage.
In any of these scenarios, you will need an external preamp to connect to the AV receiver. Although this is quite simple, you need to take some precautions to avoid damaging your sound system or damaging your hearing.
You may also be wondering if you can connect a preamp to an integrated amplifier. You can definitely do this, but there are a few important things to consider.
How to choose speakers for an amplifier (theory)
We use this sound reproducing equipment for the following purposes:
1) Listening to music
2) Watching a movie
3) Music creation (monitoring, mixing)
For sound equipment used to create music, the main thing is to introduce a minimum of distortion into the reproduced phonogram.
For household audio equipment, it is more permissible to introduce some distortion, which can even embellish the sound. That's why there is an opinion that one system is more suitable for heavy metal, another for electronic music, a third for jazz, and a fourth for classical music.
However, for high-quality studio monitors (speakers used in the studio when creating a musical soundtrack), the question should not arise at all: for what style are these monitors more suitable? Yes, for anyone!
Ideally the system
amplifier - speaker cable - speakers
should not introduce any distortion into the sound of the soundtrack, which was recorded in the studio based on the sound of high-quality monitors. The musicians and sound engineer tuned the sound of the musical piece in such a way as to replicate its emotional impact on household acoustics.
The listener's ears perceive the sound pressure of the air.
Acoustic systems create this sound pressure.
Acoustic systems, in turn, convert the electrical signal of a phonogram (musical recording) into air sound pressure. The dependence of sound pressure on the ears (loudness) on the frequency of sound (note pitch) - let's call it the frequency response of the sound pressure of the speakers (or the frequency response of the sensitivity of the speakers) .
If we apply a signal with the same voltage to the input of the speakers (let it be 5 Volts) at different frequencies (we play notes of different heights), then the volume of the sound of different notes will be different , because The E of the 1st octave will create, for example, a pressure of 1, the E of the 3rd octave will create 2, and the E of the 6th octave will create 0.5. The pressure values are conditional.
We can conclude:
Even if we have an ideal amplifier that produces the same electrical signal voltage over the entire audio range (for any musical note), then the sound pressure (sound volume) of the real acoustics connected to this amplifier will still be different for different frequencies (notes) .
Speaker system 5.1
The receiver creates 5.1-channel sound as follows: three speakers in the front, two in the back on the sides, and a separate one for low-frequency effects. However, with the exception of entry-level models, most of them have seven channels of amplification. This includes the base 5.1 and two more for surround modes. The latter include frontal height, frontal width and rears. Although Yamaha has been making front height presence channels for some time, today you can find AV receivers that receive Dolby Pro Logic II or Audyssey DSX height signals. However, for latitude channels, DSX is the only option. Ironically, only the rear ones are supported by DTS-ES or Dolby EX codecs. DPLII and DSX are the only processing modes that reproduce height or width channels.
You will need to do the same in the speakers. Make sure the speaker wires are not too tight as this may cause problems later. Give yourself enough slack to connect everything comfortably! Connect the speaker wires from the terminals on the receiver to the inputs on the rear panel of the speakers.
Here is a picture of the rear view of your receiver with all your connections. At this point you should have everything connected and ready to go. Try moving the speakers around to see which positioning gives you the best sound. Use wire ties or zip ties to connect cables, giving you a clean, organized stereo system.
Are they necessary? Height adds a new dimension to some films, but not to music. Conversely, width makes little difference in films and even less in music. Surround back can be useful if the side surround speakers are not enough to cover a long, narrow room. However, the extra channels may not justify the cost and hassle of installing speakers in the room.
Tips for connecting and setting up like a pro
Once you do this a few times you will get it.
It's just like doing anything, the more you practice, the better. Are you the proud owner of a new home theater receiver? When you connect to it, you are treated to amazing surround sound. We'll walk you through the setup process so you know what to expect. The time it takes to set up the receiver can vary greatly, but unplugging for two hours should give you enough time for everything to connect in most cases. Get to know all the components that you will connect to your receiver. Make sure you have enough cables to connect each part. For the best audio and video performance, use the highest quality audio and video connections that each component can handle.
Are preamp outputs common on audio/video receivers?
Pre-outs have become quite common on A/V receivers, especially on more expensive models. Each individual receiver will have different connections, so be sure to research your options before purchasing.
More expensive receivers usually have more connections than less powerful models. Some have no pre-outs at all, but this is usually only the case on cheaper models. Most A/V receivers on the market today have pre-outs.