Car speakers can be active or passive; in addition, low-frequency systems designed for cars are distinguished by high power and dimensions. Using such a low-frequency speaker at home is quite possible.
Theoretically, you can connect a subwoofer at home to any household device. This could be a stereo system, home theater or personal computer. The audio frequency signal, which is removed from the linear output connector of some devices, has a low level. This does not allow passive speaker systems to be connected directly. For normal operation of the low-frequency channel, an additional amplifier is required. If your household device is equipped with a multi-channel receiver, then you can connect a subwoofer from your car at home, parallel to the rear speakers. It should be taken into account that connecting speakers in parallel reduces their resistance by about half. Connecting a car subwoofer at home is best done through a separate amplifier.
Home amplifier from car
To use a car amplifier at home, we need a power supply and speakers (subwoofer optional).
I’ll warn you right away that the current consumption of some car amplifiers approaches the 40A ! This is a very high current. Therefore, not everyone will be able to find a suitable power supply for 12V and a current of 30 - 40 A :)
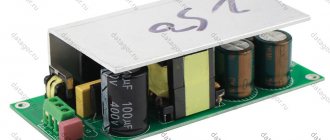
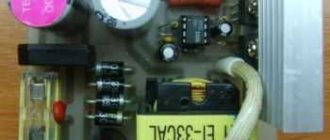
But to power the car amplifier, a computer power supply in AT and ATX format will do. Some models of computer power supplies can supply significant current via the +12V bus. Judging by the characteristics of the cheapest models that are now sold in stores, this is 12A. Top-end, expensive models give out 50 - 70A !
Such a block produces a current of 14A at the +12V output.
How to determine? We look at the characteristics of the power supply, the line “power along the 12V line”. We see, for example, 200 W. Divide 200 W by 12, we get the maximum current on the 12V bus
16 amps If the power supply is on hand, then look at the sticker on the case. All the block parameters are usually indicated there, including the maximum current for each bus.
All PC power supplies have yellow wires going to MOLEX and SATA connectors - this is +12V, and black wires are negative (common, GND ). I have already talked in more detail about using power supplies from a PC.
If you find a power supply with a lower current, for example, like I did with 12V ( 10A ), then you shouldn’t be upset. The amplifier simply will not be able to work to its full potential and will play quieter. Now about the connection.
There are 2 terminals on the body of the car amplifier for connecting power. The negative power supply is connected to the GND terminal, and the +12V terminal is connected to the positive power supply. As a result, the amplifier is in sleep mode ( Stand by ). To switch the amplifier from standby mode to operating mode, you need to apply +12V to the REM ( Remote - “control”). We throw a jumper from the +12V terminal to the REM . Then turn on the power supply.
As you know, car radios have a special output (usually blue). Most modern radios have it, and it is used to turn on active antennas, extend antennas and turn on external amplifiers and subwoofers. If you turn on the car radio, a voltage of +12V appears at this output. The load current of this output is small, about 100 - 120 mA.
By the way, when installing an amplifier in a car, it happens that the control (blue) wire is already connected, for example, to the same active antenna. What should I do? Then you can supply +12V voltage to the REM through a latching button, and place the button itself on the car panel. The same technique can be implemented at home. Just put a regular toggle switch or rocker switch in the gap in the +12V — — -> REM . These are sold at any auto supply store.
Attention! Since the current consumption of a car amplifier can reach 40 amperes or more, it should be connected to the power supply with copper wires with a cross-section of 6 - 10 mm 2. If possible, make the connecting wires shorter. This is ideal. In practice, if you do not “drive” the amplifier to maximum mode, ordinary wires with a cross-section of 1.5 - 2.5 mm 2 will do.
An ordinary MP3 player can be used as a sound source. You will also need a 3.5 mm adapter. Jake on "tulips".
When setting up the amplifier, do not forget that on its panel there is an input signal level control - “LEVEL”. This is nothing more than a volume control , like those found on analogue tape recorders or cassette players.
Read also: How to connect Android auto and Yandex navigator
At a level of 0.2V, the maximum signal level is received at the input - the amplifier will operate louder. If you turn the variable resistor knob to 8V , then the minimum signal from the player will be received at the input. Naturally, the signal level can also be set using the volume control of the MP3 player itself.
On many amplifiers, the input level control only has a pointer in the form of a stylized arrow or pointer.
Depending on the configuration of the car amplifier, it can be used in different ways. The simplest example.
Most amplifiers have filter mode switches (crossovers). For example, on the CALCELL I found an X-OVER SELECTOR (other models may have a BASS/FLAT/TREBLE and similar ones). When selecting a mode, the corresponding filter is activated - LP (40Hz - 160Hz), HP (40Hz - 600Hz). OFF mode turns off all filters (aka FLAT ).
In FLAT , no signal correction occurs. Roughly speaking, what goes into the filter is what comes out.
If you select the LP mode, the input filters cut off all frequencies above 40 - 160 Hz and leave only low audio frequencies. This mode is suitable for working with a subwoofer.
The filter works on two of the 4 amplifier channels at once, for example, on the front speakers ( FRONT ). Two other amplifiers also have such switches - rear ( REAR ). The division of amplifiers into FRONT and REAR is conditional. If we examine the circuitry of the device in detail, it turns out that all four amplifiers in its composition are identical, like Siamese twins. But that's not the point.
All car amplifiers can operate in Bridge mode . This is when two amplifiers drive one speaker or speaker. In this case, the powers add up. Thus, if you have a 4-channel amplifier, you can mount a stereo system with a 2+1 (sub) subwoofer.
It is enough to connect 2 channels of the amplifier to the bridge and connect it to the woofer, it will act as a subwoofer. In this case, use the mode switch to select the LP mode and set the desired cutoff frequency for the subwoofer. As a result, we will get a full-fledged subwoofer. The remaining 2 channels can be used to enhance the right and left front channels. For them we set the mode to OFF .
Have you ever wondered why speaker systems always use one, but powerful subwoofer? The fact is that at low frequencies the human ear does not perceive the stereo effect well. That is, the ear doesn’t care where the roar comes from. But in order for the ear to normally perceive low-frequency sounds together with others (mid and high frequencies), the sound power must be 2 times greater than the right ( R ) and left ( L ) channels separately. That is why the subwoofer needs to be turned on in bridge mode. I think this is clear.
This small manual did not cover the topic of acoustics. In any case, when connecting speakers and speakers to a car amplifier, you must remember that their resistance must be at least 2 - 4 ohms. If you want to know how to properly connect multiple speakers, then take a look at this page. I also advise you to familiarize yourself with the speaker structure and its main parameters.
Before connecting anything, be sure to read the instructions for your amplifier!
Some car enthusiasts put their car in the garage for the winter and don’t drive it anywhere. But sometimes you really want to listen to high-quality music with bass, which is in the car. The main problem here is the power supply, and it can really be solved using a computer.
All personal computers have a power supply; its power, as a rule, is about 250-300 watts, and this is exactly what we need for the amplifier to operate normally. If you don’t want to spoil your computer, you can buy another power supply to connect a car amplifier to it at home. It is best to choose older power supplies that work with the PCI bus.
Read also: What brand of car is this?
To connect the amplifier you will also need wires, a soldering iron, electrical tape or tape. It is important not to miss anything during the connection process and to connect everything clearly according to the diagram, otherwise either the power supply or the amplifier will burn out. All connections must be secure as the amplifier requires a lot of power. It is advisable to wrap the metal case of the power supply with something, since sometimes old power supplies can cause quite a shock of electric shock.
First you need to figure out which power supply wires to connect the amplifier to. To do this, you need to find all the black and all the yellow wires, there should be 3 of them in total.
Next you need to take 3 yellow wires, strip them of insulation and twist them, then solder the red wire from the amplifier to these wires. This is the “positive” wire and should go to the +12 volt mark on the amplifier. As for the black wires, they are also twisted together and connected to the black wire coming from the car amplifier. This black wire should be connected to the pin marked GND, which is ground.
In addition to all of the above, car amplifiers have one more input, it is called REM. This input must be supplied with voltage from the connector that connects to hard drives and drives. There are a total of 4 outputs on this fitting, so you need to connect to the output to which the yellow wires go.
After connecting the amplifier at home, you need to carefully check everything again so that all the wires are connected clearly according to the diagram described above. Otherwise, when you turn on the amplifier, it will burn out.
Now another question will arise, how to start the power supply, because this task lies with the computer. In fact, doing this at home yourself is not at all difficult, you just need to find the green wire, this is the “ignition”. Next, this wire just needs to be shorted to ground, that is, to any black wire. That's all regarding power supply, now the car amplifier is powered and ready for use.
There remains one more task: how to connect a car amplifier to a computer sound card or MP3 player? You can make the adapter yourself at home, or you can not bother and buy a ready-made one on the market.
To make using the system convenient, you can connect a switch between the green and black cables. Now, when you click the switch, the power supply will turn on.
Having figured out how to connect a car amplifier yourself at home, you can enjoy luxurious, high-quality bass from the subwoofer. And if this is a combined acoustic system, then you can create a real cinema at home. It is only important to follow all safety rules. The wires must be thick enough, as they can heat up due to heavy load, and this can lead to a fire.
A car amplifier serves as an additional device that increases the output sound power, as well as the sound of standard or low-power radios. Currently, the market is saturated with this equipment, so purchasing it will not be difficult. In this case, the main thing is to observe the correspondence of the parameters of the speaker system and the power of the maximum output level of the sound signal.
However, what to do if, having sold an old car, the driver did not want to part with his favorite speaker system, or simply needed a high-quality and powerful amplifier for home use.
The main problem in this case will be to find the necessary power source, since car radios and amplifiers are designed to operate from the vehicle’s on-board network, which means the supply voltage must be constant around 12-14 volts.
Read also: Dual-circuit ignition with one hall sensor
In an apartment or private house, such voltage can only be organized with the help of additional voltage converters that reduce the value of the standard mains voltage, and also rectify it from alternating current to direct current.
To do this, you need to know how to connect power to a car amplifier so as not to damage it and maintain the functionality of the power supply and the amplifier itself.
Before considering ways to start an amplifier from a computer power supply or other step-down transformer, it is necessary to take into account the basic correspondence of electrical equipment parameters:
- The power of the power supply must correspond to the power of the amplifier at maximum volume;
- The cross-section of the wires for connection must correspond to the current. To do this, the calculated power must be divided by the supply voltage. For example, if the power of the power supply is 200 W, then the wire cross-section should be designed for a current of about 16 Amps.
It is possible to connect the amplifier to a low-power power supply, but then it will not be possible to increase its output power. This method can only be useful for checking the functionality of sound-reproducing or amplification equipment.
How to adjust sound on a computer
Once you have completed the connection, it is important to figure out how to install sound on your computer. If you have no doubt that all cables are connected correctly, then it’s time to start adjusting the audio system. Before setting up the device, wait until the operating system is fully loaded. Next, check that the driver for the speaker system is installed. Its presence is determined by a pop-up window at the bottom right (for Windows). If the buffer is new, then a driver disk is sold with it; if it is old, then downloading the corresponding application from the Internet will not be difficult. Procedure:
- Install the driver.
- Reboot.
- On the taskbar, right-click on the speaker to bring up the context menu, go to “Volume Settings”.
- Select a sound device - your audio system.
- Before turning on the sound on your computer, use the volume mixer (optional) to set the sound level for the device.
How to connect a car amplifier from a power supply
Before connecting a car amplifier through a power supply from a computer , you need to carefully examine the amplifier terminals. On the back of the amplifier there are three main groups of terminals for connection:
- Food. They are designated as follows: 12V, REM, GND;
- Line input. Line IN;
- The output terminals for connecting speakers are designated SPEAKER OUT and RICHT. For four-channel amplifiers, the output terminals are divided into front and rear.
Connecting the car amplifier to the power supply must be done with the power supply unplugged from the outlet; only after all the wires have been correctly connected and securely fastened can you insert the plug from the computer unit into an AC outlet. A power connector comes out of the computer unit, which contains two voltages: 5 and 12 volts with a common negative. They are often marked by color: yellow +12 volts, red + 5 volts, and black negative “-“.
You can check them with a multimeter turned on to measure voltage, as well as by opening the housing of the unit and visually verifying the color marking of the supply wires. To power the car amplifier, you need to take only the yellow and black wires from the power connector.
A jumper must be installed between the REM amplifier terminal and + 12 Volts. Now you need to imitate the command for the power supply, which in the computer is connected to the motherboard. The command to turn on the power supply is carried out by installing a jumper or a regular switch.
You can find it by the color marking of the wires in the second connector coming from the power supply and going to the motherboard. This is often a green or gray wire that should connect to either of the black wires.
RESULTS AND COSTS
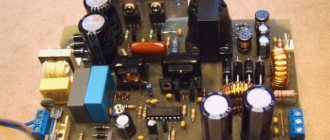
Well, what can I say, the converter justified all hopes and costs, it works like a clock. As a result of the experiments, he was able to deliver an honest 500 watts and would have been able to do more if the diode bridge of the unit that powered the converter had not died. Total spent on the converter (prices shown are for the total number of parts, not for one)
- IRF3205 4pcs – 5$
- TL494 1pc -0.5$
- BC557 3pcs – 1$
- KD213A 4pcs – 4$
- Capacitors 35V 3300uF 4pcs - $3
- Resistor 51 ohm 1 piece - $0.1
- Resistor 22 ohm 2 pcs -0.15$
- Development board - $1
How an amplifier works
For clarity, if you power the amplifier with a thin wire, it will become red-hot. If at the same time it is in a silicone braid. Well, you understand.
Expert opinion
It-Technology, Electrical power and electronics specialist
Ask questions to the “Specialist for modernization of energy generation systems”
Connection via adapter/charging In addition to strong consumers, do not forget about the weakest one - the PG radio - do not power it from the cigarette lighter or from random wiring on which you will find plus and minus. Ask, I'm in touch!
How to connect a car amplifier at home without a unit
Connecting a car amplifier at home without a power supply from a personal computer can be done in only two ways:
- Using a car battery, which will have to be recharged regularly, so this method is not popular;
- Using a powerful power supply (starting from 200 W) connected to the network, designed for an output voltage of 12-14 Volts.
When starting a car amplifier, you should not use power supplies that operate on the principle without a transformer device. They do not contain galvanic isolation, which means that any breakdown can lead to the appearance of a high mains voltage at the low-voltage power terminals of the amplifier, which is 18 times higher than the nominal one. This will certainly lead to failure of the sound-reproducing equipment.
Ripple
Most unstabilized power supplies have only one smoothing capacitor (or several connected in parallel) after the rectifier. To improve the power quality, you can use a simple trick: divide one container into two, and connect a small resistor of 0.2-1 Ohm between them. Moreover, even two containers of a smaller nominal value may turn out to be cheaper than one large one.
This gives smoother output voltage ripple with lower harmonic levels:
At high currents, the voltage drop across the resistor can become significant. To limit it to 0.7V, you can connect a powerful diode in parallel with the resistor. In this case, however, at signal peaks, when the diode opens, the output voltage ripples will again become “hard”.
To be continued…
The article was prepared based on materials from the magazine “Practical Electronics Every Day”
Free translation: Editor-in-Chief of RadioGazeta
Peak power
Despite these disadvantages, when powering the amplifier from an unstabilized source, you can get some bonus - short-term (peak) power is higher than the power of the power supply due to the large capacity of the filter capacitors. Experience shows that a minimum of 2000uF is required for every 10W of output power. Due to this effect, you can save on the power transformer - you can use a less powerful and, accordingly, cheaper transformer. Keep in mind that measurements on a stationary signal will not reveal this effect; it appears only during short-term peaks, that is, when listening to music.
A stabilized power supply does not have this effect.
The main thing is the voltage drop
When designing printed circuit boards for power supplies and more, we must not forget that copper is not a superconductor
This is especially important for “ground” (common) conductors. If they are thin and form closed loops or long circuits, then due to the current flowing through them, a voltage drop is obtained and the potential at different points turns out to be different
To minimize the potential difference, it is customary to route the common wire (ground) in the form of a star - when each consumer has its own conductor. The term “star” should not be taken literally. The photo shows an example of such a correct common wire layout:
In tube amplifiers, the anode load resistance of the cascades is quite high, about 4 kOhm and higher, and the currents are not very high, so the resistance of the conductors does not play a significant role. In transistor amplifiers, the resistance of the stages is significantly lower (the load generally has a resistance of 4 Ohms), and the currents are much higher than in tube amplifiers. Therefore, the influence of conductors here can be very significant.
The resistance of a trace on a printed circuit board is six times higher than the resistance of a piece of copper wire of the same length. The diameter is taken 0.71mm, this is a typical wire that is used when installing tube amplifiers.
0.036 Ohm as opposed to 0.0064 Ohm! Considering that the currents in the output stages of transistor amplifiers can be a thousand times higher than the current in a tube amplifier, we find that the voltage drop across the conductors can be 6000! times more. This may be one of the reasons why transistor amplifiers sound worse than tube amplifiers. This also explains why PCB-assembled tube amplifiers often sound worse than a surface-mounted prototype.
Don't forget Ohm's law! To reduce the resistance of printed conductors, you can use various techniques. For example, cover the track with a thick layer of tin or solder tinned thick wire along the track. Options are shown in the photo:
