Car audio systems rarely use only one full-range speaker. This scheme is used only in exceptional cases, since one loudspeaker gives a satisfactory sound picture, where there are mainly mid frequencies, and the low and high ranges are weak and inexpressive. Component acoustics with two or more acoustic emitters require a crossover.
Typically this is a passive filter using capacitors and inductors that suppresses a certain frequency band. The tweeter limiter attenuates or nearly attenuates all frequencies below 2500 Hz and allows high-frequency content to pass through. The filter, designed to connect the low-frequency head, cuts off frequencies above 150-200 Hz. Thus, the range of reproduced frequencies is divided into two bands designed to work with a specific speaker.
Assembling and connecting the crossover: step by step
To assemble and connect, do the following:
The inductors must be glued to the board. Don't forget about the capacitor. We use good glue for this.
This is important because these parts often fall off due to shaking and vibration. Now you need to connect the speaker wires. To do this, use a standard soldering iron. Pay attention to the polarity, and do not confuse the inputs of the LF and HF speakers. We fix the soldered wires with glue
They are also often damaged by shaking and vibration. Now you can connect the device. First, we make a test connection to make sure that the signal can be transmitted to the speakers. If necessary, turn on the resistor. You can use the device.
Thanks to the presented instructions, you can easily make a crossover
It is very important to choose the right materials for the device and install them
What is a crossover and what do you eat it with?
How to make a muffler with your own hands?
Do-it-yourself muffler repair without welding Crossover diagrams for acoustics
First, let’s find out why a crossover is needed? This is a special device designed to separate audio frequencies. Crossovers seem to remove unnecessary frequencies and filter them.
How to connect a crossover to acoustics
For example, there are speakers (see How to choose speakers for a car radio on your own) such as tweeters. If there were no crossovers, then all frequencies, their full package, along with low frequencies and midrange frequencies, would be supplied to the tweeters. It is clear that this will ultimately negatively affect the detail of the music. HF speakers, such as tweeters, are not capable of reproducing low and medium sounds and the presence of unusual frequencies will become a dangerous problem in this case.
Crossover circuit for acoustics
Passive crossover, its pros and cons
So:
A passive crossover filters the signal with its capacitors, resistors and coils. As a result of this, the first drawback of such crossovers is revealed - loss of power.
Speaker crossovers
Passive crossovers are connected directly in front of the speakers. It turns out that it is enough to use just one amplifier (see How to connect an amplifier and a subwoofer to a car radio: you are your own master), which is an undoubted advantage of passive crossovers.
Acoustic crossover
- Passive crossovers are sold individually or as a set with speakers, usually two-way or more.
- Among the disadvantages of passive crossovers, one can highlight the limited peak load, which entails rapid failure.
Passive digital crossover
Active crossover, its pros and cons
So:
An active crossover is used in front of the amplifier. Therefore, using one amplifier in this case is simply impossible. In the case of an active crossover, each speaker, be it a tweeter or a woofer, uses a separate amplifier channel.
Active crossover
The advantage of an active crossover is that, unlike a passive one, it allows you to fine-tune the cuts. It is this factor that largely determines the cost of such a crossover, which is more expensive than its opponent.
How to install crossovers for speakers
To avoid problems with how to connect a crossover for speakers, you need to follow the installation rules. Do not lay power and speaker cables together. This may cause low-frequency interference in the speakers. The same effect is caused by crossing cables. The band limiter is not a device whose operation requires any intervention, so the blocks can be placed in any convenient location. The main thing is that no dust, dirt gets in there and there is no elevated temperature. The blocks do not have a sealed housing, so negative external factors can lead to disruption of internal soldering and failure of the speaker system. It is advisable to tin the ends of the copper cable with a thin layer of solder before clamping it with a screw. This will reduce copper oxidation and the formation of an oxide film. Broken contact between the speaker and the amplifier is especially dangerous. Lack of load leads to breakdown of the output transistors.
Some crossover modifications consist of two first-order filters in series. Such models have a signal attenuation switch on the front side. When connecting a first order filter, the attenuation of unnecessary frequency band is 6 dB per octave. The crossover design allows you to connect a second link and get an attenuation of 12 dB. When connecting a crossover to speakers, it is desirable that the filter controls be accessible.
Leave a request and we will call you back within 48 hours!
Car audio is usually understood as a system of speakers with wires and additional devices such as filters and crossovers. Acoustics are installed on almost any car that comes off the assembly line of a car plant. If we approach this issue a little abstractly, then standard speaker systems can be divided by level into low, medium and high (both in relation to the quality of the sound produced and the cost that is included in the cost of such a package). And since the capabilities of car owners are not always comparable to the amounts that automakers ask for car configurations that are equipped with high-quality acoustic systems, most purchased cars are “equipped” with low-level systems. And that is why every second car owner thinks about replacing the standard acoustics, especially since standard systems of a higher level are sometimes subject to modifications (since there is no limit to perfection).
If a car owner comes to a specialized store, or finds himself in the catalogs of specialized online stores, then he will be presented with the following types of car acoustics to choose from - coaxial, component, standard and individual components. Coaxial acoustics are called so because its emitters are on the same axis (from the Latin co - together and axis - axis, that is, coaxial). In such acoustics, two or more speakers are assembled in one housing. In component acoustics, all speakers are separate components, with each one installed in the required location in the car interior. Standard acoustics assume full compliance with the standard seats of a particular make and model of car, which implies the simplest installation (such acoustics can be either coaxial or component). Certain components may be of interest to the car owner in case of failure of those already installed, or when building an individual acoustic system. This article will focus only on component acoustics, as they are the most popular among car owners.
Choosing the right speakers and radio
DIY sound amplifier for 12V speakers
First of all, specialized audio equipment is intended for installation in the car interior. Manufacturers of car speakers take into account not only sound quality, but also difficult operating conditions: vibration, dust, temperature changes, etc.
Is it possible to install household or variety speakers in a car?
Computer and concert speakers are designed for more gentle conditions. They most likely won't last long in a car.
In addition, computer speakers usually require not only a sound source, but also a separate power supply, without which they will not work, while car speakers are connected only to the output of an amplifier or radio.
As a rule, it is advisable to buy speakers where it is possible to evaluate the sound quality. Appearance does not play a special role, since in the car's interior the speakers are usually covered with a decorative mesh or grille.
Choosing suitable speakers for a car consists of determining the basic requirements for them and comparing the technical characteristics of several models of the same price category
Designations of modifications
Among the designations that crossover modifications for vehicles have are the following:
- Input, or entrance. It is to this place that the output of the active amplifier is connected, so it is important not to make a mistake with the polarity here.
- Woofer, or low frequency emitter. A speaker with mid and low frequencies is connected to this place. Separation stripes are indicated in the technical documentation.
- Twitter, or tweeter. A high-frequency speaker is connected to this location.
These are the main points and rules regarding how to connect crossovers to speakers and to the entire sound system of the vehicle.
Connection diagrams
How to make a podium for speakers in a car with your own hands
High-quality car audio is ensured by a correctly selected cutoff frequency. If a three-way crossover is used for acoustics, then in this case 2 cutoff frequencies are determined: 1 - for the difference between low and mid frequencies, 2 - for filtering mid and high frequencies.
The active type of amplifier is a built-in equipment, so to install the stereo system you just need to choose the most suitable place in the car. You can connect the passive one yourself; a simple circuit is used for this:
- It is necessary to install suitable speakers in the car interior.
- Connect the speaker to the device input terminals.
- To connect the crossover to the car speakers, you need to look at the markings.
Speaker input designations:
- Wf - broadband;
- Sw - subwoofer;
- Mw - midwoofer;
- Tw - high frequency.
A simplified connection option is to connect high-frequency speakers with broadband speakers in series. A coil of thin wire is connected parallel to the tweeters. This option allows you to connect tweeters without a crossover.
In this case, the sound of the high-frequency speakers will be enhanced, but the low-frequency and mid-frequency speakers will be slightly attenuated. It all depends on the thickness of the selected wire in the coil. The thinner it is, the higher the resistance will be. An alternative speaker connection scheme will provide natural and high-quality sound to any audio system.
Almost every motorist tries to equip his car with music, but does not always adhere to the rules for installing and connecting speakers
To ensure satisfactory sound quality, it is important not only to choose speakers, but also to know where to install them and how to connect them correctly. If the goal is to independently install a speaker system in a car, then you should familiarize yourself with the possible nuances of this procedure in advance, after which you can begin step-by-step actions
Installing component acoustics - advantages and disadvantages
The main and main advantage of component acoustics is the ability to install speakers separately. If a coaxial speaker is installed in the lower part of the car door and the entire frequency range goes “at the feet” of the listener, then in the case of component acoustics it becomes possible to install each speaker exactly where it belongs. By “there” we mean such an arrangement when individual frequency ranges reach the listener in such a way that they are perceived most fully and clearly.
To separate frequencies, crossovers are used in component acoustics, while capacitors are used in component acoustics (almost always). The latter cuts off only the lower limit of the tweeter, while the crossover “works” with both limits of the ranges of each individual speaker. This is an undeniable advantage of component acoustics.
Another advantage of component acoustics is the ability to customize it. This will require either a processor head unit or the installation of an external processor. This approach is obviously an expensive pleasure, but it gives a huge number of opportunities to lovers of high-quality car audio. This includes adjusting frequency cuts, time delays, and a high-quality equalizer. By the way, the latter allows you to “work” with a large frequency breakdown with the ability to “raise” or “fail” the required intervals.
There are two standard disadvantages of component acoustics - cost and installation complexity. Cost is a very important parameter for many car owners, therefore, when comparing the options “component or coaxial,” very often the choice is made on the latter, as it is more budget-friendly. And in general, the starting price limits for coaxial acoustics are lower. The cost of installing component acoustics is also higher than coaxial acoustics, since more components need to be installed. Unfortunately, it is precisely because of the desire to save several thousand rubles (and the difference in cost is not always very noticeable) that many car owners end up with a sound that is not at all what they wanted in their car.
Do-it-yourself replacement of standard speakers
The least expensive way to improve the sound inside a car, both in terms of money and effort, is to replace the standard wideband speakers with two- or three-way coaxial ones.
The standard place for the “native” speakers is the lower front corner of the doors. For replacement, it is advisable to select speakers of the same size as the standard ones. Larger speakers generally sound better, but they will require a larger mounting hole in the door.
Installation Tools
To replace the speakers you may need the following tool:
- jigsaw,
- electric drill,
- Phillips and flathead screwdrivers,
- knife,
- soldering iron,
- pliers,
- set of car keys,
- panel puller,
- file,
- insulating tape,
- plastic clamps for fastening wires.
Preparatory work: how to remove the trim
Before carrying out work, turn off the ignition and disconnect the negative cable from the battery. Then do this:
- Often there is no speaker panel, and the speakers are hidden behind a non-removable mesh (grid) of the door trim.
In this case, remove the door handles that interfere with dismantling. If there are fastenings with self-tapping screws, remove the protective plugs and unscrew the screws. Then remove the trim. Slowly rocking, remove the panel, releasing one fastener after another. - If the standard speakers are covered with a separate decorative panel, carefully pick it up in the least visible place and pull it, roughly identifying the attachment points.
Slowly rocking, remove the panel, releasing one fastener after another. Remove door handles and other body parts that interfere with dismantling - If fastening with plastic clips, hook the trim in a less visible place, being careful not to leave scratches on the surface. Remove it, releasing the latches sequentially around the perimeter of the door.
Responsibility for unauthorized installation
If the insertion into the pipe for connecting the column is made bypassing the metering device, then such an act falls under Art. 7.19 AC RF. For this, administrative liability is provided in the form of penalties.
For individuals, fines range from one and a half to two thousand rubles. This is the least possible measure for those illegally connected to the gas system. How an official connection to a centralized gas main is made is described in detail in the following article, which we recommend that you read.
In addition to the administrative code, unauthorized tapping and installation of gas equipment is subject to Federal Law No. 69 “On Fire Safety.” According to the text of the document, the owner of the property bears administrative or criminal liability depending on the severity of the consequences.
If the actions cause property damage to third parties, the owner will be obliged to compensate it in full. In addition, a fine of RUR 80,000 may be imposed for a violation. If significant harm was caused to the health of neighbors, the owner may be taken into custody and imprisoned for up to two years.
Advantages and disadvantages
Active crossovers
- Convenience during operation;
- The switches are output directly to the housing.
- Too expensive;
- The need for active crossovers in amplifiers for channels;
- The presence of distortions in the work that arise due to the operation of the elements of these devices.
Passive crossovers
- Dividing signals into systems with several bands, and this requires only two amplification channels;
- Low cost.
- Impossibility of configuration without direct intervention in the entire electricity supply circuit;
- Select according to the acoustic system bands used;
- Configuration, selection and installation are processes that require professional knowledge and experience.
When exactly is this element needed?
Good acoustics may not need a crossover at all. Why? Because the frequency range of the sound entering the speakers is harmonious. The speakers themselves and other elements contribute to this. However, even a good acoustic system, which is expensive, sometimes does not satisfy with its sound. An ear for music is not a vice. Is it worth suffering because of an innate biological feature? The manufacturer is not obliged to focus on the category of citizens with an ear for music and sensitive receptors.
Speakers without a crossover are not functional in some cases. What is it: creaks, extraneous noise, voice distortion? A good trainer for hearing and strengthening the nervous system? Taking care of yourself is important. Manufacturers sometimes offer people to do this themselves.
Music is many sounds that have different frequency ranges. Some people hear, some they don’t. He likes some, he doesn't like others. Muting certain frequencies, on the contrary, emphasizing them, making them loud or completely unnoticeable - the crossover was invented for this purpose. Acoustics will delight and truly serve people if this element is added.
Active and passive
Crossovers are divided into two groups:
- active;
- passive.
Each type has its own advantages and disadvantages.
Active ones consist not only of capacitors and coils, but also of transistors. Thanks to this, the dimensions of the device were reduced. It is difficult to find an active crossover made as a separate element. They are basically an integral part of a car audio amplifier.
Passive ones are much more common. The main advantage of this type of crossover is that there is no need for additional power, so they are easy to install.
In addition, passive and active filters are divided into 3 more subtypes:
- High-frequency, designed to pass a high-frequency signal, cutting off everything else. This subtype is intended for tweeters.
- Low-frequency ones, on the contrary, cut off the upper frequencies and pass the low-frequency signal through themselves. Used for woofers.
- Wideband filter, also called Band Pass. This subtype is necessary to cut off frequencies outside a certain range. It is intended for midrange speakers.
Cheap speakers have first or second order crossovers. This is done to reduce cost, since the filters use only one or two electrical elements. Third order filters are found in power amplifiers. As for the fourth order, this type is considered elite. A separate housing is made for them.
Not long ago, there was debate among lovers of good music about the effectiveness of the 4th order divider. The work of fourth-order crossovers, with a cutoff slope of 24 dB per Octave, can only be compared with the work of banks in Switzerland, where everything is strict and clear.
The main thing in setting up a crossover is the cutoff frequency.
Take, for example, a three-way speaker. For high-quality music reproduction, you need to make sure that only low frequencies are sent to the woofer, the mid-frequency range is sent to the midrange speaker, without low and high frequencies, and the tweeter receives only a high-frequency signal. Thus, it is necessary to correctly determine the two division points. At the first point the signal will be split between the subwoofer and midrange. And at the second point the midrange speaker and tweeter will be coordinated. If you choose the wrong cutoff frequencies, at best you can end up with terrible sound. In this case, it will become impossible to listen to music and you will want to turn it off immediately. In the worst case, the acoustics will fail. For example, the high-frequency speaker will receive low-frequency range, which is very harmful for tweeters.
Crossovers are used quite actively these days. Despite the fact that you can purchase a digital analogue - a processor. Thanks to which, you can not only filter the signal, but also set delays and much more.
However, crossovers have an advantage over digital processors - the quality of filtering the audio signal. The fact is that a lot of work is put on the filter: filtering, time delays, equalizer. Therefore, the quality of filtration itself decreases. Thus, passive and active crossovers are in great demand. They are even used to make professional speakers.
Professionals predict the imminent death of analog filtering. They believe that the price of digital analogues slows down the natural process. However, there is a group of people who believe that there is always a place for a good passive crossover in any audio system, no matter how far technology has come. You can agree with both the first and second groups of people. This is due to the fact that you can build a good, high-quality and professional speaker system using both a crossover and its digital brother - a processor. The only question is which one you like best.
Watch a video about crossovers
Installation of component acoustics - components and frequency boundaries
As mentioned earlier, component acoustics are a set of several individual speakers. There are 2-component and 3-component acoustics. In 2-component acoustics, it is assumed that there are four speakers (two each for symmetrical installation in the car interior), in 3-component acoustics there are six speakers (three each for symmetrical installation).
Here it will be useful to consider what kind of speakers these are and what each of them is needed for. The directionality of any acoustic system must correspond to the frequency range of 20-20,000 Hz audible to the human ear. This range is divided into low, medium and high frequencies. There is no car speaker that is able to fully reproduce this entire frequency range, which is why a system of speakers is used, each of which reproduces its own frequency range. That is, ideally, we should have a low-frequency speaker (woofer), a mid-frequency speaker (MF speaker) and a high-frequency speaker (HF speaker). But since we are talking about interior acoustics, the woofer falls out of this scheme, since it is not possible to install it using standard methods (with rare exceptions for some car brands). And that is why, almost always, it is assumed that there is a so-called bass/midrange speaker, which is referred to as midbass. That is, it affects both the lower and mid frequencies of the sound spectrum. This is one of the speakers for both 2 and 3 component acoustics. The second standard component is a tweeter (tweeter or tweeter), which is responsible for reproducing high frequencies. A set of midbass and tweeter is called 2-component acoustics. Sometimes a midrange speaker is added to this kit, which highlights the mid-frequency range. And it is the set of midbass, midrange speaker and tweeter that is called 3-component acoustics.
As part of any component acoustics, there are two frequency dividers (crossovers), which are necessary to divide the sound stream into separate frequency intervals and feed each of the intervals to a specific speaker (so that each speaker produces exactly the frequency range that is intended for it, since There is only one sound signal for the entire acoustic system.) The general division by frequency intervals for 2-component acoustics can be represented as follows: midbass - 60-4,000 Hz, tweeter - 4,000-20,000 Hz. In 3-component acoustics, the midrange speaker “takes away” the interval of 1,000-4,000 Hz from the midbass. This division is somewhat abstract, since for each crossover the cuts are configured in the way the manufacturer considered necessary.
Purpose
A crossover is a special device in the structure of the speaker system, designed to prepare the required private range for each of the installed sound speakers. The latter are designed for operation within certain frequency ranges. If the frequency of the signal supplied to the speaker goes beyond the range, it can lead, at a minimum, to distortion of the reproduced sound, for example:
- if the frequency is applied too low, the sound picture will be distorted;
- when applying too high a frequency, the owner of a stereo system will face not only sound distortion, but also failure of the tweeter (high-frequency speaker). It may simply not withstand this operating mode.
Under normal conditions, the task of a tweeter is to reproduce only high-frequency sound, and low-frequency sound, respectively, low-frequency sound. The mid-frequency band is fed to the midwoofer - the speaker responsible for the sound of mid-frequencies. Based on the above, in order to reproduce car audio with high quality, you need to select the appropriate frequency bands and feed them to specific speakers. To solve this problem, a crossover is used.
Crossover device
Structurally, the crossover includes a pair of frequency filters that operate as follows: for example, if the crossover frequency is set to 1000 Hz, one of the filters will highlight frequencies below this indicator. And the second is to process only the frequency band exceeding a given mark. Filters have their own names: low pass - for processing frequencies below a thousand hertz; high pass – for processing frequencies above a thousand hertz.
So, the principle by which a two-way crossover works was presented above. There are also three-way products on the market. The main difference, as the name implies, is the third filter, which processes the mid-frequency band, from six hundred to five thousand hertz.
Technical features
Most modern crossovers contain inductors and capacitors. Depending on the quantity and quality of manufacturing of these reactive elements, the cost of the finished product is determined.
Capacitors can isolate and handle high frequencies, while coils are needed to regulate low frequencies. By using these properties wisely, the result can be the simplest frequency filter. There is no point in delving into the complex laws of physics and citing formulas as examples. Anyone who wants to become more familiar with the theoretical foundations can easily find information in textbooks or the Internet. It is enough for specialized specialists to refresh their memory about the operating principle of LC-CL type networks.
The number of reactive elements affects the crossover capacity. The number 1 denotes one element, 2 - respectively, two. Depending on the number and connection diagram of elements, the system filters inappropriate frequencies for a particular channel in different ways.
It makes sense to assume that the greater number of reactive elements used makes the filtration process better. The filtering circuit for unnecessary frequencies for a specific channel has its own characteristic called slope.
It's called sensitivity. Depending on this indicator, products are divided into four categories:
- first order models;
- second order models;
- third order models;
- fourth order models.
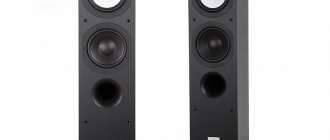
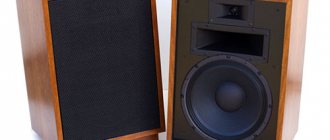
Speakers for component acoustics
The professional term “component acoustics” means speakers with broadband, high-frequency emitters assembled in one housing. The name, which characterizes the differences between coaxial and component speakers, has also taken root in the trade designations of diffusers.
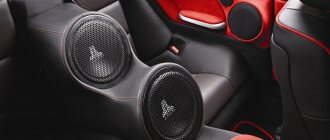
component acoustics in the car
Replacing low-quality standard speakers is the first step in acoustic tuning. Without changing the factory car radio, you can use inexpensive coaxial speakers (they have a high-frequency diffuser built into the broadband) or two-component acoustics.
Based on the sound quality when selecting a signal from the standard car radio of budget models, only a specialist can distinguish between coaxial and component speakers. But even relatively inexpensive component speakers in cars last much longer than coaxial speakers.
2-component acoustics (which is correctly called “two-way”) combines two diffusers in one housing, allowing you to reproduce both high and mid frequencies. For background listening to music, a two-component system is sufficient, but it does not meet the high requirements for the quality of overtone transmission.
A complete set of two-component acoustics includes:
- two tweeters (professionals often call tweeters “tweeters”);
- two midbass (bass/midrange speaker with a range of 50 Hz - 3.5 kHz);
- two passive two-way crossovers.
Most inexpensive stock radios are not equipped with built-in crossovers, which must be purchased separately. A device combining an inductor and a capacitor is necessary to accurately separate the frequency spectrum.
To this set, 3-component acoustics add two midrange and mid-range speakers for reproducing the mid-range (frequencies 150 Hz - 1 KHz). To complete three-component acoustics, you will also need to replace two-way crossovers with three-way ones.
Both dynamic sound wave reproduction systems are designed for frontal placement (in the front of the cabin). They can be installed in door panels (in place of standard speakers), above the dashboard, on the side pillars of the windshield.
When creating a three-lane front for the third pair (midranges), you need to think about the installation location. In addition, midrange models without a phase-equalizing tip will require the manufacture of a bulk body. Most often, the third pair of speakers is installed on the central tunnel of the cabin. It makes no sense to install midranges near the rear window; this will worsen the sound volume.
Connecting speakers via crossover
The cross-section of the conductor is very important when driving speakers through a band-pass filter. It directly depends on the power of the speaker system and the resistance of the dynamic head. If we omit all the calculations, it turns out that for a speaker with a power of 100 watts and a resistance of 4 Ohms, you need a cable with a minimum cross-section of 2.0 mm2. The lower the acoustic resistance, the greater the current will flow in the circuit. When connecting loudspeakers, it is recommended to take a 20% margin over the cable cross-section.
Connecting the crossover to the speakers should only be done with real copper wire. Particularly dangerous when connecting elements of a sound system is the use of cheap cables from some Chinese manufacturers. Instead of copper, they use copper alloy or copper-plated steel. Both are strictly contraindicated in car acoustics. In addition to poor sound quality, there will be uncontrolled heating of the connecting wires, which can lead to dangerous consequences.
Installation of component acoustics - assortment
The choice of component acoustics is huge, and the car owner is unlikely to have problems finding the necessary set in the required price category. The cost of component kits varies very widely - from one thousand to several hundred thousand rubles. Of course, kits in the highest price categories are of interest to a very limited number of car owners - those who want to build a truly high-quality and individual acoustic system, and are ready to spend serious money. More often, the buyer's choice is focused on low and medium price categories, in which the main assortment is presented.
In any specialized online store, a visitor can see offers from dozens of manufacturers, including many well-known and not so well-known. Well-known brands in this area are DLS, Focal, Hertz, JBL, Kicx, Morel and some others. Some manufacturers produce speakers exclusively, while others specialize in the entire range of car audio equipment. The range of some brands contains only budget sets, while others try to cover the maximum number of price ranges. Manufacturers such as Focal, Audison, Morel have high-quality kits in their lines that may be of interest to true car audio fans.
The cost of a specific kit depends on many parameters - brand awareness, technical characteristics, quality of materials (from which the components are made), acoustic class. In addition, each brand has its own individual sound characteristics, which is very important when building a high-quality acoustic system in accordance with the preferences of the car owner. That is why it is advisable to seek the help of specialists from specialized installation centers who will not only select the required equipment, but also carry out its high-quality installation.
Connection features
A tweeter is an element of a stereo system whose task is to reproduce sound with a frequency from 3000 to 20,000 hertz. The radio tape recorder produces a full spectrum of frequencies, ranging from five hertz to 25,000 hertz.
The tweeter can only reproduce high-quality car audio with a frequency of at least two thousand hertz. If a lower-frequency signal is applied to it, it will not be reproduced, and if the power for which the mid- and low-frequency speakers are designed is high enough, the tweeter may fail. At the same time, there can be no question of any quality of playback. For long-lasting and reliable operation of the tweeter, you should get rid of the low-frequency components that are present in the general spectrum. That is, make sure that only the recommended range of operating frequencies falls on it.
The first and simplest way to cut off the low-frequency component is to install a capacitor in series. It passes well the high-frequency frequency band, starting from two thousand hertz and more. And does not pass frequencies below 2000 Hz. In fact, this is a simple filter, the capabilities of which are limited.
As a rule, the capacitor is already present in the speaker system, so there is no need for additional purchase. You should think about buying it if the owner decided to acquire a used radio and did not find a capacitor in the tweeter kit. It may look like this:
- A special box to which a signal is sent and then transmitted directly to the tweeters.
- The capacitor is mounted on the wire.
- The capacitor is built directly into the tweeter itself.
If you do not see any of the options listed, you should purchase the capacitor separately and install it yourself. In radio stores their range is large and varied.
The range of filtered frequencies depends on the type of capacitor installed. For example, the owner can install a capacitor that will limit the range of frequencies supplied to the speakers at three or four thousand hertz.
Note! The higher the frequency of the signal supplied to the tweeter, the more detailed the sound can be achieved. If you have a two-way system, you can choose a cutoff from two to four and a half thousand hertz
If you have a two-way system, you can choose a cutoff from two to four and a half thousand hertz.
Connection
Connecting the tweeter looks like this: it is connected directly to the speaker that is located in your door, plus the tweeter is connected to the plus of the speaker and the minus to the minus, while the capacitor must be connected to the plus. This is a practical tip for those who don't know how to connect tweeters without a crossover.
An alternative connection option is to use a crossover. Some models of car speaker systems already have it included. If not available, you can purchase it separately.
Installation of component acoustics - features and nuances
When installing component acoustics, several questions may arise, and regarding each component of our component system. Even if the mid-bass speaker has identical mounting dimensions to the standard ones, its depth may interfere with the window lift mechanism. If this speaker has other dimensions, then its installation may not be possible at all. In both cases, the situation can be corrected by spacer (mounting) rings, which are attached to the metal of the door, and the speaker is already attached to them. But a situation may arise when it is impossible to secure the ring to the required size of the speaker, or the speaker moves so far that it is impossible to put the door trim back on. In this case, it may be necessary to modify the seat or door trim. But car owners also have access to the service of making podiums for installing speakers, which can be made on the basis of existing elements, or completely individually. It is worth noting that the manufacturing option significantly expands the car owner’s capabilities, not only regarding sound, but also visualization of the installation.
If 2-component acoustics are being considered for installation, then a question may arise with the second component – the tweeter. If the standard system has space for a tweeter, then the new speaker can be placed in this very place. If such a place is not provided, then you can get out of the situation by placing the tweeter on the door trim or the car pillar.
If 3-component acoustics are being considered for installation, then you will have to look for a place for the midrange speaker. There will almost certainly not be a standard place for this speaker, so again you will have to resort to non-standard solutions. Here again, the option of making podiums can be considered, and one podium can be made for both the midrange speaker and the tweeter. As a rule, such a podium is made and installed on a car windshield pillar. Of course, podiums are additional costs that are noticeably higher than the cost of standard installation of speakers, but here everything depends on the wishes and capabilities of the car owner.
Very often, when installing component acoustics, it is recommended to soundproof the car doors (where midbass units are installed). Similar work can be performed with the application of one, two or three layers of material. This will create a more sealed volume for mid-bass speakers, eliminating the influence of external factors as much as possible. Soundproofing doors is practically necessary when installing high-quality and powerful acoustics.
But we also shouldn’t forget that cabin acoustics are far from the only component of a car’s audio system. It is recommended to connect high-quality and powerful acoustics to an external power amplifier, which will allow you to achieve maximum performance from the speakers (if there is high-quality noise insulation). If the car owner needs high-quality bass, then it is unlikely that he will be able to do without installing a subwoofer. And you shouldn’t write off the head unit, the sound characteristics of which directly affect the quality of the sound reproduced by the speakers.
Where to install component acoustics is up to the car owner to decide. A huge number of installation centers provide similar services. And if it comes to simply replacing standard components, then no questions should arise. If the goal is to achieve truly high-quality sound, then you will need to take the most responsible approach to the choice of equipment and its installation options, which not everyone can do.
Connection features
A tweeter is an element of a stereo system whose task is to reproduce sound with a frequency from 3000 to 20,000 hertz. The radio tape recorder produces a full spectrum of frequencies, ranging from five hertz to 25,000 hertz.
The tweeter can only reproduce high-quality car audio with a frequency of at least two thousand hertz. If a lower-frequency signal is applied to it, it will not be reproduced, and if the power for which the mid- and low-frequency speakers are designed is high enough, the tweeter may fail. At the same time, there can be no question of any quality of playback. For long-lasting and reliable operation of the tweeter, you should get rid of the low-frequency components that are present in the general spectrum. That is, make sure that only the recommended range of operating frequencies falls on it.
The first and simplest way to cut off the low-frequency component is to install a capacitor in series. It passes well the high-frequency frequency band, starting from two thousand hertz and more. And does not pass frequencies below 2000 Hz. In fact, this is a simple filter, the capabilities of which are limited.
As a rule, the capacitor is already present in the speaker system, so there is no need for additional purchase. You should think about buying it if the owner decided to acquire a used radio and did not find a capacitor in the tweeter kit. It may look like this:
- A special box to which a signal is sent and then transmitted directly to the tweeters.
- The capacitor is mounted on the wire.
- The capacitor is built directly into the tweeter itself.
If you do not see any of the options listed, you should purchase the capacitor separately and install it yourself. In radio stores their range is large and varied.
The range of filtered frequencies depends on the type of capacitor installed. For example, the owner can install a capacitor that will limit the range of frequencies supplied to the speakers at three or four thousand hertz.
If you have a two-way system, you can choose a cutoff from two to four and a half thousand hertz.
Connection
Connecting the tweeter looks like this: it is connected directly to the speaker that is located in your door, plus the tweeter is connected to the plus of the speaker and the minus to the minus, while the capacitor must be connected to the plus. For more details on which wire color is suitable for which column, see the radio connection diagram. This is a practical tip for those who don't know how to connect tweeters without a crossover. An alternative connection option is to use a crossover. Some models of car speaker systems already have it included. If not available, you can purchase it separately.
Component acoustics in practical use
Two-component car acoustics in a car can improve the sound quality and volume slightly. For noticeable results, it is necessary to purchase and install a high-quality head unit.
how to install component speakers
The possibilities of three-component acoustics are wider, but even here a significant jump in quality will only be achieved by channel-by-channel amplification. Connecting each device to a separate channel of a four-channel or eight-channel amplifier, equipping the system with filters, and correctly setting time delays - provide quality comparable to listening to a high-quality home audio system.
In the lower price segment, the best component acoustics from the brands Audison, Challenger, Kicker, Polk Audio, Alpine cost $80 - $210. The advantages of inexpensive but high-quality speakers include decent maximum power (up to 300 W), silk dome tweeters, the possibility of detailed customization, size (available for installation in standard places of serial foreign cars), compatibility with various amplifier models.
When choosing component speakers, important characteristics are:
- equipped with an external crossover;
- aluminum diffuser;
- magnet power;
- cast basket;
- chromed back;
- Convenience of mounting holes;
- durable protective grilles;
- swivel tweeter design.
User reviews consider the advantages of various midbass models to be complete with additional fastening and installation devices. For installation on domestic car models, a small installation depth is important.
characteristics of component acoustics
Car audio lovers consider the common disadvantage of all component speakers to be manifestations of crossover defects and insufficient bass depth. The design disadvantages of some models will be short tweeter wires, demands on the precise direction of sound, high sensitivity of the coils, close location to the core (manifested in squeaks after washing the car). Larger remote crossovers may require special sockets for installation.
Installing component speakers in a car showroom
Installing speakers in door panels faces certain challenges. If you do not want to redo the door panel, it is better to first remove one of the speakers in order to be guided by its dimensions. For domestic models (in particular, the tenth VAZ family), the installation location is designed for speakers with a diameter of thirteen centimeters. Most foreign manufacturers produce high-quality component diffusers measuring 6 inches (16 centimeters).
In addition, it is necessary to redesign the mounting systems that do not prevent the speakers from rattling.
To install a new imported speaker you need:
- disassemble the door panel;
- cut off the installation location;
- trim and straighten the stiffener;
- plan the installation location of the speaker (the best location is considered to be towards the center of the cabin);
- close and seal the technological holes (use masking tape, fiberglass, epoxy glue);
- install a complete or homemade podium under the speaker (necessarily a tight fit to the door metal);
- improve the sound insulation of the door (glue the internal surfaces with vibroplast or other sound insulator);
- install speaker;
- mount a crossover (installed next to the midbass);
- cut holes in the door panel for diffusers and cables;
- assemble the door;
- strengthen protective grilles;
- decorate the door panel from the outside.
A homemade podium can be assembled from several plywood rings of various diameters (repeating the configuration of the speaker), held together with an adhesive joint. For the bottom ring, it is necessary to provide ears with holes for fastening. In foreign cars, new speakers are usually installed in standard places. An improvement could be the manufacture of a more massive wooden podium.
Removing car door trim
The location for installing tweeters must be selected individually, depending on the interior of the car. On a Zhiguli, a triangle near the mirror shift control can be a convenient place, although this arrangement lacks a bit of soundstage height. The protruding standard “cup holder” of the tweeter can be replaced with a homemade podium of an original shape, glued together from fiberglass with epoxy. For the wire you need to make a hole from the door panel.
installing speakers in a car door
In the broadest sense of the concept, choosing component acoustics involves replacing not only the speakers. The natural process of improving sound certainly leads to the first purchase of a high-quality head unit (receiver, player, media system), for the installation of which new special cables will be needed. Then the car enthusiast purchases an amplifier for the “head”. The next step is the purchase and installation of a subwoofer, which also requires an amplifier. This is where the list of devices for tuning car acoustics ends, except for modifications to the sound insulation of the car.
The endless process of improving the quality of the speaker system will require the purchase of higher quality (and therefore expensive) components. At the same time, you will certainly have to move from independent work with simple systems to complex interior upgrades. Expensive equipment requires the development of competent wiring diagrams, cable routing, installation of equipment in the trunk, and adjustment of sound systems. These works are professionally performed by specialists from car tuning studios.
How to configure
In order to get the highest quality sound, you need to select the required cutoff frequency. If you use a three-way active crossover (the best option for most acoustic systems), you need to identify two cutoff frequency levels. The first shows the boundary between frequencies such as medium and low, and the second does the same, but for high and medium frequencies.
An important point: every vehicle owner must correctly determine the frequency characteristics of the speakers used before connecting the crossover to the speakers. There is no need to go to these frequencies, since in this case the crossovers will refuse to work normally at them. Ultimately, this will only lead to deterioration in sound and quality. This will also cause a reduction in the life of the equipment and the entire acoustic system in the vehicle.
Installation
Features of how to connect crossovers to speakers include the following:
- Crossovers, as devices that help create the necessary frequencies and sounds on speakers, are connected to the entire audio system;
- All devices, regardless of the type of operation, have symbols located on stickers. Here, on the stickers located on the back, there are diagrams for connecting the active wires;
- After this, the cover is removed, since under it there are indications of the operation and working elements of the device in the general acoustic system of the vehicle;
- The next step is choosing a suitable installation location.
Differences between active and passive crossovers
Let's start the comparison with a passive crossover. It is known from practice that the passive crossover is the most common and most often found type on the market. Based on the name, you can understand that passive ones do not require additional power. Accordingly, it is easier and faster for the vehicle owner to install the equipment in his car. But, unfortunately, speed does not always guarantee quality.
They are rarely found as separate equipment, but any car amplifier contains an active filter as an integral part. Due to the passive principle of the circuit, the system needs to take part of the energy from the filter to ensure its operation. In this case, reactive elements tend to change the phase shift. Of course, this is not the most serious drawback, but the owner will not be able to fine-tune the frequencies.
Active crossovers allow you to get rid of this disadvantage. The fact is that, although they are much more complicated than passive ones, the audio stream in them is filtered much better. Thanks to the presence of not only coils and capacitors, but also additional semiconductor elements, the developers were able to significantly reduce the size of the device.
They are rarely found as separate equipment, but any car amplifier contains an active filter as an integral part.
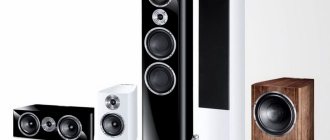
About the subwoofer
The decision was conscious and quite mature. A music lover I knew, who already owned a trifonic, only added fuel to the fire. Later, during one of the tests of audio equipment, I had the opportunity to combine and configure the triphonic with my own hands. Of course, the desire to apply this practical skill at home only intensified.
And now, finally, the cherished day has come.
My choice was the M&K Sound SB12 closed box subwoofer. Black glossy beauty, matching my bookshelf acoustics. The dimensions of the subwoofer are not very modest: height and width - 381 mm, depth - 438 mm. The weight exceeds 20 kg.
The front panel houses a 12-inch cellulose driver. The side and top panels remain intact. The bottom panel has five rubber support feet. The back side houses all the connection terminals available to the sub, controls and a cooling radiator. The peak power indicated by the manufacturer is 250 W. Frequency range: 20–200 Hz.
Regarding the functionality, I will describe only those nuances with the help of which the subwoofer was connected, configured and fine-tuned.
The power switch has three positions: “On”, “Off” and “Auto”. The latter mode came in very handy - the subwoofer turns on itself when an incoming signal arrives and also turns off when there is no signal for some time. In my scenario, this option was in demand.
Phase adjustment is smooth: from 0 to 180. Crossover adjustment is implemented from 40 Hz to the “Bypass” position, when the crossover gives the subwoofer complete freedom. The last knob controls the subwoofer volume.
Below are two pairs of high-level connection terminals. Even lower are two identical pairs of terminals, but for a different purpose. With their help you can connect a stereo pair to the subwoofer.
Homemade crossovers
It happens that having become the owner of an expensive car acoustics, the owner discovers that the kit does not include crossovers. It is clear that it will be impossible to do without them, since the HF speakers can simply burn out. What to do? The answer is ridiculously simple - make them yourself.
Tools
First, let's arm ourselves with the necessary tools:
- A good and convenient soldering iron.
- A special device that measures inductance.
- Glue "Moment".
- Ferric chloride.
- Foil fiberglass laminate.
- Heat shrink tube.
- Silicone sealant.
Crossover circuit
So:
First of all, you need to carefully study the technical characteristics of the purchased speakers
It is recommended to pay special attention to the low frequencies of the tweeters, as well as the level of characteristic sensitivity of the LF and HF speakers. Then you need to select the correct electrical circuit, which involves connecting a crossover.
Crossover circuit
Inductor
Inductors in a crossover
So:
We wind the inductors for the speakers. Note that when doing this for a woofer, it is better to use copper wire with a diameter of 1 mm and insulated with a special varnish.
Making a printed circuit board
So:
- It's time to draw the board on paper. This must be done based on the sizes of the resulting coils and resistors.
- We draw the board and transfer it to a sheet of special material.
https://youtube.com/watch?v=cyv0Wm8BTYM
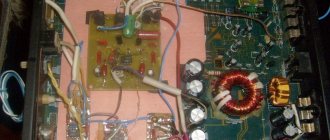
We assemble the boards of our future crossover according to the installation diagram.
Crossover assembled according to a standard design
Connecting speaker wires
So:
We connect the speaker wires using a regular soldering iron. When working, you need to be extremely careful and not confuse the outputs for the low-frequency and high-frequency speakers
You also need to pay attention to the polarity. Glue will come in handy here too. It is necessary to fill the wires that are soldered with “Moment”, which will again protect against vibrations and possible fractures.
Connection
So:
- We carry out a test connection and make sure that the signal is supplied to each speaker from the corresponding output of the homemade crossover.
- If necessary, you can also include a 4 ohm resistor in front of the RF filter.
Acoustic car crossover
We wrap the crossover ready with our own hands with heat-shrink tubing, observing the required dimensions. Be sure to fill the edges with silicone to prevent moisture or dust from getting inside the crossover. The presented instructions will help you make a homemade crossover for acoustics without any problems. During the operation, it is recommended to study additional photos and video materials. As for the price of consumables, it depends on the number of coils and speaker outputs
The material that is used is also important.
Educational program: about crossovers, car amplifiers, car acoustics
Important components of high-quality car audio are a crossover and a car amplifier.
Without their correct selection and proper installation, you simply cannot count on a full-fledged acoustic picture in the car. Crossovers can be active or passive. The difference between them is that active ones consist of components that require power sources - operational amplifiers, microcontrollers, etc. Passive crossovers are composed of elements that do not need power (resistors, capacitors, coils). There is also a difference in the rules for installing crossovers: active ones are mounted only in front of the amplifier; As for passive ones, they can be installed in front of the amplifier, and otherwise - in front of the speaker.
The advantages of passive crossovers include the ability to separate signals for a two- or even three-way system, using only two amplifier channels. And all this at a relatively low cost. The disadvantage is the inability to configure the crossover without interfering with the electrical circuit. And in active crossovers, the switches are located on the body, and due to this, maximum ease of use is created. The disadvantages of active crossovers include their high cost, the need for separate amplifiers for each channel, and distortion resulting from the active elements. The crossover is selected in accordance with the number of lanes of the speaker system. Selecting it, installing and configuring it requires a professional approach, so it is better to entrust this delicate task to specialists.
It happens that the amplifier is not of very high quality, even in a by no means cheap car radio. Why does this happen? Because the car radio compartment is usually small in size, and for this reason a high-power amplifier cannot be installed in the head unit. So those who adore truly high-quality sound buy an external amplifier.
A car amplifier can be single-channel (capable of amplifying only one channel), more often called a monoblock, two-channel (which can amplify a stereo signal), three-channel (stereo signal plus a subwoofer channel), four-channel (strengthens the signal from front and rear speakers). There are also five and six channel amplifiers.
What other parameters are used to select car amplifiers? In terms of power, which is selected 10-20% less than the power of the speakers. If you do not adhere to this rule, the speakers will soon fail. It is worth keeping in mind that the calculation is based on RMS power, not peak or maximum power. Another indicator is load resistance. The impedance values of the speakers and amplifier must match each other! Otherwise the amplifier will fail.
There is also a selection parameter such as signal-to-noise ratio. This indicator shows the amount of extraneous noise in the output signal in relation to their amount in the input. This value is measured in dB, and its ideal level is 98 dB or more.
A sufficient number of amplifiers provide the possibility of bridge connection, which allows you to double (for good car amplifiers, triple) the power delivered by the amplifier. Bridging is often used to connect a subwoofer.
On sale you can find many amplifiers with already built-in crossovers. Meanwhile, the use of external modules guarantees better opportunities when setting up car audio.
The small dimensions of the amplifier case (40x30x5) allow it to be installed in various places. For example, on the bottom of the rear shelf (screw it with bolts or screws) or in the fender niche. If the subwoofer enclosure is custom-made, then you can quite effectively fit the amplifier into it. It should be borne in mind that the amplifier emits quite a lot of heat into the surrounding space, so it cannot be completely isolated.
If you want to equip your car with an audio system, spending a reasonable minimum of money, we recommend purchasing broadband or coaxial car audio, placing it in a regular place, and using a standard amplifier from the car radio. Over time, existing acoustics can be improved by equipping it with an active cabinet subwoofer.
If you are a true music connoisseur, and it is important for you to clearly listen to instrumental tracks, feel the volume of sound and how small musical nuances are played out, then you should think about installing two-way component auto-acoustics, passive crossovers and external amplifiers. And install a closed subwoofer in the rear.
Fans of fiery dance rhythms will benefit from a two-way coaxial speaker system, with a pair of speakers installed in the rear shelf for back-up.
Well, if you feel that you won’t rest until your car’s sound quality resembles a symphony orchestra, then your choice will be a three-way (three-component) speaker system, which will have not only active crossovers and rear speakers, but also a subwoofer , and several external car amplifiers. The pinnacle of this type of installation is a channel-by-channel connection, when each speaker is connected to a separate channel of the car amplifier.
Source
Requirements before connecting
To properly install tweeters in a car, you need to perform a number of steps before installation:
- Select the locations where the speakers will be installed. Due to their size, they are most often installed in doors, along the edges of the dashboard or on windshield pillars. Installation in doors is more popular due to the possibility of installing an acoustic podium.
- Measure the size of the speakers and transfer the dimensions to the installation site. If double-sided tape is enough for installation on the dashboard, then precision and new holes will be required to install the speakers in the doors.
Pick up the wires. Sometimes this is not required, and the kit comes with cables with a suitable cross-section (the optimal one is 1.5-4mm 2 ), but in most cases, the speaker kit comes with wires that are unsuitable for stable operation of additional speakers (0.25-0.5mm 2 ). If you do not select new cables, this may not only result in poor sound and sound distortion, but also a short circuit in the future. It is recommended to use copper wires during installation. It is required to soundproof the doors (if they are selected for installation). This is done to improve the sound quality of the speakers.
Removing the casing and other actions must be done as carefully as possible so as not to damage anything.
Installation of component acoustics - location recommendations
When building a car speaker system, the sound stage is usually oriented towards the front of the car. Component acoustics can create a high-quality sound stage, so it is recommended to install them as front speakers (in the front of the car). That is, if the car owner places some emphasis on sound quality, then it is worth proceeding from these considerations. You can either leave the rear speakers alone or change them to coaxial ones, which will act as a “backup” for the front ones.
Many car owners are interested in the possibility of installing component acoustics in the rear of the car. Here the car owner starts from thinking - why not create a high-quality sound stage for the rear passengers? But within the space of a car interior, it is almost impossible to create two high-quality scenes (for front and rear passengers) so that they do not interfere with each other. This also “suffers” from some automakers who want to “surprise” the buyer with a large number of speakers in the cabin. As a result, the rear scene spoils the front one, and it turns out, as in the well-known saying about “two birds with one stone.” Therefore, here we can answer simply - not recommended.
But when choosing a set of component acoustics, the car owner often asks another question - why install a 2-component system if you can install a 3-component one? More spaced speakers, each of which plays its own frequency range - better sound? In theory, yes. In practice, almost always - no. But the point here is that 3-component acoustics are VERY demanding in terms of installation location and configuration. And this is very expensive (production of podiums, processor system). But even if all recommendations are followed, the final option may not always suit the car owner. Even in our practice, we have often encountered cases where car owners assembled processor systems (costing hundreds of thousands of rubles) based on 3-component acoustics, but later changed them to 2-component ones. But, of course, you can experiment.
How to connect speakers to a car radio
Before you begin installing and connecting the speakers, you need to decide on the location of their installation. Depending on the vehicle, there may be space provided for the speakers from the factory. It is recommended to mount the front speakers on the edges of the dashboard or in the doors. Both options are good, but the second is the most popular, since the dynamic heads can be secured more reliably. In addition, an acoustic podium can be built into the door body. The diameter of the columns must be measured, after which the dimensions are transferred to the doors, for example, with a sharp knife. It is advisable to use patterns to transfer dimensions.
As for the second pair of speakers, they are located in the rear of the cabin. Basically, the rear shelf or doors are used for these purposes. In any case, installation requires some modifications. The standard shelf of the car is a decorative element and to install the speakers you will need to remove it and install speakers with podiums. Only in this case can you count on high-quality sound and the absence of squeaks, rattles, etc.
Wire selection
To connect speakers, it is recommended to use speaker wires with a cross-section of 1.5–4 mm². Despite the fact that compared to a radio and speakers they are low in cost, their quality should not be neglected. First of all, you need to know and take into account that the wires that come with the speaker system are unsuitable for normal operation of the speakers: they have a cross-section of 0.25–0.5 mm². Such wiring will be sufficient only for connecting low-power dynamic heads (up to 15–20 W). The thing is that the RF signal in the wire spreads across its surface. Using wires of small cross-section, not only the quality, but also the volume of the sound deteriorates.
Speaker wires should be selected with a cross-section of 1.5–4 mm², which depends on the signal strength. You should not use the wires that come with the speakers due to their small cross-section, which will negatively affect the sound quality
It is also necessary to take into account the fact that the speaker wires are marked, can have either two or four pairs, be plain or with a black stripe. The connection of a single-color conductor is made with a wide contact of the speaker, with a black marking - with a narrow one. If the acoustics have low power (up to 20 W), then the minus for the side and rear speakers can be used. For higher power systems, “+” and “-” must be supplied to each speaker separately, while the negative wire cannot be connected to the car body. Otherwise, the sound will be distorted. The main materials used for making acoustic wire cores are copper and aluminum. It is preferable to use copper, since it oxidizes less on connections, but it is also more expensive compared to aluminum. There are also more expensive wires - silver.
Installation of component acoustics - characteristics
Component acoustics have a number of characteristics and features that you will have to pay attention to before purchasing. For example, the diameter of any system under consideration. This diameter always relates to the largest speaker, that is, the mid/bass speaker, which is installed in the car door. Here, manufacturers, for the most part, focus on the size of the standard seats of most cars, so the largest range is presented in relation to the following sizes: 10 cm, 13 cm, 16 cm and 15 cm (4, 5.25, 6.3 and 6.5 inches, respectively). It is in these sizes that the main range of component car audio is presented, although there is some variation in both directions. In this case, it is not at all necessary that the car owner should choose replacement speakers that correspond to the seat of the standard acoustics of his car, but this will be discussed later. It is also worth noting that in component acoustics the midbass almost always has a round shape.
When choosing acoustics, you should take into account such an indicator as sensitivity. The sensitivity of an acoustic is essentially the ratio of the sound pressure of the acoustic to the supplied electrical power. Sensitivity is a technical concept that reflects the efficiency of the speaker. Sensitivity is expressed in the fact that with the same power input, a speaker with greater sensitivity will create greater sound pressure, that is, it will be louder. Sensitivity depends on many parameters, such as: weight, size and material of the diffuser, method of winding the coil, etc.
The question of the power of component acoustics interests many car owners. Manufacturers do not write on the packaging of their products the emitted power, but the power that the speaker coil can withstand, that is, the supplied electrical power. It is impossible to judge the emitted power from these data, so it is always necessary to look for the rated power in the characteristics. It is the latter that you should count on during installation. The main range of component acoustics is designed for power in the range of 60-120 W. The choice within this range will depend on many individual factors.