You can now connect a microphone to absolutely any computer or laptop. Audio capture is performed either using an internal or external audio card. Inside it is a DAC, which converts the analog signal to digital. By default, sound is recorded in .wav format (by default in all Windows operating systems), but some programs allow you to immediately convert it to the more common .mp3, .ogg, .wma.
Classic connection method
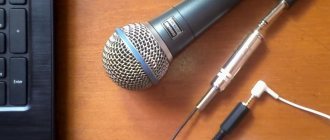
Any wired microphone is connected to the MIC IN jack of the audio card. Most often, it is additionally marked in red or pink (the output to an external speaker system is green, the Line IN input is orange or yellow). You must first make sure that the latest available version of the audio adapter driver is installed (especially if the connection is made to a socket that is not located on the front panel of the PC).
If the microphone has a 6.3 mm jack, then it is connected through a corresponding adapter from 6.5 to 3.5 mm. (they are usually included in the kit).
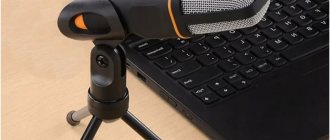
Connecting a microphone to a laptop's audio card is done in a similar way. It is enough to find a socket labeled MIC IN (sometimes a microphone icon is simply drawn instead).
There are also audio cards with hybrid connectors. In them, recording equipment can be connected to any connector; in the future, you just need to use the proprietary software (supplied with the driver) to indicate exactly where the connector is inserted.
And before you connect the microphone to your laptop or computer, you need to check their compatibility in terms of resistance. The conventionally “acceptable” value for most audio cards is the range from 200 to 1500 Ohms. If it is higher, then the connection is made through an external receiver or DAC (as a rule, in this case it is recommended to use the Line IN jack for higher recording quality).
Equipment needed for a good sounding stream
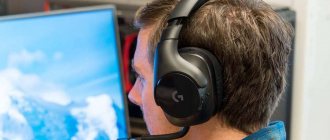
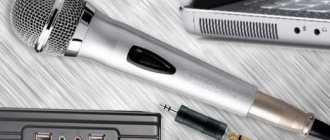
Professional microphone
Surely you already know the answer to this question - the microphone affects the sound quality. For outstanding sound quality, a simple microphone, for example, for communication on Skype, or the one installed on a webcam, will not be suitable. Your choice will fall on professional microphones, which are sold in musical instrument and audio equipment stores. These microphones are used to give concerts and record sounds in the studio. Fortunately, nowadays it has become possible to achieve studio-quality quality, even at home.
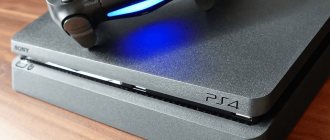
Sound card
Depending on your goals, the most important piece of audio equipment for a stream can be a sound card. This discrete device allows you to process and transmit audio signals without delay.
Room acoustics
The sound wave is reflected from smooth walls, creating a hum and echo effect. Professional microphones can pick up such artifacts, but because of their sensitivity, you shouldn't sacrifice the quality they provide. Experienced streamers try to reduce the noise in the room as much as possible by placing special acoustic foam on the walls, which absorbs sound, preventing it from being reflected. It also helps to have a lot of soft objects in the room, such as carpets, curtains, large stuffed animals, and so on.
Audio signal processing
Even the best equipment produces a signal that needs to be processed. During processing, equalization is used to give the voice a special timbre, compression to make the volume of the voice the same, a limiter to limit the maximum volume of the signal, and noise reduction to permanently get rid of even the slightest hiss. All these settings are made within the program through which the broadcast occurs.
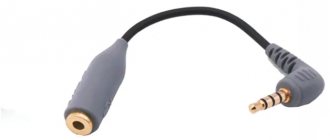
Via an adapter if you have a headset jack
In many laptops, there is a single connector for both external acoustics and a microphone (it is also called a “headset”). Inside, the pinout of the contacts has been partially changed. Therefore, to connect audio recording devices you will need to use an adapter. This is not necessary for headsets (as well as lavaliers) - there, by default, the device should be detected normally without any additional settings.
But before you connect an external microphone to the combo jack of the laptop, you must enable automatic detection of recording devices in the audio card settings (required, for example, if you are using a DAC from Conexant or Via HD).
Via an external sound card, if the audio jack does not work
If the standard audio card is faulty or its socket is simply broken, then the microphone can be connected via an external one. If we are talking about a PC, then if you have a free PCI slot, you can simply buy a new sound card (you can even install several of them). If this is a laptop, then you will have to purchase an external USB DAC. For example, one of the most popular such models is the Asus Xonar U3 card. Moreover, it has a separate microphone input, and even supports both 2-pin and 3-pin connectors.
It is also worth mentioning headsets that connect via USB (they do not have a 3.5 mm or 6.3 mm connector). In fact, they have their own sound card integrated with support for MIC IN only. Their purchase will be the best option if the user does not want to purchase an audio card for some reason.
Using a Bluetooth microphone
If your computer or laptop is also equipped with a Bluetooth module version 2.1 or higher (starting from this, the second revision A2DP profile with support for sound recording devices was added), then you can connect a compatible wireless microphone to it. To connect it, you will need (using Windows 10 as an example):
- Turn on Bluetooth. In laptops, the key combination FN+F is responsible for this.
- Open the Notification Panel, right-click on the Bluetooth icon and select Open Settings.
- Select “Add device”, indicate “Bluetooth”.
- Turn on the microphone and put it into pairing mode. You can find out exactly how to do this from the instructions.
- Wait for the device to be detected and, if necessary, enter the pairing code.
You can check the operation of the device through the standard “Sound Recorder” application. In Windows 7, adding a device is done in a similar way. You will need to right-click on the Bluetooth icon in the tray, select “Add device”, and then do the same.
To start…
So, first, let’s agree to proceed from the most popular tasks: recording audiocasts, dubbing screen videos (screencasts), dubbing “live video” for subsequent distribution of this material on the Internet: either in the form of files/online players on your website, or in the form of copyrighted audio - and video courses.
Let me note right away that a truly high-quality speech recording can only be obtained in a studio. I think any specialist in the field of recording will agree with me.
Why?
Firstly: a good recording studio has specialized equipment (from microphones and special equipment to professional software), which has all the necessary characteristics to obtain high-quality output material.
Secondly: ideal quality requires a competent approach to business, observing all the nuances. For example, let's say true studio quality involves recording in a room that meets all the important acoustic requirements.
Thirdly: a specialist (and perhaps more than one) will work with you in the studio, who will directly record and process the material. And a lot also depends on the qualifications of the specialist...
In the studio, everything is thought out to the smallest detail: from the correct grounding of the equipment, to the material used to decorate the walls of the room, as well as its size, shape, and so on.
To summarize, quality ultimately depends on a myriad of factors - who records, how they record, where they record, what they record on, who processes the material after recording, how exactly they process it, on what software and on what computers, etc. and so on.
Therefore, if your goal is super-high-quality sound, as much as possible (for example, if you are preparing some specific audio or video course, say, on vocals, in which the highest quality is simply necessary), then it is better to immediately go straight to professionals in their field - to the recording studio.
You will get all the advantages and only one disadvantage - the cost of services...
Why am I talking about this?
First of all, in order to destroy some myths regarding recording perfect sound: such perfect recording is simply impossible on a regular home PC.
You shouldn’t think that all the flaws can be eliminated by processing - the computer won’t do a miracle. Yes, with its help you can, so to speak, “bring some shine,” but, alas, the laws of physics in general and acoustics in particular cannot be circumvented.
Now let's briefly clarify this:
Setting up sound and microphone on your computer
The microphone is configured through an application installed with the sound card driver (for example, VDeck for Via HD, Soundman for Realtek HD, Asus Sound Center for ASUS). If it is not provided or a standard Microsoft driver is used, then setting up the microphone on a computer or laptop is done through an audio mixer. Enabling, disabling or selecting a recording device is done in the “Sound” tab in the “Control Panel”.
Please note that these settings in Windows 10 may be ignored by some applications. For example, in Viber or Telegram, the microphone must be selected in the settings of this program. The recording volume is also set there. In Windows 7, settings specified in the system take precedence over applications.
In the same case, if the microphone does not work on a PC or laptop, then the first thing you need to do is check the privacy settings. In Windows 10, by default, third-party programs are not allowed to access audio recording devices. This is configured as follows:
- open “Settings”;
- go to the “Sound” tab;
- click on “Privacy Dashboard”;
- grant access to the microphone to the applications you plan to work with.
You can check the performance of your sound recording equipment in the “Sound” tab. And even before setting up a microphone on a laptop or computer, it is recommended to turn off all unused audio devices (so that there are no conflicts between them).
If the sound is recorded in low quality, then you must:
- go to “Control Panel”, open the “Sound” tab;
- go to “Recording”, select a microphone, click on “Properties”;
- go to the “Advanced” tab and set the recording quality (recommended 44.1 kHz and 16 bits, the higher the better).
So, in most cases, you just need to connect the microphone to the appropriate jack. The operating system will set all other parameters independently. If you previously had any difficulties connecting your recording equipment, be sure to share this in the comments. And also tell us what kind of recording equipment you personally use.
How to check the connection quality on Skype
For this purpose, a Skype service “Echo / Sound Test Service” was specially invented. When installing Skype, only this service is present in the contact list by default. To check the connection (voice only), just call there and do what the girl says. We rejoice and communicate with friends and relatives if the sound quality is satisfactory. By the way, you can record your conversations on Skype.
If your friends are hard to hear on Skype, share the news with them via social networks.
Calling over the Internet today is the most common way of communication. But sometimes this is impossible, since the microphone is most often poorly configured and the quality of the connection suffers as a result. All versions of Windows have the same microphone settings.