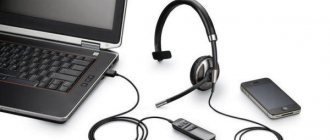
The desktop personal computer or desktop is not equipped with a microphone. This limits the user's options. Therefore, it is important to know how to connect a micro to a computer without errors. You can connect an external voice device to your computer through the provided sockets. To enable connectors, the following positions are provided:
- Mic socket on the rear wall of the case
- Similar input on the front panel
- Any USB port
The main errors occur when connecting a microphone to a computer using the connector on the rear panel.
Connecting a microphone to a computer
To connect the microphone to a computer, use a standard audio connector for Mini Jack 3.5 mm. This connector is located on the rear side of the system unit. Next to the microphone connector there are usually several more similar connectors. They are used to connect headphones and multi-channel speakers. In order not to confuse the connectors and connect the microphone where you need it, pay attention to the colors with which the connectors are highlighted. The microphone connector is always marked in pink. There may also be an image of a microphone next to it.
There is also a microphone connector on the front panel of the computer, next to the USB ports. This connector is also highlighted in pink.
To connect a microphone to your computer, just plug the microphone into one of these connectors. If drivers for a sound card are installed on your computer, the microphone will start working immediately after connection.
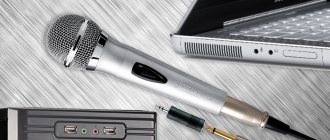
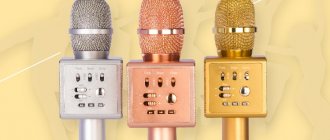
Universal microphones for PC
HyperX QuadCast
- Sensitivity: -36 dB
- Frequency range: 20 – 20000 Hz
- Impedance: —
- Connection: USB
Price: from 9,400 rubles
This model is a professional microphone and is quite expensive. It has four cardioid patterns (there is a convenient switch on the body), which makes it a universal option for solving any user problem. A convenient touch button to turn on will allow you to quickly stop voice transmission, and customizable RGB lighting (proprietary software required) will decorate the interior.
This device is certified by a number of programs (Discord, TeamSpeak and others) and is suitable not only for PCs, but also for PS4 and PS5 game consoles. The case also has a headphone jack, and there is also a gain control here. The model comes with a convenient holder with a shock absorber, an adapter for connecting tripods and a built-in pop filter. Cable length – 3 meters.
Blue Yeti
- Sensitivity: -47 dB
- Frequency range: 20 – 20000 Hz
- Impedance: —
- Connection: USB
Price: from 12,000 rubles
This condenser microphone is one of the most popular in the world. It is convenient for use in any conditions, has a convenient stand with position adjustment, and is connected and powered by USB. The body has a power button, sensitivity adjustment and a headphone output with zero latency, which will allow you to immediately control the recording quality.
This device has four polar patterns, so it is suitable for any task - from recording interviews to streaming. Inside, a proprietary triple capsule is used, guaranteeing clear sound. The model is available in several colors.
RODE NT-USB
- Sensitivity: —
- Frequency range: 20 – 20000 Hz
- Impedance: —
- Connection: 3,5
Price: from 15,500 rubles
A professional studio model with a narrow focus, suitable for any task, including home concerts. It is capable of capturing the sound of a musical instrument and voice and transmitting them qualitatively through streaming applications. The model is equipped with a 3.5 jack for headphones, which allows you to control your voice, and it also has sensitivity adjustment.
The kit includes a pop filter, a 6-meter cable with a USB connection to the microphone and a 3.5 to the PC, a tripod, a holder with a ring mount and a storage case. The device does not require driver installation and is compatible with MacOS and Windows.
Checking the operation of a microphone connected to the computer
In order to check the operation of the microphone, you need to right-click on the speaker image on the taskbar and select “Recording devices”.
This will open the Sound window under the Recording tab. The microphone you just connected to your computer will be displayed here. To check the microphone's operation, simply say something into it. If the microphone is working properly, green bars should appear to the right of the microphone. If the microphone does not work, the stripes will remain gray.
Computer microphone input
Even if the micro is properly connected to the desktop, it may not work. One of the reasons is the failure of sound drivers. In order to see all audio devices connected to the PC, you need to open the “Device Manager” tab. The tab opens in the context menu of the “Computer” item when you click on “Properties”.
A yellow triangle with an exclamation point next to the device name indicates problems. This could be a hardware malfunction or driver failure. The technical device needs to be checked and the drivers reinstalled. If a regular micro is connected to a personal device, but it is not in the manager, this may mean a defect in the micro connector on the PC or that the device is not activated and the system does not see it. You can check this through the “Sound” panel and the “Record” window. In the context menu of the Microphone icon there are lines: “Show disconnected devices” and “Show disconnected devices”. There you can activate the desired channel.
Setting up a microphone connected to a computer
The microphone usually does not require any special settings. As a rule, it works great as is. But, in some situations you may need to change some settings. To access the settings, open the “Sound” window in the same way as described above. After that, select the microphone connected to the computer and click on the “Properties” button.
As a result, a window with microphone settings will open in front of you. On the first tab, you can rename the microphone, change the microphone icon, go to the driver properties, or disable the use of the microphone.
On the next tab, called “Listen,” you can enable the “Listen from this device” feature. When you enable this feature, audio from the microphone will be output directly to your speakers (or headphones).
The next tab is called “Levels” and here are the most useful microphone settings. These are microphone volume and microphone gain. Using these two functions, you can select the microphone sensitivity you need.
The next tab is called “Enchancements” or “Improvements” and only one function is available here: “Disable all enhancements”.
The last tab is called "Advanced". Here you can select the bit depth and sampling frequency that the microphone connected to the computer will use. Also here are settings that relate to the exclusive mode of operation of the microphone.
After making changes to the microphone settings, do not forget to click on the “Apply” button.
Probably any of us would like to chat with friends via video calling, or sing our favorite song via Karaoke.
But how to do this without a microphone?
In this article we will figure out how to connect a microphone to a computer in Windows 7,8 and 10.
Noise Removal
Microphone settings are not limited to changing recording parameters. Also, during the process of recording sound, the user may encounter unnecessary noise, which affects the quality of the final audio. Below are a couple of effective means of getting rid of this kind of artifacts.
Physical protection
The simplest and at the same time affordable way to prevent noise on a finished recording is to use a foam microphone attachment. It sort of purifies the sound, cutting off unnecessary noise. Thus, there is protection from wind and other factors that affect the quality of the recording.
Software cleaning
Noise reduction can be organized not only physically, but also programmatically. In particular, it is proposed to reduce the microphone sensitivity using standard Windows 10 tools. To do this, just open “Property” and change the corresponding parameter in the “Levels” tab.
Also, software from third-party developers has special software features. Apps that focus on audio recording offer their own noise reduction effects and do a good job.
Setting up a microphone in Windows
To properly configure the microphone: the “Control Panel” in the “Start” menu , and then, in the menu that opens, you should find the “Sound” . This can be done by entering the appropriate phrase in the top “Search in Control Panel” .
Next, click on the “Sound” and see the window that opens with the sound settings menu.
However, we require a tab called "Recording" . We go there and notice that the microphones are turned on in the system.
Here you can configure your microphone by setting it to “default” if you don’t want to understand all the options and capabilities of the menu. After that, so that you can go directly to setting up the microphone, double-click on the icon with your microphone.
“Properties” will open in the next window , where the settings are actually located.
Adjusting the microphone volume and gain level
In the “Setting Levels” , you can set the desired indicator of the received signal and set the gain indicator by moving the system sliders.
A gain of 20 dB is enough for simple communication and leisurely conversation. If you set a higher value, the noise will increase, for this reason it is better not to overdo it.
“Enhancements” tab will help you combat natural noise “Enable noise reduction” checkbox for clearer sound.
How can I test the microphone's performance?
“Listen” tab comes to the rescue .
Check the “Listen from this device” and click “Apply” .
Next, you can enjoy your voice on your computer!
It is also worth noting another useful option for your microphone, which is available in the “Sound” . Here you can reduce the strength of system sound reproduction when communicating through a microphone.
At this step, the microphone setup is completed. We hope that your microphone will delight you with its reliable performance for many years.
Useful information for installing and configuring a microphone
What do the audio outputs look like in the system unit on the motherboard?
The picture below shows standard “Jack” connectors (they are typical for personal computers with built-in sound cards).
Standard jack connectors
Next picture. So-called separate connectors.
This arrangement system may vary slightly, but this does not play a big role. The main feature of separate sound outputs is the ability to separately connect headphones and a microphone .
Next, it is worth considering the installation of various system equipment.
Headphone plugs can be connected to the above-mentioned connectors on the motherboard. However, combined devices can only be connected through a separate adapter. If you do not use it, the microphone will not turn on.
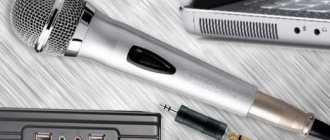
Connecting an external sound card
If you need to obtain a detailed voice recording, a combination of a microphone - an external sound card - a laptop gives results comparable to those in a studio. The audio interface, unlike plug and play devices, requires the installation order to be followed:
- First, insert the disk with the driver into the CD and install it;
- then turn off the laptop and connect a sound card to it (via USB or IEEE 1394);
- After turning on the laptop, the installation wizard appears, detects the device and helps you configure it.
To avoid hardware conflicts, it is recommended to disable the built-in sound card in the BIOS and remove its drivers.
Microphone does not work in Windows 7
What to do in this case?
First, you should make sure that your microphone is basically working. You can do this by connecting the device, for example, to another personal computer or laptop.
If you are sure that the microphone is fully functional and in working condition, then it’s time to move on.
Before you start changing anything in the settings of your computer , make sure that you have not mixed up the sockets.
As I wrote above, there are usually three sockets on the back panel of the system unit, which are painted in different colors: pink (the microphone is connected there) , green (for speakers) and blue.
It should be remembered that on the front panel of the system unit, the connector locations may not be marked in different colors , in which case you should pay attention to the icons near these sockets: these icons are in the form of a microphone at the corresponding sockets.
Microphone and headphone jacks on the front panel
Also, before connecting a microphone, it’s worth finding out what type of connector you have.
Please note that there are 2 types of connectors: mini-plug and USB. These connectors can be connected to any system unit, since most modern computers (as well as laptops and Chromebooks) have these sockets.
Not always necessary
But before that, it is worth noting another rather important fact. Almost all laptops and netbooks have a built-in microphone by default. It is usually quite powerful.
If you plan to sing a couple of times and then use a sound recording device for conversations on Skype or to record let’s plays, then you can get by with an internal headset. With it you don’t have to rack your brains, think about how it connects, and so on. However, sometimes you may hear interference. If you don’t know where the microphone is in the laptop, then take a close look at the front panel. This is usually where the device is built in. This is because it is in this position that the sound is best recorded.
If you don’t want to use the built-in microphone, then, of course, you’ll have to buy an additional device and figure out how to make it work. Sometimes this can cause minor problems. Nevertheless, let's try to figure out what's what.
USB connection
A convenient and modern connection method that is supported by almost all motherboards.
Find an available USB port on the system unit and plug your device into it.
Microphone with USB connector
The PC must independently find drivers for the microphone to work. After the drivers are installed , you can check if your microphone is working by going to the sound settings window.
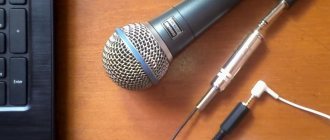
Connecting a jack microphone
Some devices use a plug connector, similar to the ones you use on a cell phone. On a computer, the socket is located on the back of the system unit.
If the microphone was not found automatically?
If the system cannot independently detect your device and install drivers for its full operation, you may need to download and download drivers from the Internet.
How to tell if a microphone has been found
To do this, you should enter the control panel of the Windows operating system (search for “Control Panel” ). In the " Settings " , select " Hardware and Sound " . Next, click “Sound” and the sound settings will open.
In the Settings , click on the Recording to find available devices. Here you can check for yourself whether the microphone is working in the “Recording” .
You can find and install the device in this list, then click on “Properties” to change the settings (volume value for recording).
If when you connect a microphone you hear yourself in the headphones, then this can be fixed !
Well, that's all for today! Please write in the comments if you liked this article! And were you able to connect and configure the microphone?
You may need to connect a separate microphone for a laptop or computer running Windows for a variety of reasons: the user wants to find a song by sound, arrange a karaoke session, does not have the ability to increase the volume of the built-in device, and so on. The installation and configuration process is simple and does not take much time. Let's try to figure out how to turn on the microphone correctly.
How to connect and configure a microphone?
The first thing you need to do before connecting the microphone to your computer is to find the connector. Most likely, the user is using a standard device with a 3.5 mm plug; then to turn it on you will need to find a contact located on the front, rear or side panel, the edges of which are painted pink - or near which there is the inscription Mic (Microphone). All that remains is to insert the plug and start setting up - everything is easier than understanding why the touchpad on a laptop does not work.
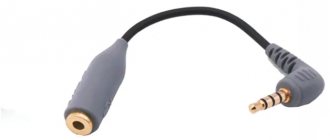
Important: if you plan to use a 6.5 mm microphone, you will need to first purchase a 3.5 mm adapter; Most manufacturers do not think to build the corresponding connector into the computer, and on laptops this is technically impossible.
The microphone connector can be located either next to the contacts for speakers and headphones (usually blue and green, respectively), or separately from them. Finding it is not difficult, and setting up the device is almost as simple as turning on the camera on a laptop; hardware configuration on Windows 7, 8 and 10 will be discussed in detail in the relevant sections.
On Windows 7
A user who has managed to connect a microphone to a computer or laptop running Windows 7 can increase or decrease the sound, select the main recording device if there are several installed, update drivers and otherwise optimize the operation of the device. To do this you need:
- Turn on the microphone and click on the Start menu.
- Select “Control Panel” from the list that opens.
- Go to the “Hardware and Sound” section.
- Next, go to the “Sound” subsection.
- In the new window, switch to the “Record” tab.
- All connected microphones will be displayed here. A Windows 7 user can select the appropriate one.
- Make sure by observing the sound scale located on the right that the device is working properly.
- Set it as your default microphone.
- Or go to Properties to increase or decrease the volume level.
- In “Properties” you can check where exactly the device is connected.
- And if necessary, temporarily disable it.
- On the “Levels” tab, the owner of a computer or laptop can easily adjust the recording volume.
- And on “Advanced” - you will select the format and quality of sound saving.
Tip: You can make it easier to find microphone settings on Windows 7 by opening the Start menu, entering the appropriate query in the search bar and selecting the item of the same name.
On Windows 8
Setting up a microphone on Windows 8 or is as easy as installing a printer; the procedure for user actions is fundamentally no different from manipulations on the latest generation of operating systems from Microsoft, and therefore will be described in the next section.
On Windows 10
Windows 10 users quite often encounter difficulties when recording sound or unexpected “losses” of the microphone. Before proceeding to the device settings, it is highly recommended to check its presence in the system. To properly connect the device, the user should proceed in the following order:
- Insert the plug into the appropriate connector, then right-click on the Windows flag in the lower left corner of the screen and select “Device Manager” from the list that opens.
- Expand the “Audio Inputs and Outputs” submenu.
- And find your device in the list.
- If there are problems, the user can right-click on the microphone header to update the driver.
- And if this does not help, remove the device, and then, updating the hardware configuration, add it to the list again; As a rule, this is enough to normalize the microphone’s operation under Windows 10 - only if the problem is not in the device itself.
- You can quickly adjust the volume of the input signal recording by entering the word “Sound” in the Windows “search” and selecting “Sound Mixer Options” in the output list.
- In the window that opens, the user must first select the desired device from the drop-down list, and then, by moving the slider, adjust the volume level.
- To go to advanced settings, you should use the same “search” to find “Control Panel”.
- And on the already familiar “Recording” tab, select the required device and open “Properties”.
- Here, on the Levels tab, the user can adjust the volume of the input signal, as well as set additional gain.
- And to avoid wheezing and hissing, disable additional effects on the “Enhancements” tab.
In “Properties”, in addition, you can temporarily disable sound recording from the microphone, set the device as the main one, and so on - how to do this was written in the section on setting up for Windows 7.
Adapter
However, before this it is worth noting another small fact. All microphones are divided into two types. The first is 3.5 mm. So to speak, the standard. There shouldn't be any problems with such a device.
The situation is different if you bought yourself a second type of microphone - 6.3 mm. It won't fit into a standard hole. But this does not mean that the headset can be thrown away. All you have to do is go to the nearest hardware store and buy a special adapter. With him, the problem will leave you forever. All that remains is to find the right connection location - and the job is done.
Programs for setting up a microphone
If the built-in microphone settings are not enough for the user, he can try one of the many simple and free programs to optimize sound quality:
- RecordPad;
- Free Sound Recorder;
- Absolute Sound Recorder;
- Echo;
- Audacity and many, many others.
Setting the quality and volume of sound captured from the microphone using the example of RecordPad:
- Download and run the program and wait until it detects the microphone (a characteristic splash screen appears in the center of the window).
- Select the desired device from the drop-down lists on the main page.
- Recording source (it is recommended to leave it as default).
- The format of the converted audio signal.
- And by clicking on the “wrench” located nearby, its quality.
- Now, having determined the path to save the recordings, the owner of the microphone can click on the Options button located in the same main window.
- Set the minimum input signal volume level processed by the system, recording stop time and other important parameters on the Record tab.
- And enjoy the sound quality - if required, while simultaneously recording by clicking on the red button in the center of the main window.
Important: using some applications, the user can even adjust the frequency of the recorded signal - however, there is little point in this: the quality is much more influenced by the technical characteristics of the device than attempts to “extract” obviously bad sound using software.