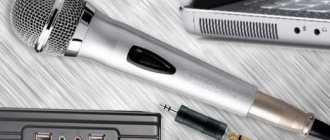
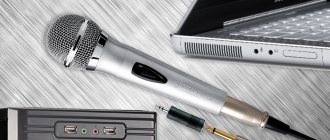
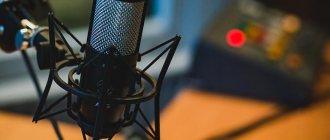
How to connect a microphone to a JBL speaker? Most models of portable devices do not provide this option. But in some models you can try connecting using a Bluetooth connection or via the USB or AUX input via a wired connection. Alternative options cannot be ruled out - using a built-in device or using “transit” via a PC/laptop or smartphone. Below we will look at the features of each option and what difficulties users most often encounter.
How to connect karaoke to your phone?
To connect a microphone to a smartphone running Android OS for karaoke, you should use either an adapter or a Bluetooth connection. The adapter should be connected to the miniJack 3.5 or USB connector, and a microphone should be connected to the adapter.
Interesting materials:
How to trim cherries? How to pick leaves from a tomato? How to arrange a narrow room? How to beat a low ceiling? How to appeal a regional court decision? How can a ruling approving a settlement agreement be appealed? How to clean coins? How to divide one room into two rooms? How to limit internet speed on iPhone? How to cool a room without air conditioning and a fan?
Connecting a microphone to speakers via a laptop
If your laptop is running Windows 7, follow these three simple steps:
- Click the column icon in the notification area. Select “Sounds” and in the window that appears - “Record”
- Find your device (the name of the device or its part will be displayed in the list).
- Right-click the line with its name, then select “Properties” - “Listen” - “Listen from this device”. Don't forget to save your changes by clicking the "Apply" button. After this, the sound from the microphone will be output to the speaker.
Not all, but many modern models are equipped with a built-in microphone. However, your device may not have such a microphone, or the internal microphone may not work for some reason. Below are solutions to common problems related to connecting a device to a laptop.
Connecting a microphone to a laptop may be necessary for several reasons. This can be done for:
- communication via Skype and other voice messaging services, video chat and similar programs;
- video games that can be played cooperatively or require voice communication;
- karaoke;
- sound recording;
- producing a presentation.
Where to buy and how much it costs
My choice from everything that I found on Aliexpress settled on the Q7 model. That’s what it’s called – Bluetooth microphone Q7. It can be easily found by searching on Aliexpress, I bought it.
I ordered in April 2022. The order cost about $35. It took two weeks to get to the Vologda region. Arrived safe and sound and without damage. It looks like a regular dynamic microphone, but with a cube in the middle.
Click on the picture to enlarge
I immediately liked the very original design. It is more aesthetically pleasing in appearance compared to other models. If I remember, news reporters have these cubes with the channel logo on their microphones.
And on the Q7 there are two speakers on the right and left in the cube. These two speakers are covered with a fine metal grille, which is understandable from the point of view of the safety of the speakers themselves.
Where is the built-in microphone located on a laptop?
If the laptop is equipped with a webcam, a microphone is also provided. It is located in different places, depending on the manufacturer. Acer has it next to the webcam, on the top frame of the display. Or bottom left if the model is outdated. On ASUS laptops the built-in microphone is located near the keyboard, on Lenovo and HP - on the top frame of the display.
Advantages and disadvantages
Advantages:
- lack of connecting cables;
- versatility - you can connect the device using a cable;
- range is about 10 m - you can sing not only indoors, but also outdoors;
- the battery provides up to 8 hours of operation (depending on volume and model);
- affordable price.
Cracking:
- Budget models do not have built-in speakers;
- Depending on the type of device, battery consumption may vary - there is a need to have a spare set;
- not all of them have a direct connection to the recorder - some require a mixer;
- Wireless devices operating in the UHF band (300-3000 MHz) have a shorter signal range, so it is better to use equipment with the VHF band (30-300 MHz).
Will anyone do?
Let us immediately note that not every device is suitable for connecting to a JBL speaker. It must have a Bluetooth module (for wireless connection) or USB / AUX connectors for wired connection. You also need to take into account the manufacturer’s statements from the perspective of the possibility of such pairing. The same applies to the ZhBL model.
Now you know how to connect a microphone to a JBL speaker, and what is needed for this. In the comments, tell us whether the given instructions were useful to you, and what other methods can be used to solve such a complex problem.
Possible problems
Even if connected correctly, sound from the microphone may not be output to the speaker.
The following reasons contribute to this:
- Manufacturing defects. Check the device's functionality on another PC or DVD. If the device does not work after connecting, it means it is faulty.
- Lack of drivers. To check, download special software. Find and update your audio drivers.
- Bad connection. Each connector has its own purpose. Sometimes the color is non-standard (this information is in the instructions).
Sometimes the speakers produce a weak voice. In this case, please connect and configure again.
Is it possible to connect 2 microphones at once?
Yes it is possible. To do this, use two methods:
- Wired connection of two single microphones via a splitter amplifier or external sound card. Not suitable for all smartphones.
- Pair one or more recording devices via Bluetooth. However, at some point only one can work.
In some cases, it is necessary to use additional software to connect two or more microphones.
I tried everything, but it doesn't work
It is not always possible to connect a microphone the first time. This is due to a number of reasons:
- The outlet is clogged with dirt or broken. Try carefully cleaning the 3.5mm jack or try connecting the recording device to another phone.
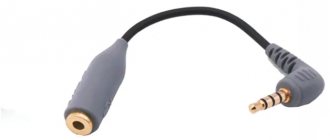
- Inappropriate adapter. Externally, the tracks on the plug and adapter match, but the sound is not recorded? Perhaps the internal pinout in the adapter differs from the external one. Try changing the adapter, but it is better to immediately purchase a compatible adapter.
- Broken wire. Try connecting the headset to your computer or laptop. If there is no signal, then most likely the cable is broken.
- Pairing via Bluetooth. Sometimes the voice recorder conflicts with other connected devices. For example, with a smart watch or headset. Disconnect other devices and reconnect your microphone.
As a last resort, contact a store or service center.
Sources
- https://ProMikrophon.ru/podklyucheniye/podklyuchenie-mikrofona-k-kolonkam
- https://besprovodnik.ru/kak-podklyuchit-mikrofon-k-kolonke-jbl/
- https://avtograf70.ru/obsluzhivanie/kak-podklyuchit-besprovodnoj-mikrofon-k-blyutuz-kolonke.html
- https://kompyutery-programmy.ru/proizvoditeli/kak-podklyuchit-mikrofon-k-kolonke-dexp.html
- https://HobbiNaMillion.ru/novichkam/kak-podklyuchit-blyutuz-mikrofon.html
- https://games-on-pc.ru/info/kak-podkljuchit-besprovodnoj-mikrofon-k-kolonke/
Checking the internal microphone
If you are lucky and your laptop is equipped with it, you don’t have to connect anything else: you already have access to voice communication or audio recording. Just check if you have it enabled.
- Find the speaker icon in the notification area and right-click on it. Select "Recording Devices" - "Recording".
- On this tab, find "Microphone". Click on the "Properties" button in the lower right corner of the window.
- Notice at the bottom of the area that appears: the drop-down menu should indicate that the device is turned on. Eat? This means the connection is established.
- It's worth checking the sound level just in case. To do this, in the “Properties: Microphone” window, go to the “Levels” tab (second from the right) and move the slider all the way to the right. This way you will set the maximum sound level so that you can be heard well in any case.
If you cannot find the notification area on your desktop, everything described above can be done through the Control Panel. If you have Windows 7 , after clicking the “Start” button, select “Control Panel” - “Hardware and Sound” - “Sound”, and then follow the instructions indicated above, starting from the first step.
At the same time, of course, based on the allowable expenditure of funds.
Standard option for connecting a microphone
First, let's look at a fairly common method that can definitely be handled by a person who does not have special skills and knowledge. So, below are the actions, and it is recommended to adhere to them:
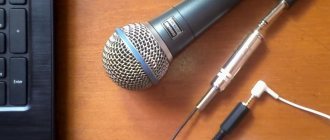
- If we talk about standard connectors in a laptop, then it is worth remembering the figure of 3.5 millimeters. As for the output plug of the device itself, there are two holes. The first of them has a measurement of 6.5 mm, and the second - 3.5. Accordingly, we will use the last of them. Since to use a non-standard output it is necessary to purchase a special adapter. It can be purchased at audio equipment stores.
ATTENTION. Under no circumstances should you connect a regular plug to a non-standard input. Otherwise, there may be a risk of breakdown of all equipment.
- Thus, when everything is clear with the connectors, certain parts are in service, you can start connecting the elements. To do this, you should find the necessary recesses on the side panel of the laptop. The color of the connector, of course, directly depends on the manufacturer of the design, however, most often you can notice such inherent shades as orange or pink. Consequently, the next step is to insert the plug until it makes a characteristic click.
- After this, a connection notification should appear on the device’s screen, and an icon should appear on the taskbar. It is usually located close to the specified time.
REFERENCE. In order for the structure to function correctly, it is highly recommended to restart the computer.
- Next, when the monitor lights up again, you will need to reproduce the changes in some settings. To do this, click on the “start” button and go to the “control panel” section. There it is worth noting the line called “sounds and audio devices”. You will have access to the “audio” tab, where you can go to the “volume” window by first clicking on “record sound”. Where it says “microphone”, you can change parameters, for example, increase the volume and so on.
IMPORTANT. After carrying out all the above-described manipulations, be sure to click on “OK”. This way you will record the changed indicators.
Bluetooth connection
Thanks to modern technologies, you can increasingly find a kit that consists of a microphone with a built-in speaker. This is exactly the design that is installed using bluetooth. The process of activating the equipment is as simple as possible and involves the following actions:
- First of all, the unit turns on.
- Next, on the laptop you need to click on the Bluetooth icon. After that, a list will be displayed, in it you need to mark the desired name. Pairing will only take place after the speaker is selected as the main device for sound output.
Thus, as you can see, you do not have to connect the microphone itself.
- Finally, you should decide on the file and run it with the text. Receiving the voice will be done independently in the same way as receiving the signal and mixing the sound with the vocals. Due to the fact that there will be no additional transmission of voice to the speaker, the singing itself, of course, will not be delayed.
REFERENCE. If devices support any version of bluetooth, and not just one, then the one released earlier will take part.
As for the controls, there are specialized buttons located directly on the device body. Most often this is the most common mixer. With its help, you can adjust not only the volume of music and voice, but also the application of various effects. So it is possible to create an interesting addition to the performance, for example, echo or distortion.
IMPORTANT. Since the connection is wireless, and for karaoke microphones only a regular full-fledged “jack” is intended - for wired ones, you will need to purchase an adapter to a “mini-jack”. If the laptop is not at all equipped with the presented bluetooth function, then you need to buy a special external module. Thanks to it, the system immediately recognizes devices and installs the necessary resources.
How to add a microphone to audio devices
If the audio recording device is not identified by Windows, there are a number of reasons for this:
- the plug is inserted incorrectly;
- the device is disabled in device manager;
- Windows has old or inappropriate driver models.
The first case can be easily corrected. The instructions for the motherboard will also help, where everything is indicated.
To enable a component, take the following steps:
- Press RMB on the “Start” button and select “Launch device manager” in the context menu.
- Find the section “Audio inputs and outputs”, which can also be called “Sound, game and video devices”. If the device is deactivated, then next to it there will be an icon with a black arrow pointing down.
- To activate it, press RMB and select “Enable”.
If there is a yellow triangle icon next to the device, then the problem is in the drivers. They are updated by pressing the corresponding button. The second option is to remove the microphone from the list and update the OS configuration. Windows itself will find it and automatically install the software necessary for operation.