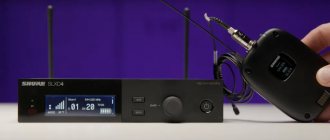
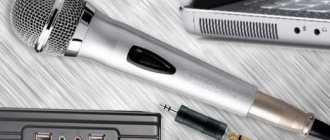
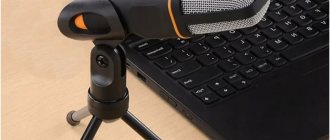
Many laptops are equipped with a webcam with a microphone for voice and video communication. What should those users do who do not have a microphone or who are not satisfied with the quality of the transmitted sound? Use an external audio recording device. At first glance, you don’t need any special knowledge to connect a microphone to a laptop, but only in the simplest case. There are many ways to connect recording equipment: direct, through an adapter, external sound adapter. There are also special features when using wireless models.
Tips and recommendations are suitable for all laptops: Asus, HP, Aspire from Acer, Inspiron from Dell, Ideapad from Lenovo and other models.
How to check if there is a built-in microphone in a laptop
There are many ways to find out if your laptop has a wired speaker.
- Open the user manual and find the information you need.
- Take a close look at the laptop; the microphone is usually located next to the touchpad or above the keyboard and hidden behind a small grill.
- If there is a webcam, then there will be a microphone, otherwise what's the point.
- Software tools Windows 7-10.
In the latter case, open the “Task Manager” via WinX or another and look for the device in the “Audio, game and video devices” section.
How to check if the microphone is connected to the computer.
Second option:
- Open Control Panel and go to the Hardware and Sound category.
- Click on the name or icon of the “Sound” section and go to the “Recording” tab.
Recording equipment will be displayed in the list.
If it is greyed out, open the context menu and select Enable.
Third method:
- Open the context menu (right click) on the speaker icon in the tray (next to the clock).
- Select "Open Sound Settings."
- Scroll down to the Input section and you will see the active device.
Here you can change if the handset detects more than one microphone, adjust the volume and check.
Automatic problem solving
Since the microphone problem is quite common, Windows 10 has a built-in tool to solve it. To use it, go to your control panel and follow these steps:
- Go to the "Troubleshooting" block. If you can't find it, use the built-in search bar located in the upper right corner.
Open the “Troubleshooting” section - Start troubleshooting audio problems.
Click on the “Troubleshoot audio recording” button - The program window will open. Confirm the action and start following the instructions provided by the application. After the diagnostics are completed, you will receive a message indicating whether the system was able to identify and resolve the problems.
We confirm the start of diagnostics
To connect a microphone to a computer or laptop, just connect the wire. After synchronization, you can configure the microphone using the tools built into Windows or third-party programs. You can eliminate noise by lowering the sensitivity. If your computer won't work with the microphone, check for drivers, disable Monopoly, or use an automatic troubleshooter.
Which microphone can be connected to a laptop?
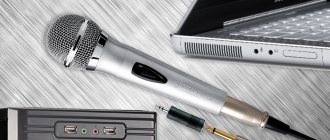
Any remote microphone can be connected to a laptop, but some will require you to purchase the appropriate adapters or use an external sound card (for professional equipment). There are three device sizes with corresponding plug (connector) diameters: 2.5 mm, 3.5 mm and 6.35 mm. The latter are used in professional (studio) speakers, but are connected to a laptop via an appropriate adapter or an external audio adapter.
Under the general name of the jack there is the abbreviation TRS, which means: tip, ring, sleeve. Jacks vary in the number of pins:
- TS - 2 pins - 2 poles - obsolete, almost never used;
- TRS - 3 - headphones, audio adapters and other equipment;
- TRRS - 4 connectors - mainly regular and audiophile headphones, karaoke, professional equipment (mixing consoles);
- TRRRS - 5 - headset with noise reduction function.
Bluetooth devices are gaining immense popularity among consumers. Despite the fact that the range of such a wireless microphone is small, up to 10 meters without obstacles, it is enough for comfortable work with a laptop.
Other devices
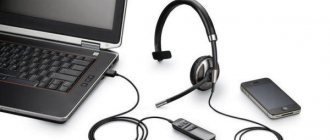
Conventional computer microphones come in three types - built-in to the headset, lavalier (a small device that can be attached with a special clip to clothing) and desktop (a large, massive device, often equipped with an external sound filter).
Studio vocal devices can either be mounted on a tripod or simply held in the hand. There are no lavalier ones among them, since large membranes are used here. This is no longer computer equipment, so they have a slightly larger jack - ¼ inch.
There is no such socket on the motherboard. They are only available on sound cards of the mid-range or top-end segments. However, such a device can also be connected, which requires a special adapter. Computer hardware stores usually don't sell them, but music stores always have them.
As for the headset from the phone, it will not work when connected through the red socket. Although the size of the jack is physically the same, the contacts in the slot and on the jack do not match.
Often such a headset cannot be used as headphones - again, due to the mismatch of the contact positions. If these are ordinary telephone headphones without a microphone, then when connected to the green slot they will work. The volume will have to be adjusted using Windows, but these are minor things.
For more details on this topic, I advise you to read “Connecting and connecting speakers to the computer” - there is a lot of interesting stuff there. Follow me on social networks and share this post to please me. Till tomorrow!
Connecting a microphone to a laptop using a cord
In the recent past, laptop models only had a wired method of connecting a microphone, speakers and other types of headphones. Several standard audio jacks served as audio input and output.
The input jack received the signal from the microphone, digitized the voice, and then transmitted it to headphones or speakers.
Structurally, the connectors were no different. The only difference between them is the color of the finish:
- the pink frame was for the microphone input;
- The green border is the output for headphones and other external audio options.
Sound cards for desktop PCs are most often equipped with connectors of other colors, each of which has a specific purpose. For example, line input or optical output. Such gadgets could not be found in laptops. Their small size did not allow even an additional input or output connector to be included.
However, the rapid development of nanotechnology has led laptop manufacturers to use combined audio connection options for their laptops. The laptop connector is now 2-in-1, meaning the input and output are in the same physical connector. This connection model has many undeniable advantages:
- Cheap attitude towards the device body, especially when it comes to miniature ultrabooks and processors;
- Possibility of combination with telephone headsets;
- It is impossible to insert the plug into another socket by mistake.
However, owners of old-fashioned headphones with separate input and output jacks did not like the combined connection model. In principle, it is not difficult to go to the nearest store and buy an option with one connecting plug. But at the end of the day, most people use very expensive devices that have been tested for many years. And they, of course, do not want to change their favorite equipment to an analog one with a different type of output.
In this regard, the opportunity to purchase a new headset is excluded in itself. And the USB connection option doesn't matter either.
The only real solution would be to purchase an adapter to connect your headphones to your laptop. And the cost of additional equipment will be significantly less than the cost of a new high-quality microphone.
Modern people pay special attention to the wireless method of connecting an audio headset. These microphones are very convenient for singing, talking or making calls. However, professional players prefer wired models. Bluetooth technology, of course, provides a high-quality connection, but there are times when the voice being played is lost or blocked by other waves.
What if the settings are lost?
It happens that the system sees the microphone, but still cannot hear you. Then you should check the signal settings. To do this, go to Start → Settings → System → Sound again. Below the list of connected microphones there is a scale (Check microphone) - it turns blue if the microphone picks up sound.
Speak loudly and then quietly, and watch the scale. If during a loud conversation the shading does not even reach half, click on Device Properties and try increasing the volume. Yes, in Windows 10 the sensitivity is called master volume.
Connecting a wireless Bluetooth microphone to a laptop
If your computer or laptop is also equipped with Bluetooth version 2.1 or higher (A2DP version 2 has since been added with support for audio recorders), you can connect a compatible wireless microphone to it. To connect it you need (using Windows 10 as an example)
- Turn on Bluetooth. On laptops, the key combination is FN+F
- Open the Notification Panel, right-click the Bluetooth icon and select Open Settings.
- Select "Add Device", select "Bluetooth".
- Turn on the microphone and put it in pairing mode. You can find out exactly how to do this from the instructions.
- Wait until your device is detected and enter the pairing code if necessary.
You can control the operation of the device through the standard “Sound Recorder” application. In Windows 7, adding a device is done in a similar way. You need to right-click on the Bluetooth icon on the taskbar, select “Add device”, and then do the same.
Second way
If you don't want to worry about adapters and wires, buy a wireless microphone that works via Bluetooth.
- Charge the device or insert batteries.
- Turn on the wireless microphone and Bluetooth on the handset. To do this, use the Fn + F key combination.
- Right-click on the context menu of the Bluetooth icon in the system tray (where the watch is located) and select "Add device...".
There is an alternative method in Windows 10: press Win + I, visit "Devices" and turn on Bluetooth in the window.
- Click "Add Bluetooth or...".
- Specify the device type.
- After scanning and detecting the microphone, select it from the list.
If successful, a message indicating that the wireless speaker is ready will appear on the screen.
If Bluetooth does not turn on (the switch is not turned on) or the interface icon is missing in the tray, check whether the RF transceiver driver is installed and whether the module itself is activated on the handset and microphone.
- Open Device Manager via Win + I menu.
- Expand the "Bluetooth" section to make sure the driver is there.
If this option is not listed or has a yellow icon next to it, reinstall the Bluetooth software from your laptop's installation disc or PC support site.
Suddenly a gray downward pointing arrow appears on the radio icon, right click and select Enable Device.
The following steps will also help return the icon to the tray:
- Press Win + R and execute the command “ncpa.cpl”.
- Call up the Bluetooth connection properties.
- On the second tab, click on the “Settings...” link.
- Select the checkbox to display the Bluetooth icon in the notification area.
- Save the changes with the “OK” button.
The microphone will work.
Noise Removal
Most cheap microphones record sound with noise. This is due to the fact that more expensive models automatically eliminate all interference that comes along with a person’s voice. If you have a microphone that cannot do this itself, you will have to manually clear the sound of noise.
Physical protection
On all microphones you can see a black tip. It not only protects from dust, but also prevents extraneous noise from passing through, since it is so weak that it gets stuck in it and is muffled. If your microphone does not have an attachment, purchase one or make one from improvised materials (the first option is better, since they are very inexpensive).
The nozzle protects against noise
Eliminating noise-producing objects also helps eliminate noise. Close the window and turn off any unnecessary electrical appliances near the computer. Move the microphone away from the computer itself, otherwise there is a high chance of recording the whirring of the cooling system.
Software cleaning
Reducing the sensitivity of the microphone allows you to get rid of noise. The sound it produces will become quieter, but the noise will no longer be recorded. The necessary settings can be made using the system tools described in the “Standard Windows tools” section. In the “Levels” tab you can control the volume - drag the sliders to the left until you achieve the desired result.
Move the sliders to the left
Using third-party programs you can also remove noise. Almost all applications have a function that allows you to do this. For example, in Audacity, just expand the “Effects” tab and select the “Noise Removal” mode. By specifying the necessary parameters, you will erase all existing defects from the track.
USB connection
Instructions for connecting an external microphone to a laptop are suitable for most operating systems: Windows XP, 7, 8, 10, Android, MacOS, Linux, etc.
To connect a USB microphone, follow these steps: You need to find the USB connector to which the device is connected.
After connecting, a sound setup wizard starts on your laptop, the name of which depends on the sound card. It asks you to confirm the presence of the device or perform step-by-step configuration (optional).
To find out if your audio device is detected, follow these steps:
- Open the Control Panel window;
- In the Settings window, click the Hardware and Sounds button;
- Go to the "Recordings" tab to view the available equipment;
- Check the device name to make sure it is activated.
After further settings, the recording device is ready for use.
Combo port
Some laptops use a combo port to connect headphones and receivers. The kit easily includes an earpiece from which a cable goes to the headset and voice recording points. However, if you take a regular dynamic microphone, you will not be able to connect it directly to your laptop.
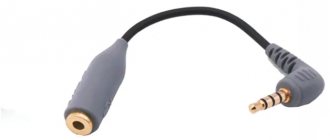
To use an external recording device, you must purchase a proprietary one. It may be the same brand as your laptop, or it may have compatible parts. However, such a device is quite expensive. It is much more attractive for the average user to buy an adapter.
This adapter looks very simple. At one end there is a plug for the hybrid port, at the other there are two outputs, marked in green and red for clarity. It is the latter that allows you to connect an external microphone to your laptop.
Selection of adapters and cables
Any mixing console is mains powered, so the first thing you need to look at is the type of plug. For modern devices it is of a European type, so the user may need an adapter if he has an old type socket.
To connect the remote control to a laptop, you will need a cable equipped with two “Jack” plugs on one side and one “mini Jack” plug on the opposite side. In this case, it is necessary to immediately determine the length of the wire, taking into account the possibility of working in various conditions, so that in the future you do not have to additionally purchase a longer cable.
The user will also need a cable to connect a microphone - XLR-mini Jack.
This, of course, depends on the amount of money allowed.
Standard microphone connectivity
First, let's look at a fairly common method that a person without special skills and knowledge can probably handle. So, below are the steps that we recommend you follow:
- Speaking about standard connectors on a laptop, it’s worth remembering the figure of 3.5 millimeters. As for the output connector directly on the device, there are two holes. The first is 6.5 mm, the second is 3.5 mm. Therefore we will use the last option. Because to use a non-standard socket you need to purchase a special adapter. It can be purchased at audio equipment stores.
WARNING. Never connect a standard plug to a non-standard input. Failure to comply with this requirement may result in failure of the entire device.
- So, when the connectors are cleaned and the parts are in place, you can start connecting the components. To do this, you need to find the necessary recesses on the side of the laptop. The color of the connector, of course, directly depends on the manufacturer of the design, but most often you can find its inherent shades, such as orange or pink. Then insert the plug until it clicks into place.
- Your device should then display a connection notification and an icon should appear on the taskbar. It is usually located near the specified time.
ADVICE. To ensure proper operation, it is recommended that you restart your computer.
- Then, when the monitor lights up again, you will need to change some settings again. To do this, click the "Start" button and go to the "Control Panel" section. There, check the box next to “Sounds and audio devices.” The “audio” tab will appear, where you can go to the “volume” window by first clicking on “record audio”. Where it says "microphone", you can change the settings, for example, increase the volume, etc.
IMPORTANT. After you have completed all the manipulations described above, do not forget to click “OK”. This way you will notice the changed settings.
Connection via blue Bluetooth
Thanks to modern technology, it is increasingly possible to find a set consisting of a microphone with a built-in speaker. This design is installed using bluetooth. The process itself is very simple and includes the following steps:
- The first step is to turn on the device.
- Then click on the bluetooth icon on your laptop. A list will appear from which you can select the desired name. Pairing will begin only after you select the speaker as your primary audio output device.
As you can see, there is no need to connect the microphone itself.
- Finally, define the file by running it with the text. The voice will be received independently, as will the signal reception and audio mixing with vocals. Since there will be no additional voice transmission to the announcer, the singing itself, of course, will not be late.
ADVICE. If your devices support any version of bluetooth, and not just one, the one that was released first will work.
As for the controls, these are special buttons located directly on the device body. This is usually the most common mixer. With its help, you can control not only the volume of music and voice, but also apply various effects. Therefore, you can create an interesting addition to the performance, such as echo or overdrive.
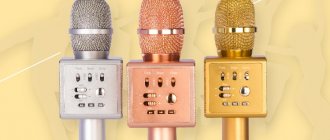
IMPORTANT: Since the connection is wireless, and only a regular full-size jack is available for karaoke microphones, for wired microphones you must purchase a mini-jack adapter. If your laptop does not have Bluetooth functionality at all, you will have to purchase a special external module. In this case, the system immediately recognizes the device and installs the necessary resources.
To connect the device, a built-in connector is required. Traditionally, all modern laptops are equipped with a 3.5 mm mini-jack connector. Here you can connect a karaoke microphone to your laptop or headphones. Insert the plug into the outlet. Note: Typically the manufacturer's 3.5 mm mini-jack connector is color coded pink.
Unlikely (but possible): the sound card has failed
We deliberately put this point last. If you are using a 3.5mm connection and none of the recommendations have helped, try USB devices.
The fact is that an analog signal is supplied through 3.5 mm, which the sound card converts to digital. And in headphones with a USB connection, the sound is transmitted directly in digital form.
Sources
- https://SmartBobr.ru/poleznosti/podklyuchit-mikrofon/
- https://pronashkomp.ru/kak-vklyuchit-mikrofon
- https://winda10.com/nastrojki/kak-nastroit-mikrofon-na-windows-10.html
- https://AudioTop.ru/info/podklyuchenie-mikrofona-k-noutbuku
- https://journal.citilink.ru/articles/vas-ne-slyshno-kak-nastroit-mikrofon-v-windows-10/
- https://zagruzi.top/instruktsii/kak-nastroit-mikrofon-na-windows-7.html
- https://tehnika.expert/cifrovaya/noutbuk/podklyuchenie-mikrofona.html
- https://Lumpics.ru/how-connect-microphone-to-windows-10-laptop/
- https://kkg.by/razem-dzhek-i-mini-dzhek-kak-podklyuchit-mikrofon-k-kompyuteru/
- https://myearphones.ru/mikrofony/kak-podklyuchit-mikrofon-k-kompyuteru
- https://AudioTop.ru/info/podklyuchenie-mikrofona
- https://sovety-pk.ru/kak-podklyuchit-mikrofon-k-noutbuku.html
[collapse]
What to do if the sound when recording or talking is very quiet
You can adjust the microphone sound volume using system tools in Windows 7, Windows 10. To do this, you need to go to the recording device settings window, as shown above. Here you just need to select the name of the model you are using with the left mouse button and click the Properties button. It is located in the lower right corner of the window.
In the device properties, sensitivity levels are adjusted on the tab of the same name. Having switched to it, you should use the slider to set the acceptable sound volume. To save the settings, just click OK and close the settings window.
Connecting a microphone to a laptop is sometimes very difficult. We are talking about old devices - their connector does not meet modern standards. Therefore, to use a very old microphone, you cannot do without qualified assistance. The device must be taken to a workshop or electronics specialist to re-solder the wires to a modern interface. Only after this can you connect the microphone to the laptop using one of the methods described above.
Settings in communication programs “Skype” and “Discord”
Most applications for communicating over the Internet have a separate section with settings that does not depend on system parameters. For example, we will look at the setup procedure in Skype and Discord.
Skype
We will talk about the most recent version of Skype. If this update is not available to you, you can still use the instructions - the approximate location of the sections and names remains the same:
- We go to settings through the additional menu.
2. Here open “Sound and Video”, select the device to record and adjust the volume level.
3. To test the sound, click on “Make a free test call” at the bottom of the window.
During the call, you will be connected to an answering machine that will record up to 10 seconds of your speech. It will then play the recording so you can listen to it. This will allow you to understand how your voice will sound when talking online.
Discord
This application is newer than Skype, but is already very popular among gamers due to its functionality. For the microphone to work properly with it, do the following:
- Open the section using the gear.
2. Go to the “Voice and Video” tab. Here you can select I/O devices (1). Below you can adjust the volume sliders (2). To listen to your voice, you need to click on the “Let's Check” button (3). You will hear a slight delay - this is normal. After listening to the voice, make adjustments to the volume level.
3. If the voice sounds too quiet, try turning off automatic sensitivity detection and setting the slider to maximum.
Additionally, you can assign a hotkey and mute the microphone if necessary.
We reviewed only two current programs. If you use another application, then most likely its settings are very similar to these instructions.
Why doesn't the computer see the microphone from the headphones?
Such gadgets are popular among gamers and those who like to communicate online, since it is more convenient to use one audio device instead of two. They differ in connection type and power supply in the same way as microphones.
Possible problems:
- Incorrect connection.
- Typically, combined models have one wire, standard or USB. In the first case, the plug is plugged into the headphone jack (on a desktop computer this is a green socket).
- Two connection cables (separate for microphone and headphone) may cause user error when selecting the appropriate ports.


