Modern laptops have built-in mini-speakers, through which it is convenient to watch movies and listen to music. However, for complete immersion in the content you are viewing on portable devices, it is better to purchase external speakers: this will make the sound even deeper, so you can hear the quietest notes. The article discusses ways to connect a speaker to a laptop and how to deal with the main problems and synchronization errors.
It will be useful: How to choose speakers for a computer and laptop: 3 selections of the best systems
Connecting wired speakers
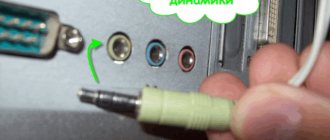
In PCs, the speaker and microphone jacks are colored differently. Laptops favor labels and intuitive images that show what the connector is for. Some laptops are equipped with a combo audio jack, which is used for audio playback and recording.
In this case, you should definitely re-read the instructions for it. Some laptops cannot be connected to a microphone, otherwise the audio jack may be damaged. For such devices, it is advisable for the user to purchase an additional external sound card.
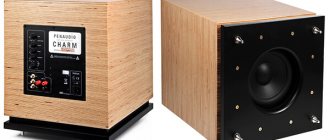
Interesting: Acoustics for a laptop with a subwoofer: what to choose from 3 types and how to connect
There are 2 types of connection for wired speakers: via Mini-Jack and USB. To connect gadgets, you just need to connect the speakers to your PC and plug them into the network. In the case of Mini-Jack, the speakers will work immediately. For USB speakers, such as the Genius SP-HF160, you will have to download drivers from the manufacturer's website.
Setting up speaker switching in Windows
In the case of wired devices, there is no need to make any settings - everything happens without human intervention. And when connecting speakers via USB, just download the necessary drivers - then the system will recognize them and switch from the internal audio system to the external one.
If there is no sound from the speakers
Reasons for lack of sound from speakers and ways to eliminate them:
- You can test the sound output to the speakers by connecting headphones to the laptop. If there is sound in the headphones, the fault is in the speakers or their connections. Check speaker connections.
Checking the connection between the speakers and the laptop
- Laptop battery is low, sometimes turning off devices. Connect the laptop to the charger.
If the laptop's battery is low, charge the battery and check the sound on the speakers again
- The speakers are not connected to the “Audio Out” jack marked with headphones. Check connections.
Checking which connector the speakers are connected to
- Headphones are connected, turning off the speakers. Check the connections on the laptop and speakers.
Checking whether the headphones are connected to a speaker or laptop
- Bluetooth is turned on, switching to an external audio source.
Turn off the radio module using the button on the keyboard (see below). Disable Bluetooth by left-clicking on it
Reference! Restarting Windows can also help in many cases of adjusting the sound on your laptop.
Video - How to connect speakers to a laptop
How to connect a wireless speaker to a laptop
Wireless speakers connect to the laptop via Bluetooth and NFC.
Bluetooth connection
Before pairing the speakers, you should turn on Bluetooth on your laptop. To do this, you need to go to the laptop settings.
On Windows 10
- Go to the Start menu (window image in the far left corner).
- Click on it and select the sign that shows a gear - this is the icon for quick access to settings.
- In the “This PC” window, select “Open Settings”.
- Click on “Start” with the right mouse button (RMB), selecting the “Settings” sub-item.
Important : The keyboard shortcut + i will immediately bring up the settings menu.
On Windows 7
You need to go to the “Start” menu by clicking on the window icon in the far left corner and select “Control Center”.
Important: This is also done through the “Run” menu by calling this program with the Win + R combination and then entering the “control system” command (without quotes). After executing this command, the settings window automatically opens.
How to setup
Settings menu using Windows 10 as an example
Go to the “Devices” submenu.
Find the Bluetooth icon and select it.
Turn on Bluetooth.
What to do if the laptop does not have Bluetooth
If the laptop does not have Bluetooth, which happens in very old models, you should purchase a Bluetooth adapter (some speakers already come with it). The adapter will interface with the computer via a USB connector. At the same time, the adapter will connect to the speakers via Bluetooth. Thanks to such adapters, laptops don’t even need Bluetooth, since the adapter takes on this role.
Connecting Bluetooth speakers
Correctly connecting Bluetooth speakers to your computer is as easy as shelling pears. Everything that is required from the user is described in the table.
| Synchronizing PC with speakers | 1. Turn on the speakers. |
| 2. Press the key that activates the search for a device for subsequent synchronization. | |
| 3. Open the control panel on your computer or laptop. | |
| 4. In it, open: Hardware and Sound → Devices and Printers → Bluetooth Devices → Add Device. | |
| 5. Select the device to be connected and click “Next”. | |
| Designate the connected device as the device from which audio will be played by default |
In addition: How to choose speakers for a computer and laptop: 3 selections of the best systems
It is not difficult to correctly connect stereo speakers, as well as a 5.1 multi-channel speaker system to a computer. The main thing is to connect all the cables correctly and set up sound reproduction in the PC itself. The instructions are suitable for both Windows 7 and the tenth version of this OS. True, the names of the tabs may differ slightly. However, the difference is so insignificant that it will not raise any questions.
When might an adapter be needed?
An adapter may be required if the special socket is missing/broken or the required connector is occupied. For example, if a PC's Mini Jack is broken, then its owner will need to purchase a USB adapter for speakers.
MacBook owners may also need a USB-Lightning adapter, since Apple equipment only supports USB-C, and for older versions, these computers need an adapter to Lightning.
In the case of a wireless connection, an adapter may be required if it is already included with the device.
Problem solving
If there is no sound on the PC after connecting, this means one of the following problems:
- The sound is turned off in the settings - click on the speaker icon in the tray and look at the volume level. If set to 0 or off, it simply increases the volume.
- If the speakers themselves have a physical power off button, press it to wake the device from sleep mode.
- Make sure the wires are connected correctly by matching the colors on the sockets and plugs.
- In Device Manager, check your sound card drivers, if there are problems, reinstall them.
Instructions for connecting via USB
You can easily and quickly connect the speakers to your laptop via wire. You can use a regular portable model or a stationary system from a music center. It all depends on personal preference.
Typically a set of speakers is used that is connected via a USB port or a 3.5 mm audio jack.
Detailed connection instructions consist of a sequence of steps.
- Choose a suitable speaker model for your laptop.
- Place external speakers on your workspace. Most speakers have L and R markings on the bottom or back. You need to install the devices according to these inscriptions. If the system has a separate subwoofer, then it is usually installed behind the laptop or even on the floor. It is important to make sure that all wires are located conveniently and safely.
- Turn down the volume on the speakers. This usually involves turning the adjustment wheel on the main unit in the kit. The regulator turns completely to the left or down.
- Click on the sound symbol at the bottom of the quick access panel, which is located in the right corner of the desktop. Set the volume on your laptop to approximately 75%.
- Click on “Mixer”. Use the item labeled “Applications”. Adjust the additional slider also to a level of about 75%.
- Connect the speaker cable to the appropriate port on the laptop. The gadget must be turned on. If you need a 3.5 mm input, then you should look for it on the side panel. The round hole is marked with a headphone or speaker icon. The input next to which the microphone is shown is not used to connect external speakers. If you connect a plug to this jack, there will be no sound. When connected to a USB port, drivers may begin to be installed. This process sometimes occurs automatically, and in some cases requires direct user participation. If the system requires you to insert a disk, then the one that came with the speakers is used. Next you need to follow the instructions. After installing the drivers, the laptop may require a restart.
- Turn on the speakers using the button on the case. Sometimes it is combined with a volume control. It is worth noting that if the speakers have a power cable, you should first connect them to the mains.
- Enable playback of any file. It could be music, video or film. The format doesn't matter.
- Slowly turn the volume control on the speakers. This way you can set a comfortable indicator. You should turn the wheel carefully so as not to immediately use the speakers at full power.
Such simple manipulations allow you to use speakers that are connected to the laptop wired. You can route the cord anywhere, install external speakers on a shelf and enjoy high-quality sound.
It is important that the cables are positioned freely near the connectors and are not strained.
It happens that after connecting the speakers there is sound, but it comes from the built-in speakers. In this case, you should switch the playback method on Windows.
- Simultaneously press the “Win + R” keys on the keyboard. The first one is to the left of the left "Alt".
- A command prompt window will open. You must enter the word “control” in the field and confirm your entry by clicking “OK”.
- The “Control Panel” window will appear on the laptop screen. Next, you need to select “Large Icons” in the display menu. It is located on the top right. Directly on the “Taskbar” you should click on the icon labeled “Sound”.
- Click on the “Playback” tab. Next you need to select “Speakers” and click on the “Default” option. To confirm the action, use the “OK” button.
This simple setting will allow the system to output audio to external speakers by default. If you no longer need to use the speakers in the future, you should turn them off and also switch the way the sound is played. After setting, you should play the music file again and adjust the volume.
The method for switching playback does not depend on which connector the speakers are connected to.
There are external speakers that connect exclusively to the USB port. In this case, it is important to use the correct type of connector. Moreover, such a speaker will not work without a driver. Typically, models are not connected to a power supply. The power they get from the laptop is enough for them.
Sometimes it is not possible to connect peripherals directly to a laptop with a cable. It is necessary to use an adapter in such cases.
- Some stationary speakers have two plugs that need to be connected to the headphone and microphone jacks, respectively. However, most modern laptop models are equipped with a combined connector.
- There is no free USB input on the laptop. This is also a common problem with modern laptops. In this case, you need a USB hub.
- Older laptops may require an external sound card.
Turning on different models of portable speaker
The activation procedure is the same for most equipment - press the desired button. Using the example of popular manufacturers:
- JBL. The power button is located on the top of the case. If the model has a screen, a signal will appear. If not, focus on the light indication. This mini-speaker reports the status of the device;
- Sven. For example, to turn on the PS-420 model, you should move the switch on the back of the case to the ON position;
- Sony. Turns on by pressing the power button. At the same time, the Bluetooth indicator will start blinking;
- T&G. This is a JBL product. The power button is similar and is located on the body. It is pressed until the beep sounds;
- DEXP. Models use a corresponding button or ON-OFF switch.
There are a lot of models, the sound quality varies, but their switching principle is identical.
USB connection
The situation is somewhat different if the external audio system has a USB interface. To connect to a laptop in this case, you must first install the appropriate driver, which is usually located on the disk included with the speakers.
If your laptop does not have an optical drive, the driver can be found and downloaded on the official website of the external speaker system manufacturer.
After installing the software, connect the speakers to your laptop using a USB cable. The external audio device will be recognized automatically.
Incorrect settings
Due to the presence of several devices for reproducing audio information, including a virtual audio device, the system may transmit digital data to the wrong device that the user needs. The problem can be solved simply:
- Using the context menu of the “Speakers" icon in the tray, open the list of playback devices.
- Click on what should be used by the system.
- Click on the Default button and save the settings.
If the required equipment is not detected, then do the following:
- Call the Task Manager.
- We update the equipment configuration by clicking on the corresponding icon.
- We find the disabled device and activate it by calling Properties and selecting the “Use this device (on)” option from the list in the “Use device". We confirm the changes with the Apply and OK buttons.
Windows Audio Service
Sometimes it happens that the audio service in OS Windows is simply turned off. To check whether the service is currently active, you need to do the following:
- Press the Win+R key combination, after which the “Run” window will appear. Enter the services.msc command to view all system services.
- Find the Windows Audio service and enable it if necessary (in properties). In the startup type field, select “Automatic”.
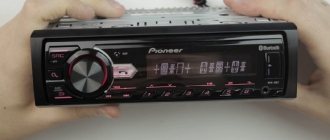
Connecting a music center to a TV or computer
When purchasing equipment, some users encounter certain difficulties in connecting it, especially if this concerns the entire design circuit. In particular, it can be difficult to decide how to connect a stereo system and how to do it correctly.
In addition to the standard use of the music center as a means for listening to audio files, you can connect it to any other audio and video devices, making the most of the opportunities provided in this case. Let's look at how to do this.
Connecting to a TV
This process will not take much time. The first connection step will be to study the connectors of the original TV and center models. As a rule, their colors are the same, that is, a connector, for example, red on a TV will be designed to connect audio through a connector of the same color on a stereo system.
Next, we prepare a wire with RCA connectors, it is also called a “tulip”
Such a cable can be purchased at any store of the appropriate direction, the only thing is to immediately pay attention to its length, which should correspond to the distance between the connected devices
The next step is, in fact, the connection itself; do not forget to first disconnect both models from the electrical network. We check the colors of the plugs and connect them.
The end of our process will be to connect both devices to the network and check that they are working correctly. It may happen that there is no sound, do not be alarmed, as a rule, this means that on the center you need to change the mode to AUX.
During the connection process, pay attention to the following points:
- On the TV, the input required for connection is designated as AUDIO OUT, on the music system – AUDIO IN.
- If the plug costs more, it will contribute to better sound quality and longer service life. The external difference between these plugs is their gold plating.
- If for some reason your TV does not have RCA connectors, you can connect via SCART using an adapter.
Connecting a music center to your TV will significantly improve the quality of the soundtrack of your favorite films and programs.
Just try this option and you will immediately feel the difference.
Connecting to a computer
1 way. You will need:
- working music system;
- computer or laptop;
- cable for connection 3.5 mm.
You need to connect one end of the cable with a single plug to the central jack of the PC, and the other end with a double connection to the audio device. After that, we look for the required AM-FM frequency and AUX signal. If difficulties arise during this process, you can use the “Run” command in the Start menu to type “soundman” and set the necessary connection settings in the window that opens.
Method 2. You will need:
- music Center;
- PC;
- cable 3.5;
- RCA connector;
- bases made of plastic and metal;
- insulating tape;
- soldering iron
The first step will be to remove the insulation from the cable, after which the wire strands will need to be rolled up. Next, we attach the wires to the metal base, and the elements will need to be soldered. We connect the wires to the contacts and solder the connection. Composite with electrical tape also requires audio/video bases made of plastic and metal.
https://youtube.com/watch?v=OkqP2TWx-Po
If old headphones were used to form the cord, you need to burn the wire. In general, it will be almost identical to the cable of DVD players.
After that, we look for the AUX outputs on the system unit and connect the AV cable on one side to the cord blank, and on the other to the personal computer, after which we connect the cord to the audio device. Turn on the music center, press AUX, launch the music player on the computer. In addition to the center itself, you can also connect speakers.
Thus, answering the question of how to connect a music center to a computer or TV is not particularly difficult. This can be done easily and simply, with your own hands. Many people are not even aware of the possibilities that a combination of various devices used autonomously can open up. Meanwhile, progress does not stand still, offering us more and more new ways to use familiar things. Sometimes this saves a lot of time, and sometimes even money.
Audio effects
Software filters can cause noticeable audio distortion, which can make the user feel like the sound on a Windows 10 computer is wheezing. You can get rid of this distortion in the output signal by deactivating audio filters:
- Open “Playback devices” through the context menu Speakers in the tray.
- We indicate the problematic equipment and call its Properties.
- Activate the “Advanced” tab.
- Uncheck the box next to “Enable additional audio.”
- On the “Additional Features” tab, uncheck the “ Loudness Compensation” box. You can turn off all effects.
In a similar way, setting up sound in Windows 10 is done through the Realtek HD Manager when using an audio card from Realtek and having the Sound Manager utility:
- We call the application, for example, through the context menu Speakers.
- Go to the “Sound Effect” tab.
- Uncheck the boxes next to the voice suppression and “Loudness” options.
Bluetooth module is not turned on
You will learn how to enable Bluetooth on a laptop or computer in the following video:
The speaker does not connect to the laptop? It happens that Bluetooth, as a module, is turned off in the device manager. Usually this function is disabled as unnecessary. Because it sometimes happened that the user accidentally pressed the automatic connection button and the laptop connected to other devices. There's no one to blame here. It happens.
What to do:
- Right-click on “My Computer”;
- Click on “Properties”;
- In the window that opens, unknown to you, on the left, find the line “Device Manager”;
- Here is a whole encyclopedia of incomprehensible terms. Find the blue icon among them. It says "Bluetooth Radio". Click on it twice;
- Find the "General" tab;
- Click on "Enable".
Ready. You have mechanically enabled a disabled module. You can take a short smoke break and read the contents of the first subheading again. Read it and do it? Enjoy the acoustics!
Types of external speakers
Having received an affirmative answer to the question: “Is it possible to connect speakers to a laptop?”, the user “burdens” himself with a new problem associated with choosing the most suitable external speakers.
Selecting external speakers
Specialized stores can offer a wide selection of speakers that differ in design, quality and power. When making a choice, the user must understand how to connect the speakers to the laptop, especially since the connection methods can be different, as well as the power supply to the speakers.
External speakers fall into two categories:
Portables, just like a laptop, are characterized by compactness and mobility. They are easy enough to take with you on the road and simply connect. Fixed speakers are large in size, but they are the most suitable option for those who want to provide the highest quality sound.
Most often, stationary external speakers, which are equally suitable for both laptops and desktop computers, require power from the mains. Portable speakers are powered by a USB connector. There is also a category of speakers that receive power from built-in batteries.
Having decided on the choice of portable speakers, the owner of a netbook should carefully study the recommendations of experienced users and find out how to connect the speakers to the laptop.
Why use a portable speaker
The vast majority of laptops, in terms of sound quality, are, to put it mildly, not very good.
As a rule, they are equipped with small speakers, which not only cannot play loud enough, but also cannot cope with low frequencies. When watching a movie this is still acceptable, but for music this quality is not suitable.
In conjunction with any portable device - laptop, netbook, tablet or smartphone, a portable speaker equipped with a built-in battery or powered by batteries performs better.
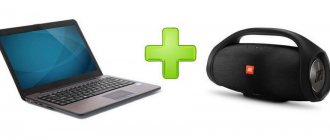
Connecting a JBL or any other speaker to a laptop is easy, no matter what OS is installed - Windows 7, Windows 10, G8 or Vista. Almost all modern laptops are equipped with a built-in Bluetooth transmitter, with which you can also connect a mouse, keyboard, gamepad or headphones. In this case, installing drivers and complex manipulations with settings will not be required.
When connecting a wireless JBL to a computer, everything is somewhat more complicated - as a rule, there is no “blue tooth” in a desktop PC. You will have to additionally purchase a universal adapter that connects via a USB port.
Separately, it is worth noting that a similar “stray” from a wireless mouse or keyboard will most likely not work - it simply will not connect with the speaker, since it is designed only for connecting a “native” device.
Typically, a universal adapter is a plug-n-play device, so it will immediately install drivers the first time you connect it to your computer. Otherwise, you will have to install them yourself from the disk that comes in the kit.
Steps
- 1
Select your speaker system.Consider whether you need a subwoofer or want surround sound through a 5.1 system. Don't spend a fortune, but don't buy the cheapest system either.
- 2
Connect the 3.5mm plug to the headphone jack of your laptop.
- 3
Adjust the volume on your laptop by clicking the sound icon on the taskbar and setting the slider to 80.
- 4
Insert the plug into the outlet and turn on the speaker system.
- 5
Set the speaker volume to minimum.
- 6
Launch the music player on your laptop, and slowly increase the volume of the speaker system to a comfortable level.
- 7
Enjoy listening to music.
