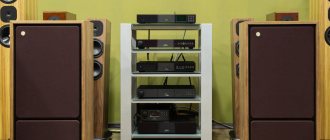
Having received a fair share of experience and impressions from the Great Journey, we will continue to surf the expanses of the universe of “black boxes”. Of course, the variability of switching Naim components is very extensive and, as a rule, in everyday conditions is dictated by the cost of the components. Today we decided to submit to the price hierarchy, putting together a very positive (despite the color) setup: Naim NAP 250 DR power amplifier, Naim NAC 202 preamplifier with proprietary power supply from HiCap DR and Naim NDX2 network player. Where will such a logical path lead us?
Naim Audio are one of the founders of British style. Both in sound and in device design. Drawing on their many years of experience (the company was founded in 1969), Naim engineers continue to work on the development of new devices and trends, but do not forget about already released components: from time to time they are also subject to improvements in accordance with scientific and technological progress or their own developments .
The black box system looks impressively stylish!
In our case, there is a component that has been modernized more than once and has already become legendary to some extent - the powerful NAP 250 DR.
Naim Audio NAP 250 DR: Discreet Regulation, NA009N and 2 Ohm
The first generation of Naim Audio NAP 250 power amplifiers was released back in 1975. Since then, the powerhouse has undergone multiple upgrades, mainly related to increasing the power characteristics of the power supply and replacing the element base with a more modern one.
But the years passed, and after the presentation of the quintessence of its capabilities - the Statement line, namely the mono-power NAP S1 - Naim designers decided that the relatively budget, but beloved NAP 250 simply had to receive a new upgrade.
No sooner said than done.
Operate into a 2 Ohm load? No problem!
Let's start with power: here integrated voltage stabilizers have been replaced by discrete ones, Discreet Regulation, which, firstly, made it possible to provide an almost 30 times lower noise threshold than its predecessor, and secondly, determined the very two letters in the name of the device - D.R.
From now on, all honest people should know: if you see the letters DR in the name of a Naim component, you will find discrete voltage stabilizers inside the device. If you don't see, you won't find. In general, everything is simple here. In addition, thanks to other improvements in power supply, the NAP 250 DR was able to operate quietly and for a long time into a 2 Ohm load.
Let's continue with transistors: in the same NAP S1, semiconductor transistors labeled NA009N, custom-made for Naim Audio, were used for the first time. It took more than a year to develop these transistors. After their use in the NAP 250 DR circuitry, according to the manufacturer, the dynamic and frequency characteristics increased noticeably.
This increase is achieved due to the fact that the NA009N has noticeably better organized cooling and has a significantly larger margin of safety: engineers say that the new semiconductors can withstand loads of up to 80 A and 350 W! Of course, for the NAP 250 DR these transistors are more than enough, since its declared power is 80 W at a load of 8 Ohms.
There are almost no secrets left inside the black case
Transistor cooling radiators are attached to the device body. The case, in turn, is assembled from black anodized aluminum and has a certain number of solutions that protect the entire circuitry from resonances, vibrations and interference. By the way, the bulk of the space inside the case was taken over by a flat toroidal transformer - this is a necessary measure, since the NAP 250 DR refused to work without it.
In appearance it is difficult to talk about something new. Have you seen components from the Naim classic range? So, we can say with a high degree of confidence that the Naim you saw is the twin brother (or just brother) of the NAP 250 DR.
Monolithic black body, which is slightly enhanced by a designer chiseled relief on the front panel. B, which is dimly illuminated in green when the device is turned on. The front panel is decorated with a round power button.
Standard power connectors have their own vibration isolation on all Naim Audio devices - this is one way to block vibrations from entering the case
The rear panel is not rich in switching. Its largest element is a label with the model name. On either side of it there are two pairs of terminals for connecting an acoustic cable, which are designed only for banana connectors. There is even an old English saying: “If you love Naim, get used to bananas.”
On the left side of the rear panel there is a network connector, on the right there is one XLR connector for receiving an analog signal.
This is how the Naim NAP 250 DR turned out. Externally - almost like all Naim, but inside - with special features.
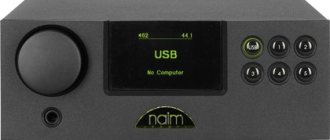
Naim Audio NAC 202: star, microprocessor and DIN
The next contender for debriefing is the Naim Audio NAC 202 preamplifier.
Externally, it differs in many ways from its fellow system - the NAC 202 has buttons on the front panel! When the device is operating, they are also illuminated in dim green, as is the logo in the center. In terms of functionality, the buttons are designed to select inputs, although they can also be switched from the remote control.
Style cannot be hidden behind buttons!
The NAC 202 was designed based on a more budget preamplifier - the NAC 152 XS. The main changes during the upgrade affected the organization of grounding inside the device - new boards were added, the grounding of which is organized according to the “star” type.
The essence of this implementation of grounding is that all voltages in the circuit are measured and counted relative to one specific point. This solution, according to Naim designers, made it possible to achieve a more open, transparent and airy sound.
The functionality of the buttons on the front panel is duplicated on the remote control
Then drastic measures were taken: a microprocessor was added to the circuit, which was allowed to control everything that it could potentially control (of course, without harming the sound). One of the most important points is that the microprocessor controls the protection circuits, which constantly monitor all power circuits and, if anything happens, will safely turn off the NAC 202.
Having resolved the problems with internal power, the engineers set to work on the functionality: adding a power input for single-brand StageLine and Prefix phono preamps. Then the NAC 202 was deprived of almost all RCA standard connectors, leaving only a couple - because the preamplifier cannot do without “tulips” at all. However, judging by the abundance of branded DIN connectors, it can be understood that the NAC 202 has a clear focus on working with fellow brands.
The contact “pins” on wires with DIN connectors also have a small amount of intentional play - be careful with them!
To power the Naim NAC 202 with clean, smooth, quiet current, we used a Naim Audio HiCap DR power supply. As you can tell by the DR in its name, the HiCap is equipped with the same discrete voltage regulators as the NAP 250 DR.
And this is not at all surprising: knowing how important the issue of proper power supply is for Naim, they simply could not entrust the role of an external power supply to a device that does not have the letters DR in its name. They used to trust it, but then DR had not yet been invented.
Naim NAP140 power amplifier clone kit: review and assembly
I got the idea to assemble and listen to well-known amplifiers with relatively old transistor circuitry. It became interesting why there are circuits that have been alive for 30-50 years and are still considered very musical. After listening to a couple of options, I’m going to leave the one I like and put it into a case.
Class A (JLH 1969) I have already assembled and listened to, I liked it very much, although I haven’t had the final setup and instrumental measurements yet. Next up is the very famous (but very controversial) Naim NAP140 amplifier. Controversial because the circuit does not involve anything outstanding, but these amplifiers are highly valued and are still produced with almost the same circuit.
One of the versions, NAP140 below.
Story
English engineer Julian Vereker in the early 70s developed a power amplifier circuit, which formed the basis of the future NAP140. A company was founded to produce audio equipment, mainly known for its amplifiers, which, by the way, still exists. Amplifiers based on the same circuit have been produced for 40 years.
Naturally, there were modifications and improvements, the circuits of power supplies and preamplifiers changed, but the basis was still the same.
The scheme, by the way, in modern times is as simple as three rubles together, but it still sounds.
Now there are several kits for assembling an amplifier, naturally the most common are from China, and even the board layout copies the original, sometimes with minor changes.
Unboxing and Review
So, the treasured parcel has finally been received. Everything was packed as usual, in a bag and then in a bubble wrap. It arrived normally, nothing was particularly wrinkled.
I open it, lay out the components... now you can see what actually arrived there. I tried to take more photos because usually there are questions about components from China, look and decide for yourself.
The board is made of very high quality, the mask, metallization of the holes - no complaints. Some places allow the installation of components of different sizes, which is valuable if you want to change, for example, capacitors.
Let's go over the components.
Resistors of different ratings, three powers, mostly of course 0.25 watts. Looking ahead, I can say that the measured accuracy of the nominal value was always within 1% and even better. The spread is minimal and always in one direction.
The electrolytes are the most common, let's say, rootless, the capacity ratings are within the limits, I don't know the voltage yet.
Transistors. Small ones with a fairly wide spread in parameters, I didn’t measure the big ones, there’s no point anyway in operating modes there’s nothing to measure with.
Capacitors are measured in heaps, the capacity is close to the declared one. The trimmers are the most common, setting them up will show how they work.
Assembly
I usually start with resistors, measuring each one before installation. Here we just form the legs and solder them.
All 0.25 watt resistors are installed; I will solder more powerful ones later.
Capacitors. I also checked the denominations so that there were no surprises. Here, of course, the deviations were expectedly greater.
There are not many of them, so everything is quick.
Transistors. It’s easier to start with small ones, of course. Each one was tested before soldering. The scatter was sometimes large, so I tried to group them together. It is necessary to take into account that, after all, a transistor can overheat when soldering (like any component) and for it this can be unhelpful or even fatal. I'll tell you how I solder transistors, maybe it will help someone.
Usually I put 4-5 transistors on the board and start soldering everything together. Those. I solder one leg of the first transistor, if you know where the collector is, it’s better to start with it, if not, then any one. Then the second, third,... then I go back and solder the second terminal of the first, which by this time has at least already cooled down. I solder the second legs and then the third ones in turn. This makes it easier to avoid possible overheating. But of course there are other options, depending on your convenience.
The pre-terminal cascade is installed on small radiators.
Next I soldered the diodes and terminals.
Before soldering the final stage, I installed the boards on bronze stands to correctly form the legs of the transistors. They bend quite easily, but there is no reason to do this several times; it makes more sense to immediately fix the installation height of the board in the case and mold the pins once and for all.
Preparing for setup
This amplifier requires some tuning, and the transistors must be provided with cooling. I found suitable pieces of the radiator, drilled holes for the board using CNC, then screwed them in to mark the holes for the transistors.
I cut an M3 thread and lightly sanded it.
Here they are ready to launch.
Conclusion
The set is suitable, the quality of the passive components is quite high, the active ones seem to be the same, but only a spectrogram will tell. Whether it’s necessary or not, everyone decides for themselves, I’m interested in digging around, setting it up, listening and comparing.
Ecosystem
The signal source in the system is the Naim Audio NDX2 streamer, a detailed test of which has already appeared on the pages of our magazine. To avoid a long read, we will not delve into the internal arrangement and external charms of this streamer.
In short, the NDX2 can be called one of the exemplary devices that other manufacturers would not be ashamed to focus on. This applies to both circuit design and user-friendly development.
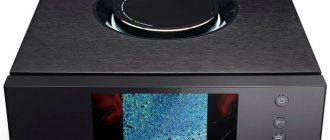
Icon of modern streaming
Only DIN, only hardcore!
All components were connected to each other via DIN connectors, which, according to the Naim developers, avoided “ground loops”. The fact is that the DIN connector carries a common ground for the left and right channels, while conventional RCA or XLR allow the formation of “loops”, since both the left and right channels are equipped with their own “ground”.
Thus, the switching diagram looks like this: NDX2 is connected to the NAC 202 preamplifier, which in turn is connected to the HiCap DR power supply. The NAP 250 DR power amplifier is also connected to the HiCap DR and receives the signal from the preamplifier through it. By building the connection in this way, we fundamentally comply with the precepts of Naim Audio engineers: no “ground loops”!
REFERENCE GUIDE
Naim Audio Receivers and Amplifiers
- Image
- Text
- Content
REFERENCE GUIDE
STRENGTHS
R O S S I U
- Contents
- 1 Connections 1.1 Analog audio connecting cables
- 1.2 Speaker cables
- 2.1 Wiring diagram
- 3.1 Equipment installation
- 4.1 General notes on connection
- 5.1 NAP 500 amplifier connected to NAP 500PS
- 6.1 General notes on connection
- 7.1 NAP 300 amplifier connected to NAP 300PS
- 8.1 General notes on connection
- 9.1 NAP 250 – rear panel connectors
- 10.1 General notes on connection
- 11.1 NAPV 145 – rear panel connectors
- 12.1 General notes on connection
- 13.1 NAP 200 – rear panel connectors
- 14.1 General notes on connection
- 15.1 NAP 155 XS – rear panel connectors
- 16.1 General notes on connection
- 17.1 NAP 100 – rear panel connectors
Another reality
The acoustic system involved in testing was two-way Totem Acoustic Forest floorstanding speakers. They look quite modest, without frills. But you shouldn’t make hasty conclusions with the Totem brand.
The musical material was flown over the network from Tidal - as it turned out, this is not so simple.
HiCap DR - strong, stylish
A monobrand system (with the exception of acoustics) seems to hint: I am coordinated, carefully tuned and ready to demonstrate the result that the engineers and developers were aimed at. It must be said that, considering the Naim Audio engineers and developers in this context, it seems that they were very serious.
The Naim sound is legendary, no exaggeration. In particular, when the conversation turns to integrated devices of this brand, you can hear both enthusiastic exclamations and languid sighs in the dialogue.
All connection diagrams via DIN connectors are carefully displayed in the instructions for the devices
When it comes to dividing the functionality of the integrated device into different “black boxes”, such a dialogue becomes more moderate in terms of languid sighs.
This system perfectly demonstrates how one and the same sound paradigm can be raised, educated and made more mature. Naim remains recognizable in intonation, but ceases to allow itself any minor excesses that were allowed due to the “youth” and versatility of the younger components.
First of all, this is expressed in a significant increase in realism to what is happening in the sound picture. That is, if an integrated speaker can afford to make some edits to the picture, then a system with separate components takes its tasks much more seriously: if the vocals were recorded without deep overtones, this is how you will hear them.
At the same time, a more universal device can allow itself to “turn up the heat” and embellish this or that moment. But this does not mean that the same integrated amplifier will be worse: I know music lovers who consciously abandoned the Naim separate path and found their perfect world in the company of a Naim integrated amplifier. These are two bordering universes that have points of contact.
A system of this level can often serve as a revelation. This happened this time too - and more than once.
The color display added color to the setup
It was thought that the inimitable academic vocals performed by Carlos Mena would no longer be able to amaze, since they had been listened to many times. What a surprise it was when in the composition “Ave Maris Stella” it turned out that Carlos’s vocal cords had different degrees of tension and vibration! Don’t think that this was analysis for the sake of analysis—I was ready to accept any result. And it turned out to be impressive!
By and large, these vibrations of the vocal cords can be heard on almost any system. But it’s one thing when the system just plays - and quite another if it becomes a source of realistic sensations, regardless of whether you were ready to perceive them or not. This can be compared to a movie: when there is an explosion in a movie, sometimes we can get scared, but we are unlikely to believe that this explosion is real.
This system with Naim Audio components is able to touch those strings of perception that are responsible for the analysis and systematization of real events in real life. As a consequence, what is happening in the musical material can often be perceived as the presence of a performer or instrument in the room, next to you.
Sometimes it is so realistic that a certain amount of discomfort is felt, as the listener’s brain intuitively begins to look for the person singing or the instrument playing. Naturally, this search ends in failure, which causes a slight dissonance.
Moreover, all of the above can be attributed to any genre or sound range.
Naim Audio = user friendly
Now we can move on to the disadvantages. But they will concern not the setup itself, but the scrupulousness with which he treats music playback. The owner of such a system will have to go through/update the music library considerably, since the slightest signs of compression in any of the ranges will be heard as clearly and realistically as Carlos’s vocals.
As a result, approximately a third of the material from Tidal’s personal playlists, which were carefully compiled for testing setups, was deleted there, “without leaving the checkout.” Naim is a witness to this.