At the beginning of our article, it makes sense to immediately note that the following method for setting up a radio is designed for an entry-level user, and there is nothing overly complicated in it. Note also that the quality of the reproduced sound usually depends only 33% on the composition and quality of the equipment components. Another third depends on the correct installation of the equipment, and the remaining 33% depends on the correct setup of the audio system.
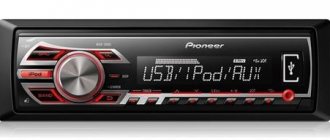
In this article we will look at how to set up a Pioneer radio. Adjustment recommendations are discussed using the example of the Pioneer DEH-1900UB model from the 2022 line. They can also be used to adjust other modern Pioneer car radios, since they all have the same menu. The exception is processor devices, the configuration of which is somewhat more complicated.
Equalizer
An equalizer allows you to make the sound more even - raise or lower the bass, mid and high frequencies. This is a rather fine adjustment of the audio system. It is not the entire sound range that is regulated at once, as in other menu items, but specific frequency bands. Different models have different numbers of them, depending on the class of equipment. There are five of them in Pioneer radios: 80 Hz, 250 Hz, 800 Hz, 2.5 kHz and 8 kHz.
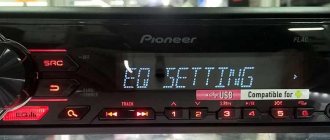
The equalizer is located in the “Audio” section of the settings menu, EQ item. In it you can select one of the preset standard settings. For those who are not satisfied with these options, there are two sets of user settings (Custom). You can switch between them both from the menu and the EQ button next to the joystick.
To make changes to frequency parameters in a custom setting, you need to select it with the wheel and press the joystick. Then turn the wheel to select one of the equalizer frequency bands. Press the joystick again and set the position from -6 (attenuate frequency) to +6 (increase). By doing this you can make some frequencies louder and others quieter.
There is no universal recipe for setting the equalizer on the radio. It is performed by ear depending on the preferences of the consumer. In addition, different adjustment options are selected for a specific genre of music.
We can only give rough recommendations:
- if heavy music is played, it is worth increasing the bass - 80 Hz (but not too much, +2–+3 is enough). Percussion instruments sound around 250 Hz;
- for music with vocals, frequencies of approximately 250-800+ Hz are needed (male voices are lower, female voices are higher);
- for electronic music you will need high frequencies - 2.5-5 kHz.
Setting the equalizer is a very important step. Using this tool, you can improve the sound quality many times over. Even if the acoustics are not very expensive and of high quality.
High pass filter
Next we find the HPF (High-passFilter) item. This is a high-pass filter that cuts the frequency of the sound supplied to the speakers below their specified limit value. This is done because it is very difficult for standard speakers (13–16 cm) to reproduce low frequencies due to their small diaphragm diameter and low power. As a result, the sound is reproduced with distortion even at low volumes. By cutting the low frequencies, you can get clear sound over a larger volume range.
If you do not have a subwoofer, we recommend installing an HPF filter at a frequency of 50 or 63 Hz.
You can then exit the menu using the return button and check the result. It is better to do this at a volume of 30.
If the sound quality is not satisfactory, or if you are outdoors and want to have a loud disco, you can raise the lower limit from 80–120 Hz or more. It is recommended to use the same level of boundary cut if you have a subwoofer. These measures will allow you to increase the purity and volume of the reproduced sound.
There is also an adjustment for the frequency attenuation rate. On Pioneer it comes in two positions - 12 and 24 dB per octave. We advise you to set this indicator to 24 dB.
Calibration
Here This is the longest and most difficult part of setting up your AV receiver.
Most AV receivers come with an installation microphone. Plug it in and run Auto-Calibration when prompted—it will measure your speakers and your room, set speaker distances and levels, and, in the case of fancier (read: more expensive) amp calibration systems, optimize the amp's performance to match its surroundings.
We recommend running auto-calibration as soon as you plug everything in - get rid of that fuss early on, the sooner you can start listening to your new home theater.
Additionally, the system will not function correctly until calibration is performed. Once the microphone is connected, simply follow the on-screen instructions to the letter and let the calibration take its course. Some only take a few seconds, while others may take more than five minutes because they are taking multiple measurements. We tend to go away and make tea for the longer ones.
- How to set up a home theater speaker system
If you have Dolby Atmos speakers installed, you will need to tell the amplifier this before calibrating.
Go to the manual speaker settings (you may have to drill down into sub-folders in the menu) to tell the amplifier if they're firing up Atmos-enabled speakers (like the KEF R50) or mounted in the ceiling - then it can calibrate accordingly. The amp will ask you about the ceiling height in your room, so have a tape measure handy.
You will also need to tell the amplifier whether you are using one or two subwoofers. Set the subwoofer volume to about halfway, run a calibration, and then adjust accordingly if it sounds too low (or not low enough) when playing a video clip.
If the calibration detects a problem with one of the speakers during measurement (or does not recognize it when it is present), double check that it is connected to the right jack - sometimes it appears when the speaker is out of phase.
Most calibration systems these days are largely accurate, but it's always worth delving into manual speaker settings to double-check distances and levels and adjust results if necessary. Trust your ears: if it doesn't sound right, it probably isn't, so adjust it.
The main thing you need to change is when the amplifier does not recognize whether your speakers are large or small. (this happens often).
You can even become a nerd like us and adjust your speaker levels using an SPL meter (or use a similar smartphone app - they actually work).
It's worth noting that if you ever change your speaker set, change their position, or move furniture in the room, you'll have to do the entire calibration again. So don't lose that tuned microphone.
We also recommend going back to the menu and manually turning off any dynamic range compression (sometimes called DRC) in the menu. This reduces the dynamic range of the amplifier and is really suitable for listening at night, so any loud bangs and glitches don't annoy the neighbors. If you're mainly going to be watching movies during more sociable hours, then you'll want to hear the soundtrack in all its glory, right?
- How to Combine Stereo and Surround Sound in One AV System
Low pass filter (subwoofer)
After we have dealt with the speakers, we will configure the radio for the subwoofer. For this we need a low pass filter. With its help, we match the frequencies of the speakers and subwoofer.
The situation looks like this. When we removed the bass from the speakers (set HPF to 80+), we got loud and high-quality sound. The next step is to “dock” the subwoofer to our speakers. To do this, go to the menu, select the audio item, and in it we find the subwoofer control section.
Attention!!! It doesn’t matter which connection method you use, before connecting the cable, all equipment must be turned off and de-energized.
Output sound from the TV to the home theater/receiver using an HDMI cable.
One of the most modern ways to transmit high-quality sound (not only audio, but also video) is the HDMI interface. As for transmitting sound from the TV to the receiver, this interface is also suitable, but with a few reservations - your TV and home theater must support Audio Return Channel (ARC) technology.
ARC (Audio Return Channel) is a technology that allows you to transmit surround sound from a TV to a home theater/receiver using an HDMI v 1.4 cable.
But in order to use this technology, your TV must have an HDMI (ARC) connector.
An HDMI connector with ARC support should also be on your home theater receiver; you can find this information in the technical documentation for the audio system.
If your TV and audio system support ARC, all you have to do is connect them to each other using an HDMI cable version 1.4, preferably 1.4b. Please note that the cable must be of high quality, because if the cable is of poor quality, problems may occur when playing audio on a home theater, in particular, the sound may disappear for several seconds.
After you have connected your TV and home theater/receiver with a high-quality HDMI v 1.4 cable, make sure that ARC is enabled on both the TV and the audio system. All that remains is to select in the TV settings to play sound from the audio system (instead of the built-in speakers) and enjoy high-quality sound.
This method allows you to achieve excellent sound quality without the use of unnecessary wires and, in my opinion, is the most preferable.
Play audio from your TV on your audio system using an optical cable.
Another way to transfer sound from a TV to an audio system is using an optical cable. To do this, make sure that your TV and home theater receiver have an optical cable connector. The TV must have an OPTICAL OUT connector, and the home theater receiver must have an OPTICAL IN connector.
If such connectors are available, all that remains is to purchase an optical cable of the required length and connect the TV and home theater.
What is the advantage of this method - the optical cable is not “afraid” of electromagnetic radiation, so there will be no interference when using it, plus it is capable of transmitting excellent sound quality.
Output audio from your TV to your home theater receiver using a coaxial cable.
If the first two methods do not suit you, then connecting using a coaxial cable (RCA-RCA) is your salvation.
First of all, see if such a connector is present on your TV and audio system.
After this, use a cable to connect the COAXIAL OUT (S/PDIF - OUT COAXIAL) jack on the TV and the COAXIAL IN jack on the theater receiver. After that, you can enjoy multi-channel sound on your home theater.
Set up audio playback from the TV to the receiver using an analog connection.
If all the methods described above do not work for you, you can use the simplest methods, namely, use an analog connection, for example, connecting using RCA (in common parlance - a tulip).
Use it to connect the AUDIO IN port on the receiver and the AUDIO OUT (LINEOUT) port on the TV. In addition to the “tulip”, you can use various adapters, for example mini Jack - 2RCA, SCART - 2RCA (if 3RCA, then the yellow one (transmits video) does not need to be connected), etc. The main thing is to choose an audio connector on the TV with an OUT prefix and on a home theater receiver with an IN prefix.
I would like to add that connecting via analog connectors reduces the sound quality, and if possible, it is better to use any of the first three methods.
Bottom line.
As you can see, there are quite a few ways to set up audio playback from a TV on a home theater. It's up to you to decide which one to use.
Video of sound settings from TV to home theater.
I really hope my article helped you! Please share the link with your friends:
Radio setup
Even your favorite music recorded on a flash drive or USB drive can get boring over time. Therefore, many car enthusiasts like to listen to the radio while driving. Setting up the radio correctly on the Pioneer radio is not difficult and can be done in just a few steps - you just need to select a band, find and save stations.
There are three ways to configure the radio:
When all 6 preset stations are full, you can switch to the next memory section. There are 3 of them in total. In this way, you can save up to 18 radio stations.
Turning off Demo mode
Immediately after purchasing and connecting the radio, you should figure out how to disable the demo mode, intended for displaying the device in the store. It is possible to use the radio in this mode, but it is inconvenient, since when you turn it off, the backlight does not go out, and inscriptions with various information run across the display.
Disabling demo mode is very simple:
- We go to the hidden menu by turning off the radio and holding down the SRC button.
- In the menu, turn the wheel to reach the DEMO item.
- Switch demo mode from ON to OFF.
- Exit the menu using the BAND button.
You can also set the date and time in the hidden menu by going to the System section. The time display is switched here (12/24 hour mode). Then open the “Clock Settings” item and turn the wheel to set the time. In the System section there is also a language setting (English/Russian).
If your settings are reset when you turn off the ignition, the article “how to connect a radio” has the answer to this question
