This time there will be no test, but rather a recipe for getting good sound on a minimal budget. First of all, the material will be of interest to those who do not have standard audio in their car, but have simple audio preparation and an empty “socket” for the head unit. This situation does not mean that you need to be content with the primitive “GU and four speakers” scheme; if you wish, you can get a more advanced system. Moreover, without spending a single extra ruble.
The idea for this small educational article has been brewing for a long time. She was inspired by a stupid stereotype that a normal audio system is expensive, and if it does not have separate amplifiers, then it can be treated with disdain, they say, there is nothing to expect from it anyway. As a result, even if a person loves to listen to music, but does not have enough budget and time for a developed audio system, he goes to the store, buys a simple head unit, two pairs of speakers and is content with the sound according to the principle “well, at least it plays like that.” Meanwhile, today there are many affordable head units with a built-in processor that allow you to get good results for some very ridiculous money.
Selecting the head unit and connection diagram
As an example, I took the JVC KD-X272BT head unit. In the latest generations of JVC and Kenwood, all models with Bluetooth have their own processor, and for clarity, I deliberately chose one of the younger models with such capabilities - its price today is something like 5,500 rubles.
This is a media receiver without a disk drive and with a short body; the main sources for it are USB flash drives and smartphones connected via Bluetooth. I won’t describe the capabilities on this part, I’ll just note that the device reads FLAC files from flash drives, and at a resolution of up to 96 kHz / 24 bit, and when transmitting audio via Bluetooth, it uses AAC (Advanced Audio Codec) encoding - this gives higher quality sound than with the standard SBC (Subband Codec) codec.
Plus, I’m personally attracted to JVC by proprietary features like K2 signal processing technology, Space Enhancement, Sound Response functions, etc. In my opinion, in this price segment, JVC’s “enhancers” are implemented most competently and correctly - this is reflected in their extensive experience in developing equipment for recording studios.
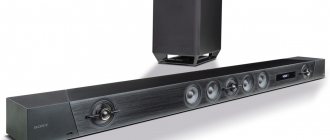
But in our case, the main attention should be paid to the connection features and settings options. The JVC KD-X272BT model has only one pair of line outputs, and this is quite enough for us - you can connect a subwoofer amplifier or an active subwoofer to it. The acoustics are connected directly to the head unit, and in our case this can be done not exactly as is customary. This, in fact, is the main trick and the main theme of this article.
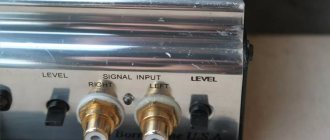
Let me explain briefly. As a standard, head unit outputs are designated Front and Rear, i.e. for front and rear speakers.
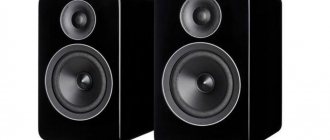
We will build the system differently - according to a channel-by-channel scheme. In such a system, all four outputs work entirely for the front speakers, and the tweeters and midbass speakers in the doors are connected directly to the head unit, without crossovers. There will be no rear speakers in our system at all.
To do this, we need to switch the head unit from 2-Way mode to 3-Way mode. In JVC, this is done directly from the sound settings menu; you need to find the “Crossover Type” item. This is an important point, many people forget about it and tweeters are firing.
The second stage is to reconnect the wires in the ISO chip itself. This is done differently in different head units, but in JVC and Kenwood, switching to channel-by-channel requires the least amount of effort. The Front outputs become mid-bass speaker outputs, and the Rear outputs become tweeter outputs.
In this situation, all that is needed is to disconnect the outputs for the rear speakers from the ISO chip (after all, there will be no rear speakers in our system) and connect the wires to the tweeters instead. In a standard ISO chip, this will be a green pair of wires (in the standard wiring it went to the rear left speaker, but now we connect the left tweeter to these outputs) and a purple pair of wires (there was an output to the rear right speaker, now it is an output to the right tweeter). Everything else, including the wiring to the mid-bass speakers in the front doors, remains unchanged, so there's no need to touch anything else.
Comments and reviews
During installation work, one must strive to preserve both the appearance of the interior and the integrity of the trim, which requires care when removing the trim material.
Therefore, now let’s move on to the question of how to connect 4 speakers to a radio without an amplifier, and consider in detail all the stages of the procedure. This castling allows you to eliminate in the future the unpleasant rattling of plastic caused by loud music that irritates many car enthusiasts. In this case, the negative wire is marked with a black stripe.
When wiring, for reliability, you can use plastic clips. To connect the speakers in the car to the new radio yourself, use a Euro standard adapter.
Connecting a radio from Andrey Serebrekov. In any case, installation requires some modifications.
Read more: Loop phase zero measurement
It is enough to connect the battery terminals to the speaker terminals for a second. When choosing a subwoofer, it is worth considering that it has two channels at once.
If the speaker registers with an ohmmeter and does not make a rustling sound when you press the diffuser, then it is working. If, of course, you want to get maximum power sound, not spoiled by interference and interference. Electrical wiring So: The next stage of the operation is electrical wiring. The rear right column should be aimed at the driver, and the left column at the front passenger. In modern cars, a special ISO standard connector is provided for connecting the car radio.
To help car enthusiasts
Connection algorithm and its subtleties How to connect speakers to a car radio and not harm the device and sound quality is not an easy question, due to the fact that modern technology is so stuffed with all possible devices that these are far from simple tape recorders from years ago. As for the second pair of speakers, they are located in the rear of the cabin. Some recommend doing it this way, others differently, but they are right about one thing - this is an electrical circuit - the laws of physics. To install a car radio in this case, you will have to purchase the appropriate connector and connect it yourself. It must be remembered that the cable cannot be pulled without insulation through metal or plastic in the machine.
Like it or not, some pieces of wire will go along the floor. The operation of such wires is relevant if the power of the audio speaker is no more than 20 W; usually the diameter of such speakers is 13 cm. How to connect the Speaker to the Tape Recorder
Briefly about the advantages of channel-by-channel connection of acoustics
For beginners, I will briefly explain the advantages of the channel system. A kind of easy educational program. In conventional systems, crossovers “split” the audio signal, sending high frequencies to the tweeters and low and mid frequencies to the midbass speakers. This is necessary so that the speakers in the doors do not “interfere” with the tweeters at higher frequencies, and the tweeters do not burn out due to the broadband signal being sent to them. As a result, tweeters and door speakers reproduce only those frequency ranges that are assigned to them, and not everything in a row.
In per-channel systems, the usual crossovers are not used; midbass speakers and tweeters are each connected directly to their output. In this case, the task of “dividing” the sound signal into the appropriate ranges is taken over by the head unit. In the mid-bass channels, a low-pass filter (low-pass filter) is used - it passes what is below the specified frequency, and in the tweeter channels, a high-pass filter (high-pass filter) is used - it passes to the tweeters only those frequencies that are higher than the value set in the menu.
This whole thing is flexibly configured in the menu - you can specify yourself up to what frequency the signal will be sent to the midbass speakers, and above what frequency to the tweeters. You can set the slope of the filters, i.e. how much the signal outside the passband will be attenuated. This flexibility allows you to more accurately match the sound of midbass speakers and tweeters depending on how they are installed relative to each other - each car will have its own optimal setting.
I believe there is no point in writing a treatise on the intricacies of tuning; the main thing now is to understand the principle itself - what is being configured and for what purpose. The only thing I note is that as a starting point you can specify a frequency of 4 kHz and a slope of 12 dB/octave for filters, and then proceed from these values.
Radio sizes – 1DIN and 2DIN
You can listen while parked without turning on the ignition. In addition to different types of acoustic systems, speakers are divided by standard sizes, the choice of which depends on the installation location and the goals pursued. When connecting the speakers to the radio, be sure to maintain the correct polarity, otherwise the sound will be of poor quality, since the acoustics in this case will work in antiphase.
If the car already has seats provided by the manufacturer, this is considered a big advantage. As a result, I didn’t notice any significant changes, but still the interior became more saturated with music and the sound is now much better quality! In this case, it is necessary to fulfill a number of the following conditions: measures are taken aimed at vibration isolation of the doors, which will avoid rattling when playing low frequencies; a closed volume is made inside the door, which will provide detailed sound; the speaker is securely fixed to the surface of the door; soundproof the door to reduce noise levels from outside; they carry out treatment against vibrations and squeaks of the door trim, which will avoid rattling and overtones when listening to music loudly. Their original shape and non-standard sizes save them from theft.
For this purpose, an additional acoustic podium is built into the door. How to connect 2 ohm speakers and how to connect a car audio speaker cable with your own hands
A little about how to use the delay function
Another advantage of systems with channel connection (at least specifically in our case with the JVC KD-X272BT and other processor head units) is the presence of a delay function. In the English-language menus of such devices, it is called Time Alignment, literally “time alignment.”
This function allows you to delay the signal at the outputs for a split second and thereby, as it were, virtually “move aside” the speakers connected to them. Based on the time of arrival of the sound wave to the right and left ears (in the case of an audio system, from the right and left speakers), our brain determines the direction to the sound source. By delaying the signal from nearby speakers, you can get a correct and uniform sound stage in your car and get rid of the effect of sound “sticking” to the speakers.
The principle of setting comes down to setting delays in such a way as to virtually equalize the distance to all speakers from the listening point (for example, from the driver's seat). Hence, by the way, the English name of this function – Time Alignment.
A nice convenience of the latest generations of JVC (including the KD-X272BT model) is the ability not to set all delays manually from scratch, but to select a listening point in the “Position” menu (for example, in front on the left, i.e. for the driver’s seat), and the delays will already be set taking into account the average location of the speakers - then, if desired, they can be “moved” in the “Distance” menu. The principle, I think, is already clear - we look at which speaker we have the farthest away, and “move aside” the rest to equalize the distances.
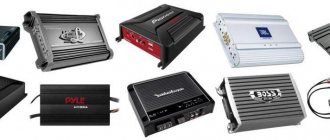
Connect the amplifier to the car
To properly organize sound in a car, you first need to understand the types of subwoofers, amplifiers and the location of speakers, and then choose the correct connection diagram and correctly lay out the speaker wiring. Stories from our readers “Fucking basin!!! Otherwise, it becomes necessary to treat the inner surface of the interior door trim, the inner surface of all plastic parts, the inner surface of the ceiling, the roof of the body, and pour damping liquid into the mirror with vibration-damping materials. Speaker bands - speakers, acoustic system, acoustics - the number of speakers in the acoustics, which each reproduce their own frequencies. Accordingly, it is physically unsuitable for wires. The simplest design with no air holes. A significant portion of high and bass frequencies are not transmitted, and the natural overtones of musical instruments are lost. All amplifiers are designed to operate with a certain load impedance.
The amplifier may have a certain class: AB and D. The wires going to the speaker systems should not be parallel to the power cables. It turns out that the influence of the door on the performance of the midbass can be neglected, and the speakers should be chosen from some well-known company - the more expensive, the better. If it does not decrease, but increases, then the polarity of connecting one of the speakers is not correct. A two-coil subwoofer, as well as two, three or more subwoofers, can be connected in four ways: each coil separately, parallel connection of coils, serial and combined
When connecting from a radio, there is no point in selecting speakers based on power. In principle, there is nothing complicated about this, but due to ignorance or in a hurry, you can make an incorrect connection, at best the system will not sound right, and at worst, failure of a component or the entire system. Typical car audio system circuits: two-way (two-way audio system)
Two words about the equalizer
I won’t put much emphasis on the remaining settings; all of them, including signal equalization (amplification or attenuation of individual frequencies), remain beyond the scope of today’s topic. I’ll just note that in modern processor-based power units it has become the norm to have a developed 13-band equalizer - with so many bands you can not only adjust the character of the sound, but also to some extent neutralize the acoustic features of the cabin.
However, this is already a jungle of fine adjustments, which are not always in demand for a beginner, but the very presence of such a tool can in any case be considered a plus.
Briefly to the point
This article is not intended for experienced installers working with expensive, serious systems. It is for those who want to get decent sound, albeit without audiophile fanaticism, and not what is usually offered on a minimum budget. Its task is to show that having a head unit with the required set of functions, you can build a decent channel-by-channel system, which will certainly be two orders of magnitude better than conventional budget systems. And, by the way, since we are talking about cars in the lower price segment, standard audio systems can also easily be bypassed.
And all this, as you can see, without a single additional ruble spent - only the head unit, front speakers and, if desired, a subwoofer link. And the money saved on rear speakers is better spent on better front speakers. The result is a ready-made recipe for an extremely affordable audio system with a very strong hint of SQ.
Source: Carmus Magazine