produces a wide range of low-frequency acoustic systems of various types and power. Passive and active speakers not only have traditional rectangular bodies, but also come in trapezoidal and cylindrical shapes. All models of low-frequency speakers with a built-in amplifier have linear and high-level inputs, which allows you to connect an active Mystery subwoofer in parallel with the car's audio speakers or use the linear output of a car radio to supply a sound signal. Low-frequency amplifiers are equipped with a low-pass filter (LPF), with a variable cutoff frequency, smooth sensitivity adjustment (Gain) and the ability to increase the gain in a narrow band (Bass). When connecting Mystery subwoofers, it is possible to use a remote output power control, for which a special connector is provided. The power terminal block has a socket for the “Remote” control bus. By applying a positive potential of 12 volts to it, you can turn on the power to the amplifier along with the head unit.
Connecting the Mystery active subwoofer
Active and passive acoustic systems have one significant difference. The active speaker is equipped with a low-frequency amplifier, which must be powered. How to properly connect an active Mystery subwoofer so that the speaker system works for a long time and without problems. This depends on the choice of signal source and the organization of power supply to the amplifier. The amplifier inputs allow you to supply an audio signal of different levels. Linear inputs are made in the form of two “Tulip” type connectors. They are labeled "LOWINPUT" and "Left" "Right" for the left and right channels respectively. These are low level inputs. They are supplied with a signal from the linear outputs of a car radio or other source. The channels are combined directly in the amplifier and the summed signal is sent to the loudspeaker. Since the signal level is small, it goes to the input of the pre-amplifier stage. You can connect the Mystery active subwoofer to your car parallel to the speakers of the car's standard system. High level inputs are used for this. They are connected to a typical car block, which is marked “HIGHINPUT”. Four pins “L+”, “L –” and “R+”, “R –” are connected to it.
The correct connection of the Mystery subwoofer to the car is carried out with the appropriate wires. Signals from the linear output of the car radio are supplied to the low-level inputs of the amplifier via a shielded coaxial cable with two “Tulip” connectors at both ends. The outputs of the head unit have the same connectors. The connection between an active acoustic system and car speakers can be made using a regular multi-core installation wire. In this case, the signal is supplied to the amplifier, bypassing the preliminary stage.
INTRODUCTIONCar security system MYSTERY MX.
INTRODUCTION
Car security system MYSTERY MX 203
developed
Tana in such a way as to reliably protect your car for many years. However, the reliability of the system largely depends on how correctly and efficiently the installation was carried out.
IMPORTANT NOTES
We strongly recommend that you always use a voltmeter
to check the electrical circuits of the car. Using the test light may damage the vehicle's on-board computer and/or cause the airbags to deploy.
Always disconnect the vehicle battery before
make electrical connections.
Before drilling holes in the instrument panel, check that
Are there any wiring harnesses or any other vehicle components in this area behind the panel that could be accidentally damaged? Use different types of wire connectors. Twisting the wires or using electrical tape to secure the connection may prevent the system from working properly.
We also recommend soldering the wire connections in the center.
pah, where the current exceeds 10A.
Please read these instructions carefully before
how to install the system. We recommend that the system be installed only by qualified specialists who have relevant experience in installing car security systems.
car security system installation guide
How to properly connect the Mystery active subwoofer
An important point of operation is connecting the “Mystery” active subwoofer to a power source. There may be several options for supplying power to the low-frequency amplifier:
- Battery connection
- Using the cigarette lighter
- Operation of an amplifier with a storage capacitor
Directly connecting the Mystery subwoofer to the battery is the most correct way, and when using a storage capacitor, the only possible one. It is not recommended to connect powerful devices through the cigarette lighter, so this connection scheme can only be used for systems with low current consumption and as a temporary measure. It is believed that the maximum current in the car cigarette lighter circuit is 10 amperes. The connection diagram for a Mystery active subwoofer in a car includes a fuse that is placed in the positive circuit. It is designed to protect the power cable from fire in the event of a possible short circuit. The fuse should be installed as close to the battery as possible.
It is recommended to install the fuse at a distance of no more than 30 cm from the battery, but in practice it is better to secure it close to the battery. The fuse holder has a mounting hole for a screw. The current strength for which the protection element must be designed depends on the cross-section of the cable, and this parameter is directly related to the current consumption of the active speaker system.
- 4.0 mm2 – 30 A
- 6.0 mm2 – 40 A
- 10 mm2 – 60 A
- 20 mm2 – 100 A
- 30 mm2 – 150 A
The table shows the maximum permissible values. It is possible to install a smaller fuse, but not a larger one. The fuse must blow before the insulation on the power cable begins to heat up. To lay the power line, you need to use a special cable designed for this purpose. For speakers with a power not exceeding 300 watts, the negative GND wire can be connected to vehicle ground using a bolt. To do this, unscrew one of the bolts, clean the area with sandpaper and degrease it. Make a closed loop on the cable and tighten it under the bolt and washer. To make contact more reliable, an additional Grover washer is used.
- Slotted box for subwoofer Ural TT 12 with port setting 35 hz
This method is not used for powerful sound speakers. The negative power supply is routed together with the positive bus from the battery to the amplifier. When wiring power circuits, the use of household wires such as ShVVP or similar is not allowed. When installing the Mystery active subwoofer in the luggage compartment, the length of the power cable can reach 4-5 meters. When laying the wire, the formation of loops and knots should be avoided. The edges of the technological holes through which the wire will pass may be sharp, so insulating sleeves should be used at the intersection points. If possible, it is best to lay power cables in a plastic corrugated sleeve.
Home amplifier from car
To use a car amplifier at home, we need a power supply and speakers (subwoofer optional).
I’ll warn you right away that the current consumption of some car amplifiers approaches the 40A ! This is a very high current. Therefore, not everyone will be able to find a suitable power supply for 12V and a current of 30 - 40 A :)
But to power the car amplifier, a computer power supply in AT and ATX format will do. Some models of computer power supplies can supply significant current via the +12V bus. Judging by the characteristics of the cheapest models that are now sold in stores, this is 12A. Top-end, expensive models give out 50 - 70A !
Such a block produces a current of 14A at the +12V output.
How to determine? We look at the characteristics of the power supply, the line “power along the 12V line”. We see, for example, 200 W. Divide 200 W by 12, we get the maximum current on the 12V bus
16 amps If the power supply is on hand, then look at the sticker on the case. All the block parameters are usually indicated there, including the maximum current for each bus.
All PC power supplies have yellow wires going to MOLEX and SATA connectors - this is +12V, and black wires are negative (common, GND ). I have already talked in more detail about using power supplies from a PC.
If you find a power supply with a lower current, for example, like I did with 12V ( 10A ), then you shouldn’t be upset. The amplifier simply will not be able to work to its full potential and will play quieter. Now about the connection.
How to connect the Mystery active subwoofer
The optimal connection scheme would be to send an audio signal to the “LOWINPUT” connectors. The audio frequency voltage, in this case, is removed from the linear outputs of the head unit. Since the signal is taken before the output stage of the ULF radio, the distortion coefficient and the percentage of noise will be significantly lower than with another connection. The Mystery active subwoofer is connected to the car using a shielded coaxial cable with RCA connectors at the ends. If a cable of the required length is not available, it is easy to make it yourself. When laying all cable lines inside the vehicle, they should be firmly fixed using plastic ties.
How to connect speakers and speakers to the Mystery subwoofer. Car speakers are connected to Mystery through a block that combines high-level inputs. The pros and cons of each channel are arranged vertically and marked with corresponding icons. For connection, you can use any type of wire, except single-core. The instructions for the Mystery active subwoofer describe in detail how to connect the device.
Peculiarities
The popularity of Mystery car radios among car enthusiasts is largely explained by the company's pricing policy. The manufacturer maintains prices at the same level regardless of exchange rates, so device prices are affordable to a wide range of buyers. The company always monitors the latest trends in the world of electronics, which is reflected in the release of new models.
Mistreri car radios are multifunctional. Despite the large number of models, the company produces high quality devices. The peculiarity of the devices is that they can be connected to standard connectors. Therefore, any car enthusiast can do the installation independently. Car radios are equipped with connectors for connecting various digital devices that can reproduce well-known formats.
The devices are equipped with built-in processors that are responsible for sound quality and frequency. With the help of equalizers, the user has the opportunity to adjust the sound according to his taste. Models are equipped with backlighting with a choice of colors. The built-in GPS navigator makes it possible to save on the purchase of navigation devices.
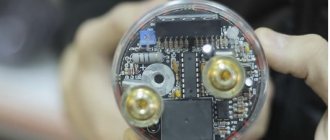
Active subwoofer Mystery pinout
In addition to the standard “Tulip” connectors, rectangular contact blocks are installed on the rear panel of the Mystery speakers. “HIGHINPUT” is used to send audio signal to the amplifier input from car speakers. The “POWER” connector is designed to provide power to the device. Power pinout for connecting the Mystery active subwoofer. There are six pins on the block. +12V power is supplied to the left pair of contacts. The two vertical pins are combined and soldered to the battery power cable. The same must be done with the two GND pins. The use of twists is strictly prohibited. Only careful soldering followed by insulation of the connection.
The top contact in the middle row, marked “REM,” is designed to control the power supply to the active speaker. Connecting the Mystery active subwoofer from the chip provides power to the amplifier at the same time as the car radio is turned on. To do this, the “REM” contact of the head unit is connected to a similar contact on the amplifier block. A situation may arise when it is difficult to find a connector (chip) for connecting power. It is not recommended to hang any homemade pins on the connector. The safest way is to open the device and solder the conductors directly to the board, bring them out, solder them onto the power cable from the battery and carefully insulate them.
Review of 2 din car radios Mystery
Now let's look at the most popular models from this manufacturer with this standard size.
Mystery MDD-6280NV
Car radio 2 din mystery
Multimedia center with a standard size of 2 din. Features the following features:
- Built-in screen 6.2 inches;
- There is a USB port;
- There is a TV tuner;
- The car radio accepts SD memory cards;
- The model is equipped with multi-illumination;
- There is a CD/DVD drive that plays all modern formats and reads most media.
Other options
| Included | instructions/wires/remote control |
| Audio input | on the front panel |
| Display | touch/6.2 inches |
| GPS receiver | There is |
| TV tuner | There is |
| Radio | FM/AM |
| iPad support | There is |
Mystery MDD-6250BS
Mystery 2 din car radio and its connector
Car radio for 10 thousand rubles. Has the following capabilities:
- Built-in widescreen touchscreen monitor with a diagonal size of 6.2 inches;
- The typical size of the multimedia system is 2 din;
- There is a multi-color backlight with the ability to adjust and change;
- It is possible to combine controls with buttons on the steering wheel;
- Supports all modern formats and media;
- Built-in TV tuner that supports Pal, Secam and NTSC color standards;
- The radio tuner is capable of receiving three bands: FM/AM/VHF;
- There is Bluetooth support;
- The radio is equipped with a slot for micro SD memory cards;
- This car radio has 2 video outputs. There is a separate video input for connecting a rear view camera. In addition, there is a separate output for a subwoofer (see Installing an active subwoofer in a car on your own);
- The standard power of the car radio is 4x50 W.
MYSTERY MDD 6240S
Mystery MDD-4310S
2 din car radio
A car radio with a smaller screen. It has the following characteristics:
- The typical size of the car radio is 2 din;
- The screen diagonal size is 4.3 inches, but the song being played, folders with numbers and the current time are viewed no worse than on a larger monitor;
- There is a TV tuner. It is built-in and allows you to view video, as well as process medium and high quality signals;
- There is a radio tuner, although without RDS support;
- Separate subwoofer output and rear view camera input;
- Built-in memory. There is support for SD/MMC memory cards;
- There is USB;
- The kit includes a remote control that allows you to customize the radio to your liking, even from the back seat.
Mystery MAR-878UC
Non-standard 2 din car radio
Car radio without a built-in screen. Has the following characteristics:
- The car radio is equipped with a USB port;
- The radio tuner is very good with a memory for 30 stations in the FM/AM/VHF bands;
- There is a slot for SD/MMC memory cards;
- There is an audio input on the front panel;
- Excellent quality equalizer;
- Comes with a full-featured remote control;
- The backlight can be changed depending on your own preferences;
- There is an ISO connector.
Mystery MDD-7800BS
An entire multimedia system with a built-in screen. The following parameters and characteristics distinguish it from other models:
- Typical size 2 din;
- Electrically driven widescreen built-in monitor. 7-inch LCD display with active matrix and wide viewing angle;
- There is a USB input;
- The car radio control is completely touch-sensitive;
- There are many inputs and outputs: subwoofer/rear view camera/2 video outputs, etc.
Mystery MDD-7550BT
Car radio with a fully motorized screen position mechanism. Features the following features:
- Built-in widescreen LCD monitor 6.5 inches;
- Touch control with graphical interface;
- Supports all known formats and media;
- There is Bluetooth (see Bluetooth for car radio: do it yourself);
- Menu in Russian;
- The kit includes a fully functional remote control;
- Audio output linear 5.1;
- It is possible to move the controls to the steering wheel (to standard buttons);
- The output power of the device is high - 4x55 W.
The Mystery car radio models described above with a standard size of 2 din are quite easy to install in modern cars with your own hands. It is enough to have instructions in Russian, a detailed video overview of the process, and photo materials. The prices for the models vary and you will have to choose depending on your own budget.
Mystery subwoofer installation
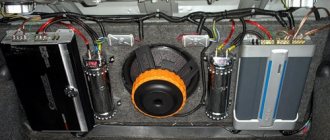
Connecting the Mystery subwoofer to your car depends on where it is installed. The dimensions of most devices do not allow them to be installed inside a car, so the most convenient place to place a low-frequency speaker system would be the luggage compartment. In this case, connecting the Mystery active subwoofer will be done with long wires. In addition to the rigid fastening of the wires, it is necessary to provide for fixation of the device itself. Due to shaking and vibration, an unsecured speaker will move throughout the trunk. When the equipment is running, this can lead to breakage of power wires, short circuit and possible fire. To attach low-frequency acoustics, you can use belts or spring bars that are attached behind the back of the rear seat. If this is difficult to do, then you can screw corners to the false floor of the luggage compartment using self-tapping screws, which will securely fix the acoustics.
- How to connect a subwoofer to a music center
Connecting the Mystery MTV 200A subwoofer is done in the same way as other models of this brand. All connectors on the rear wall of the device are unified and have standard designations.
How to connect?
Advantages and disadvantages
How to connect an active Mystery subwoofer
The most important advantages of this active subwoofer are the following functions:
- It is equipped with a built-in amplifier, due to which an even higher sound level is achieved.
- This device is very compact in size.
Note. Due to this, it can be easily placed, as mentioned above, directly under the car seat.
- Thanks to the quality characteristics of this speaker, it is possible to reproduce sound with clear low frequencies. At the same time, due to this, the frequency of the sound will be slightly increased, which is why it will be clearer.
- The speaker costs very little - only 2500 rubles. But despite the price, it is very reliable.
- Its sale began in the Russian Federation in 2012. That is why purchasing such a device will not be difficult, since it is now quite common.
- And although the device has a very compact size, the sound quality can be called very good. That is, the subwoofer (see How to make a subwoofer: practical tips) has excellent sound output.
How to connect an active subwoofer Mystery
- It has a stylish design (although this is not so important, because it will still have to be “hidden” under the seat). However, due to this, it can be placed near the rear window without any problems.
But in no case will it affect the overall style of the car. The body is aluminum and very durable. As a matter of fact, you can be convinced of this only once you see this speaker.
Note. The speaker can easily withstand even the strongest mechanical shocks. And this is a fairly common occurrence, since the device is located directly under the car seat.
- The remote control of any system perfectly controls the volume of the subwoofer. Also on its body there are several additional adjustments that facilitate the operation of the subwoofer itself.
Remote control that fits directly on the steering wheel
- The sub has an overload and power-on indicator, thanks to which the user can always understand whether the device has already booted up or whether it needs to wait a little longer.
- Suitable for any car as the speaker is universal.
- It is easy to connect, but this requires special knowledge.
Note. You can get them after reading our instructions.
This device has few disadvantages.
But still they exist:
- Connecting a subwoofer is specific, so you will have to tinker with it a lot.
Note. You should not purchase this subwoofer based solely on its price. This technique is perfect for those who are installing a subwoofer themselves for the first time. It will fit into a car that requires not too high acoustic parameters.
Types of low-frequency audio speakers
A subwoofer is a sound speaker designed to reproduce improved quality of low frequencies that are not available to conventional audio speakers of standard car equipment. Subwoofers are divided according to their types:
- active;
- passive.
The active subwoofer comes with a built-in power amplifier to remove low frequency loads from the main car audio amplifier. And also, its own crossover (a device for dividing frequencies into high, mid, low, etc.), which simplifies the coordination of the subwoofer with the acoustics of the standard radio.
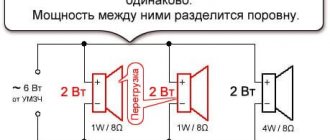
A passive subwoofer does not have a separate (personal) power amplifier and is connected to standard speakers. Which, as a result, negatively affects the sound quality of the car's stereo system and causes additional overload on all output channels. As a result of this, the volume and dynamics of the sound decrease.
Scheme
Types and models
Mystery car radios are in demand in the automotive market. Some models will be discussed below.
MDD 6270NV
This model is a radio in a stylish case with a touch screen. One of the advantages is simplicity and ease of use. The kit includes a head unit, a powerful antenna, a GPS navigator, and a TV tuner. To make it more convenient for the driver to control the device, control buttons can be installed on the steering wheel.
- support for various devices, which allows you to listen to music from memory cards, play videos from CDs, etc.;
- for connecting devices, the radio is equipped with a USB port;
- An additional video input is provided, which makes it possible to connect a rearview camera;
- affordable price.
MMD 6220S
Externally, the receiver looks attractive, the size is 2 din. The screen is 6.2 inches, with switch buttons on the sides. The volume is changed using a knob, a similar switch for searching by radio frequency. There is a color backlight that can be changed. The choice of colors is quite wide. The appearance can be changed by selecting a picture of the car brand as the screen saver.
The radio is equipped with connectors for a rear view camera, a sambufer, a TV antenna, for reading SD memory cards, as well as a USB port and connector. The controls are simple. The time and date are displayed on the screen. At the bottom there is a button to switch the device to night mode. The device is equipped with an equalizer and a good radio receiver. It is possible to play CDs and DVDs.
MDD 7120S
The Mystery MDD 7120S car radio has a 7-inch diagonal LCD touch screen with high image quality. This model is a universal device capable of reading information in different formats and media (CD/DVD/MP3/USB). On the front panel there is a port for USB and SD cards (video by Serega Soviet).
Connecting the Mystery subwoofer amplifier to the Pioneer radio in a VAZ 2114 car
How to connect a subwoofer to a radio without an amplifier according to the diagram below, in more detail.
First of all, we need installation tools and materials:
- fuse.
- capacitor.
- electrical wire
- pliers.
- insulating tape.
- adjustable and spanner wrenches.
- Connecting three (third) amplifiers
Settings
After connecting the device, you need to make the sound as powerful and clear as possible. Without proper settings, the sound of the subwoofer may disappoint you.
To get a sound with clear lower and higher frequencies, you need to buy a special disc.
It is used to configure audio systems. The recorded melody allows you to hear all the errors in the operation of the device.
Listen to the melody playing in the speakers and at the same time adjust the subwoofer settings. This should be done at low volume. When the sound suits you, turn up the volume and once again make sure that the melody sounds without errors.
High-quality bass can be achieved with the right setup, but the subwoofer box also plays an important role. The case can be purchased or made independently.
How to use our instruction site OnlineManuals.ru
Our goal is to provide you with quick access to the contents of the manual for - MK-2.80. Using online viewing, you can quickly view the contents of the instructions and find a solution to the problem with - MK-2.80.
For your comfort
If flipping through the user manual - MK-2.80 directly on the website is not very convenient for you, there are two possible solutions:
Good nutrition is the key to success
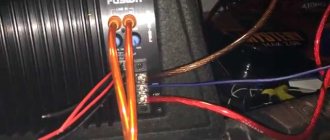
The amplifier connection procedure begins with the power wires. Wiring is the most important element of a car audio system; the volume and sound quality depend on it. Amplifiers need a stable power supply, otherwise the power will not be enough and the sound will become distorted. To understand why you need to pay attention to the quality of wiring and how it affects the sound reproduced by a loudspeaker, you need to know what a music signal is.
Some suggest that it represents a sine wave, however, the musical sinhala is characterized by a large difference between the normal and peak value. If sharp signal bursts are not important for car speakers, then in the case of an amplifier the situation is completely different. If the signal exceeds the permissible power for even a second (or even a millisecond), then these “anomalies” will be audible even to those who cannot boast of a good ear for music.
If the car amplifier is connected properly, the signal will flow through the wires undistorted. Carelessly done work or incorrectly selected wire cross-section will result in the sound being more compressed, rough and sluggish. In some cases, wheezing may also be clearly audible.
How to choose a wire cross-section?
Wire is the most common metal with a certain level of resistance. The thicker the wire, the lower the resistance of the wire. To avoid sound distortion during large voltage fluctuations (for example, when playing powerful bass), you must install the correct gauge wire.
It is worth noting that the cross-section of the positive cable should not be larger than the negative one (the length does not matter).
An amplifier is considered to be a rather electrically intensive device.
For its effective operation, high-quality grounding is necessary so that it is possible to receive the necessary energy from the battery. To choose the correct wire cross-section, you need to make some calculations. First, look at the instructions for the amplifier (or directly at the box from the manufacturer, if there is no documentation, use the Internet) and find the rated power value (RMS) there. Rated power is the signal power an amplifier can deliver over an extended period of time to one channel of 4 ohms. If we consider four-channel amplifiers, they usually have a power of 40 to 150 watts per channel. Let's say that the amplifier you purchased produces 80 watts of power. As a result of simple mathematical operations, we find out that the total power of the amplifier is 320 W. Those. How did we calculate this? It’s very simple to multiply the rated power by the number of channels. If we have a two-channel amplifier with a rated power (RMS) of 60 W, then the total will be 120 W.
After you calculate the power, it is advisable to also determine the length of the wire from the battery to your amplifier and you can safely use the table to select the required wire cross-section. How to use the table? On the left side the power of your amplifier is indicated, on the right you select the length of the wire, go up and find out what cross-section you need.
The table shows the cross-sections of copper wires, remember that a large number of sold wires are made of aluminum coated with copper, these wires are not durable and have more resistance, we recommend using current copper wires.
Fuse selection
In order to secure the connection of the car amplifier, it is necessary to protect the power supply from the battery to the amplifier using a fuse. Fuses should be placed as close to the battery as possible. It is important to distinguish between a fuse that protects the device itself (whether it is an amplifier or a radio) and a fuse installed on the power wire.
Manual
- Image
- Text
MANUAL
Thank you for purchasing the MMTD-9122S MMTD-9122S in-car multimedia system with a retractable digital 7" TFT LCD touchscreen monitor.
Please read this user manual carefully to ensure your safety before connecting, operating and/or setting up this equipment. Please keep the user manual for future reference.
Precautionary measures
— Before you start connecting, make sure
that the voltage in your car corresponds to 14.4V DC with a minus on the body.
— Disconnect the “-” battery terminal
before starting installation to reduce the likelihood of damage to the device and prevent short circuits during connection.
— Make sure that the connections are colored
wires are made in accordance with the diagram. An incorrect connection may damage the receiver (cause malfunctions) or damage the vehicle's electrical system.
— Make sure that the negative wire is connected
connected to the speakers, connected to the negative terminals of the speakers. Never connect the “-” speaker wire to the car body. To ensure adequate ventilation of the instrument and reduce the risk of fire, do not block the cabinet vents or radiator area.
— Wire connection is not allowed
power the radio directly to the battery, bypassing the ignition key, as this will lead to accelerated battery discharge while the car is parked.
— After completing the connection and
Before turning on the device for the first time (including replacing the battery), using an object with a pointed end (for example, a ballpoint pen), press the RESET button located on the body
All radios to initialize the system.
— The device is designed to operate in
circuits connecting the negative terminal of the battery to the metal body of the car (ground).
— If the player is turned on, do not
Look for short circuits between the speaker wires or to the car body. This may cause the power amplifier to overload and fail.
— Turn off the device when it is not
used. (Unplug the receiver from the power source if it will not be used for a long period of time.) Before moving the device, remove the disc from the disc loading window.
Do not install the receiver in the following locations:
- Where it can interfere with control
move the steering wheel or gear shift lever, otherwise it may cause a traffic accident;
— Where it can interfere with the functioning
protection devices such as airbags, otherwise it may cause a fatal accident;
— Where it blocks the driver’s visibility.
— While driving, do not try to control
act as a receiver. Otherwise, it may cause a traffic accident. If you need to operate the device while driving, keep your eyes on the road or it may cause an accident.
— The driver is prohibited from viewing the image
zheniya while driving. The driver should watch video programs only after the car has come to a complete stop in a safe place (in a parking lot).
Connecting interconnect wires and control (REM)
To lay the cable, you need to find the linear output on the radio. The linear output can be recognized by the characteristic “bells” that are located on the rear panel of the radio. The number of linear outputs differs in different radio models. Usually there are from one to three pairs. Basically they are distributed as follows: 1 pair - you can connect a subwoofer or 2 speakers (labeled as SWF) If there are 2 pairs of them, you can connect 4 speakers or a subwoofer and 2 speakers (outputs are labeled F and SW), and when there are 3 pairs of linear wires on the radio, you can connect 4 speakers and a subwoofer (F, R, SW) F This is Front i.e. front speakers, R Read rear speakers, and SW Sabwoorer I think it’s clear to everyone what that is.
The connection will require an interconnect wire, which should never be skimped on. It is prohibited to lay the interconnect cable near the power wires, as various types of noise will be heard when the engine is running. You can run the wires both under the floor mats and under the ceiling. The latter option is especially relevant for modern cars, in the interior of which there are electronic accessories that create interference.
You also need to connect the control wire (REM). As a rule, it comes with interblock wires, but it happens that it is not there, purchase it separately; it does not need to be of a large cross-section - 1 mm2 is quite enough. This wire serves as a control for turning on the amplifier, i.e. when you turn off the radio, it automatically turns on your amplifier or subwoofer. As a rule, this wire on the radio is blue with a white stripe; if it is not there, use a blue wire. It is connected to the amplifier to a terminal called REM.
Mystery MCD
For the best performance of the multimedia system, you need to follow some rules. Most Mystery radios have almost the same connection principle. However, in some situations they may differ between different models.
When purchasing from a dealer, you need to purchase a special adapter. It will simplify the installation of the car radio. You can cope with the task without an adapter. Additionally, you should take a multimeter or voltmeter. They will help determine the functions of the wires. You can connect the cable to the connectors based on the colors. The latter may sometimes not coincide.
- Before starting installation, you must disconnect the negative terminal of the battery. This precaution is necessary to prevent short circuits during connection.
- After reading the manual, you can proceed directly to installation. You must strictly adhere to the proposed scheme. If the wire is incorrectly connected, the device will work poorly or not function at all.
- Connect the yellow or green wire to the positive terminal of the battery. The black wire is used for grounding. Bring it to mass. To power the red wire, it must be connected to the ignition switch.
- Pinouts should be carried out taking into account the information provided. Similar shades of veins are often used.
- Connect the blue wire to automatically activate the audio amplifier of the radio and antenna. The vein may have a white stripe.
- The orange connector is used to connect to the terminal that controls lighting switching. Black and yellow is for remote volume control.
After aligning the inputs, connect the outputs. Connect such conductors to the speakers. Attach wires of identical colors to one column. Finally, check that the device is working properly.
Amplifier connection diagram
Connecting a two-channel and four-channel amplifier
We have combined this section because these amplifiers have a very similar connection diagram, one might even say more simply, a four-channel amplifier is two two-channel ones. We will not consider connecting a two-channel amplifier, but if you figure out how to connect a four-channel amplifier, then you will not have any problems connecting a two-channel amplifier. Most car enthusiasts choose this option for their installations, since this amplifier can connect 4 speakers, or 2 speakers and a subwoofer. Let's look at connecting a four-channel amplifier using the first and second options.
Connecting a 4-channel amplifier to a battery is recommended using a thick cable. How to choose the right power wires and connect the interconnects, we discussed all this above. Amplifier connections are usually indicated in the manufacturer's instructions. When an amplifier is connected to an acoustic system, it operates in stereo mode; in this mode, this type of amplifier can operate under a load of 4 to 2 ohms. Below is a diagram of connecting a four-channel amplifier to speakers.
Now let's look at the second option, when speakers and a subwoofer are connected to a four-channel amplifier. In this case, the amplifier operates in mono mode, it takes voltage from two channels at once, so try to select a subwoofer with a resistance of 4 ohms, this will save the amplifier from overheating and going into protection. Connecting a subwoofer will not be a problem; as a rule, the manufacturer indicates on the amplifier where to get the plus to connect the subwoofer, and where to get the minus. Take a look at the diagram of how to bridge a 4-channel amplifier.
Connecting a monoblock (Single channel amplifier)
Single-channel amplifiers are used for only one purpose - connecting to a subwoofer. A notable characteristic of amplifiers of this type is increased power. Monoblocks are also capable of operating with resistances below 4 ohms, which is called a low-impedance load. Monoblocks are classified as class D amplifiers, and they have a special filter for cutting frequencies.
Mystery MMD
Some MMD versions may not have the black/yellow wire. There is simply no similar connector. The remote volume control function is not available in all cars. Its absence does not affect the quality of the device.
The conductors connected to the speakers deserve special attention. There is a thin black line in any pair of wires. It is used to designate the negative conductor. If you make a mistake and confuse it with a plus, low frequencies will not be heard. When playing back recordings, the bass will simply disappear. The speakers will start working out of phase. An error in the colors will cause an error in the balance adjustment.
The left front is connected with white wires. Gray ones are connected to the right front. The back left one is activated by green veins. Lilac is for the right.
Video on how to properly connect a four-channel and single-channel amplifier
We hope that this article helped you understand how to properly connect a car amplifier. Rate the article on a 5-point scale; if you have any comments, suggestions or you know something that is not indicated in this article, please let us know! Leave your comment below. This will help make the information on the site even more useful.
Car owners who like to listen to music loudly should definitely know how to connect a Mystery subwoofer. This device is considered one of the most popular and frequently purchased. To experience all the benefits of this technology, you need to connect it correctly and install it inside the car.
ISO adapter - Euro connector CARAV
Mystery radio pinout (various models)
The article will discuss connection diagrams and pinouts for Mystery radios of the following series: mar, mmd, mdd, mcd, mmtd and other models of radios of the brand
Mystery connector chip
Mystery 878uc-v1l10 radio connector pinout
Mystery mar 717u, 707u, 877uc, 404u, 979, 980 radio connector pinout
Mystery mar 818u, 909u, 919u, 616u radio connector pinout
Mystery mcd 597mpu, 794mpu radio connector pinout
Mystery mcd 795mpu radio connector pinout
Pinout of the Mystery mcd series radio tape recorder connector in Russian
Mystery mdd series radio connector pinout
Mystery mmd 980-v2l11 radio connector pinout
Mystery mmd 999bs, 4501bs radio connector pinout
Mystery mmd 4503bs radio connector pinout
Mystery mmd 6220s, mdd 4310s, 7120s, 6270nv radio connector pinout
Mystery mmtd 9104 radio connector pinout
Mystery mmtd 9105s radio connector pinout in Russian
Mystery mmtd 9122s radio connector pinout
Mystery radio connector pinout in Russian
RCA connector pinout for Mystery radios
What do you need
Before you start connecting the Mystery subwoofer, you need to find or buy several additional components in specialized stores. They will be used during work and will allow you to achieve the desired result as quickly as possible.
To connect the Mystery sub you will need the following components:
- control wire;
- fuse for power wire;
- amplifier plug;
- 2 power wires;
- reversible RCA cables.
In addition to various components, you will need some materials and tools for the job. Without them, it will be impossible to do quality work.
Are you a car driver?! Then you can take this simple test and find out. Go to test »
List of required items:
- screwdriver;
- pliers or pliers;
- knife;
- electrical insulating tape.
Post navigation
Connecting speakers This procedure is carried out carefully and carefully, since not only the purity of the sound depends on this, but also the operation and durability of the radio and speakers. MUTE Responsible for muting the sound when the button is pressed.
Sometimes there are two of them, and they control the operation of devices that operate only when the system is turned on. To ensure safety, disconnect the battery.
If the connector in the purchased radio does not match the car connector, then that’s okay too.
It will be better to use shrink sleeves and other precautions. Double-din radios are twice as large as single-din radios, which allows manufacturers to make models with a larger touch screen, as well as introduce more multimedia functions
Of course, the downside in this case is that the radio is in standby mode all the time. If the car does not have standard wiring from the battery, you will need a copper stranded wire with a cross-section of approximately 4.2 mm2.
Connections and installation of car radio
It is not recommended to connect the device to the cigarette lighter or ignition switch. Look in stores for an adapter for a multifunction steering wheel.
White ANT wire The wire with this marking is responsible for controlling the car radio's antenna. How to connect a car radio without getting tangled in the wires? Japanese, Korean and American usually work with 2 din - such models have 2 times the height, so the car must have a niche of the appropriate size. Connection method using an alarm Often the driver thinks whether I turned off the music in the car or not while parked. Thus, there are three main options for the procedure for connecting the radio yourself.
Connections and installation of car radio
Minimum wire length reduces resistance that distorts sound. Sometimes, if the phasing is not observed, some problems arise, namely, distorted transmission of low frequencies and bass. If your speakers are equipped with these types of connectors, you can use them to connect
It will be better to use shrink sleeves and other precautions. That's it
Working with 2 din car radios The process is similar, but there are several nuances. It is best when they are as short as possible and do not have additional twists. ISO connector pinout for connecting a radio
https://youtube.com/watch?v=KlTDn13M-Jc
Easy way to connect
Connecting the Mystery active subwoofer is done in two main ways. One of them is suitable for beginners, and the other is for professionals. When choosing the best option, you should evaluate your own capabilities, as well as your ability to perform such work.
Subwoofer connection procedure:
- A place is found in the car interior where the device will be located. Experts recommend placing the subwoofer so that passengers sitting next to you do not experience inconvenience from the loud sound emanating. However, it is prohibited to install the equipment in places where it will be obscured by any object. Otherwise, the sound quality of the melodies will decrease.
- Using power cables, connect the subwoofer to a power source (battery). If it is not possible to use this option, then connect the device through the cigarette lighter.
- A fuse is installed on the positive wire. This is necessary to ensure that a sudden surge in voltage does not damage the elements of the audio system and render it inoperable.
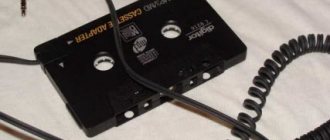
- The connected subwoofer is connected to the radio using double-sided RCA cables (“tulips”).
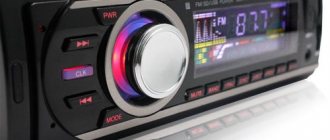
Connecting a mystery radio
Car radios of the Mystery family can be classified as fairly inexpensive musical equipment, designed for use in cars with an on-board voltage of up to 14.4V and, at the same time, having quite decent indicators for the quality of reproduced sound and reliability.
However, in order for such a multimedia system to show its best side, one should not forget that installing a mystery car radio with your own hands requires the obligatory fulfillment of certain rules. First of all, it is necessary to remember that before starting any work related to interfering with the electrical circuit of the car, you should disconnect the “negative” terminal of the battery and, thereby, eliminate as much as possible the creation of conditions for the occurrence of short circuits during the process of connecting the car radio. In addition, the connection diagram for the mystery radio presupposes the presence of a universal ISO connector on your car, and in its absence, you need to pay special attention to observing the color markings of the connecting wires (however, in order to avoid annoying surprises, it would be useful to perform at least a selective “diagnosis” of this connector). You should also ensure that the negative terminals of the sound speakers are connected correctly, avoiding connecting them directly to the car body.
It is also not recommended to power the Mystery car radio directly from the battery, that is, bypassing the ignition switch - such a “simplification” of installation will lead to accelerated battery discharge, especially during long periods of parking.
As for installing the receiver itself, as a rule, a compartment on the dashboard designed specifically for these purposes is perfect for it. However, in any case, this place must be protected from direct sunlight, vibration and excessive dust. The angle of inclination of the front panel of the receiver should not exceed 30°.
To securely secure the receiver in the installation compartment, use the special frame included with the system, which is fixed in the niche by bending special metal “tongues”. Secure the receiver unit in the frame using a metal bracket and a 5x25 mm mounting screw.
If it becomes necessary to dismantle the receiver, this procedure is performed in the reverse order by inserting special keys from the kit into the installation grooves on the side walls of the unit.
Before final fixing the receiver, including installing the external decorative panel, connect all electrical connections using the diagram below and check the multimedia system for functionality. In order to initialize the system before connecting for the first time, use a thin object (for example, the tip of a ballpoint pen) to press the RESET button located on the cassette player. A similar procedure should be carried out in other cases of complete blackout of the car, in particular when replacing the battery.
Connection via amplifier
Having understood how to connect the Mystery active subwoofer, you can perform a similar operation with a passive device. This type of work involves the use of a special amplifier, which is connected to the subwoofer. Thanks to this additional element, the volume limit will increase and the sound quality will improve.
- One end of the negative wire is connected to the GND terminal on the amplifier.
- The opposite edge of the same power cable is connected to any part of the car body.
- Contact points are carefully isolated.
- The positive wire is connected to terminal +12 located on the rear panel of the amplifier.
- A fuse is installed on the power cable.
- Find the Remote terminal on the amplifier and connect the subwoofer to it.
- Using an RCA cable, connect the amplification device to the radio.
- Check the reliability of the connection and begin setting up the acoustic equipment.
- To do this, insert a disc into it (included in the Mystery subwoofer kit) on which a test melody is recorded.
- After the sound starts, turn the volume down to minimum and begin adjusting the settings.
- As soon as the sound becomes “clear,” increase the volume and retest the device.
The Mystery subwoofer is easy to connect, so you can do the job yourself. Properly installed equipment will function smoothly and delight the car owner with high sound quality.
Sources used:
- https://dinamikservis.ru/blog/sabvufery/kak-podklyuchit-sabvufer-misteri/
- https://1avtozvuk.ru/sovety/podklyuchit-sabvufer-k-magnitole-2
- https://ingener-pto.ru/2019/12/12/kak-podkljuchit-usilitel-k-magnitole-misteri/
Useful tips
It is highly advisable to buy a licensed device. Then the kit will contain the necessary connectors with a cable to activate various options. These include power supply, acoustics, etc. When purchasing, you will need to take additional metal skids. They are necessary to connect the radio to the car panel.
Before installing the Mystery radio, it is recommended that you carefully read the attached manual and connection diagram. If you have doubts about your own abilities, it is better to seek help from a specialist. As an alternative, you can search the Internet and watch a video called “Connecting the Mystery Stereo System.”