Checks before purchase
Visual inspection
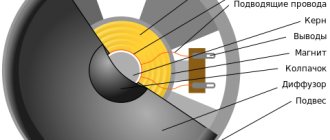
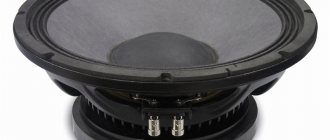
Pay attention to the integrity of the diffuser, whether there are any cracks or damage on it. Inspect the line of its attachment to the basket; it should be smooth and have no signs of removal or installation. Also inspect the dust cap, it should be intact and there should be no traces of plywood on it. Pay attention to the fastening of the centering washer to the basket and reel; there should be no tears there. The magnet should not have chips or cracks. In other words, make sure that the subwoofer is not damaged or has not been repaired. We do not recommend buying refurbished speakers secondhand, even if the repair was of adequate quality.
Damage to the suspension, damage to the diffuser, crack in the magnet
Determining age
If possible, find out when the sub was released. For example, if the speaker in question is more than 10 years old (the model is no longer available or you were able to determine the manufacturing date by the serial number), then it may be worth considering another option, since over time the properties of the magnet and rubber parts deteriorate.
Checking the progress
An elementary check is to carefully press the subwoofer cap in the center and push it down, making sure it returns to its place. There should be no obstacles or extraneous sounds when moving. If you feel some resistance or hear a rustling noise, this means that due to damage or poor quality repairs, the coil is out of alignment and is clinging to the core or magnetic system. Of course, you should immediately refuse to purchase such a subwoofer.
Checking the coil
Be sure to look at the color of the coil; if it is darkened, it means that it was overheated and the sub was working in clipping. Don’t be fooled by the owner’s arguments like: “It’s normal when you pile on”; “On the contrary, he is well kneaded”; “Yes, at competitions there are generally blacker than katuki” - all this is bullshit. Taking a sub with a scorched coil is a big risk that will not justify the savings on buying a used one.
Example of a scorched coil
If the speaker is in a box, then do not be embarrassed to ask to take it out, even if it is a factory case.
Calling the coil
Ask someone for a tseshka (multimeter) or buy one for yourself; it’s a useful household item and simply necessary if you’re dealing with car audio. Any budget model will do just fine. Using this device, measure the resistance of each coil; if there are several of them, it should approximately correspond to the declared values or may be a little higher (device error). For 4 Ohm, the normal value will be around 3.8-4.5 Ohm .
If the resistance is much lower than stated, then there is a problem with the coils. If the coil does not ring at all (has maximum resistance), this means that the winding or supply wire is broken. Be careful, if the sub has 2 coils, then it can work even if one of them is faulty, but this is not the correct mode and it is a faulty subwoofer!
How to check a car amplifier with a multimeter
Before checking the sound amplifier for functionality, you need to use a multimeter to determine if there is a short circuit in the power supply circuits, which could occur as a result of a breakdown of a semiconductor diode or transistor.
To check the operation of the audio amplifier, or rather its inverting and pulsation-smoothing unit, you need to set the multimeter to current measurement mode and connect it in series to the power circuit. The operating current should be in the range of up to 500mA (that is, 0.5 A). If this value goes off scale, then the power supply installed inside the amplifier has probably failed, or rather a breakdown of the power circuit.
How to check the audio amplifier in a radio
To figure out and understand how to check whether the sound amplifier in the radio is working or not, you need to apply an algorithm similar to checking a car amplifier. That is:
- check the presence of power and short circuit in the power supply system;
- carefully inspect the circuit board for the presence of clearly failed elements and radio components;
- check the tight fit of the radiator to the transistors and microcircuits of the output stages.
There are many ways and techniques for ringing a sound amplifier, but not all specialists want to reveal the secret of finding a fault.
Leave a request and we will call you back within 48 hours!
How to test an audio amplifier with a multimeter
In order to correctly and with a high degree of probability find a failed output stage transistor, thereby checking the sound amplifier, it is best to unsolder each of these semiconductor devices. However, this procedure is very labor-intensive and will take a lot of time, so the output transistors are checked directly on the circuit board, switching it to resistance measurement or continuity testing. If, when connecting the multimeter chips to the legs, the resistance in one direction and the other is the same or very low, then this means the transistor is broken and requires replacement.
You can also ring diodes, which must pass current in one direction, that is, if you touch the ohmmeter probes in one direction, the resistance should be low, then in the other direction it should be more than 100 kOhm.
You can ring the emitter circuit of the output stage, but to do this you need to know the wiring of the transistors, that is, where its base, emitter and collector are. Checking the sound amplifier involves touching the emitter of the output stage transistor with one probe, and the terminal going to the speaker with the other. The continuity test should show zero resistance or a value close to it. Even a person unfamiliar with electronics can understand how to test an audio amplifier with a multimeter.
How much does a sub cost?
Prices for subwoofers in the car
| Car subwoofer name | Price |
| Pioneer TS-WX300A | from RUR 11,794 |
| Ural AS-D12A Black Hurricane | from 8,735 rub. |
| Nakamichi NBF10.2A | from 10,690 rub. |
| JBL BassPro Nano | from RUR 11,299 |
Interesting materials:
Why do messages on Viber come without sound? Why are there unread messages on Viber? Why can't voice messages open on WhatsApp? Why can't a voice message be recorded on WhatsApp? Why is there no sound during voice messages on WhatsApp? Why can't messages on VK be read? Why is sending messages limited on VK? Why is there a message limit on VK? Why are WhatsApp short voice messages? Why doesn't WhatsApp show that the message has been read?
How to check a car amplifier at home
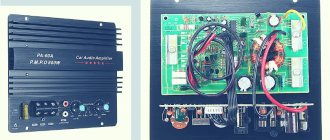
In order to check the performance of a car amplifier at home, you can use any unit with a constant output voltage of 12 to 14 volts, or a computer unit that has the voltage necessary to start the amplifier. The source power must be at least 200 volts and before turning it on, be sure to set the power volume control to minimum. The repair process should always begin with a visual inspection of all radio components on the amplifier circuit board. A standard car amplifier model consists of three main components:
- an input voltage converter unit, which changes the unipolar input voltage of the vehicle's on-board circuit into two polar ones with an increase in voltage up to 20 Volts;
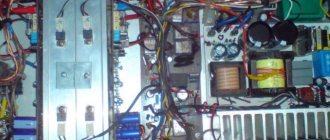
- power amplifier unit, often it is made of bipolar transistors, which are installed on radiators necessary to increase the heat dissipation area. Powerful output stages at maximum power get very hot, so a poor, leaky connection between the transistor plane and the heat sink will certainly lead to its overheating, and, accordingly, to breakdown;
- a frequency control block used to change the sound timbre. A common malfunction of this unit is associated with a deterioration in the smoothness of changes in resistance by variable resistors.
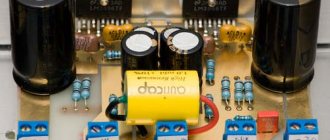
After opening the case, you should carefully inspect every detail of the amplifier, paying special attention to:
- blown fuses. An unbroken fuse-link thread should be visible through the glass flask;
- resistors should not have visible carbon deposits indicating their burnout;
