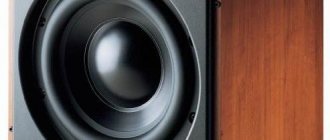
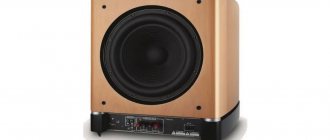
It's hard to imagine a home PC without speakers. Indeed, in this case, its capabilities will be significantly limited. You won’t be able to watch a movie, listen to your favorite musical composition, play a game, or just chat on the Internet on Skype. Sometimes it becomes necessary to connect speakers to a laptop. Although modern models are equipped with speakers, good volume levels and playback quality are not always available. It is in this case that it becomes necessary to solve the problem of how to connect the speakers to the computer. It would seem that the task is very simple. However, without knowing some of the nuances, this is not always possible.
Connecting and setting up speakers on your computer
There are many speaker models on the market from different manufacturers with different numbers of elements and additional functions. The process of connecting and configuring all the necessary components depends on the complexity of the device.
Step 1: Connection
First of all, you need to connect the speakers to your computer. The side panel of the motherboard contains all the connectors necessary for connection. Note that it will be colored green. Sometimes "Line OUT" is also indicated. Take the speaker cable and plug it into this socket.
Additionally, it should be noted that most computer cases also have a similar audio output on the front panel. You can make a connection through it, but sometimes it reduces the sound quality.
If the speakers are portable and powered by a USB cable, you should also connect them to an open port and turn on the device. Large speakers also need to be plugged into an outlet.
Step 2: Installing Drivers and Codecs
Before setting up a new connected device, make sure you have all the codecs and drivers for the system to function properly and play music and movies. First of all, we recommend that you check your installed drivers and the process is as follows:
- Open Start and go to Control Panel.
- Here, select Device Manager.
- Scroll down to Sound, video and game devices and expand it.
Here you should find a line with the audio driver. If it is not there, install it in any convenient way. You can find detailed instructions in our articles linked below.
Sometimes music doesn't play on your computer. This is mainly due to the lack of codecs, but the reasons for this problem can be very different. To learn how to solve the problem with playing music on your computer, read our article at the link below.
Step 3: System Settings
Now that the connection is complete and all drivers are installed, you can begin setting up the system for the newly connected speakers. This process is quite simple, you only need to complete a few steps:
- Open Start and go to Control Panel.
- Select the "Sound" option.
- In the Playback tab, right-click the speaker you're using and select Configure Speakers.
- In the window that opens, you will need to configure audio channels. You can change the settings and check immediately. Select the location that best suits your needs and click Next."
- Users who have installed speakers with full-range speakers or surround speakers will need to activate them by checking the corresponding icons in the configuration window.
This setup wizard only takes a few steps to improve your sound, but you can get better results by manually adjusting the settings. This can be done according to these instructions:
- On the same “Playback” tab, select the columns with the right mouse button and go to “Properties”.
- In the “Level” tab, only volume, left and right balance are adjusted. If you feel like one of the speakers is louder, adjust the balance in this window and move to the next tab.
- On the Enhancements tab, select sound effects for the current configuration. There is an ambience effect, voice suppression, pitch shifting and an equalizer. Make the necessary settings and go to the next tab.
- All that remains is to study “Advanced”. Here the exclusive mode is configured, the bit depth and sample rate are set for use in the general mode.
After changing the settings, be sure to click “Apply” before exiting for all settings to take effect.
Step 4: Realtek HD Setup
Most built-in sound cards use the HD Audio standard. The most common software package at the moment is Realtek HD Audio. With this software you can set up playback and recording. You can do it manually like this:
- First download the program from the official website and install it on your computer.
- Open Start and go to Control Panel.
- Find "Realtek HD Manager" here.
- A new window will open and you will be taken directly to the Speaker Configuration tab. Here the appropriate speaker settings are made and the full-range speakers can be activated.
- In the “Sound Effect” tab, each user configures the parameters for himself personally. There is a ten-band equalizer, many different patterns and presets.
- The Standard Format tab makes the same change as the System Playback Settings window, only Realtek HD still allows you to select DVD and CD format.
System Settings
After connecting external speakers and installing the appropriate software, you can analyze and adjust the system configuration. The entire algorithm in this case is quite simple and includes the following manipulations:
- go to the “Control Panel” tab in the “Start” menu;
- open the “Sound” section;
- in the Playback menu, right-click the connected speaker system and select settings;
- in the tab that opens, configure audio channels and click “Next”;
- When installing broadband audio devices, they must be activated by checking the corresponding lines.
Correct use of the installation wizard will maximize the quality of the reproduced sound. In this case, you can get the best results by adjusting the settings manually. To do this you need to follow the instructions.
- In the Playback section, select the installed speakers and right-click on them and go to the Properties tab.
- In the "Level" section, adjust the volume settings and balance of the left and right speakers.
- If desired, select sound effects based on the current configuration in the “Improvements” tab. This menu item provides options such as EQ, Pitch Bend, Voice Suppression and Ambient Effect.
- In the last step, you need to go to the Advanced option to configure the exclusive mode and also configure the sample rate and bit depth for the general mode.
After making all of the above changes, you must click “Apply”. Otherwise, you may find yourself in a situation where all the steps have been followed correctly, but the connected speakers are not working.
Realtek HD setup
In the vast majority of cases, built-in sound cards operate in HD Audio format. In this case, the most common software package is Realtek HD. This program allows you to configure all sound playback parameters, as well as record the corresponding files. To make the necessary changes, you will need to follow a number of steps.
- Download the latest version of the program from the developer's official website and install it.
- From the Start menu, go to the Control Panel tab.
- Open Realtek HD Manager."
- In the window that opens, the “Speaker Configuration” item will appear, in which you need to configure previously connected speakers. In the same section you can activate broadband audio devices.
- Adjust the settings in the Sound Effects menu to suit your personal preferences. To do this, the user is provided with a 10-band equalizer and a whole arsenal of models.
- By clicking on the “Standard Format” tab, the user has the opportunity to make certain changes to the parameters and formats: CD or DVD.
How to connect a bluetooth speaker to a laptop?
In a situation where the functionality of standard laptop speakers is not enough to reproduce sound, Bluetooth speakers are an excellent solution. Such a portable device has a number of advantages. First of all, they are compact, have very good sound and are very easy to use due to the absence of cables or wires.
But how exactly do you connect a wireless speaker? What do I need to do? The algorithm of actions is as follows:
- First, place the Bluetooth device and laptop at a distance of less than one meter. Then turn on the speaker. The indicator light should light up.
- Immediately after this, press the Connect pairing button and hold it for at least five seconds.
- Next, we activate bluetooth on the laptop. As a rule, on many models this can be done using the so-called hot keys (Fn+F3). If there is no result, then try this: open Device Manager. In the new Windows 10, this is the key combination Ctrl+Alt+Delete. You can also click on the notification center icon. After that, click on the activate/deactivate Bluetooth icon. This icon will turn blue when in working condition.
- Then find Bluetooth speakers in the list of devices available for connection. In the new Windows 10, just right-click on the power icon. And then click on “Go to settings” in the window that opens. Next, you will see a list of devices. If it was not possible to connect automatically, and this sometimes happens, then you need to click on “Connect”
Some differences in this connection are characteristic of Windows 7 and 8. Here the column should be reflected in the “Devices and Printers” section. Find it (path – Control Panel / All Control Panel Elements / Devices and Printers), click on this icon and click on “Connect”. Another option is to open the bluetooth tab. Then you should activate the “Add devices” option. A list will appear in which you need to select speakers and connect them.
Connecting wired speakers
Step 1: Choose a set of laptop speakers. If your laptop has a USB port or a headphone jack, you can connect most wired speakers to your personal computer.
- Most computer speakers have a small 3.5mm audio jack (1/8″ mini jack, suitable for smartphones, iPods, PC sound cards) that plugs into a standard headphone jack. This type of speaker usually connects to a power source; 3.5mm audio jack on most speakers
- USB-powered speakers plug into your computer to supply power, so you don't have to plug them into a 220V outlet. If your laptop has "extra" USB ports, this may be a preferable option. USB speakers with a regular audio jack
Step 2: Place the speakers in your work area. Most PC speakers are labeled "Left" (L) or "Right" (R) on the back or bottom of the device.
Place the speakers correctly
If your speakers have a subwoofer, you can place it behind the system or on the floor.
Place the subwoofer behind the system or on the floor
Step 3: Turn down the speaker volume: This is usually done by turning the volume control on one of the speakers all the way to the left.
Reduce speaker volume
Step 4: Left-click on the sound icon in the bottom right corner of your desktop. Adjust the volume to about 75%.
Left-click the sound icon in the lower right corner of your desktop
Use the slider to adjust the volume to about 75%
Step 5. When you click on the "Mixer" option, several sliders will appear, use the slider that says "Applications").
Click on the "Mixer" option
In the slider labeled “Applications”, set the sound to 75%
Step 6: Turn on your laptop and connect the audio cable (USB or 3.5mm) to the appropriate port on the laptop.
- If you are using a 3.5 mm jack, look at the sides of the laptop to find a small jack with a headphone or speaker model. Find a small jack with a picture of headphones or a speaker, connect the speaker jack.
To connect, do not use the jack with a microphone model - If you are using USB for audio, connecting speakers may trigger driver installation or the system will automatically install the driver.
If the operating system asks you to insert a disc, insert the one that came with your connected speakers and follow the on-screen instructions. To connect USB speakers, use an available USB connector on your laptop. Insert the driver disc that came with your USB speakers.
Step 7: Turn on the speakers using the "On" button, usually located on the back of one of the speakers. Sometimes the power button is combined with the speaker volume control.
Turn on the speaker with the corresponding button responsible for power
If you have a power cord, plug it in
Step 9: Play Audio on Laptop: Stream Music, CDs, YouTube Videos, etc.
We play any sound on a laptop
Step 10: Find a comfortable listening volume by slowly turning the volume control on your speakers until you reach the desired level.
Adjust the volume on your speakers for comfortable listening
Connecting wireless Bluetooth speakers
Step 1. Make sure that the laptop is equipped with a Bluetooth radio module, which can be used to connect wireless speakers. To do this, press the “Win + R” keys, type “devmgmt.msc” in the line and click “OK”.
Type “devmgmt.msc” in the line and click “OK”
If you see a category called “Bluetooth Radios” in the Device Manager tree, click on it to expand the list of devices. If there are any devices in the list, then Bluetooth is installed on the laptop.
We find the category “Bluetooth radio modules”, double-click it to open it, check the list of devices
Step 2: Make sure Bluetooth is turned on. To do this, look in the tray (bottom right) for the presence of a blue icon.
Checking for the Bluetooth icon on the taskbar
If the icon is missing, you will need to enable it.
- Press the button with the image of a wireless connection in the form of a Bluetooth or antenna icon on the laptop. Usually this is one of the “F1–F12” buttons (depending on the laptop model), pressed together with the “Fn” button.
Click on one of the “F” buttons with the image of a wireless connection with the “Fn” key combination, for example “Fn+F2”
- Make sure that the blue tray icon appears.
Check for the presence of a blue tray icon
Step 3: Find a suitable location to place the Bluetooth speakers (speaker).
Finding a suitable location for Bluetooth speakers
When installing speakers you need to consider:
- the speakers must be connected to a nearby power source;
- To easily turn the speakers on and off, place them in an easily accessible place;
- the presence of a wall between the laptop and the speakers is not necessary, but may reduce the sound quality;
- Consult your speakers' manual to find out how close they should be to your laptop.
Reference! Typically, Bluetooth speakers can be up to 10 meters away from the receiving device, but some models may have a closer range.
Step 4: Turn on the speaker, making it discoverable. Whether the speakers are turned on depends on the speaker model. They often have a button that must be held down for a few seconds to put the device into "discovery" mode.
Turn on the speaker by pressing the corresponding button on it
Note! If the information on how to enable detection of a Bluetooth speaker printed on its body is not enough, you should refer to its instruction manual.
Step 5. To connect the laptop to the Bluetooth speakers, press “Win + R”, type “control printers” and click “OK”.
Type “control printers”, click “OK”
Step 6. In the window that opens, select “Add a device.”
Select “Add device”
Step 7. The search for devices will begin. When the speakers appear, select them with a mouse click and click Next to pair the devices.
Select the speakers by clicking the mouse and clicking “Next”
Setting up a laptop to play audio via Bluetooth
Step 1. Press the “Win+R” keys, type “control” and click “OK”.
Type “control”, click “OK”
Step 2. In the “Control Panel”, select “Large icons” at the top right and click on the “Sound” icon.
Select “Large icons” at the top right, click on the “Sound” icon
Step 3. Click on the “Playback” tab, click on “Bluetooth Speakers” and click on the “Default” button. Click "OK".
Click on the “Playback” tab, select “Bluetooth Speakers” by clicking, click the “Default” button, then “OK”
Sound should start playing through the new Bluetooth speakers.
Step 4: Left-click on the sound icon in the tray. Adjust the volume in the controls to 75%. When different sliders appear, use the slider labeled “Applications”.
In the slider labeled “Applications”, adjust the sound to 75%
Step 5: Minimize the volume on your Bluetooth speaker. If your speaker has a hardware knob, turn it all the way to the left to turn off the volume.
Minimizing the volume on a Bluetooth speaker
If there is no hardware volume setting on the speaker, click the “Sound” icon in the tray and move the volume level down (to the left).
Click the “Sound” icon in the tray and move the volume level down (to the left)
Step 6: Test the sound by playing a song, video, or audio file.
Checking the sound by playing a song, video or sound file
Step 7: Slowly increase the volume on the Bluetooth speaker until it is loud enough for comfortable listening.
Slowly increase the volume on the Bluetooth speaker for comfortable listening
This completes the setup of Bluetooth speakers on the laptop.
How to connect a speaker system to a computer?
In principle, connecting regular speakers to a computer is not difficult, but connecting a speaker system can cause many difficulties for many users. In such a situation, there are several ways to solve this problem. How to connect speakers to a computer without an amplifier? — First, you need to determine the number of outputs or connectors that the sound card has in your computer. 7.1 system For modern integrated sound cards, it is possible to use 7.1 acoustics, marked on the motherboard with colored connectors. Each color has its own purpose:
- green output related to the front or so-called front speakers;
- the orange plug supports the center channel and subwoofer;
- The blue tinted connector is for line input, which can be used, for example, for a musician, electric-acoustic guitar;
- The gray lead goes to the side speakers, also called surround speakers;
- The pink output is for microphone operation.
- black jack - for rear or surround speakers;
How to turn on and adjust the sound in speakers on a PC and laptop
If everything is physically connected but there is still no sound, you need to click the speaker icon in the bottom right corner of the screen and check if it is disabled. You can also adjust the volume here.
More extensive settings are made in the Speaker Properties window, in which we go through the Sound option in the Control Panel. In this window you can configure the sound and adjust the volume.
When using a desktop computer, speakers are often built into the monitor. It also contains audio controls.
How to connect a music center to a computer
Modern sound cards built into a computer allow you to connect up to six channels of acoustics. The presence of a discrete six-channel card is easily verified by external inspection of the system unit. On the case you can always find a larger number of connectors for connecting to an audio system.
To connect the stereo to your computer, you need to connect the pins to the corresponding colored jacks, then turn on the audio equipment and the computer. After this, audio recording is activated and playback quality is checked.
IMPORTANT! On the music center with this connection, select the AUX mode, which allows you to receive a digital signal from an external source.
Possible problems
So, you have understood the intricacies of cables and still connected the speaker system. After starting your favorite track, it turns out that there is no sound. What to do?
- Make sure the speakers are turned on and turned on. Most high-power speakers have a separate power switch.
- Check the position of the volume control. On some models it is connected to the power button. When scrolling all the way, a characteristic click is heard.
- Check if the sound is muted in the system settings. You can access it directly by clicking the speaker icon in the taskbar (bottom right corner on the desktop).
One more nuance. When connecting new speakers to a new computer or a new sound card, you may have forgotten to install the audio driver. You can check its presence like this:
- In Windows 7 - Start - Control Panel - Device Manager - Audio, Video and More. If the audio output driver is not used, the device will appear as unknown.
- On Windows 10: Click the magnifying glass search icon and type “manager.” In the search results, select Device Manager, then everything is as in “Seven”.
Perhaps the linear output has weakened due to long-term use and does not work or has simply burned out. To test this, you can use any working column.
In addition, noise and sound distortion may occur when connecting a speaker. Reasons for this phenomenon:
- Bad or damaged adapters or cables;
- Inappropriate drivers;
- Incorrect connection of plugs to sockets.
If you are completely sure that everything is fine, the only option left is a manufacturing defect in the speakers or sound card. Alas, this also happens.
Read the following article to learn how to connect Bluetooth speakers. I also recommend reading what the speaker power is and what the frequency range is. I will be grateful to everyone who shares this post on social networks. Till tomorrow!
Sincerely, blog author Andrey Andreev.
The second method is via USB
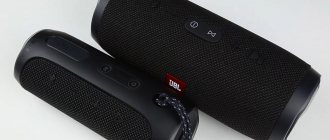
If your computer does not have Bluetooth, you can connect your JBL speaker to your computer via USB.
For this:
- Take the USB cable that comes with the speaker
- Insert one end of it into the computer's USB port and the other into the speaker port
- Turn on the column
- Windows will automatically begin installing the connected device (may take up to a minute)
- Once the installation is complete, try playing the sound
- If there is no sound coming from the speaker, try updating its drivers
How to update JBL speaker driver on Windows 10?
Go to “My Computer” -> right-click on the empty field -> select “Properties” -> open “Device Manager” -> find the column name in the list -> right-click on it -> open “Properties” - > go to the Drivers tab -> click Update Driver
How to activate your computer's built-in speaker
A laptop usually has built-in speakers. They connect automatically.
If there is no connection, do this:
- in Windows, go to the “Device Manager” through the “Start” button;
- select “Audio, video and gaming devices”;
- install the driver if necessary.
- check if the sound card is detected and if there is a driver;
- connect the sound card via BIOS;
Built-in desktop speakers are located on the monitor.
To link them:
- connect the audio input of the monitor with a cable to the audio output of the sound card;
- On the display panel, click the icon with the speaker crossed out.
How to connect a speaker to a computer via USB
The main feature of speakers connected to a laptop or computer via USB is the absence of any wires. This significantly simplifies the user’s work and makes it more comfortable. In this case, the algorithm of actions is as follows:
- Install the software on your PC. To do this, insert the disc that comes with the speakers into the drive. An installation window will appear, click “Install”, wait for the automatic actions to complete.
- After that, connect the USB transmitter. You can use any free connector. In this case, the system will automatically determine the type of this device and will be able to configure its operation on the PC.
- When a special notification appears on your desktop indicating that the device is installed and ready to use, turn on the speakers. In some cases, you will need to restart your computer. Also, some speakers are not equipped with a driver disk; the software is installed automatically as soon as you connect USB to the PC.
Sometimes unexpected situations happen: you did everything correctly, but the speakers still don’t work. There may be several reasons.
- Bluetooth function is not activated (check in Device Manager)
- The volume is set by default - to the minimum level (go to Control Panel / Hardware and Sound / Volume Settings. Adjust the volume control.
- The necessary drivers are not installed (in Device Manager, right-click on the adapter and then select “Update driver”).
- Wireless speakers are asking for a password. Typically these are prime numbers 1234 or 0000.
- An uncharged battery of a Bluetooth device (generally, charging is enough for no more than ten hours of battery life).
The task of how to properly connect speakers to a computer or laptop is quite simple and not at all difficult. Especially if you follow the instructions carefully. Connect good acoustics and enjoy the high-quality and loud sound of your favorite films and musical compositions.
Adjusting sound and volume
The system provides built-in tools for adjusting the sound and volume of headphones or speakers. They are located in the Sound Settings section of the Windows Control Panel. If the settings are not enough, you can use additional software for Windows XP versions 7, 8 and 10:
- Realtek HD Audio. Driver package for setting up sound cards from the manufacturer Realtek. The feature set is minimalistic, but the software allows you to fine-tune the sound.
- FxSound Enhancer. The program offers simple but powerful settings to improve your sound. The sound quality can be improved in real time. Tools are available to improve clarity and enhance bass.
- ViPER4Windows. Professional software for sound tuning. Includes a large set of tools for changing parameters.
How to connect 5.1 or 7.1 speakers
If you need to connect speakers that are 5.1 or 7.1, the first thing you need to do is look at the audio outputs that your sound card comes with. As a rule, the built-in sound cards of modern computers allow you to connect 5.1 and 7.1 speakers without any problems. To do this, 6 connectors appear on the rear panel of the computer:
- Green output - front speakers (front.
- Orange output - center speaker and subwoofer.
- Blue - line input (used to connect an acoustic guitar, player or other equipment).
- The gray pin is the side (side) speakers).
- Pink—microphone connection.
- Black output - rear speakers (rear)
If your computer has these 6 connectors, then everything is fine, you can connect 5.1 or 7.1 speakers, if there are only three connectors (pink, green and blue), you will need to buy a discrete sound card.
If you need to connect 5.1 speakers, additional connectors (green, black and orange) will be used. Connect the cable with the green plug to the green connector on the sound card, then connect it to your speaker system's subwoofer (the connector that controls the front (front) speakers). Do the same with all the other cables, connect them to the appropriate connectors, let yourself be guided by the colors and purpose of the connectors (description above).
After connecting the subwoofer, you need to connect the remaining speakers to it. Typically a tulip-to-tulip (or RCA-to-RCA) cable is used, with one end connected to the subwoofer and the other end to a suitable speaker. In this case, you need to follow the jack markings on the subwoofer to ensure that all speakers are connected to the correct jacks, otherwise the channels will be swapped.
After everything is connected, you need to configure the sound card. To do this, go to the driver settings and select the appropriate mode (in this case 5.1).
If you need to connect 7.1 speakers, you will also need the gray connector, which is responsible for connecting the side speakers.
If you have connection problems, see the instructions for your speaker or sound card.
The third method is via AUX
If you have an AUX cable, you can connect JBL to a PC or laptop using it:
- Plug one end of the AUX cable into the 3.5mm jack on the speaker
- The second end is the output for the speakers in the computer
- Turn on the column
- If necessary, in the PC sound settings, select external speakers as the sound source
In this manual, we told you how to connect a JBL wireless speaker to your computer. If you have questions, write in the comments, we will try to help.
Find other JBL instructions in the Wireless Speakers section.