At first the idea arose to buy a powerful mobile Bluetooth speaker, but branded JBL ones cost up to $300, and their power rarely exceeds 40 watts, so it was decided to start assembling my own. The “boombox speaker” was based on a TDA7492P UMZCH module with a power of 2×50 Watts and a Li-Ion battery with a total voltage of 21 V and a capacity of 3500 mAh (70 W).
Most of the parts were ordered from the well-known AliExpress website, including the speakers. While the batteries are charged with a separate IMax charger, in the future it will be necessary to make a ready-made charger in the case itself.
The speakers are two broadband speakers with a power of 25 W each and two high-frequency speakers with a power of 10 W each, which gives us a total of 70 W, but in peaks they can handle 100 W. The manufacturer of these speakers is the little-known Aiyima, but the quality of their performance and sound quality was a pleasant surprise, which allows us to recommend it for assembling small speakers. Their parameters are as follows:
- Frequency range range: 81 – 5400 Hz
- Sensitivity: 87 dB
- F res. about 115 Hz
A USB module has been added as a Power-Bank. The body is made from 10mm thick MDF and measures 12x12x27cm. It was glued together with wood glue and also reinforced with screws on each side, except for the plate on the back which was glued in place with hot glue in case any repairs or modifications were needed.
Useful: DIY voltage converter 12/220 V
How to use a smart speaker?
Almost all smart devices have an intuitive interface that any user can quickly understand. To use the Yandex.Station mini smart speaker and its analogues, follow the following algorithm:
- The device is connected to the power supply, or the battery is charged for the time specified in the instructions.
- The next step is to connect the device to the Internet, without which its operation is impossible.
- The main control buttons are located on the body of the device: turning it on and off, adjusting the volume and muting the microphone.
- The device is activated by a voice command to contact an assistant, for example, Alexa or Alice.
- All the following commands are also given by voice: change the track, tell us about the weather for today, and more.
How to connect a smart speaker?
There are several ways a smart speaker connects to other devices:
Wired. This could include wired connections to other speakers or connecting to your TV using an HDMI cable. Via Bluetooth connection. By connecting to the same Wi-Fi network
To do this, it is important to connect both gadgets to the network and log into your account on each of them, for example, Yandex. Next, select “Devices” on your smartphone or TV and connect a speaker from the list provided.
How to set up a smart speaker?
When you first launch a smart speaker, you need to make certain settings for the voice assistant to work correctly, which are often done using a special mobile application on a smartphone or tablet:
- Install a special application.
- Connect the speaker and smartphone to the Wi-Fi network.
- Go to the “Devices” menu item and select the desired device.
- Next, make the necessary settings specified in the application. You can change the phrase for calling the assistant, set up timer activation and much more.
Battery Installation
To ensure high-quality operation of the wireless speaker, you should select a battery with a capacity of several ampere-hours. The best option would be to create a design of two or three modules, the own capacity of which reaches 2-3A.
Similar parts are sold on radio markets, in the form of old batteries from phones and tablets.
After finding the part you need, follow these steps:
Determine the location of the battery and try it on the body of the future speaker. Using a soldering station, connect the wires to the battery and then temporarily insulate them. Secure the battery to the bottom of the case; the side wall can also be a great place. Super glue is used for fixation. The battery is connected and ready for further connection to other devices.
The following steps should be followed: Using a soldering iron, connect the USB cable to the charging area. Install the charge module into the case and secure it with super glue or sealant. Connect the module output and the battery input, paying attention to the polarity.
As a test, you should connect the battery to your phone or tablet using the attached USB module. If the LED on the board lights up, everything works correctly.
Then you should do the following:
Using a soldering iron, connect the return module with two pairs of input and output wires
Please note that you should leave an open circuit for power, it must be connected in series. Secure the switch with super glue or sealant. Connect the switch to the power break using a soldering station. Check the device by activating it; if everything is correct, the LED on the switch will light up.
Then the following steps are performed:
- All soldered contacts are insulated using available materials: sealant or insulating tape. You should pay careful attention to this stage of work, since modules received from China have extremely low protection rates, as a result of which they burn out even with small output short circuits.
- The return power module is secured to the speaker body using super glue or sealant.
This completes the first stage of assembling your own homemade Bluetooth speaker. The power interface is completely ready, and the node boards are securely fixed in the device body. It's time to move on to installing the amplifier and Bluetooth wireless module.
What can it be made from?
At home, the speaker body can be made from almost anything. In action are:
- housing from a failed car radio;
- the body of a glowing cube in which the backlight has burned out;
- the “egg” column is made of paper, folded into many layers and impregnated with glue (for example, epoxy);
- remnants of laminate or parquet - after re-flooring;
- Chipboard, MDF material, fiberboard, natural wood;
- for portable speakers, a PVC pipe (or polypropylene) of the largest diameter is suitable - like what is used to install an interfloor drainage channel for bathrooms throughout the house;
- plywood - be careful when sawing it: it easily chips and cracks, and bends over time.
Having decided on the supporting material of the case, take care of the remaining parts and consumables.
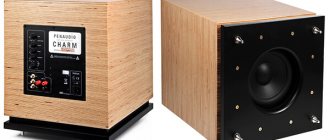
DIY wireless Bluetooth speaker
The finished result of a homemade Bluetooth speaker (acoustic) My experiment in making a housing for a wireless Bluetooth speaker (acoustic) using CNC.
It all started with the purchase of an old cassette recorder for subsequent conversion into Bluetooth acoustics. The price of the tape recorder is 500 rubles. Everything turned out to be bad with the donor's speakers; the sound even in the old cases was modest. He concentrated his efforts on developing the technology for manufacturing the case “in layers.” I often encountered such enclosures in complex acoustics. I decided to make an extremely simple option. The entire manufacturing process is in the video:
I am posting the drawing for informational purposes: Well, the author is not responsible for anything at all
Soldering modules
The most interesting part of the assembly for many is the soldering of components; everything is very simple here:
First, let's connect the amplifier and Bluetooth module BT162
Turn on and heat the soldering iron.
Connect the power wires (red and black) to the amplifier, then the wires (green, yellow, blue) to the audio input, be sure to make sure the polarity is correct.
Add a power module.
Using this module, you can increase the voltage to the required 5 volts.
A blue potential meter is used to regulate the voltage. Solder 2 wires to the step up module and to the charge module.
Installation of housing components
Charge module and switch
First we glue the charge module, for this we use a glue gun. It's fast and cheap. Then glue the switch and solder the wires from the charge module to the switch.
Battery
We solder and glue together 2 18650 batteries and glue the assembly onto the wall of the rear panel. Where the charge module was placed.
Installation of main modules
First we install the voltage converter, then the remaining modules, we fasten everything in the same way using thermal glue.
After installing the components, we perform final soldering.
We solder the power wires from the step module to the switch, do not forget to check the polarity, this is very important. Gluing the back panel
Gluing the back panel.
After all the components are assembled, glue the remaining walls of the case, carefully apply glue and hold the walls until the glue sets.
Apply a generous amount of superglue to the edges first, then carefully attach the back panel and hold it in place for a bit until it is properly stuck. Finally, apply hot glue to attach the back panel more firmly.
After attaching the back panel, we solder the speaker wires to the amplifier and check everything for functionality. Final assembly.
After which you can glue the remaining parts of the body. After gluing, you can use sandpaper and a file to clean the edges of the walls from traces of glue.
Technological progress is moving forward by leaps and bounds, now even preschoolers have a mobile phone and know how to access the Internet, and seeing a person talking to himself on the street, no one will twirl his finger at his temple - everyone is already familiar with a Bluetooth headset, which is a wireless technology. This transmitter operates using encrypted signals, which, in addition to convenience, allows you to protect personal data. The wireless module allows you to establish communication among several devices.
A simple way to make bluetooth speakers
First of all, to manufacture such a device you will need a housing.
The best solution would be to make it
from plywood
.
Important!
When choosing the size of the case, you need to take into account that it must accommodate not only all the electronic components, including speakers, amplifier and battery, but also passive membranes.
Panels
On the front panel it is necessary to make holes for 4 types of speakers
. A pair of large holes are intended for woofers. Smaller holes are needed for tweeters. The devices should be placed in pairs, a pair of LF and HF on the left and right.
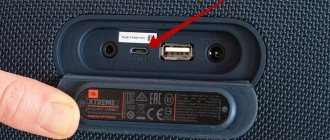
The rear panel should contain passive membranes, as well as charging connectors and a power switch.
REFERENCE!
The best material for gluing plywood parts is wood glue.
The side panels must be sealed and treated, since damage to their integrity will lead to a deterioration in the sound quality as a whole and the appearance of unwanted vibrations in the case.
On the rear panel, as mentioned earlier, there are passive membranes that significantly increase the depth of the bass. They are not electronic devices and do not require inclusion in a circuit. The membranes are attached to the body with helium super glue
.
REFERENCE!
In order to reduce the body's own vibration, you should glue a couple of MDF strips. This will prevent unwanted sounds caused by panel vibration.
Assembly
After all the component parts of the case are ready, you should begin assembling the electronic components.
Nutrition
You should start with nutrition. If the voltage is supplied from batteries, an additional protection board will be required. Because lithium-ion batteries are very sensitive to both short circuit and overcharging.
IMPORTANT!
Make sure that the voltage across all battery cells is the same. Otherwise, the device will work for a very short time.
Along with the protection board, you should also connect the power switch
. When connecting the latter, the polarity must be observed, otherwise the device will fail. To check this, you should first connect the battery and check the voltage.
Bluetooth
The next step is to connect the Bluetooth module. This element has separate outputs for power and separate outputs for audio. The module itself already has both an ADC and a receiving antenna, so it will receive and process the signal itself. Power to the module will come from the protection board to special contacts.
REFERENCE!
This element should be located in an accessible place so that the user has the ability to turn it on/off, as well as pairing and configuration at any time.
The Bluetooth module, in turn, should be connected to the amplifier via a step-up stage.
The signal from the amplifier will go to crossovers, the main task of which is to separate the sound into high and low frequencies. The corresponding speakers are connected to the corresponding output.
When all the elements are connected, they should be placed on the back panel
. It is advisable that the wires do not cross each other. This may cause unnecessary interference that will affect the sound quality.
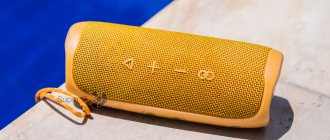
After all the parts have been placed, the front panel should be secured. The jbl portable speaker is assembled and ready to go.
Pros and cons of smart speakers
Those users whose interactive speaker has been in good service at home or at work for several months or more note some advantages and disadvantages of the device. The advantages include:
- Convenient voice control. You don't need to press keys or unlock your smartphone to play your favorite track or check the weather outside. At this time, your hands are free for other things.
- A smart mini speaker is a compact device with a stylish design that fits seamlessly into any modern interior.
- The ability to control other devices of the smart home system both in the home itself and remotely.
- Many devices are capable of distinguishing user voices and adapting to their interests, including, for example, playing different music for all family members or protecting children from listening to inappropriate content.
The disadvantages include:
- Possible recording of all conversations in the house and theoretically probable hacking of the server with these attackers.
- A limited set of functions for a number of devices and compatibility only with gadgets of specific brands.
Purpose
The adapter for the radio has several main purposes:
- Bluetooth for a car radio acts as an intermediary between the file storage device (tablet, smartphone, laptop) and the audio system.
- By installing the adapter in the car, the driver provides wireless communication with the gadget, freeing his hands.
- The car Bluetooth adapter allows you to exchange files, play videos and listen to music; in addition, it is also suitable for radio.
Some Bluetooth adapters for car radios are equipped with more extensive functionality, which depends on the model.
External speaker from a smartphone
I told you how to make a bluetooth speaker from a regular one. But you can play sound through any smartphone. For example, if your laptop audio system breaks down at the most inopportune moment. To do this, you don’t need a soldering iron, wires, or purchasing microcircuits in China. A special application for Android or iOS is enough. There are a lot of such programs today, you can choose any one to your liking. For example, I'll talk about w.
This application is shareware. That is, it is quite possible to use it and not pay anyone, but in this case, every 45 minutes the signal will be interrupted by a not very pleasant sound and a block of advertising. $3 for the full version will remove the limit and give you good compression as a bonus, as well as the ability to make multiple connections simultaneously.
So, how to make a Bluetooth speaker from your phone yourself?
- Download SoundWire If any of the steps remain unclear, all stages of assembling a Bluetooth speaker with your own hands can be easily found in the video on the Internet or below.
The word Bluetooth is a technology for transmitting data over a radio channel over a short distance of several meters, for communication between mobile phones, computers and other digital devices. The Bluetooth interface is characterized by low energy consumption and low cost. Currently used most often for communication between cell phones and wireless headsets. The Bluetooth radio interface was intended for transmitting data and voice messages.
In the traditional headset version, the Bluetooth module has a chip, a small 3.7V 50mA lithium-ion battery, a microphone, a speaker and a power button.
The low cost of the hardware, a good degree of protection and ease of use have made this standard very popular. Bluetooth uses frequencies in the region of 2.4-2.48 GHz and does not require licensing. Currently, the global industrial community has accepted this technology as a general standard.
The user experience that Bluetooth technology provides is sure to be hugely popular. Let's say, when you come to the office, your pocket computer is immediately automatically synchronized with your desktop PC, new contacts are transferred to your mobile phone, etc.
The Bluetooth module contains a forming, receiving and transmitting part of the equipment and built-in software. Communication between the module and the host controller is made using a high-speed USB interface or a UART/PCM interface. The host controller interface in the Bluetooth module is the command interface. The host sends commands through the IHC, and in response receives messages from the module about their execution; The communications manager sets up the required host controller configuration.
Bluetooth has two communication options: synchronous and asynchronous. The first type is designed to establish a symmetrical connection and is used for voice transmission. The information transmission speed is 64 Cit/s. The asynchronous version is designed for packet data transmission, the transmission speed is 720 Kbps. At the beginning of the block there is an access code, followed by a packet header containing the packet checksum and information about its parameters, and at the end an area directly containing the information being sent.
The diagram of one of the Bluetooth radio modules is shown below:
The frequency spectrum allocated for Bluetooth has a range of 2.402...2.480 GHz, which is divided into several channels. The bandwidth of each channel is 1 MHz. Channels are changed according to a pseudo-random law. Constant alternation of frequencies allows the radio interface to broadcast information over the entire range and eliminate interference from other devices. If this channel is busy, the system will switch to another, free from interference.
Discuss the article BLUETOOTH DEVICE DIAGRAM
Technological progress is moving forward by leaps and bounds, now even preschoolers have a mobile phone and know how to access the Internet, and seeing a person talking to himself on the street, no one will twirl his finger at his temple - everyone is already familiar with a Bluetooth headset, which is a wireless technology. This transmitter operates using encrypted signals, which, in addition to convenience, allows you to protect personal data. The wireless module allows you to establish communication among several devices.
Working principle and application
In the cases described below, there are several ways to organize sound transmission - through an FM transmitter, using Bluetooth Flash, as well as through a Bluetooth to AUX adapter, and power will be provided via USB. Each of these options has its own advantages and disadvantages.
For example, an FM transmitter is a bulky device. It is inconvenient to use, especially for smokers, since it constantly occupies the cigarette lighter socket, so it precludes its use.
In addition, it has other disadvantages - for example, at a short distance from the car in which it is installed, they will also be able to listen to this music, simply by setting the appropriate settings in the receiver.
The second solution is Bluetooth Flash. It also has its downsides. For example, it cannot provide stable communication. This causes the sound to drop out or be intermittent. In addition, the device is not compatible with all devices.
Experienced motorists believe that a Bluetooth adapter for a car radio is the best solution. It is an inexpensive but versatile device. AUX outputs are available in any model, so there is no need to assemble or disassemble anything, you just need to connect it to the appropriate connector.
At the same time, such a Bluetooth adapter for a car helps the driver solve several problems at once, i.e. it will be able to receive phone calls and play music from a flash drive or smartphone through standard speakers.
A Bluetooth module is often called an SD to USB adapter. And this best describes the principle of its operation. Once connected, digital audio is transmitted and at the same time, through the connection, the device receives power for its operation. That is, in some ways it resembles wireless charging, although they perform different functions.
It should not be confused with a module such as a CAN adapter.
The need for the latter is due to the fact that most modern cars equipped with electronics have a CAN bus in their architecture.
From it, information is sent to the car radio. And this makes it easier for the driver to control the car.
If the CAN adapter for WV is not connected, then the radio becomes more difficult to control. For example, it will not change the backlight level at night. But the adapter does not affect sound transmission. And a standard device is used for these purposes.
How to choose a portable speaker
Checklist when choosing the best column
1. If you are choosing a speaker that will mainly live in an apartment as the main speaker system, then it is better to consider medium or large models so that they produce a power of at least 30W, and preferably 50-60W. If the system has single-way speakers, then at least there should be low-frequency passive radiators, but it is even better if the system is two-way and with a lower threshold of the frequency range of 50 Hz. Then the acoustics will pleasantly fill the entire room with sound, without straining or getting lost at low volume levels. And you can always take it with you to the dacha or to visit friends.
2. If you just need a speaker as an auxiliary device for the home (if you have decent basic home acoustics) and for outings with friends, then you can consider compact and medium-sized models. A power of 20-30 W and a lower frequency threshold of 70 Hz will be sufficient. Bass will be normal, you can dance, on the street or in nature you will not get lost in the surrounding noise. Having water protection in this case will not hurt.
3. In any unclear situation, buy Flip 5. Just kidding. If you can’t choose which speaker is most suitable for you, then consider one of the compact popular devices. The above-mentioned model or the Sony SRS-XB21, or a similar one from another recognized manufacturer, will cope with most everyday tasks. They are not bulky, moderately powerful, are not afraid of harsh operating conditions, can work for a long time and can be chosen from a huge variety of colors.
4. About cheap and cheerful. If for some reason you don’t want to spend a decent amount of money on good portable acoustics, but want to grab the most for the least amount of money, then be prepared to plunge into the world of little-known Chinese speakers. You shouldn’t buy them blindly; it’s better to be able to come to the store and touch and listen for yourself. To rid yourself of surprises as much as possible, it is better to consider well-known budget multi-brands, the same ones that produce anything: from teapots to laptops. At least they will have their own representative office in Russia, warranty service, and you will be able to read reviews about the models. It is simply necessary to read reviews, since in most cases the technical characteristics and appearance may differ from those stated, and otherwise it will be impossible to understand how reliable a particular model is.
Selecting a column
The most crucial moment. The quality of the reproduced sound depends on the choice of speaker.
You should understand what tasks are assigned to the assembled device. Will there be an emphasis on playing music or using a voice assistant.
You can even look for speakers that look similar to the HomePod.
Here are decent options from AliExpres:
- GGMM D6 – 3,165 rub.
- COWIN DiDa – 4,040 rub.
- Baseus E50 – 4,713 rub.
Here are a few speakers from Russian stores:
- JBL Flip 4 – RUB 5,990
- JBL Pulse 3 – 9,990 rub.
- Harman Kardon Onyx Studio 3 – RUB 9,990.
Don't forget about other features of speakers from different manufacturers. For example, some can simultaneously act as a lamp, night light or charger for the main smartphone. Individual models can be paired to reproduce stereo sound.
When connecting audio wired, do not forget to get a 3.5 mm to 3.5 mm cable.
We assemble the system and enjoy.
How to make basic speakers with your own hands
To make the case, you can use either wood or plastic. It is better to give preference to the first one, since its use in acoustics improves the sound quality. If you are too lazy to cut wood, then you can refine the speakers from an old radio or use them without modification. The amplifier and power supply will be assembled in the subwoofer box, so all that remains is to connect the speakers to the required connectors. Therefore, if you have two speakers from the music center, you can safely use them.
If you decide to do everything in the best possible way, then, by analogy with the subwoofer box, you also make two housings for the main speakers. If desired, they can also be covered with attractive material. Pasting with thin felt, for example, improves the sound quality of the speaker system. In these speakers, it is best to install two speakers - for mid and high frequencies. This will save connection wires and provide a more attractive appearance of the entire system.
Required Components
Before you begin manufacturing, you need to make sure that all the required elements are at hand. These include:
- An old small speaker or a housing and two speakers.
- A Bluetooth receiver that receives a signal from the phone and transmits the sound of the melody to the speakers. You can order this component in China or in an online store located nearby. Typically, such products are relatively inexpensive. Currently, the receiver can be purchased for $6 including shipping.
- Battery from an old phone. The larger the battery capacity, the longer the speaker will work without the need to connect to a charger.
- Sound amplifier (from $0.5 on Aliexpress). The current example uses a Class D amplifier, model pam8403, 5V.
- You will also need a working soldering iron, solder, sealant or glue.
If all the required components are already on the table and ready for use, then you can begin assembling the device.
How to make a power supply
As mentioned above, you should not use bipolar power supply chips for the design. The reason is the complexity of the power supply; it is not easy to obtain the current necessary for operation. Therefore, it is best to make designs that can be connected to a unipolar power source with a voltage of 12-24 V. And subsequently, repairing speakers with your own hands will be much easier, if, of course, some kind of breakdown occurs. The power of the transformer should be slightly greater than the power of the consumers - all amplifier microcircuits.
The best option is to make one power supply for all devices. To effectively arrange all acoustic components, it is worth placing the power supply, the low-pass filter with an amplifier for the subwoofer, and the low-pass filter for the main speakers and tweeters in one housing. This will allow you to use the equipment ergonomically, and the number of wires will be minimal. On the back wall of the subwoofer you need to install connectors for connecting the main speakers and tweeters. But keep in mind that the subwoofer is a source of vibration, so soldering must be done efficiently, and fastening to the body must be done using rubber washers.
Functionality check
Once the assembly is complete, it's time to turn on bluetooth on your phone or other source and start searching for wireless equipment nearby. If you are asked for a password when connecting to a new gadget, use the standard four zeros.
That's all, you've made a fairly powerful Bluetooth speaker with your own hands, and then a new life begins without wires.
From paper
Making a column from plain paper is not as easy as it seems. You will need glue containing a hardener - the layers of paper are impregnated with it. Epoxy is best suited for this - coils and printed circuit boards are often made from it (the material resembles getinax). Do the following.
- For a square column, mark and cut sheets of paper according to the template of each of the walls. In the sheets from which the front edge of the speaker is glued together, cut out holes for the speakers and the bass reflex output. For the back there are holes for audio connectors and a power socket.
- Dilute and apply some epoxy glue to the sheets that serve as the first layer. Glue two layers for each wall and leave them to dry.
- The next day, glue the third layers to each wall. Add one every day. The interval between stages can be reduced from one day to several hours to speed up the process. But in this case the quality may suffer. Repeat these steps until the thickness of the walls of the future column reaches at least 1.5 cm. Instead of paper, you can use thick cardboard.
Once the speaker walls are ready, mount and connect the speakers and other parts according to one of the instructions above.
Disadvantage - evenness and accuracy when gluing sheets is important, otherwise the structure will lead to the side. The advantage of the method is the use of paper from old magazines and newspapers, cardboard (except wavy cardboard, with voids inside).
A round body will speed up the process: a roll of paper is wound onto a piece of pipe with a wide clearance, soaking as it goes. Secure the starting winding line with tape. The development looks interesting, in which the role of a voice coil is played by a strip of metal foil, and the role of a diffuser is played by a sheet of paper. Do the following.
- Apply metal tape or double-sided tape with foil to a sheet of paper. Place the coils so that they do not touch.
- Bring the ends of the tape or foil to the sound source.
- Place a magnet under a sheet of paper, connect the gadget and turn on the music.
You won't get high volume - the amplifier in the gadget is too low in power. Mid and low frequencies will be added to the “rustling” sound. Powerful speakers use a multilayer design - an electrostatic membrane, designed for high amplifier power.
From a tire
A speaker made from a tire cannot be compared in terms of coordination and amplitude-frequency response with branded or homemade rectangular systems. The rigidity of the walls is insufficient - rubber and hard rubber dampen low frequencies due to excessive elasticity. A stereo music system needs a large speaker - its diameter should be fixed in the tire, but not fall inside. The other side of the tire is covered with plywood or a board made of other lumber, placing the power supply and amplifier on it.
The tire itself should not contain holes or holes - but surface cracks do not affect the sound quality.
A more advanced design will be the part of which on the speaker side is closed with a wooden ring cut from the same plywood. The speaker is not mounted on the tire itself, but on a plywood ring, which can be connected to the back, where the blank plywood wall is located, using long through-tapping screws or bolts. Such a column can be rolled along the road. But it contains only one speaker, since it is difficult to place two or more in a flat and limited space. The amplifier, power supply and filters are located on the rear wall.
From a Pringles can
The simplest, but unusual option is to use aluminum, cardboard, plastic cans and glasses as speakers, making slits and inserting a smartphone into them . A more “advanced” option is to place a speaker of suitable diameter in a can of chips or a glass. The principle of any such speaker is based on the fact that the sound, reflected from the walls, acquires additional volume. But without an amplifier and a high-quality speaker, you won’t get good, bright, beautiful sound. Making an upward-firing speaker from a Pringles can is similar to any design that uses a piece of PVC sewer pipe as the body.
From headphones
A headphone column is an option in which, instead of a dynamic head, which is not designed for decent volume at a large distance from the listener, any modern speaker is used. The headphone space is sharply limited to accommodate the amplifier and power battery. In such a column, a piece of the same PVC pipe is used. However, when the column is passive, the process speeds up significantly. The step-by-step instructions are as follows.
- Disassemble the headphones and remove the heads with membranes.
- Insert speakers in their place. The speaker is chosen as thin and flat as possible.
- Connect the wires that previously supplied high-frequency voltage to the membrane heads.
- Secure the speakers using self-tapping screws.
- Close (if possible) the mesh inserts.
It is possible to turn headphones into speakers if they were initially large enough to completely cover your ears. If the speakers do not insert completely and do not close, then use an equivalent replacement made as follows.
- Remove the membrane heads from the headphones.
- Cut holes in the bottom of a plastic or cardboard glass, slightly smaller in diameter than the heads themselves.
- Insert and glue the membranes.
This option is very easy to make. The disadvantage is that the sound volume is no more than 30 decibels. This sound is comparable to a radio point and is used in rooms where there is little noise from outside.
Such acoustics are more of a joke - they are not designed for professional use. For full-fledged speakers you need speakers. If it was not possible to insert small-sized speakers instead of headphone membranes, the cylindrical design that is already familiar to you will be suitable as a basis.
- On the back of the headphones, cut a hole into which the magnet on the back of the speaker will fit. The hole should be much larger than the magnet itself - only the side supporting structure will remain from the headphone body. The back (outer) wall of the earphone will be cut off entirely.
- Using hot glue or Moment-1, glue the earphone to the piece of PVC pipe you just made.
- Place the power supply (or lithium-ion battery with a charge controller) and the amplifier itself inside the pipe. The result is an active column.
- Similarly, make a base for another earphone and place the speaker in it. The result is a passive speaker. In stereo systems, only one of the speakers is active.
- Remove the audio cable from the passive speaker and solder a plug with a standard diameter of 3.5 mm to it.
- Insert the same connector into the active speaker to connect the passive one. Connect one of the amplifier's stereo outputs to it. The second is directly to the speaker of the active speaker.
- Insert another connector into the active speaker - to connect an external sound source (for example, a smartphone), connect it to the stereo input of the amplifier.
- Connect the power supply to the power input on the amplifier.
- Check that all parts and assemblies are securely fastened, close both columns with a plug.
If the speakers are powered by a battery, instead of the power supply, connect the battery to the discharge controller, and the controller itself to the power terminals of the amplifier. Connect the charge controller to the battery by cutting its connector into the round walls of the active speaker. If you need a wireless connection, purchase and install a Bluetooth audio card in the active speaker.
From the bottle
Any plastic or glass bottle will do. It is safer to cut and drill plastic. For glass, you will need diamond drills and a crown, and the process itself is performed under water for safety reasons. Do the following .
- Using a hole saw, drill a hole in the bottle for the speaker.
- Drill mounting holes for self-tapping screws. The bass reflex will be either an open neck or additional holes drilled with a smaller diameter crown for a piece of plastic pipe.
- Fill the holes with sealant and install the speaker with pre-soldered wires. Tighten the screws. You cannot screw them “dry” into glass - the bottle will crack and shatter into pieces.
Do not use bottles made of tempered glass - it cannot be processed and will immediately break into small cubic fragments with dull edges.
Portable speaker made from old computer speakers
- Disassemble the column and immediately unsolder the power wire and transformer. They won't be needed anymore.
- To power the future speaker, you will need a lithium-ion or lithium-polymer battery , depending on what you have available.
- To charge the battery itself you will need a charge controller . You can order it inexpensively on AliExpress. Choose one that has deep discharge protection. The battery is connected to the terminals marked B+ and B-, and the load is connected to OUT- and OUT+.
- in the base of the speaker for the charging port located on the charge board. The board itself can be glued with double-sided tape, but for reliability, secure the port with hot glue.
- In standard speakers, the power wire is connected to the transformer, and from there to the diode bridge. We solder all 4 diodes.
- We solder the wires from the charge controller directly to the diode bridge, observing the polarity.
- We didn't touch the power and volume buttons for the acoustics, so you won't have to fiddle with them. We simply glue the board to the bottom of the speaker, and the battery and charge controller to the back wall.
- All that remains is to assemble the column . It will work via the AUX wire. If you need it to work via Bluetooth, you need to add the appropriate element to the system.
This is the easiest way to make portable speakers due to the fact that virtually nothing needs to be soldered. If the sound quality of the “native” speakers of the speakers does not suit you, you can always replace them with more powerful ones.
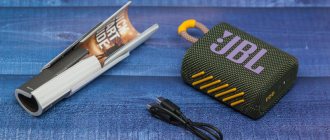
Making a column from PVC pipe
- Disassemble the Wi-Fi modem case. It will serve as a housing for the future speaker.
- At the edges of the upper part , make two holes for the switches, as in the photo.
- If you wish, you can make a couple of holes in the upper part of the pipe and fix the antennas from the router in them . Subsequently, they can be used as a signal amplifier.
- Make holes in the cover of the router case and in the pipe through which the wires will pass, as well as 2 additional ones for attaching the pipe.
- To ensure that the speakers are not damaged during operation, they will need protection. You can either purchase it separately or make it yourself from a special mesh trim for car windows. Place the speakers on the grid and make a circle around each of them with a distance of about 3-4 cm from the edge of the speaker.
- Cut them out . Using a thick thread and a needle, tighten the mesh around the speaker so that tension is felt on the front of it.
- The speakers can be secured in the pipe using hot glue or small self-tapping screws, if the diameter and thickness of your pipe allows this.
- Solder the audio wires to the speaker terminals. They are usually glued in pairs, so they are easy to recognize.
- As for the electronic part, everything is simpler here . In the front part of the router case we cut out a place for the mp3 module and attach it in any convenient way.
- Solder all electronic components together as shown in the diagram.
- Now you need to install the connector for powering the system . You can put it in the hole where the router's power port was, if it fits, or cut a new one.
- Now it's time for the speaker on indicator. To do this, we take a resistor and a diode. We solder one end of the diode to the resistor, and the other to the battery. We connect the resistor to the power button. It is needed in order to regulate the brightness of the diode. Install the diode into the hole provided for it.
After you have soldered everything, check the column for functionality and assemble the housing. As a result, you will get an original speaker assembled with your own hands.
Sources
- https://omagnitolah.ru/podklyuchenie/blyutuz-adapter-dlya-avtomagnitoly.html
- https://AutoTuning.expert/magnitola/bluetooth-adapter.html
- https://stroy-podskazka.ru/portativnye-kolonki/akusticheskaya-svoimi-rukami/
- https://svoimirykami.guru/blyutuz-kolonka-svoimi-rukami/
- https://besprovodnik.ru/kolonka-bluetooth-svoimi-rukami/
- https://stroy-podskazka.ru/portativnye-kolonki/svoimi-rukami/
- https://bestdiy.ru/prostaya-portativnaya-bluetooth-kolonka-iz-fanery-svoimi-rukami.html
- https://SdelaySam-SvoimiRukami.ru/5058-kak-samostojatelno-vstroit-bljutuz-v-ljubuju-avtomagnitolu.html
Briefly about the acoustics design
The first devices for extracting sound were simple: gramophone records were listened to through bells or mica membranes. The quality of this sound can be heard in old films: against the background of high frequencies, noise, crackling and the rustle of a needle. The next stage in the development of sound transmission equipment was the appearance of the speaker (an electrodynamic emitter with a conical diffuser) - it was invented in 1924.
The first devices were large in size and had a limited frequency range. But for those times it was know-how. Over time, speakers have been upgraded and manufactured using modern technology. Their frequency range was assessed as broadband, and later multiband ones appeared.
To produce high-quality acoustics, it includes not only speakers that better transmit high frequencies, but also massive subwoofers for low frequencies. The minimum number of emitters in a normal column is 2 pcs. Higher class acoustic music system contains up to 6 pcs. and 1 subwoofer. Modern speakers operating in mono sound mode are practically not produced. The exception is acoustics for military and federal purposes.
“Mono” was replaced by:
- "Stereo". This mode is provided by two channels that contain the entire frequency spectrum.
- "Sound around." The speakers have a larger number of channels (4 and above), which create a surround sound effect.
What you need for work
Details
- To get full sound from the device, you will need speakers. In total, you should take 4 of them: two for low frequencies, two for high frequencies.
REFERENCE! It is not necessary to use exactly 4 speakers. There are options for a three-speaker build. One of them acts as a subwoofer, the other two are responsible for reproducing high frequencies. You can also use two identical speakers, which will not be separated in frequency.
- Crossover with two channels (2 pcs.).
- Two passive membranes.
- Battery.
- Charger.
- Amplifier.
- Bluetooth module.
- Boost converter.
- Power connector.
- Switch switch.
- Case material.
REFERENCE! The optimal material for assembling the case is plywood, since it is easy to obtain and easy to process.
Materials and tools
To make a homemade speaker you will need a number of tools and materials.
- Glue.
- A hacksaw, jigsaw and other tools for working with plywood or any material that will serve as a housing for the device.
- Marker, pencil and other items for marking.
- Ruler
Assembly diagram
As can be seen from the diagram, the speakers are connected via HF and LF pairs to the crossovers, which receive the signal from the amplifier. This was done to provide better sound quality to the device. To increase the sound quality of low frequencies, you should also install a low-pass filter between the crossover and the woofer, which will remove all upper harmonics, providing high-quality and deep bass.
Information from the Bluetooth module is sent to an amplifier, which is designed to pre-filter and amplify the signal. The amplifier module itself is powered by batteries (or rechargeable batteries). The voltage from them rises to 14 V and is supplied to the input of these two elements.
A protection board should also be placed between the supply voltage and the boost module, which will provide the device with short circuit protection.
Step-by-step instructions for connecting a speaker via Bluetooth to your phone
When setting up manually, perform the following steps:
- Turn on the accessory and wait for the notification to appear on the screen of the mobile device.
- Go through the items in Bluetooth, “Settings”, “Search”.
- After activating the channel, select columns from the drop-down list.
- Waiting for correct pairing.
This operation is performed once, but it can also cause some problems.
For a Samsung phone
When connecting speakers to a smartphone of this brand, use the classic version. The scheme is simple: turn on the device, activate Bluetooth on the phone. The accessory appears in the list of possible connections. In the list, press and hold the required name for a few seconds, and select the connection string in the context menu. Pairing occurs automatically. The operation of the device is checked using any audio file.
In the same way, pair the Bluetooth speaker with any mobile devices running Android OS. The recommended version of the operating system is at least 4.0. If necessary, you can connect 2 or 3 devices from different manufacturers to 1 phone on Android OS using Dual Audio technology (available for Bluetooth at least 5.0). With different sound delays, such manipulation is appropriate in an open space; indoors, playback will be asynchronous.
To iPhone
The algorithm for connecting an iPhone to the speakers is as follows:
- The compact audio system is located in close proximity to the smartphone. This is necessary to create a stable connection between devices.
- Turn on the speakers and put them into pairing mode by pressing and holding the corresponding button on the panel.
- On the iPhone, open the settings section (gear icon).
- At the top of the application select Bluetooth.
- Move the slider to the on position. Columns available for connection appear in the drop-down list.
- Click on the device name. The aggregation process takes 1-2 minutes.
Power type
As a rule, portable speakers operate autonomously from built-in batteries. It is clear that they need to be recharged from time to time. But it is possible to recharge from a power supply or connect to a laptop via a USB cable or to a power bank. When purchasing, it is advisable to ask the seller about the battery life. The longer the speaker can work without recharging, the better.
There are devices that have a mixed type of power supply - both from batteries and from an alternating current network of 220 V. Mains power is useful for those who do not plan to move the smart speaker to different places in the house, but have found a permanent home for it on a shelf or on the refrigerator in the kitchen.
There are also devices that are only self-powered by batteries that need periodic replacement.
What do you need from acoustics?
It's nice when the sound reproduced from a personal computer sounds over the entire audible range (from 20 Hertz to 20 kHz). To emphasize certain frequencies, you need to use special filters. Most of the cheap speakers that can be found on sale reproduce sounds in the range from 50-100 Hertz and up to 15 kHz. This makes the sound seem incomplete and ugly. Therefore, DIY speakers must have higher performance to meet your needs.
Decide right away which frequencies you plan to emphasize and whether your amplifier will have the ability to manually adjust. But if you decide to take the easy route, then it will be enough to filter out the low and high so that the devices reproducing this spectrum work in parallel with the main speakers. You've probably heard words like "tweeters" (small speakers that filter out high frequencies) and "subwoofer" (a large wooden box that houses a speaker for bass reproduction). These are the ones you will have to do yourself.
Bluetooth speaker diagram
The work begins with disassembling the Bluetooth receiver. This is done to understand the device model and replace the battery with a more capacious one. The operation will increase the service life without recharging.
Next, you need to solder all the contacts of the amplifier to the receiver:
- on the board we find the letters “L” (left channel), “R” (right channel) and an inverted “T” (ground or minus). You need to solder mini-jack plugs to them: white to “L”, orange to “R”, green to “T”. Naturally, the color designation may not match (it all depends on the manufacturer). If everything is correct, then the signal arrives from the Bluetooth receiver to the amplifier, but is not sent further.
- We find the “Out” mark, and next to it there are two sets of contacts (plus and minus). We connect them to the contacts marked “L”. Speakers can be connected according to your wishes. On the diagram we find the designation “R”.
- To supply power to the amplifier, just find the contacts next to the “5V” mark. The cable is soldered to the positive on the amplifier. On the amplifier from the on-off button you need to find a contact that is not connected to the battery. We connect it to the board.
The preparation stage is over. All that remains is to check the functionality and assemble it into the case.
Battery pack assembly
The battery is assembled as follows:
- Both poles of the battery are bad.
- On two wires of different colors at the ends, the insulation is removed on one side by 7-10 mm, on the other by 20-25 mm and also tinned.
Long tinned ends are soldered to the batteries folded together:
- black wire - to the battery negative;
- red wire - to positive.
BATTERY BATTERY JBL Flip 1
- The battery we offer is CPP-583
Capacity up to 2
000mAh 3.7V
Battery code of the original battery AEC653055-2P
The speaker is not charging, is the battery swollen or does the battery not hold a charge? Then you need a new power source for your device. Our online store TERABYTE MARKET will help you buy a new battery, accumulator, battery for your speaker.
• Most batteries on our website are ordered from factories in China according to the sizes that the client tells us. Since it is an original battery, it is very difficult or impossible to find a battery for a tablet.
• All batteries are guaranteed for 3 months
Tags: Where to buy a battery for a speaker, battery, battery, battery, order, price, sale, repair, battery replacement, swollen battery, not charging.