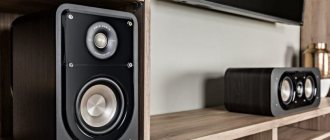
What can you make your own speaker housing from?
A fairly wide range of materials can be used as a material for creating speaker housings. The most popular of them is fiberboard. Less commonly used are ordinary wood, chipboard, plywood, MDF, and thick cardboard. Plastic and metal are also suitable for this, if you have the ability to process them. Description of each material:
- MDF is a wooden material that is most often used among factory speaker designs. It is distinguished by the fact that it resonates the least, is durable and easy to process. True, the quality of MDF varies.
- Plastic – If we put aside the processing and melting issues, this is a worthy candidate for a speaker enclosure. Lightweight, moderately flexible (depending on quality) and strong enough to ensure a long service life.
- Chipboard is generally a good material, if you forget about some of its shortcomings, namely fragility and fragility. What is meant here is not the general weakness of the structure, but intolerance to moisture and certain types of paint. Not suitable for everyone. Easy to process and a fairly cheap option. Varnish will help protect against irritants.
- LDSP – laminated chipboard. An improved option that does not need to be varnished. This material does not look very good in the original, but it can be painted, and the price is much lower than regular chipboard.
- Plywood - is divided into several subcategories according to the tree from which it was made. If the creator of a speaker cabinet is willing to put up with processing difficulties and a considerable price, then plywood is perfect for him. The point is that, as it dries over time, any wooden product bends like a screw, and in plywood this distortion is quite pronounced. If you make it from plywood, then you don’t need to cover the product with anything: its advantages will be negated.
- Solid wood requires high costs, but ultimately rewards the user with minimal exhaust emissions. This option is only suitable for the sake of realizing that a lot of money has been invested in the speaker body. The only advantage is the natural appearance.
- Thick cardboard is a cheap and short-lived option. On the other hand, even a child can handle such a case.
- Metal is a heavy and expensive choice of material. In addition, you need to be able to process it correctly. If this works, the user will end up with a speaker with a metal body, which adds style.
Which plywood to choose?
The speaker cabinet must be rigid enough to ensure optimal reflection/absorption of sound waves of a certain power and frequency. To do this, you can use a wide variety of materials: plastic - belongs to the category of budget equipment, glass, metal or hard rubber. However, wood is considered the best solution. Solid wood is rarely used for this task; other options are mainly used:
- Chipboard - one of the main advantages of the material is its availability. But to achieve good sound, you need to use high-density boards, the thickness of which is at least 16 mm. This will reduce the resonance and also eliminate the appearance of its own overtones. Raw materials also need to be additionally coated with other materials or treated with special paints to protect them from moisture and damage;
- MDF - arose as a result of improvements in the production technology used to make chipboard. The advantages of the material include high mechanical rigidity, as well as the ability to absorb sound vibrations well;
- plywood is the best choice. To get a quality product, you need to give preference to high-grade raw materials. The best option would be multi-layer plywood with 12 layers and no less. This material has good absorbent properties, is weakly subject to delamination, and it is also much lighter than chipboard or MDF. As for the type of wood, experts recommend paying attention to pine or oak. With their help, you can create a good resonance, and they are also characterized by exceptional aesthetic properties.
Instructions: how to make a body?
After choosing the material, you need to decide on the dimensions of the case. If you have the “internals” for the speaker on hand (wires, speaker, etc.), it won’t hurt to choose a size so that everything fits, but is not too loose. Excess empty space inside the speaker housing can cause damage.
Classically, the electronics of the speakers consist of a rectangular parallelepiped of the optimal size, but it is not necessary to make this shape the final one: after the rough filling, the creator will still have the opportunity to add decorative details that will change the shape and appearance of the speaker.
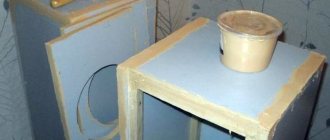
After the measurements, the direct cutting of the primary material follows in order to obtain the necessary parts. Roughly speaking, you will need six plates, three pairs of different sizes, or all the same - it’s up to the creator to decide. Do not forget that the overlap between adjacent sheets should be equal to the thickness of the material.
After making all the necessary parts, all that remains is to connect them. The type of connection depends entirely on the preferences of the owner - it can be glue, nails, screws, construction staples, and anything else. You just need to leave one plane to place the electronics inside.
REFERENCE! Speakers will require stands to prevent communication between the actual sound device and the shelf, table or floor on which it sits.
Stands can be easily made from small weights intended for construction scales. These small, and most importantly, inexpensive items will fit perfectly into the interior and will cope with their task.
DIY ACOUSTIC SPEAKERSAcoustic design does not mean decorating the speakers with carvings in an antique style, although this will give the speakers uniqueness, but solving the problems of acoustic short circuit. The fact is that when the diffuser moves, excess air pressure is formed on one side, and the air is discharged on the other. For sound to occur, it is necessary that air vibrations propagate into space and reach the listener, and in this case the air vibrates around the dynamic head basket and the sound pressure it creates is not very high, especially in the low frequency region:
More details about the principle of operation of the dynamic head HERE. Methods of breaking the acoustic circuit are called acoustic design, and each of them is designed to make it difficult for air to penetrate from one side of the diffuser to the other. There are several main options for breaking an acoustic short circuit. The simplest is to use sheet material in the middle of which a hole is cut for the dynamic head. This is called an acoustic screen:
A slightly more complex method is an open box, i.e. drawer without back wall:
Both of the above methods have too little efficiency, so they are practically not used only in cases where “there is no fish and no fish.” It is much more effective to use a closed box, and in such speakers special attention is paid to the tightness of the box - any gap in the box will produce overtones, since quite a lot of pressure arises in the box (when the diffuser goes inside the box) and a fairly large vacuum (when the diffuser moves out) :
The next option for acoustic design is a box with a bass reflex:
In this case, this is a rectangular hole located in a strictly calculated location on the front panel of the speaker system. However, this option can also be done using a pipe:
The advantages of these options include increased output at the frequency at which the bass reflex is designed, the main purpose of which is to invert, i.e. change the phase to the opposite. As a result, sound is emitted into space not only by the front part of the diffuser, but also by the rear part, the phase of which is changed by the bass reflex. A more complex version of acoustic design is an acoustic labyrinth. The essence of this option is that the passages inside the speakers are located in such a way that resonance occurs at a certain frequency and, as a result, a large increase in output at this frequency. The calculations and manufacturing accuracy of such systems should be taken VERY seriously, since there is a high probability of “standing” waves occurring in the labyrinth. In this case, the sound quality will be even worse than that of the option with an acoustic screen:
The horn version allows you to get even greater output at the resonant frequency:
The difference between a horn speaker and a speaker with a labyrinth is that the direction of sound waves varies according to different laws - the horn either expands conically along its entire length, or exponentially. The labyrinth can have the same window along its entire length, it can expand or, on the contrary, narrow, but always linearly. In addition, for speakers with a labyrinth, both the front and rear parts of the diffuser take part in the work, while for horn speakers, both one and both sides can radiate. The next acoustic design option is a bandpass or bandpass resonator:
This option differs from all previous ones primarily in that it emits only at the resonance frequency and requires strict adherence to the design dimensions. The last three options are mainly designed for using a low-frequency dynamic head, while the previous ones are quite suitable for wideband speakers. Therefore, if the acoustic system has, in addition to woofers, others, for example, midrange and HF, then it is not recommended to embed them into the housing with the woofer. In any case, to calculate the speaker sizes, you will need the characteristics of the dynamic head, in particular the Thiel-Small parameters. If this data is not available, it is necessary to obtain it before calculating the dimensions of the speaker housing. There are quite a lot of descriptions of methods for obtaining these parameters - just use any search engine. Of course, these are not all types of acoustic design - these are the most popular. The enclosure dimensions are calculated using special programs for calculating speaker enclosures. Finding them on the Internet, as well as instructions on how to use them, is also not problematic. When designing speakers, you should take into account some technological features - if the front panel on which the speaker is installed is recessed into the housing, then you will need to make additional ribs into which the front panel will actually rest:
If you don’t want to mess around with the ribs, you can make the front panel so that it rests against the sides of the case, which also strengthens the connection between the front panel and the sides:
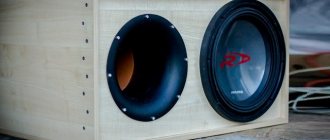
All this will give the front panel an additional, more rigid connection with the body. You should also not forget about the methods of attaching the dynamic head to the front panel and the pitfalls that you may encounter. Mounting the speaker from the outside is most preferable, since it does not mechanically weaken the structure, but this method involves chamfering along the diameter of the dynamic head and sinking the speaker inside the body so that ALL emitters, bass, midrange, and treble are in the same line. chamfering reduces the mechanical strength of the front panel and its restoration will require an additional ring secured from the inside. The relevance of this ring is the higher, the greater the power expected to be obtained from the speaker being manufactured, and at powers above 150 W it is already 100% necessary:
If necessary, you will need to remove the side chamfers on the ring so that it does not interfere with the front panel installation into the case itself. When installing the dynamic head, it is necessary to ensure that there are no gaps. If the chamfer is removed by a machine, the surface turns out to be relatively smooth; all that remains is to sand it. However, at home it is quite difficult to obtain a flat surface. Here it is not entirely clear what the manufacturers are doing - it is strongly recommended to install the speaker from the outside, but the sealing rubber on almost all dynamic heads is located for installation from the inside:
To solve sealing problems, you can use door seals - self-adhesive strips of porous rubber, sold in all hardware stores. The sealant is glued along the perimeter of the chamfer and when installing the speaker, it completely fills all the cracks:
If the dynamic head is installed from the inside, then the hole will need to be chamfered to prevent the appearance of standing waves. However, such a chamfer weakens the rigidity at the point where the speaker is attached to the panel (the material is too thin) and this method of fastening is not acceptable for powers above 50 W without additional reinforcement of the structure:
It is advisable to use natural material for the manufacture of speaker cabinets, optimally plywood, but this material is too expensive. Therefore, it is better to use plywood to build speakers of medium and high price categories, using dynamic heads of VERY good quality and power above 100 W. For the average price category and low powers (up to 50W), you can use fiberboard or MDF (the same as fiberboard, only the thickness and density is greater), but it must be processed and modified, or chipboard.
For powers up to 10 W, plastic is also quite suitable, but also using technological tricks. The first problem when making speakers from plastic arises when eliminating the chatter of the plastic itself, especially manifested in the centers of the sidewalls. You can get rid of this unpleasant sound by using thicker plastic, or you can glue additional stiffeners. If the plastic is dissolved with dichloritane, then dichloritane with plastic chips dissolved in it can be used to attach the ribs. If the plastic is not dissolved by dichloroethane, then it is better to use epoxy glue, preferably made in Dzerzhinsk. Before gluing, carefully sand the contact areas with coarse sandpaper and do not be afraid that the glue forms beads at the point of contact of the parts to be glued:
For greater efficiency in suppressing overtones of the body, you can “paint” the resulting “baths” in 2-3 layers with anti-gravel - a coating used to cover the underbody of cars to protect against fine gravel.
After drying, anti-gravel acquires the properties of rubber and absorbs sound quite well. When using fiberboard as a material for the manufacture of speakers, it is necessary to determine the required thickness. If the speaker power does not exceed 5 W, then fiberboard can be used in one layer. Before cutting the fiberboard, it is coated on one side with epoxy glue and heated with a hairdryer. Under the influence of temperature, the glue becomes more liquid and impregnates the fiberboard to almost half the thickness. Once the glue has hardened, the resulting material is quite strong, essentially getinax, but on the one hand retains the sound-absorbing properties of fiberboard. You can cut DPV with a jigsaw, and you can glue the workpieces with epoxy glue reinforced with material. To do this, the blanks are folded into the desired structure and secured with any SUPERGLUE. Then strips of strong fabric are cut, in our case it is red silk. The width of the strips should be approximately 3...4 cm. The strips are laid at the joints of the workpieces, covered with epoxy on top, and then “ironed” with a 40...60 W soldering iron. High temperature allows the glue to completely saturate the fabric, and also significantly accelerates the polymerization of the glue. True, during operation a certain amount of smoke is released, so work must be done either outside or under a hood:
If the speaker power is higher than 10 W, but less than 20, then it is better to glue the fiberboard in half - first the sheets are glued together, and then the finished case is assembled:
For powers up to 30…35 W, you will need to fold the fiberboard in three or use 18 mm thick chipboard (unfortunately, 22 mm thick chipboard can only be found in old grandmothers’ homes in the form of old wardrobes made before the 80s). To stiffen the sidewalls, you can use spacers of the “CROSS” type:
For powers up to 50 W, the relevance of using fiberboard is already debatable - it is much easier to work with chipboard, MDF or plywood than to fold fiberboard from 4-5 layers. For this, material with a thickness of 18 mm is suitable, but you will have to use additional bars to ensure a greater connection between the speaker parts:
The speaker can be assembled using self-tapping screws, but since the power is not greater, it can be glued with epoxy glue or PVA, but it is better to buy it not at an office supply store, but at a hardware or construction store. This PVA will be called MOMENT-STOLYAR, water-dispersion glue. It is recommended to buy on the market only in the summer - after freezing, the glue seriously loses its quality. However, to ease your conscience, it is better to screw at least a couple of screws into each block. When manufacturing speakers, sometimes they make a grave mistake - the mid-HF link is not acoustically protected in any way from the impact of the back side of the woofer cone, which leads to a decrease in the efficiency of the speaker itself, and often the failure of the midrange link - too strong air impacts from the back side of the woofer diffuser lead to the midrange speaker coil being pushed out of the magnetic gap and the coil jamming. Much more often they forget to subtract the volume of the protective casing of the midrange-high-frequency speakers from the total volume of the speaker; as a result, the internal volume of the speaker is less than necessary and the final characteristics are greatly blurred - the resonant frequency of the phase intertors increases noticeably, which results in unwanted overtones. When assembling speakers with a power of up to 100 W, you can also use either chipboard or plywood 18 mm thick, although of course it is better to look for material 22 mm thick. To eliminate the occurrence of resonances in the sidewalls of the speaker body, additional support bars are also used through which parts of the speaker are attached. It would not be superfluous to install a “cross” and an additional washer for attaching the woofer dynamic head, as well as treating the speakers from the inside with sound-absorbing materials, for example, pasting with paralon or foam plastic 5-10 mm thick, just do not forget that the pasting will “eat” part of the internal volume and it is necessary to make an adjustment for it when calculating the dimensions of the body.
The best results are obtained with polyurethane foam, since the thickness of the applied layer can be adjusted by the speed at which the foam is released from the can. If the foam is released VERY slowly, then it turns out to be very dense and the increase in volume is not very large. If the foam is released VERY quickly, then it turns out to be much looser, and when it hardens, it greatly increases in volume. If foam is applied to the sides of the case from the front panel, increasing the foam output as it approaches the rear wall, and ensuring a minimum rate of foam output at the front panel, the internal volume of the speaker will take the shape of a pyramid lying on its side. Such tricks make it possible to completely solve the problems of standing waves, since there are no parallel planes inside the speakers, and the unevenness of the frozen foam only enhances the pyramid effect. When using this technology, you should be more careful when calculating the dimensions of the workpieces - the internal volume decreases VERY significantly and this requires a serious increase in the speaker body.
It is recommended to glue the ribs for fastening the sidewalls, in addition to the screed with self-tapping screws, as in the previous version, but there are several more options for adhesive masses: - epoxy glue mixed with fine sawdust, or, better, wood dust; - MOMENT-JOINER, but before screeding, the applied glue should be allowed to dry a little until it reaches the consistency of butter at room temperature. This will allow you to more completely fill with glue all the irregularities between the speaker parts; - polyurethane glue, for example MOMENT-CRYSTAL, which also needs to be allowed to dry a little. After assembly, the gluing area must be thoroughly heated with a hairdryer, which will lead to the formation of small bubbles in the adhesive mass, and the mass itself will more tightly fill the unevenness between the contacting parts of the body; — automotive sealant of domestic production, precisely domestic, since after hardening it is much tougher than imported sealants; — mounting, polyurethane foam. Before applying it to the parts to be glued, the foam is “released” onto an unnecessary piece of plywood or fiberboard, and then thoroughly mixed with a metal spatula until it “shrinks,” i.e. until you obtain a mass similar in thickness to thick sour cream. After application and screeding, the foam will still expand slightly and completely fill all the irregularities at the point of contact between the speaker parts. After gluing, the parts should be allowed to dry thoroughly for 20...26 hours. To increase the volume at the same output power, you can use “double” dynamic heads - parallel or series connections of two identical speakers are used for the low-frequency section. In this case, the total area of the diffusers increases, therefore the speaker can interact with a much larger amount of air, i.e. create greater sound pressure and this makes the subjective loudness much higher:
It should be noted here that the use of a large number of speakers, including for dividing the audio range, begins to introduce some troubles - it is quite difficult to achieve signal phasing in those places where the frequency response of speakers neighboring in the range intersects. Therefore, you should not chase a large number of bands for a homemade speaker - this mess can be very badly spoiled with such oil. It is better to make speakers with a power from 100 to 300 W from plywood, and you will have to look for plywood with a thickness of 22 mm. The speaker is also assembled using stiffening bars that are glued. It is better to give the bars the shape of equilateral triangles, where the legs will be attached to the sides, and the hypotenuse will be directed inside the body. If you cannot find plywood of this thickness, then you can use 8 mm thick plywood glued in three - the final thickness of the material is 24...25 mm. The adhesives are listed above. As technological advice, we can only recommend first cutting the necessary blanks and only then gluing them, and immediately tightening them with self-tapping screws. When installing a “cross” inside the AC, which would not be amiss, it is better to round the corners of the stagnating bars - quite large volumes of air are already moving and turbulence may occur around the right corners of the screeds. It is also recommended to “round” all internal corners using plasticine or applying several layers of thick anti-gravel. Another type of acoustic design is separate housings for each speaker. These speakers do not use passive filters, and the signal is divided into ranges immediately after the amplifier's volume control. The split signal is then fed to three separate power amplifiers, which each drive their own speakers:
It would be unfair not to mention the “fillers” often used in speakers—small rolls of sound-absorbing material lying inside the speaker. Such rollers make it possible to slightly increase the calculated internal volume of the body, however, in order to correctly manufacture such a “filler” it is necessary to know its acoustic properties. It is quite problematic to obtain the characteristics of the “filler” in a home-made environment, so the only thing left to do is either refuse to use the “filler” or experimentally find out the required volume and the material used (usually fluff wool, batting, sentipon). At powers above 100 W, it also becomes important to ensure the stability of the speaker cabinet, since quite a lot of work is already being done to move the diffuser and the air is actively “resisting”. It is also advisable to break the mechanical connection between the bottom of the speaker and the floor on which the speaker is installed. For these purposes, they usually use either tripods, which are problematic to make at home, or they use steel spikes screwed into the bottom of the speaker:
At powers above 200 W, it is desirable to strengthen the front panel of the speaker and it is desirable to use materials of different structures, for example, if the front panel is made of plywood, then a sheet of chipboard is glued to the inside, the thickness of which is 1.5-2 times less than the thickness of the panel. This combination of materials ensures the absorption of vibrations in a larger audio range precisely due to the heterogeneity of the materials. For greater stability of the speaker, its mass can be increased by coating the bottom with polyurethane foam and laying a couple of bricks in it, covering them on top with the same foam. After the foam has hardened, it is better to cut off the irregularities with a stationery cutter. The “stolen” internal volume must be taken into account when calculating the size of the future speaker. For powers above 200 W, it is better to use combination materials - all speaker parts are glued together from 18 mm chipboard and 18 mm plywood. Plywood is used as the outer layer, and chipboard is used as the inner layer. This trick allows you to save a little - chipboard is much cheaper than plywood. It is advisable to glue the inside of the speaker with sound-absorbing material, for example, triple-sewn batting, double-stitched with quadruple padding (the padding can be double and quadruple), 5...10 mm polystyrene foam. The different structure of tightly glued materials of different structures eliminates the problem of resonance of the body itself. It is better to additionally tighten the corners with metal corners - this will add rigidity to the structure and protect the corners of the speakers from damage - the speakers are already quite heavy and during transportation various impacts are possible from which the corners most often suffer.
For powers closer to 1000 W, the thickness of the material should already be quite large, for example, two layers of 18 mm plywood plus a layer of 18 mm DPS for a total of 54 mm, and the DPS is glued between the layers of plywood, however, the speakers already move into the category “for sound”, therefore quality can be sacrificed in favor of mobility. Based on this, you can use double 18 mm plywood, installing a “cross” inside. It is not difficult to notice that with increasing power, the thickness of the speaker walls increases. This is primarily due to the fact that it is necessary to isolate the air moving inside the speaker from the listener. However, we should not forget that the speaker cabinet can also resonate. It is to eliminate this nuisance that it is better to use internal pasting of the housings and minimize the overtones resulting from resonance. It is not difficult to check the resonant frequency of the housing yourself. To do this, you need to tilt the speaker 20...25 degrees and throw a rubber mallet on top of it, from which you first pull out the handle. The tilt of the AC is necessary so that the blow is single and the mallet bounces far to the side. A microphone attached to the speaker (the membrane hole to the body) and connected to any linear amplifier on the oscilloscope screen will draw both the moment of impact and the aftersound that the body itself gives. The test is, of course, quite crude, since in reality the “shock wave” comes from the inside, and during the experiment from the outside, however, based on the results of this test, one can judge at what frequency the body itself resonates and how quickly attenuation occurs:
An ideal speaker does not cut and the moment of impact fades immediately, almost instantly, but the walls of an ideal speaker consist of concrete 1 cm thick for every watt of power and such a speaker is more suitable for ridicule than for use:
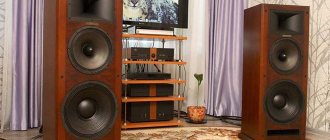
The finishing of the speakers can be very different, there are no strict requirements here. If the body is made of plywood and the pattern is quite attractive, then the body can be sanded and then coated several times with colorless varnish:
You can buy veneer from valuable wood species and cover the speakers with veneer to match the color of the furniture in the room:
Car audio stores sell so-called acoustic fabric, which is synthetic felt. The material adheres well and stretches, which will allow you to finish the speakers at a fairly high level:
Having sanded the body, you can paint it with car paint, just make allowance for the fact that car enamels need to be dried at high temperatures. Therefore, you will have to use a special hardener “IZUR”, the mixing proportions are written on the packaging of the hardener, although it is better to add 10-15% more than the suggested proportion:
If the body is carefully sanded and sanded, then it can be covered with a self-adhesive film sold in BOI stores, but this material is quite delicate and should be used if you are sure that the speakers will stand in their place for ten years:
If you plan to frequently transport the speaker system, it will be very useful to provide appropriate handles. This is especially true for small speakers, which you want to take two at once, and for large ones, which simply have a lot of weight.
How to independently assemble an active speaker with increased efficiency at low frequencies is described HERE.
Site administration address
DON'T FIND WHAT YOU WERE LOOKING FOR? GOOGLE:
CUSTOM SEARCH STRING
How to put content inside?
First you need to select the side that will be the “front”, and drill a hole in it for the speaker, then insert it into this hole and screw it (glue it, nail it, if desired). It is advisable to place the remaining insides so that none of the wires are bent or pressed, and small parts do not emit play. If the size was chosen correctly, everything will fit. The final step is to attach the last plate that will close the box.
Subscribe to our Social networks