The initially installed sound system in budget cars does not always suit its owners. Therefore, they are inclined to replace it. But sometimes a case arises when these are simply forced actions - a quiet sound in the speakers, wheezing or other interference. The problem may lie in one speaker or in the entire circuit. Sometimes there is a discrepancy between all elements of the “sound” chain or each separately.
For normal operation of the speaker system, you need to pay attention to all details. I’ll look at why the radio plays quietly, heats up and there is excess noise in the speakers.
The speakers produce a low sound
Including any tracks with different recording quality, the speakers produce a quiet sound, regardless of the position of the volume control.
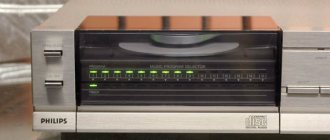
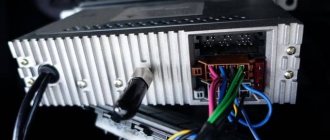
Car radio
This could be several problems:
- A burnt-out speaker or capacitors that prevent it from doing this at peak loads.
- Mismatch between the resistances on the speakers and the output contacts of the radio.
- Accidentally pressed or stuck volume mute button when talking on the phone.
- Weak signal with volume mute wire.
All these points answer the question why the radio started playing quietly.
Vehicle interior
Lost bass from subwoofer
So, there is a 2.1 speaker system. Recently, at a volume of about 45%, the bass on the subwoofer periodically disappeared (the satellites are playing). And recently the subwoofer stopped producing low frequencies altogether, only a slight hum + hum from the satellites (the satellites themselves reproduce the sound). After disassembling the system, a place was found on the board where the resistance was charred. In other places there was nothing, no deposits, no deposits, no inflated capacitors. Tell me if this is the problem. If so, which one should I replace it with? I can’t make out the markings. Thank you.
There is a video of the board itself, but I can’t attach it ((
What about the sub? You turn on the music quietly in the car and the bass from the subwoofer is only audible at times, it gets louder for a few seconds and then stops. And so it repeats, then the bass appears, then disappears
- The radio turns off when the engine starts on 2112 - 4 answers
- How to connect a radio to a VAZ 2112? – 3 answers
- The radio does not turn on in 2112 - 3 answers
- How to connect a radio via a button on 2112? – 3 answers
- The radio's power cables are thinner in cross-section than they should be - 2 answers
Often the culprit is the volume control (variable resistor) on the amplifier. Also due to an increase in resistance at the “input” or (and) “power” at the contacts due to oxide. But some amplifiers are simply designed for a powerful input signal.
Subscribe
to our channel in
Index.Zen
Even more useful tips in a convenient format
Sub Klipsch SUB 12 there is some kind of auto volume level ((You do more than half of it - the bass disappears!! How to remove it?? What does this look like?
Answers
The volume control on the subwoofer is set to half scale - your glass should already be rattling and the furniture in the room resonating! And if then the sound disappears, then most likely this sub is faulty, take it to service!
Power mismatch
When buying a car, no one pays attention to the audio system. Its inability to work emerges only after a few days. Most likely the speakers were chosen at random - they play well.
In this case, it is necessary to check the entire circuit: the radio, connecting wires and speakers. You should also take into account the correct connection. Since the speaker also has its own polarity.
Standard radio
Modern car radios are configured to operate at a power of about 55 W. If there is a discrepancy and the volume increases, the speakers could simply burn out. This way they will operate at minimum volume. In another case, additional noise and crackling may occur, as well as heat up.
Noise in the speakers
When installing the system in a car, there is a possibility of damage to the wires going to the speakers. Subsequently, this will lead to oxidation, damaged area and loss of contact. The contact on the speaker itself may also be damaged. To check, you will need to connect a working speaker.
Noise in the speakers
If all speakers are connected to one output, then it is necessary to check the initial contact. It may be oxidized or damaged. You can also check the integrity of the wire.
Why is my bass not sounding and how to fix it
Author: Tiki Horea
Most often, it is poor monitoring that is the reason why it is not possible to make a sound that gives the listener “goosebumps.” Sometimes this is due to a lack of skills, but that is not what this article is about. Once you get your monitors set up properly, you'll notice how your mixes start to improve. Also: • You won't have to waste time testing mixes on other audio systems • You'll be able to trust exactly what comes out of your speakers and stop second-guessing your creative decisions Before I continue, I'd like to share a little secret with you: it's impossible to make your own room completely flat in terms of frequency response. This is only possible in exceptional conditions like the Microsoft Audio Labs rooms. What is important to us is to minimize the acoustic peaks and dips that are usually present in our rooms. Once you have finally discovered (or admitted) that the environment in which you usually listen needs correction, the first thing that comes to mind is to change the acoustics, right? Or perhaps you have already started thinking about acoustic design? Either way, the first step should be to find the correct position for the monitors in the room. And only after that - acoustic design. Speakers are similar to microphones in the sense that move them a couple of centimeters left or right and the sound changes. Here are a couple of ideas on how best to place speakers in a room. Arm yourself with a tape measure. 1. Place the sound flame along the room, not across it.
This will give the low frequencies room to accelerate, and the frequency response will be straighter.
Also, with this arrangement there will be fewer destructive reflections from the side walls. 2. Place the speakers at equal distances from the side walls.
The same applies to the listening point.
For stereo imaging, symmetry is critical. 3. The 2 speakers and your head should form an equilateral triangle.
The distance between your head and each speaker should be the same.
You can start with 110 cm. 4. Some monitors are designed so that they can be positioned while lying down, while there are those that can only be listened to in a standing position.
All this can be found in the manual for your monitors.
5. Position the speakers so that the tweeters (tweeters) are at ear level.
High frequencies will be guides.
This means that if the speakers are lower, higher, or at the wrong angle, then what you hear may not sound quite “honest.” You can use foam stands to point the speakers directly at your ears. 6. Place monitors on stands.
Stands and rubber mats (including Genelec rubber racks) rarely help.
If the speakers are on a table, vibrations and distortion of perception cannot be avoided. Monitors on stands are also easier to move. 7. The 38% Rule
In a rectangular room, the ideal listening position would be approximately 38% of the length of the room from the wall behind the speakers.
This is where low frequencies will be best read. It is worth keeping in mind that points a and g only apply to perpendicular rectangular rooms. If your room has a different shape, look for a listening point relative to the symmetry of your specific room. If there is a sofa, let it be centered relative to the width. If you have a bookcase, place it behind the sofa so it can act as a diffuser. Don't forget that the back of the door can be a great place for an absorbent panel. I hope the idea here is clear. The distance between the front wall and the speakers also needs to be taken into account. Low frequencies are more omni-directional (i.e. bass flies in all directions). Low frequency sound waves diverge and reflect off the front wall back towards you. When these reflections combine with direct sound from the speaker, they create acoustic interference, causing nulls or dips in the frequency response. This phenomenon is called SBIR (Speaker Boundary Interference Response - interference distortion caused by the interaction of direct sound from loudspeakers with reflections of sound waves from enclosing structures). Place the speakers as close to the front wall as possible.
Flush mounting, or installing the speaker in shelves inside the front wall, is commonly found in commercial studios with higher budgets. For typical home studios, the next option is more appropriate - sometimes the speakers are placed close to the front wall. Being close to the front wall will cause negative dips in your frequency response to shift towards the top. This is fantastic news for you because higher frequencies are more directional, meaning they ricochet less than others. They are also much easier to deal with using standard acoustical wall treatments. In most cases, a gap of 20cm or less between the speakers and the wall is a good starting point for reducing coloration caused by SBIR. However, it is best to check the specifications of your speakers to see what the manufacturer recommends as the minimum distance. You may need a few centimeters of headroom for the bass reflexes. At such close distances, 10cm acoustic panels can help overcome subtraction issues. Remember that as the distance between the speaker and the wall increases, frequency problems will move down the spectrum and become more difficult to solve. It is worth mentioning that when placing the speakers close to the wall, you should expect a slight “boost” in the bass. However, this can be avoided by using an envelope equalizer, which can be found in most monitors.
SUBWOOFERS
When it comes to finding a place for a subwoofer, I have a couple of helpful tips: • Most subwoofers are designed to be placed close to the wall, about 45 cm away. Avoid positions more than 60 cm from the wall. • Try placing the sub along an imaginary arch that runs in a semicircle from the two monitors to the subwoofer. • To avoid standing waves, try moving the subwoofer away from the center axis of the room (slightly off center) • Try the “crawl” method (described below in the footnote to this article). A subwoofer is not needed to make low frequencies louder, it is needed to expand the low-end range of your monitoring system. This way, you can get a smooth transition between the sub and the main speakers. Most near-field monitors have a slope starting around 45 to 70 Hz, and a subwoofer can push audibility down to 30 Hz or lower. If you are mixing only music and exclusively stereo material, you can “feel” the crossover point by ear or using an SPL meter. Simply play a bass scale on a clean synth patch from C1 (33 Hz) to A2 (110 Hz) and look for balance between all notes by moving the crossover knob. If you hear a significant dip or, conversely, a hump at the crossover point, you can try moving it a little more and inverting the subwoofer phase. For those who regularly mix or create surround sound content in 5.1, 7.1 or ATMOS formats, setting up the LFE channel will require calibration and a lot of setup. This will be discussed in another article. If you only have one subwoofer, follow these steps: 1. Adjust the subwoofer's volume to fill the lower octaves. 2. Install a subwoofer crossover for a smooth transition between the main monitoring system and the subwoofer. 3. Experiment with phase. If all the steps above don't work, change the location of the subwoofer and do it all over again. There is more benefit to two subwoofers because they can be positioned in such a way that the room will resonate more smoothly and provide more response than with one sub. However, by installing 2 subwoofers in a room, you thereby greatly complicate both the setup and the system itself as a whole. Follow the same steps as above, only place the subwoofers symmetrically relative to each other. Be sure to set the crossovers, levels, and phase identically so that the bass response is “honest.” ________________________________________ The “crawling” method.
There is one method that allows you to find the ideal location for the subwoofer. You need to place the subwoofer in the sweet spot and then start crawling around the room in search of a position where the bass will sound integrated, inseparable from the monitors. Once such a location is found, simply place the subwoofer there, this will serve as a good starting point for further setup. ________________________________________
BASS TRAPS
Some people seem to be afraid of acoustics. I understand this is a complex subject, but no more so than anything else we deal with. Luckily, you don't have to go too deep into acoustics to make your studio sound better. I would caution you against purchasing two commercially available types of acoustic treatments: 1. Triangular acoustic foam pads.
These are not bass traps. They are too thin to affect low frequencies below 200 Hz. They do absorb the mids and highs, but we're talking about the lows, right? They are also not good diffusers because diffusion requires hard surfaces to effectively reflect sound waves, and the surfaces of these materials are porous. 1. Egg carton shaped foam panels
These only absorb high frequencies. They are not dense or thick enough to absorb low-mid and low frequencies. This means that you will get rid of some/most of the wandering echoes in your room, and that is the most they can do. Thick broadband absorbers are best; they only begin to absorb bass if they are at least 16 cm thick. For frequencies below 125 Hz, 20 cm or more is required. There are 4 places in the room where such absorbers can be placed. That's right, 4 corners. Low frequencies tend to accumulate in the corners of your room, so corner traps are very effective and space-saving as well. Place the panels at a 45° angle diagonally in the corners. This will create a “deeper” trap, because the air between the wall and the foam will play an important role. Start in the corners closest to the speakers. After that, add the same panels on 2 opposite corners. Important: Make sure the air gap is no greater than the depth of the panel material. So, if there is 25.5 cm of mineral wool in an acoustic panel, the gap between the wall and the panel should not exceed this 25.5 cm. So! You've placed your speakers correctly, configured your subwoofer(s) to work optimally with your monitors, acoustically designed your room (then played around with monitor positions a bit)... what's next? Buy Sonarworks reference. Jokes aside. This is one of the best investments of my life. Dot. Buy the Studio version and you'll improve the frequency response of your speakers and headphones. You also get Systemwide, which allows you to apply the same correction to the entire system, so you can listen to music or watch movies with the same correction as when mixing. This is extremely important because your ears become aware of what your surroundings sound like even when you're relaxing. This is where real multitasking comes in! Translated and localized by: Studio Day
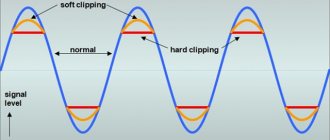
Sound distortion at maximum volume
If the sound is distorted when the regulator approaches the maximum level, the problem will need to be looked for in the device itself, the power supply, or the entire system.
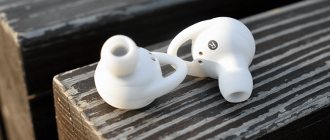
Speakers
If the unwanted hum is coming from only one speaker, you can simply replace it. If all speakers are wheezing, the entire system must be checked. You need to start with the speakers, or more precisely with the diffuser. It can be made from paper, and when exposed to moisture, it loses its elasticity.
Most checks can be done yourself, but still the best option would be to contact a specialist.
Speaker wires