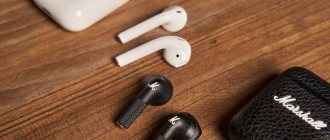
Everyone knows such an element of headphones as ear pads. All models have them and are special silicone tips for comfortable putting on and ease of listening to music. Compared to previous versions made of a solid plastic body, the silicone coating fills the ear shell much more pleasantly and provides soft contact with the skin without damaging it. Various versions have been created, differing in shape, size and material.
Unfortunately, purchased headsets are not always equipped with exactly the ear pads that will fit comfortably in the buyer’s ears. In this case, they should be replaced, which is not always possible due to the complexity of the design of some types of headsets. In our article we will look at ways to remove and replace them if necessary.
How to remove ear pads from in-ear headphones
Since the most popular version of the headset is the in-ear model (also called “droplets”), we will consider it first and show you how to remove the attachments from it. In order to do everything quickly and correctly, we recommend that you follow all the steps according to the instructions:
- First, unfold the outer part, opening the petals outward. Only the core will remain on the headphone body.
- After the petals are removed, you can begin to remove the embouchure.
- Gently grab the central part with two fingers and begin to pull it together.
- For convenience, you can try to slightly twist the nozzle, trying to remove it.
- Gradually you will succeed. Now do the same with the second earphone.
- At the end, return the petals to their original place, turning them towards the center.
IMPORTANT! Do not suddenly remove the nozzle and try to rip it off, as this may damage the surface or tear the ear pads. It is also not recommended to pull on the outer petals, as they are quite soft and prone to deformation.
How to remove and put on ear pads from on-ear headphones
Next we will look at the version of overhead headsets. Their main difference is that, as the name implies, they wrap around the ear from the outside and are not inserted inside the ear canal. Accordingly, special coatings will be applied on top of them, which we need to remove. This is not difficult to do, but everything must also be done slowly and carefully so as not to damage the covering and mechanisms of the headphones:
- Examine the headset and try to understand how the ear pads are attached to it. Classic versions use an elastic band that tightens the base or special latches.
- In the case of latches, you first need to carefully disconnect one of them, bending it slightly. This can be done using a card or a toothpick.
- After this, bend the ear pad slightly in the opposite direction and disconnect the remaining latches.
If you need to put the cover back on, just press it against the headphone body and apply light pressure. It is important to follow two rules: align the fasteners with the holes and do not press too hard so as not to break them.
The Ministry of Health warns
Now that we have looked at the basic rules of the “canonical” wearing of headphones, it is worth understanding the dangers of ignoring them. So, improper use of headphones, according to doctors, can lead to:
- To the development of hearing loss. Many people like to listen to their favorite songs in vacuum plugs at maximum volume. Although pain may not occur, the signal entering the ear canal can reach 130 decibels, which is much higher than the permissible norm. To avoid the prospect of losing hearing at a young age, doctors strongly do not recommend listening to music at maximum volume for a long time.
- To migraines and feeling tired. The abundance of stereo effects in various musical compositions can cause the brain to “get tired” of recognizing them, letting the body know about this through a headache or a feeling of fatigue.
- To the formation of sulfur plugs. Fans of vacuum headphones especially often encounter a similar problem. The fact is that their ear pads impede the natural exit of wax from the ear, which leads to its gradual accumulation and partial or complete “clogging” of the ear canal. Such a plug is removed quite quickly and easily, but who would want to visit an otolaryngologist again?
So, in order not to harm your own body, it is enough not to overuse listening to music for a long time and monitor the hygiene of your ears. Remember that health and comfort will always take priority over cost and maximum headset volume.
Rate
( +2 points, 2 ratings)
Loading…
How to change ear pads on full-size headphones
Full-size headphone models, unlike on-ear headphones, are much larger in size, completely cover the ear and create a barrier to external noise. This creates the best conditions for high-quality sound.
For full-size versions, the disassembly principle is practically no different from the overhead versions. But depending on the model and version of the device, there may be significant differences in their mounting. In order not to repeat ourselves, we will consider the option when the ear pad is attached using a special plastic ring.
To replace you will need to do the following:
- Find the ring by running your fingers around the entire perimeter of the earphone.
- Pull the ear pad slightly to one side and at the same time begin to carefully pull it off the body. The idea is to remove the ring from one latch. If at least one is revealed, then all the others will easily move away.
- After this, smoothly remove the attachment from the remaining latches.
- To install, just attach the ear pad to the body and get into all the holes at the same time, and then press lightly until you hear a characteristic click.
Key moment
We have mentioned various types and designs of ear pads more than once when talking about the design of headphones in general and even tried to analyze them in detail. And all because this is really a very important thing. It is this part of the headphones that is in direct contact with the human body, and therefore is largely responsible for the feeling of comfort or discomfort. In addition, the ear pads actually form an acoustic chamber for which the headphone emitter operates. Well, the third factor that directly depends on them is the degree of suppression of external noise. Unless, of course, we are talking about open headphones.
Good ear pads provide reliable protection from external noise.
All this applies equally to both in-ear and full-size models. At first glance, their ear pads have nothing in common - they also differ tens of times in size. But from the point of view of the functions they perform, they are as close as possible.
Essence of the question:
For sound, ear pads are no less important than speakers.
Lifehack:
If you want to choose the right headphones, you can’t do without trying them on; you don’t buy clothes or shoes based on a picture.
How to put ear pads on in-ear headphones
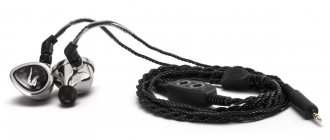
In-ear headphones come in a variety of varieties, but one thing is the same: all headphones of this type have a sound guide onto which the ear pads are placed.
There are many types of ear pads for in-ear headphones, but they all fit the same way.
The main rule is to put on the ear pad gradually; there is no need to try to pull it onto the sound guide over the entire cross-sectional area of the hole at once.
Any ear pad, be it silicone or foam, has a soft core.
For simplicity and convenience, I turned out the petals of the silicone ear pad before putting it on. This is not necessary, but depending on the softness of the material from which it is made, sometimes it needs to be done, otherwise it will be impossible to put the ear pad on the earphone. Lightly stretch one part of the core over the sound guide. Then, lightly pushing the remaining part, pull it to the end.
In some cases, when the properties of the materials from which the ear pads and the sound guide body are made allow, you can slightly turn it clockwise while tightening the ear pad, this will make it much more convenient and quick to put it on.
After installation, make sure that the ear pad core is completely in place, that it is not warped and that it is held securely. Then unfold the petals to their normal position.
In general, installing ear pads is not as difficult as removing some of them.
Type overview
Depending on the shape, size, and material of manufacture, there are several types of ear pads. These types are used for in-ear headphones.
Standard
Standard type ear pads are the most common, and they are necessarily included in the set of headphones in the amount of 3 pieces of different sizes, so they are suitable for most users. Such models consist of a rigid base with soft attachments, which is placed on a sound guide tube.
Double flanged
This type of accessory has 2 special attachments - “herringbones” or petals, differing in diameter, and this is their difference from standard models. Better noise insulation improves sound quality. It is ensured by the presence of 2 nozzles; they can be used even in conditions with high noise levels. However, such ear pads do not create complete comfort and cause slight discomfort when worn for a long time.
Triple flange
This type is similar to double-flange models and differs in the presence of 3 nozzles. The advantage of such ear pads is even higher noise insulation. However, if the size of the model is chosen incorrectly, then the discomfort during listening will be even more significant.
Anchors
Anchors are not considered ear pads themselves, but are an additional means of attaching headphones. Usually they complement standard models. Most often they are used in sports models of headphones, for which reliable fixation is very important.
Made to order
These ear pads are made to order using a special individual impression of the auricle. Such models are ideal for the user, guarantee very high noise insulation and at the same time are almost invisible.
Foam
The difference between this type of accessories is that soft foam material is used for their manufacture. Foam models have elasticity, which allows you to acquire an individual shape of the ear canal. These ear pads are characterized by a high degree of comfort and noise insulation.
The shape of the in-ear ear pads can be different: with a more elongated and pointed configuration, round or oval, in the form of a hemisphere.
The degree of sound insulation and comfort depends on the shape. Ear pads for full-size headphones have different designs depending on the scope of their application. Professional monitors and most models for amateur use use these types of ear pads.
- Circum-aural (“around the ear”) - they look like large rounded ridges that completely cover the ears and are pressed against the head.
- Supra-aural (“above the ear”) or overhead ones - have the form of soft overhead pads (like a pad) of slightly smaller dimensions that come into contact only with the ear.
Ear pads for full-size and on-ear headphones come in round, rectangular or elongated shapes.
How to remove ear pads from in-ear headphones
Removing the ear pad from in-ear headphones without damaging it is not as easy as it might seem at first glance.
You need to remove it gradually, just as you put it on, first one part of the core, then the other. Look at the instructions above and do it in the reverse order, first unfold the petals, then slowly begin to pull one part of the ear cushion from the sound guide, then the other.
If you need to remove the foam cushion , try to grab it close to the base and slowly, with a slight twist, try to remove it. Usually this is successful and the ear cushion begins to come off; after a few turns it will completely come off the sound guide.
Remember: you cannot forcefully and persistently pull on the petals or the foam part, you need to do this carefully and carefully, otherwise there is a very high probability that you will damage or tear the ear pad.
How to prevent EarPods from falling out?
The best solution to the problem of AirPods falling out is anti-slip silicone pads. With them, the headphones will not only become more comfortable, but will also sound better. With the ear pads, AirPods will fit more tightly in your ear, and you will feel more confident while jogging or simple walks.
Interesting materials:
How can I set the slides to change automatically during a full-screen presentation? How to set up auto reply on WhatsApp? How to set up an answering machine on Android? How to set up automatic connection to the Internet? How to set up auto-rotate screen? How to set the browser to autostart when you turn on your computer? How to configure autorun programs on your computer? How to adjust the sound balance in headphones on an iPhone? How to adjust the sound balance in headphones on Android? How to adjust bass on speakers?
How to install or remove ear pads from on-ear headphones
If on almost all in-ear headphones the ear pads are installed by pulling the silicone core onto the sound guide, then with full-size models there can be different options, starting with latches and ending with cunning fastening elements.
I will provide general information on how to change ear pads, but for each specific model I cannot do this, because... I don't have all the headphones in the world.
As an example of full-size headphones, I will use the Sennheiser HD 380 Pro model, and as an example of an on-ear model, I will use the Sony MDR-XB300.
In many cases, to carefully remove the ear pad, you will need a plastic spatula; if you don’t have one, a bank plastic card will do. You cannot use metal parts, because... they may damage the plastic or fabric of the headphones.
The ear cushion of the Sony MDR-XB300 headphones is secured with three latches. In order to remove it, you need to insert a plastic spatula or a bank card between the ear pad and the headphone body and pry it slightly. Do this carefully and gently, no need to make sudden or strong movements.
Remember, you should never use too much force; if the embouchure doesn't come off with moderate pressure, you're doing something wrong. Stop, look at the earphone again and think about whether you are doing everything correctly. If you use a lot of force, there is a very high probability of breaking the headphones.
Using a plastic card, I snapped off one latch; now you need to carefully pull the base of the ear pad and the remaining latches will easily detach.
What it is?
Headphone ear pads are the main component that is in direct contact with the user's ear. The operation of any type of headphones (dynamic or in-ear, monitor or on-ear) is impossible without their use. In over-ear and full-size headphones, the ear pads are soft pads that come into direct contact with the ears or head. In in-ear and in-ear headphones, the ear pads are attachments that are inserted into the headphone body and located inside the auricle.
Intra-aural models are a sealing gasket that occupies and seals the gap between the ear canal and the sound guide tube in the headphones.
Of course, the main purpose of this accessory is to ensure comfort when using headphones . Another functional feature is the creation of protection from external noise. In addition, by forming a sound chamber between the ear and the earphone, they contribute to better sound quality. These functional features manifest themselves to varying degrees and depend on the type and design of the headphones, as well as on the design of the ear pads and the material of their manufacture. An additional function of this accessory is to fix the earphone inside the ear. Ear pads are replaceable elements that can be replaced with new ones as they wear out.
How to remove or install ear pads on full-size headphones
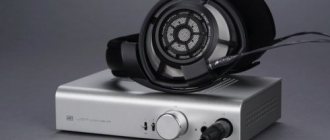
With over-ear headphones, you may have a variety of options for attaching the ear pads. We have already dealt with the latches, now I suggest you pay attention to a different type of ear pad mounting, which you can see in the example of the Sennheiser HD 380 Pro headphones.
The ear pad is attached to the headphones using a special plastic ring, which is inserted into the ear pad from the inside. In the photo you see the ear pad with the ring removed. I took it out on purpose so that you could understand more clearly how the mechanism works.
On the headphone body there are guides for installing the ring, and there are small latches on the guides. They are small, but you can see them if you look closely at the first photo of the Sennheiser HD 380 Pro.
In order to remove such an ear pad, just take it by the base, feel the plastic ring and slightly move it towards the outside and pull it towards you . The nearest latch will come away, so you can pull the ear pad off the adjacent latch and remove it entirely.
The ring holds onto the earphone tightly only if all the latches are latched. Once you release the ear pad with just one latch, it can be removed from the earphone quite easily.
To install an ear pad with a similar mount on a headphone, just attach it to the guide on the headphone body and, making sure that it matches, begin to push the ear pad to click the latches. This should be done by moving your fingers in a circle. After going through the entire ear pad several times, all the latches will work and the ear pad will hold tightly to the earphone.
You can check that everything is in order very simply - walk around the entire circumference of the ear pad, slightly pulling it away from the earphone. In a normal case, it should not move anywhere and there should be no gap between the ear pad and the headphones. If the base of the ear pad moves slightly away from the earphone when pulled back, then the nearest latch did not work and you need to push the ear pad to snap it into place.
Now almost every person has a gadget from which they can listen to music through headphones at work, in transport, and while walking. It could be a USB player or a phone, tablet or laptop. And many people listen to music at home, wearing headphones, so as not to disturb neighbors or family members.
Naturally, every music lover in his life has encountered the problem of torn ear pads for headphones. It is quite possible to repair them with your own hands if you know a few subtleties. Headphones come in different types: vacuum, with ear pads simply made of foam rubber or covered with leather. In this article we will look at different options for making ear pads for headphones with your own hands.
Instead of a preface
In general, when reading reviews and opinions about in-ear headphones, I often observe how the opinions of different people are often radically different. Several reputable sources may extol the sound quality, while others may give scathing reviews of the same device. Some people think this happens because the perception of sound differs from person to person. And partly there is some truth in this. Moreover, a lot still depends on experience. It’s trite - how many headphones and in what price categories have you used in your life. Do you have anything to compare with? Of course it's important. But at the same time, for some reason I am inclined to believe that in some cases it is the incorrect selection of ear pads that prevents the headphones from fully revealing their sound.
This article will not be a practical guide to choosing nozzles. I don’t have any specific technique for you. However, I hope that after reading this text many buyers will think about this issue. And for some owners of vacuum headphones, their devices will open up in a new way if they listen to the advice that I will talk about here and apply them in practice.
Foam ear pads
Let's start by describing the most easily corrected problem. If these pads are made of foam rubber, then you can cut out a replacement for them with your own hands using sharp scissors. To do this, you will need a small piece of thick foam rubber, preferably of a dense structure. A cardboard circle is drawn along the contours of the old ear pads. This will be the template from which the cylinders are first cut. Then a small circle is cut on one side with a blade. Bending the foam in half, scrape out the middle.
Try to keep all walls the same thickness. Making foam ear pads for headphones with your own hands will take little time; the main thing is to make the cuts carefully, especially the internal ones, so as not to cut through the foam layer.
Knitted products
If your ear pads are torn, you can replace them with knitted ones. For needlewomen who are excellent at crocheting, repairing headphone ear pads with their own hands is just a couple of trifles.
It is better to choose cotton yarn or one containing both cotton and acrylic. The hook is taken according to the thickness of the thread. Work begins with a ring, then knit a circle of the diameter of the headphones. This is an average of 8 rows, depending on the thickness of the threads. After trying on the diameter with the earphone, we begin knitting the depth of the ear pads. To do this, knitting begins at the back wall of the loops. One row is knitted evenly, and the next one according to the following pattern: decrease and single crochet. Do this for 2-3 rows. Then the connected ear pad is pulled over the earphone and work continues on it. At the end, the thread is cut and secured to the edge in the usual way. The second part for the earphone is made in the same way.
Knitted analogue
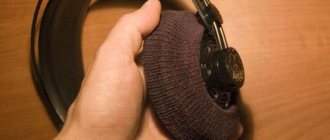
Many people who like to listen to music on headphones use knitwear to repair them, most often socks. Their diameter most closely matches the size of the plastic round parts of the headphones. It’s better to take warm knitted socks with an unstretched elastic band, because that’s exactly what we’ll need. By cutting off this part of the knitted product, we get a pipe measuring 10-14 cm.
To prevent the threads from fraying on the cut, it is stitched over the edge with simple cotton threads. On the other hand, the edge is processed at a knitting factory, so the preparation for repairing ear pads for headphones with your own hands is completed. All that remains is to roll one end and the other inward and pull it over the circle of headphones.
Sound access is free, and the soft jersey does not irritate. Fast, convenient and accessible, it's suitable for even the laziest listeners.
Sewing fabric ear pads
You can make ear pads for headphones with your own hands from fabric. To do this, you will need natural fabric that does not irritate the skin, thin twine or ribbon, threads, a needle, cardboard, a simple pencil, and a compass.
First you need to make a template on cardboard by measuring the circumference of the earphone. Then the fabric is laid out with the wrong side up and a template is outlined in chalk along the contour for one and the second element. Around the outline you need to draw a circle of larger diameter with a compass so that the distance between them is 3-4 cm plus 1 cm for the hem of the fabric. You can cut a circle out of thin foam rubber and insert it onto the inner contour of the case. The edges are bent so that a rope can be inserted inside to tighten the embouchure tightly. You can make the edging from ribbon or lace. Place the finished product on the earphone as follows. First, a foam rubber circle is placed, and a large circle with an edging is placed on top of it. The earpiece is turned over, the rope is pulled tight and tied in a knot. The edges of the rope can be hidden inside the fabric or trimmed.
Leather ear pads
If your expensive leather ear pads are torn, then, of course, you want to return things to their original appearance. Here you will have to try and select materials that match the quality and color of the original.
The first step is to measure the diameter of the earphone. You can use an old, disassembled ear pad as a template. Then foam donuts are made using the templates. Using the same measurements, the same figures are cut out, only from leather. It is necessary to leave space for seams, so both inside and outside the bagel is cut with an overlap. The blanks are sewn along the inner circle along the wrong side. If you have a sewing machine, it is better to stitch it.
Then they turn it right side out and sew a thin strip of leather around the perimeter of the large circle, having previously measured the circumference. This will be the depth of the ear pads. Then foam donuts are inserted and finally sewn up with an internal seam.
