Hi all! Many car owners value high-quality sound in their car. But it is not always possible to get it from a standard audio system. Therefore, you have to resort to some tricks, assemble a homemade complex and achieve the desired results. As you understand, today I will try to tell you about how to make and assemble a subwoofer into a car with your own hands.
In fact, if you have a good understanding of electrical circuits and also know how to hold tools in your hands, there is nothing difficult in assembly and manufacturing. Prepare special drawings, think over the design, looking for good ideas in the photo, and also calculate all the necessary parameters.
Even if your car audio system does not have an amplifier, a good passive or active sub will correct the situation and significantly improve the sound quality of your favorite compositions. Moreover, you can make a sub from old speakers or from an ordinary speaker.
Let's talk about everything in the appropriate order. Let's try to figure out together how to make an excellent subwoofer for your car.
How to make a subwoofer for a computer?
Do not think that JBL SpeakerShop or other acoustics calculation program will give you the only possible, most correct option.
Computer programs are written using established, proven algorithms, but non-trivial solutions are impossible only in theology. “Everyone knows that you can’t do this. There is a fool who doesn't know this. It is he who makes the invention” - Thomas Alva Edison. SpeakerShop appeared not so long ago, this application was developed very thoroughly and the fact that it is used very actively is an absolute plus for both developers and amateurs. But in some ways the current situation with him is similar to the story with the first photoshops. Who else used Windows 3.11, remember? - back then they just went crazy with image processing. And then it turned out that in order to take a good picture, you still need to know how to take photographs.
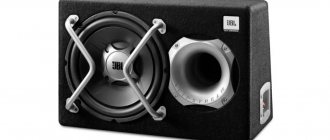
To assemble a homemade acoustic device, before manufacturing it is necessary to decide on the type of housing. There are several options for types of boxes.
Closed box
Drawing for creating a closed subwoofer enclosure
To make the box you will need chipboard, the thickness of the material will be 2.3 cm, and for the side walls you will need 2 cm boards.
Manufacturing process:
- Surfaces are cut out of wood using a jigsaw in accordance with the dimensions calculated in advance according to the drawing.
- The housing is being assembled. To fix the component elements, you can use superglue, but you should use self-tapping screws.
- Holes with a diameter of 3 mm are made in the walls using a drill. To install the heads, it is recommended to use a 1 cm drill.
- Then, using a compass, markings are made on the side wall to install the speaker. All holes are cut using a jigsaw.
- When operating, the speaker emits unnecessary frequencies. To prevent this, it is recommended to shield the terminal itself using a small box. The joint is treated with glue. The device is fixed using self-tapping screws.
- Using a plane, remove excess protrusions on the box.
- Similarly, markings are made on the front part, a hole is made for installing the column. To protect the box from moisture, it is recommended to treat it with nitro varnish. This product is applied to the inside of the front panel.
- To ensure higher practicality, the box is covered with carpet. This material is fixed using nitro varnish.
- At the final stage, the speaker is installed on the acoustic terminal and attached to the box.
Bass reflex
To assemble the case you will need:
- layer of soundproofing material;
- self-tapping screws for working with wood, their diameter is 5 cm;
- drill with a set of drills;
- Phillips head screwdriver;
- jigsaw;
- liquid Nails;
- glue sealant and PVA;
- carpet;
- plywood or chipboard 3 cm thick to make the most durable box and prevent the transmission of sound waves.
Graphic drawing for the manufacture of a subwoofer housing with a bass reflex device.
The development procedure is performed as follows:
- The component parts of the body are being prepared. Front and rear, as well as side walls are cut out of plywood or chipboard. We need to make the top and bottom. To do this, calculations and parameters are used in accordance with a specific drawing.
- Taking into account the size of the column, a hole is cut in the front part of the future box.
- You also need to make a slot above it to install the bass reflex tube. Then the compartment is fixed to the hole for the device.
- The side parts of the body are glued to each other. This is done when both holes are ready. Then the walls are fixed to each other using self-tapping screws. Each fastening element must be screwed to the end. You should not allow empty spaces between the walls, as this will distort the sound quality of the subwoofer.
- A hole is cut on the back surface of the box through which the conductors are laid.
- Before connecting the component parts of the housing, the column is installed.
- Then the interior of the box is finished. Using glue, sealant or resin, all joints and cracks, if any, are treated to increase sealing. After the material has dried, the inside of the box is covered with noise-insulating fabric.
- Upon completion of the body finishing work, similar actions are performed with its outer part. The assembled box must be covered with carpet or similar material. It is important that the fabric completely covers all joints, as well as the hole for the bass reflex. Epoxy resin or a stapler is used to fix the material.
When creating such a box, you can make mistakes in the calculations; its manufacture is best done by car owners who have experience in this. To design a housing model, it is recommended to use special software. The assembly procedure itself is performed in the same way as in the instructions described above.
Schematic design of the subwoofer bandpass housing
. But we must take into account the nuances:
- The partition into which the column is mounted is made of two sheets of plywood or chipboard.
- The inside of the case is treated with noise-insulating material. Batting may be used.
- The glue itself must be applied in strokes around the entire perimeter. There is no need to use it a lot, as this will lead to the appearance of static characteristics.
- Additional fixation of the device using a construction stapler is allowed.
- Soldering of conductors is carried out to the column and to the terminal contacts.
- The back of the box must be sealed as much as possible. This can be achieved by using tape and liquid nails, the first is glued on top of the seam.
- To make the bell of the bass reflex device, the edges are heated. Banks are used for this.
- A jigsaw is used to create a hole in the lid. It requires installing a carpet with a bass reflex device.
- Processing of joints is carried out using liquid nails.
- The back of the cover with the bass reflex device is treated with sound insulation. When the fixation of the body elements is completed, it needs to be covered with carpet.
The manufacturing option for the BP6 subwoofer is complex in terms of assembly and calculations.
Graphic drawing for creating the body of a BP6 subwoofer
It allows you to produce high-quality sound, like a fourth-order badpass, but the frequency range is higher. The efficiency of the device, as well as power parameters, are calculated using software. All characteristics are selected in accordance with the preferences of the car owner. In general, the design of the box is more complex compared to a closed box and a bass reflex.
Device assembly features:
- To create stronger connections, it is recommended to make them from wooden blocks, which are fixed with self-tapping screws.
- All components of the box must be cut to size. For production, plywood or chipboard is used.
- The assembly procedure is performed using a similar technology. But instead of conventional sound insulation, cotton wool is used.
Subwoofer "Stealth"
To make a case of this type you will need:
- the column itself;
- speaker grille;
- special socket for connecting the device;
- a set of cables of the required length;
- the material from which the body is made is plywood or chipboard, its thickness will be 2 cm;
- fiberboard board;
- epoxy resin or glue;
- fiberglass sheet;
- brush;
- masking tape;
- polyethylene;
- self-tapping screws for working with wood, 4 cm long;
- jigsaw;
- drill with a set of drills.
Before making the box, you need to decide on the installation location of the subwoofer. It is necessary to remove all tools and things from the luggage compartment in order to completely empty it. Then the casing in the compartment is dismantled. It must be carefully removed from the place where the subwoofer is installed.
A simple diagram with dimensions for creating an acoustic device of the Stealth type.
The manufacturing procedure is performed as follows:
- In the place where the music device is mounted, you need to lay plastic film. Its presence will protect the luggage compartment from glue and dirt.
- The subwoofer mounting location is glued using masking tape; for this it is recommended to use at least two layers.
- Then pieces of fiberglass are laid on top. The material is treated in advance with epoxy resin or glue. It is recommended to glue the fiberglass fabric overlapping. When performing a task, it is important to ensure that the joints are not visible. No gaps are allowed.
- Fiberglass is glued in several layers, at least five. It is necessary to ensure that the total thickness of the material is 1 cm.
- The box itself for the acoustic device hardens for about fifteen hours. When the body is completely dry, work continues.
- The lower part of the box is cut out of chipboard or plywood, which is used as the bottom. It is fixed on the body of the future device. For fastening, it is allowed to use sealant or epoxy glue to prevent the appearance of leaky seams on the body.
- There will be excess parts on the device box; they must be removed using a utility knife. This will remove any remaining glue and fiberglass.
- The side walls of the device, as well as its cover, are cut from chipboard. It is recommended to make the rounded part of the box from plywood. The material must be wetted with water in advance, then formed and securely fixed.
- All components made from chipboard are properly glued with epoxy resin or glue and sealant. Then they need to be fastened to each other; self-tapping screws are used for this.
- A hole is made in the front of the box where the speaker is mounted.
- Using a drill, you need to drill a small slot in the back or on the side wall. Cables from the subwoofer are laid through it for connection.
- A column is mounted in the device box. Its fixation is carried out using self-tapping screws or glue, both options can be used. After assembly, all components of the subwoofer are installed.
- At the last stage, the acoustic device is painted or covered with carpet. If you use varnish or paint, then all surfaces must be sanded in advance. It’s faster and easier to cover the box with carpet. To fix the material, glue or a stapler with staples is used.
- selection of materials;
- body design;
- subwoofer assembly.
READ MORE: Chinchilla blanket 32 photos pros and cons of milky and champagne faux fur bedspreads sizes and features
What kind of speaker do you need?
When assembling a small acoustic subwoofer, the first thing you need to do is decide on the type of music speaker that serves as the base. It is necessary to take into account the dimensions of the device, as well as its technical properties.
Options
- The main characteristic when choosing a speaker for a subwoofer is impedance. If the load on the device is about 1-2 ohms, this will lead to a decrease in sound quality. The best option would be to buy a speaker with a resistance in the region of 2-4 ohms. When purchasing a device, it is important to take into account one nuance - the power of the speaker will be higher than that of the amplifier. This is due to the fact that the speaker needs a certain margin of safety in the form of a difference in order to increase its service life.
- If you already have a speaker and an amplifier, then you need to determine the difference in power between these devices. Then you need to make a mark on the volume control of the latter so as not to exceed it. We must remember that no speaker will maintain sound quality while operating at maximum volume. As a result of such operation, a frequency imbalance will occur.
The Flexing Studio channel talked about the selection of technical parameters for automotive acoustic equipment.
Dimensions
When making a subwoofer for a car with your own hands, you need to decide on the dimensions of the device:
- Speakers with a diameter of 6 inches are usually used as an additional source of mid-bass. Their use will provide acoustics with an average-sounding subwoofer. It is optimal to use such speakers in the interiors of small cars.
- 8-inch devices are designed for use as additional front bass frequencies. In practice, this is not the best option for use in a main subwoofer.
- Speakers of 10 inches or more are the optimal type. Such devices provide high-quality sound, filling the free space of the case with powerful vibration. If the speaker is installed in a “closed box”, this will allow it to produce high-quality sound pressure. Speakers of 12 inches or more are considered the best option; their installation is allowed in cases with a volume of up to 35 liters.
- For the interior of a large car, it is recommended to use 15-inch devices. But in terms of implementation, this is difficult to do, since such a speaker will require a housing with a volume of about 90 liters.
Channel “D Style Audio. Autosound Studio" spoke about the choice of box sizes and gave recommendations for preventing errors in the manufacture of subs.
Best models
The rating includes models with the largest number of positive reviews.
Pioneer TS-WX70DA
The device takes first place in the ranking of the best compact subwoofers. It can be placed under any seat. The manufacturer does not declare any special operating conditions. The 15cm diameter speakers are powerful enough to produce deep bass. The positive qualities of the product include:
- no protruding parts;
- small sizes;
- stylish design allowing for open installation;
- rich bass;
- several operating modes.
The disadvantages of the Pioneer subwoofer include the low quality of the installation cables, the control panel on a wire, and deterioration in sound quality with increasing power.
Pioneer TS-WX210A
The model has a minimum amount of internal space. This allows you to place the subwoofer in any car, without taking into account the height and method of installing the seats. The rich bass produced by the 8-inch speaker is adjustable. Other advantages include the following:
- high sound power;
- the ability to change the cutoff frequency;
- increased power;
- small body size;
- reliable fastening.
Negative qualities include the lack of installation cables included, only the bottom part is attached, a wired remote control, and a high price.
Mystery MBS-204A
Low cost makes this model popular among buyers. It represents good value for money. However, installation of the product will require special skills. The advantages of the model under consideration include:
- stylish neat design;
- presence of a built-in amplifier;
- the presence of a separate volume control with an LED element;
- good sound quality.
The following points are considered negative qualities:
- poor quality of cables included in the kit;
- bad fuse;
- increased brightness of the LED component on the volume control panel;
- the occurrence of interference that can degrade sound quality.
Alpine PWE-V80
The model is capable of replacing an amplifier located in the luggage compartment. A power of 160 W is enough to pump the interior of an SUV. The device is not suitable for lovers of soft classical music. The sub produces powerful, rhythmic sounds. The advantages of the model are the following qualities:
- presence of a built-in amplifier;
- stylish flat body;
- high power;
- normal sound quality.
The disadvantages are the harsh sound of the bass (due to a small volume of air), pronounced vibration (installation of feet or a rubber backing is required), and high price.
Pioneer TS-WX130DA
The device is used as an auxiliary component of an audio system. It is not capable of producing rich, rich bass. To obtain the desired sound quality, use the buttons located on the remote control. There are functions for phase shifting and changing the cutoff frequency. This sub for installation in a car contains the following positive qualities:
- neat small body;
- ease of installation and connection;
- presence of an amplifier;
- several operating modes and settings options.
The disadvantages include low power, deterioration in sound quality when choosing maximum parameters.
Selection of materials
How to make a subwoofer at home? When starting all work, you should select the necessary materials for making the case. In order to make a subwoofer with your own hands, you need to purchase in advance:
- speaker - selected based on your needs;
- plugs - help connect the speaker to the player; they must perfectly match the connectors of your device;
- wires - used to connect the subwoofer;
- plywood with a multilayer base;
- trimmings of plumbing pipe;
- wood screws, which can be from the smallest to 50 mm in length; wooden blocks having different sections, which can be from 20x20 mm or more;
- silicone sealant; hard foam rubber or felt;
- PVA glue;
- dye.
- a hacksaw for wood, which would have fine teeth;
- chisel;
- electric drill;
- file;
- jigsaw;
- compass;
- a simple pencil;
- iron ruler;
- screwdriver;
- screwdriver;
- sandpaper - from coarse to “zero”.
Designing the enclosure We begin to design the enclosure of the future subwoofer. To do this, we use a computer and a speaker, which serves as the “heart” of the subwoofer.
We download a special program to the computer device. We enter all the speaker data into the software product. Based on the values provided, the program will calculate the optimal dimensions of the subwoofer box for you.
Now let's proceed directly to designing the subwoofer box itself. All actions should be carried out slowly, since the slightest inaccuracy in measurements can cause inconvenience, and the whole work will have to start all over again.
- speaker - you should not use a used device; it is best to purchase a high-quality product with all the documents in the store;
- protective grille;
- good quality glue - epoxy is best;
- a socket that facilitates connection;
- fiberglass;
- wire having a diameter of 3 mm;
- brush;
- plywood;
- chipboard sheet, the thickness of which corresponds to 16 mm;
- self-tapping screws and nuts, which are used in the woodworking industry;
- bolts;
- polyethylene;
- universal putty;
- masking tape.
- drill or screwdriver;
- jigsaw for wood.
After the body of the homemade subwoofer has been designed, it is necessary to prepare it for the acoustic terminal, or the so-called speaker. On one of its walls, which are located on the side, it is necessary to mark the point of the future hole. This can be done by using an ordinary school compass.
- We process the previously made square-shaped box with PVA glue and screw it using self-tapping screws to the side where the hole was cut out.
- Now we use a plane, which we use to cut off all the protruding edges of the body.
- There is a jumper inside our box. Next, using an electric jigsaw, cut a hole in the front panel.
- In this place we install the speaker, which is attached using self-tapping screws and glue.
READ MORE: We build a septic tank for your home and dacha with your own hands: is it possible to live without pumping for 10 years?
Review of Kik ALN 250SA
An excellent device for a reasonable price. Great sound, striking design and ability to perform in extreme conditions make this compact woofer stand out. The subwoofer received a lot of positive reviews and praise from experts.
Peculiarities
- Flat “underseat” sub with a collapsible design;
- Housed in a durable plastic-metal box with high damping;
- The woofer diffuser is made of pure aluminum;
- It is distinguished by a collapsible body design, which is firmly fixed with tightening bolts;
- The manufacturer took care in advance to ensure that the installation was reliable and simple;
- Kik subwoofers are very compact;
- Speaker size – 10 inches;
- The installation of the Kik speaker by the manufacturer is carried out not only in the acoustic design of the ZI, but also in installations such as Stel;
- The speakers have a low and dense quality factor, providing ideal bass;
- Excellent protection against overheating, short circuits and various overloads.
Installing compact “underseat” or “luggage” subwoofers is easy, even without outside help, with your own hands. Only during the process you need to study the instructions, watch the video review and photo materials.
Selecting the type of subwoofer
Before installing a subwoofer for the speaker system in a car, you need to decide on its type. Today there are two types of devices - active and passive. The former are equipped with a built-in sound reinforcement system and also have the ability to adjust the frequency balance - an equalizer. Thanks to the use of an amplification device, such subwoofers do not require the power characteristics of a standard audio system. The speaker will independently drive the speakers to the desired value.
The main features include the high reliability of the device. This is achieved thanks to the factory layout, as well as engineering calculations inherent in subwoofer manufacturers. If your priority is to purchase a high-quality device that will last for years, then it is recommended to choose the active option.
Such subwoofers have disadvantages:
- Speakers are sold ready-made. Difficulties arise when installing inside a vehicle. In practice, this is more typical for equipment made in a universal housing. Although it can be installed almost anywhere, the consumer will have to face inconvenience during installation.
- Fans of high-quality sound may not appreciate the performance of the device. During production, manufacturers are trying to achieve the required dimensions that are suitable for most interiors of modern cars. But this is done at the expense of the high efficiency of the device. In practice, the materials from which the housing is made are not always of significant quality.
The passive type of device differs from the active one in that it does not have a built-in amplifier, and there is also no possibility of adjusting the frequency range. The package of such a subwoofer includes only the speaker and the housing in which it is installed. But the quality of the latter will not be at the highest level. It is recommended to purchase a more powerful speaker.
The lack of controls is seen as an advantage for playing tracks. Since there is no distortion that additional electronics can add, accurate results can be achieved by adjusting the sound characteristics.
The Sundown Russia channel compared in detail all the characteristics, advantages and disadvantages of open and closed acoustic devices.
conclusions
Thus, it is clear that making and connecting it to the car is not easy, but not difficult either. This, of course, will require time, patience, and a certain skill in handling tools. But the result is worth it. Self-made sub for your car. This is, at the very least, a great reason to be proud. Moreover, unlike a purchased box, a homemade one is easier and easier to connect, because the holes and dimensions are calculated in advance and correspond to the capabilities of the machine.
Don't be discouraged if everything doesn't work out the first time, you may have to make several attempts. Don't lose faith in yourself and your strength.
Subwoofer assembly
- Using a ruler and pencil, we draw the contours of the future box on a sheet of plywood.
- We cut the plywood sheet using a hacksaw or jigsaw with a speed controller.
- To ensure that all edges are perfectly smooth and even, we clean them with special care with a file and sandpaper. We attach the walls of the subwoofer to each other with bars, so you need to set aside the required length of the bars.
- We cut a hole for the speaker. The speaker will be located inside the subwoofer.
- In the jumper between the chambers, draw a circle with a compass, having a diameter slightly larger than the speaker diffuser.
- The edges must be perfectly even and smooth; to do this, we clean them with a file and sandpaper.
- The walls of the subwoofer will be attached with the help of bars, so we measure the appropriate length of the bars.
- Solder the wires and necessary connectors to the speaker. The locations for attaching the wires can be found in the speaker instructions itself.
- We attach the speaker to the resulting hole. We make a mark for attaching the speaker to the sheet and drill.
- Now let's start assembling the subwoofer housing. How to make a subwoofer for a computer? We insert a drill into the drill, the diameter should be two times smaller than the diameter of the screws used.
- We begin to drill at those points where the wall will be attached to other walls and bars.
- Now let's use glue. At the junction points of the bars and walls, apply a generous layer of glue. It helps to perform two functions - increasing the strength of the body and sealing joints.
- We connect the walls with self-tapping screws. We screw them in all the way, since the strength in the design of the subwoofer housing is critical. The corners must be straight.
- Attach the speaker. At the junction of the speaker and the wall you need to coat it with sealant.
- We drill an outlet hole through which the wires will pass.
- We pull the wires through the hole and cover the hole with sealant.
- Next we move on to soundproofing. The inside of the cabinet must be covered with sound-absorbing material, which contributes to the “softness” of the subwoofer’s bass. The presence of such material reduces the pressure on the walls.
- We attach the back wall.
In principle, the designed subwoofer is ready. The final touch is to check the build quality. We turn on the music and check for any extraneous sounds or noises.
How to make a subwoofer for a car? Let's look at how to make a subwoofer for your steel friend from ordinary speakers.
Premium class
For music lovers who are not looking for compromises, models have been developed with crystal clear, powerful bass, capable of generating professional-level sound.
Eton B-150USB - especially for BMW
A new underseat subwoofer designed for installation in BMW underseat cars. Eton B-150USB is characterized by high output at high frequencies, which is ensured by a powerful built-in magnet.
The speaker's diameter of 20 cm is suitable for placement in a standard place under the seat. Before purchasing, check your car model for speaker compatibility.
System sensitivity is 86.5 dB, maximum power is 200 W, nominal power is 150 W. Eton B-150USB operates in the frequency range from 2 - 200 Hertz.
Advantages:
- compact form factor;
- compatible with most models of the German automaker.
Flaws:
not detected.
JBL Basspro SL - copes with its responsibilities
A worthy place in the “most expensive sub” ranking is occupied by the JBL model, designed for installation under the driver’s seat. Pre-fitting is recommended before purchasing the Basspro SL.
This is due to the design features of the subwoofer, since the connectors are located along the long side of the box, the wires go directly to the slide, which can lead to some difficulties during installation.
The speaker with a radius of 200 mm is paired with a Class D amplifier and is capable of producing good sound, which is rarely found on compact models. You can’t demand from the JBL Basspro SL the sound of a full-body device with a long-throw diffuser, but it produces intelligible bass that does not merge into unpleasant noise.
The manufacturer has provided the ability to connect the JBL Basspro SL in several ways, which can be added to the asset of the model. It is possible to adjust the low-pass filter in the range from 35 to 120 Hz. If desired, you can install an external level controller.
Advantages:
- sound level;
- there are no cooling requirements.
Flaws:
location of connectors.
Polk Audio DB 1222 - two speakers
The subwoofer body is made in the shape of a trapezoid, the vertical front panel made of gray plastic is slightly extruded in the middle part. The model has a number of characteristic features of the manufacturer, including branded grills with 8 double spokes. The body is divided into two equal parts by a slotted port.
To the right and left of the front panel there are two 12-inch speakers. The mortise chaga has nickel-plated terminals. The rated power of Polk Audio DB 1222 is 720 W, peak power is 1440 W.
The advantage of the 1222 model is true infrasound with accurate reproduction of notes throughout the bass register. The sub is able to cope with club music and leisurely blues. Not all rating models have such capabilities.
In terms of depth of penetration into sub-bass, comparing its analogues, in 2022 it has no competitors. Reproduction of sounds at frequencies less than 60 Hertz has no irregularities.
Advantages:
- powerful and musical bass;
- speaker protection;
- premium design;
Flaws:
- bulky size;
- massive weight.
Features of accommodation
The active type of devices is located almost anywhere. But the quality of the reproduced bass and music in general depends on the location of the passive subwoofer.
Several places for mounting speakers are allowed; they are described in the table.
| Installation | Peculiarities |
| In the central part of the cabin, in front | This option is optimal if you want to connect the device to the front speakers. This installation location will ensure a high level of audio file playback. But in most modern cars there is no free space in front to install a subwoofer. This option is more relevant for SUVs or minibuses |
| In the luggage compartment, pointing the speaker itself forward | This installation method is popular among our compatriots. It is suitable for all types of cars |
| In the luggage compartment, but with the column facing backwards | A good option for cars made in a hatchback body. Thanks to this type of arrangement, the sound wave will not encounter obstacles in its path during playback. Installing the subwoofer rearward in the luggage compartment is not suitable for coupe or sedan vehicles. As a result, the sound is deformed, which is due to the specific design of the compartment |
| Under the seat, on the floor of the car | Not a bad option if you need to hide the device, but it is not in demand among car owners. The sub itself is located flush with the floor. And as a result of installation under the chair, sound waves encounter various obstacles on the way |
| On the rear shelf in the car | This placement option is optimal for all vehicles, regardless of the body. The main condition for this is that the shelf must be wide and durable. This way it can handle low-frequency bass without distorting the sound quality. |
When choosing a place to install a subwoofer, you need to make an accurate calculation, this will allow you to understand how safe the low-frequency energy will be for surrounding devices. This is important, since resonance from the device box will cause damage not only to the installation site, but also to other body elements, for example, glass.
Other benefits
All that the subwoofers we describe can do is provide front mid-bass. But the features of underseat subwoofers are not limited to this, so to speak, quantitative bass indicator. Here are some of their advantages I would like to dwell on in more detail:
- With seatposts, the problem of bass localization is significantly reduced;
- You can select emergency conditions within a wider range compared to traditional options, based on your own auditory sensations.
Note. Some subs of this type may not have a second high-pass filter.
If we compare underseat subs with their “adult” counterparts, the former have one more advantage, which manifests itself in the best possible way in a cramped car interior. And the smaller the interior, the better the compact subwoofer will perform;
Active subwoofers under the seat
- In terms of box design, only ZYa is suitable for compact subs. For FI, the box will be too big, and there will be problems with the pipe;
- Underseat subs are always produced active, which is easy to explain, given the connection to the amplifier of a speaker of almost the same size. But the built-in amplifier is ideally suited for such conditions, and in most cases the pulsed version is used with all its inherent advantages: low energy consumption, small dimensions, heat dissipation, etc.;
- In terms of equipment, the seatposts are not much different from their counterparts. Well, only models without a bass regulator are quite common in this line. But this is easily explained: the “seat seat” is not a speaker that would need periodic boosting (and it won’t withstand it);
Active under-seat subwoofer outputs
- Let us note the high-level inputs of the “seat seats”, which are invariably present in any model;
- It is also considered normal for seatposts to have a remote control.
Box design
- We select a high-quality speaker. The more power it has, the louder the sound will be.
- Let's move on to designing the subwoofer box - similarly, you can use special software. Since we are building a subwoofer for a car, we will need a box with the highest efficiency, or it is also called a level 6 bandpass.
- It is very important that the housing is completely sealed. To do this, we use felt, foam rubber or ordinary cotton wool. The sealant layer inside should be about two centimeters.
- The roof of the subwoofer must have a removable structure and have high strength at the joint. Therefore, we use a layer of foam rubber and further strengthen the structure.
READ MORE: Do-it-yourself balcony finishing with clapboard
To make a compact sub, you need to calculate the volume of the case, and also choose the material from which it is made. When developing, it is allowed to use ready-made drawings and diagrams taken from the Internet.
The channel “Sergei Tumanov’s Auto Audio School” spoke in detail about the design of boxes for car acoustic devices.
The volume of the box is considered the main characteristic that determines the sound quality of the speakers in the subwoofer. To calculate this indicator, you can use two methods - using special software or manually. Winisd or JBL SpeakerShop software is used as utilities. Such software will allow you to determine the optimal dimensions of the device and the volume of the body for a specific vehicle model.
To calculate the volume of the body, you need to use the formula V=H*L*A, description of the main values:
- H—height of the speaker box;
- L—hull length;
- A is the height of the column itself.
The body of the device must comply with the dynamic laws of acoustics, this will ensure the most rich and clear sound. To produce different types of boxes you will need different materials. To ensure that the device provides dense sound and allows it to be insulated, you can use chipboard or multi-layer plywood.
The thickness of the material for the production of the subwoofer box will be 3 cm.
Ural AS-D12A Slim Hurricane
Design and adjustment of the carburetor oka 11113
pros
- miniature, thin;
- speaker sensitivity 93 dB;
- in the body - a ready-made solution that does not require the creation of a sound box or insertion into the car body.
Minuses
medium-power (I would like better sound quality in the lower range, this is due to the small size of the device).
From 8141 ₽
Small compact subwoofer. A sound machine with a bass reflex, which is a delight not only for fans of pop and rock music, but also for fans of drum & bass and rap. Both speakers are large, 16 centimeters in diameter. Rated power of 100 watts will fill any salon. The lows will increase noticeably, but don’t expect any rattling of the glass. A big plus is the mosfet amplifier, which does not mind overheating, is not afraid of breakdown and provides excellent sound quality (low and high frequencies are especially good). All this is packed into a thin oblong case.
Due to its unusual appearance and excellent sound characteristics, Hertz is recommended to all connoisseurs of automotive aesthetics.
Ural AS-D12A Slim Hurricane is very utilitarian. Particularly easy to install, compact, flat, but therefore not too torquey. A small subwoofer in the car for those who like neat, high-quality sound without blocking their eardrums.
Alpine is similar in its capabilities and characteristics to PIONEER. These compact subwoofers for cars have good sound pressure levels, are very well built and have similar dimensions. Suitable for any motorist.
The most intense sound pressure is produced by the PIONEER TS-Wx130DA. This thing will make your car feel what drive is. Excellent price-quality ratio, the design is assembled as if for space flights. It also looks solid and interesting. For those who like to do everything to the maximum.
Models without housing PIONEER TS-Wx130DA and Hertz will cause a little trouble for installation. But they will allow you to literally make the sub part of the car or create your own unique design for it.
Choose your mini subwoofer for your car!
Subwoofer space
Now we need to find a place for our subwoofer. The most ideal option is to install it in the wing, but whether it’s right or left is up to you to decide. Some cars have a special configuration in the right wing, and there is more space for installing a subwoofer.
- We line the trunk with plastic wrap, then cover the trim with masking tape in two layers.
- We cut the fiberglass into pieces that correspond to dimensions of 200×200.
- We dilute epoxy glue. To do this, mix a can of resin and a can of hardener.
- Lubricate the cut pieces with epoxy glue and overlap them with tape.
- We cover the back wall of a self-made subwoofer with fiberglass. To do this, you need to lay three or even four layers of material.
- During the day, let the product dry completely.
- The next day we remove the resulting shell. Its thickness will need to be increased outside the trunk.
- Now we proceed to the bottom of the subwoofer, the top of which is made in the form of loops.
- We attach the front wall with self-tapping screws.
- The joints should be coated with epoxy glue.
Installation and connection
When connecting the device to the speaker system, you need to prepare:
- a set of cables - three conductors go in one winding to connect power to the car radio, as well as to the battery;
- safety element;
- capacitor device;
- electrical tape or heat pipes;
- wire cutters;
- plastic clamps;
- set of wrenches.
Subwoofer cable connection map
To connect the conductors, use the following diagram:
- The cable from the sub goes to the amplifier. If this device is located in the cabin, then it is necessary to lay the conductors through the technological holes in the luggage compartment. To hide the cables, they are laid under a plastic lining. To do this, the decorative trims are removed using a screwdriver and the screws are unscrewed. Do not lay wires in the area of moving parts of the body to prevent damage to them.
- Then the cable from the amplifier goes to the radio. The connection output is located on the back of the audio device. The car radio will have to be dismantled, as well as the center console.
- The positive power conductor must be protected from damage when routing. To do this, it is recommended to wrap it in corrugation.
- A safety device is installed on the positive conductor. It is important to place it closer to the battery.
Re: Ultra-compact subwoofer under the seat in a sedan
Car Nissan Primera P11. Volume - the smaller the better, it needs to fit under the seat or under the dashboard (where the passenger’s legs are). Thickness is about 70-80mm. There will be a homemade converter for Holton.
Added after 11 minutes, I found the Earthquake SWS-8 speaker https://zwuk.ru/shop/caraudio2/subwoo. thquake_sws-8/
I entered the parameters into SpeakerShop - with a box size of 8cm x 30cm x 35cm - the volume is 8.4 liters, taking into account the car interior - an almost flat frequency response.
You don't need it under the dashboard - everything will ring. The case is too small for the required bass - and Linkwitz will not help, but I think it will actually make it worse. For TS, I would look for a combination of Fs - about 30, Vas up to 20L, Qts around 0.4. But I think if we talk about the front location of the subwoofer (SPL), the natural rise in the frequency response of the cabin 40-60 Hz, it is better to look for a good long-throw six than to find a bad eight, the six in this case will give the BEST bass.
Security measures
When everything is ready, do not rush and immediately connect the homemade device. The creation must be protected from condensation and moisture. Moisture has a destructive effect on wood, and our creation contains a thin sheet of chipboard. To secure and protect the case, it should be impregnated with a special nitro varnish, which is used in the furniture industry. In addition, it is imperative to impregnate the inside of the front panel.
Nuances that must be taken into account when installing and connecting the device:
- The use of non-working tools or malfunctioning devices is not allowed.
- When working with piercing and cutting objects, you must follow safety precautions. The wires on power tools must not be damaged. The plug from a drill or jigsaw fits into the socket easily and smoothly.
- Before performing the task, you need to make sure that the car’s battery is disconnected. This will prevent damage to the speaker system.
Video “An example of making a subwoofer from old speakers”
First of all, we calculated the housing for the loudspeaker using the WinISD program, doing it in 3D through Sketchup.
The case will be set to 35 Hz. The dimensions of the base (width and depth) are 600x400, respectively, because the subwoofer will need to fit well under the cabinet (photo at the end of the article). Here are screenshots from WinISD: according to calculations and the WinISD program, the capacity should be 60.9 liters, not counting the speaker and Bass reflector.
The minimum cross-section of the tunnel is 150 cm2, so we take 15 cm by 10 cm. The program showed a length of exactly 50 cm, but they couldn’t hold it for that long, so they tilted it. It's hard to immediately understand how bending affects the length of the tunnel, so we measured it logically so that the bent version had the same amount of air as the straight version.
First, we will glue the part of the tunnel with the bass reflector and screw it together using drywall screws. Then we will glue the bottom wall. Using the available space, we put the element on the bend of the tunnel, then add an element that was also the wall of the tunnel and the chamber with the electronics.
Then we will glue and screw the side wall on the side of the radiators and the wall on the other side. Let's glue the front plate. Now there are holes for the socket and radiators.
To strengthen it, we will tighten the speaker chamber with a T-shaped element. Here, no rigidity was given to the bottom wall, because the tunnel wall stiffens it enough. At the end we will glue the top wall.
The wood work is almost finished. Now let's start covering with matter. Glue everything to the wood with the same glue that was used to glue the box.
Cut the felt with a hot blade. At the edges where two pieces of felt were connected, we glued them to the overlap (one part overlapped the other side by a couple of cm, and the other to the edge).