Basic principles of setting up the Pioneer DEH, MVH and other models
To get rid of the distortion that will inevitably occur with the sound of an untuned or incorrectly configured audio system, as well as to select the appropriate bass power and clarity of tweets, you need to select and adjust them one by one using the menu. The device is configured using the control panel, in the center of which there is a round joystick. The selection and installation of radio parameters occurs by rotating and recessing the round handle of the joystick into the body of the device. See the photo instructions for setting up the Pioneer radio for a clear understanding of the principle of selecting the necessary parameters.
Setting up the Pioneer DEH radio and other devices, starting with the 3100 models, begins with the joystick, which is used to navigate between menu items. The round handle of the joystick can rotate in any direction and can also be recessed into the body of the radio. Before starting the setup, you need to set the volume to 30 in order to be able to correctly perceive the sound quality. Don't be disturbed by wheezing and other noises at the beginning of the setup - after successful setup of the radio, they will disappear.
Initial settings, Setting am setting step, 1 press audio to select am
2 press i or > to select am setting step, Initial settings setting am setting step
Setting AM step
AM tuning step can be switched
between 9 kHz preset step, and 10 kHz. When using the tuner in
North, Central or South
America, switch the tuning step from 9 kHz
(531 - 1602 kHz) by 10 kHz (530 - 1640 kHz).
Press AUDIO to select AM.
Press ◄ to select 9 (9 kHz). Press ► to select 10 (10 kHz).
Basic sound settings for Pioneer radio
To get to the settings menu, press the round handle of the radio joystick in the center. By rotating the knob to the right or left, we go through the menu items and look for “Audio”; to go to it, click on the round knob in the center again. Once in the “Audio” item, we find the FADERBALANSE subitem. For a new radio, the indicators of this sub-item should be set to 0. If you see other numbers, then someone has already tried to adjust the settings in the device, and you need to reset them to the previous value. We adjust FADERBALANSE using the joystick, setting the value in the fader position to +15.
Setting up the front acoustic filter. To do this, rotate the central round joystick button again in search of the HIGH PASS FILTER menu item. When you press the center button, HPF OFF should appear on the radio display, which means the entire range switches to the front speakers. To get rid of distortion, press the joystick until the inscription HPF 50 appears (or another, depending on the radio model). Having set the filter at a frequency of 50 Hz, exit this menu item using the Band button and check the level of distortion by increasing or decreasing the volume. If you are not satisfied with the result, return to the previous menu item again and set the HPF parameter to a different value (from 80 to 125).
Learning to configure Pioneer
Attention! The site has training videos on radio settings. It's here…
And so, you have become the proud owner of a Pioneer radio. You bought it because you heard the name of the brand, or because a friend has one, or the sales assistant in the store praised it very much... . You had it installed at a tuning center, or maybe you “have a mustache yourself”, because it would seem that audio preparation in a modern car is present from the factory, what a difficult trick to tuck in... .
They turned it on, turned the volume knob, and heard wheezing from the speakers..., hmm, something was wrong, the seller deceived me. And the “Pioneer” is wheezing, or maybe the speakers were weak?...
Don't rush to conclusions. Let's start setting up in order to realize all the capabilities of this device. And the first thing to do is to check the capabilities of the purchased front speakers and, by adjusting the cutoff frequency with the built-in filter, to avoid distortion along the front.
For example, we will use the Pioneer DEH 3100 or older models, which is quite popular today. It must be said that not all Pioneer models have the necessary settings in the database. Devices of the lowest price category, models whose first numbers are 1, 2, as well as 11, 21 and so on, are empty, like a drum. This is a budget, and you don’t need to demand much from them. For the money and functionality. But starting with model 3100 (this applies to last year’s model range), we have everything to experiment with.
A little about the joystick's capabilities. The handle can tilt to the right, left, up, down and recess into the center.
We set the volume level to about 30 units, even if the front end is clearly wheezing, press the joystick handle in the center and get into the settings menu. There are quite a lot of them, but don’t worry, for now we only need one item; by rotating the joystick to the right or left we find the “Audio” item, press the joystick again, and by rotating the handle, look for a mention of balance and fader.
Here it is: FADER\BALANSE. Press the joystick. We get the inscription: FAD 0, BAL 0. There may be other numbers if some kind of adjustment was previously made. By tilting the joystick to the right we move from the Fader menu to the Ballance menu. By rotating the joystick, we actually adjust these parameters. The current menu starts flashing. We move the Fader to position +15. At the same time, we send the entire signal only to the front speakers, so that the rear does not interfere with us rebuilding the front. That's it, you can adjust the cutoff frequency. Tilt the joystick to the left and drop out of the fader menu into the main audio settings menu. (it should be clarified that always when tilting the joystick to the left, we exit the current menu to the main menu. Rotate the joystick to find the settings for the front acoustics filter. Here it is: HIGH PASS FILTER. Press the joystick, pushing it down and get HPF OFF. This means that the filter is turned off and the entire signal, the entire range, goes to the front acoustics, which of course leads to distortion. (This applies to small-sized and low-power acoustics; as a rule, exactly the same speakers are installed at the front - size 13 cm.) But even with speakers size 16 see this setting is required.
We press down the joystick and the inscription changes. Now this is HPF 50. And again, clarification: The figure may be different if this parameter has already been configured. The figure indicates that now a signal will be sent to the front, the lower limit of which is limited to a frequency of 50 hertz (this is practically a sub-frequency and, naturally, not every speaker can cope with it). To exit the menu, use the BAND button located at the bottom left. Click on it and drop out of the settings menu. By rotating the joystick, that is, adding volume, we can check the level of distortion. Didn't like the result? Then we go back to the filter menu and, rotating the joystick, change the number to the next value and check again. I must say that for acoustics of size 13 cm, you can safely immediately set the filter value to 100 - 125. For acoustics 16 cm, as a rule, it should be 80. That's it, we got a clear sound, there is no distortion, but there are not enough low frequencies and it `s naturally. But now we are compensating for this deficiency with a special mode, switching the rear speakers to subwoofer mode.
Now we will work in the preset menu. Pioneer also has such a menu. How to get into it? Very simple. Turn off the device. Turned off? Now press the radio power button - this is the top left button, but not briefly, but for a long time. Hold it down until the display flashes. Yes, you are on the menu.
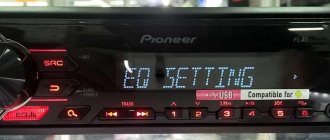
(A small digression. Almost all of these functions that we will talk about have always been present on the Pioneers, only entering the preset menu was carried out using different buttons. Sometimes this means holding the joystick in a recessed position for a long time. Sometimes it is holding down the Functions button. Almost always the radio should be in off state.) Rotate the knob to check which items are present. There may be a language setting, discrete step of searching for radio stations, options for turning on additional inputs and much more. We need the inscription SW Kontrol. Rotate the handle to search for this inscription. Eat? Briefly press down the joystick and get REAR SP FUL. The inscription says that the entire range goes to the rear speakers, but we need the speakers to work in subwoofer mode. Rotate the handle. the inscription changes from FULL to SW. Leave it at SW. All. press the radio power button. The rear is not audible at all, but this is how it should be, it is only turned on in the mode we need, but not configured. Now we need to get to the Audio menu again. You already know how to do this. Are you there already? Then rotate the knob to search for the inscription SW SETTING1. Found it? Briefly press down the joystick. What did you get? SW is on the left, but on the right there can be three types of settings. Is it either NORMAL? , either REV or OFF. By rotating the handle we move from one option to another. Well, it’s clear that OFF is turned off, that is, the mode is turned off. But the rest of the inscriptions mean that the speakers operate either in normal mode, when the diffuser works up, or in reverse mode, when the diffuser works down. Leave one of them. From experience, in Sedan cars, the Reverse mode is preferable. Have you turned it on? Now joystick left to exit settings. Rotate the joystick to search for the SW SETTING2 menu. Found it? This is the next menu if you turn the knob to the right. We drowned the joystick and got this: SW 80 HZ 0. What does this mean? Here's what. 80 is a filter, that is, what frequency is passed to the speakers. We rotate, the numbers change. If the acoustics are: 6*9, that is, oval speakers, then it is better to limit this range to 50 hertz. As a rule, with such a cut we get soft, juicy bass in the sub range. But you can experiment. Next, turn the handle to the right and the number 0 blinks. Rotate. We get numbers from -6 to +6. This is the power level of the mode. Check and select the level that your speakers can reproduce without distortion. The sub mode setup is complete. Exit the menu by pressing the BAND button, as always. Check how the rear sounds at different volume levels and, if necessary, adjust the power level. There is very little left. Thin compensation. There is such a regime. You can easily find it in the same audio settings menu by rotating the joystick. The inscription will be LOUDNESS. We press down the joystick and get three possible states on the left LOUDNESS on the right. Low, medium, high. What does this setting do? It adjusts the level of high and low frequencies at low volume levels. The lower the volume level, the greater the impact. But we must not forget that at high volume levels the influence of the mode is almost not felt. The louder it is, the smaller this correction is. Leave the value HIGT - high level. Well, that's all, almost. There is very little left, only two or three tinctures. But they are already for music lovers, for people with an ear for music. The average ordinary user can ignore them. Just one more thing needs to be done. Go to the EQ SETTING1 menu. It's there in the audio settings. Drown the joystick in this menu. The display will show EQ SETTING and three columns: adjusting the level of bass, mid and treble. Moving along the columns is a tilt of the joystick to the right, the actual adjustment is rotation, as always. Adjust them according to your preferences, but, as a recommendation, do not exceed the level of low frequencies, as a rule, a value of 0 - 1 is enough. You now have a good, balanced sound. There is no need to complicate life with your acoustics. Again, if the speakers are serious, then you can practice the settings here too. Again, clarification, these settings are good for the set: Pioneer and 4 speakers. If there is an amplifier, then the settings are slightly different.
Now your Pioneer sounds like a professional machine. And try to argue with this...
Setting up a Pioneer radio for a subwoofer
Having gotten rid of distortion at high frequencies, you need to add bass to get high-quality and spacious sound. To do this, you need to go to the preset menu by turning the radio off and on. To go to the menu, press the main power button of the device and hold it until the display turns on. When it lights up, you will be in the preset menu. Now use the joystick to look for the SW Kontrol item. Having sunk the joystick into the body of the radio, you find yourself in the EAR SP FUL sub-item. By rotating the round handle of the joystick, change the inscription FULL to SW and turn off the radio.
Now you need to further configure this item in the main menu. To do this, turn on the radio again and use the joystick to look for the SW SETTING1 item, then press the center of the handle. We have three setting options: NORMAL, REV and OFF. In practice, most car enthusiasts install radio subwoofers in reverse mode (REV). Turn the radio off and on again.
Connection option
Let's look at how to work with Sla. Many car owners consider themselves new to car audio; this guide will be especially useful for them:
- First you need to set up the subwoofer amplifier, then connect the subwoofer.
- After turning on option P.1.E, adjust the balance.
- Select your desired volume level. If necessary, use front and rear speakers, trying to ensure that the sound is balanced.
If you are using a system with two speakers, turn off the input level control function.
Thanks to Sla, you can control the volume level of all sources used, preventing sudden volume fluctuations when switching between devices. Settings are made at the PM tuner level; you can change the sound in MW/LW tuners by adjusting the input signal level.
Thanks to Sla technology, you can compare the volume of the FM tuner with the tuned source. To select the “SLA” option, click on the audio button, to change the volume, click on A or D. Adjust the sound of the signal source. The following inscriptions will appear: SLA +4 - SLA -4.
Setting up the subwoofer in the main menu
Now we need the SW SETTING2 menu item - we look for it by rotating the joystick until we see the inscription SW 80 HZ 0. By rotating the control panel knob, we set the frequency value at 50 Hz or another, depending on your personal preferences for quality sound. Having made your choice, rotate the knob further until the number 0 flashes to set the power of the mode (it is set in the range -6 +6), and set it to an acceptable sound power without distortion. Exit the menu using the Band button.
Why is it necessary to set up a Pioneer radio?
Before moving on to the process of setting up your Pioneer audio recorder, it’s worth understanding why you need to do this:
- This is done in order to maximize the audio capabilities of the head unit and the acoustics installed in the car.
- Knowing the settings will allow you to easily connect various external devices, eliminate wheezing and distortion of the audio composition, as well as change the interface language and other everyday characteristics, the correct configuration of which will make using the device more comfortable and understandable.
Incorrect adjustment of the radio can nullify the sound of even the most expensive and high-quality professional-level acoustics.
What can and should be configured in the equipment of this company
Depending on the model of the audio recorder, the user has the ability to independently adjust parameters such as:
Among all that has been said, special attention should be paid to setting the equalizer, as well as the radio, where the first is useful for those who like to listen to their own music, and the second for car owners who prefer radio stations to music from a disk/flash drive. Special adjustments are also required for the subwoofer.
Video: creating a budget combination of car radio + subwoofer for a car
Next, using the twist wheel or the movement arrows (depending on the model), we look for and go to the SW Kontrol item. After this, we find ourselves in the sub-item EAR SP FUL, which must be changed to SW using the arrow or knob, after which we turn off the radio.
After this, it is necessary to further configure the subwoofer, for which we turn on the radio again and go to the preset menu, where we look for and enter the SW SETTING1 item. Once in this submenu, you need to select one of three types of settings: NORMAL, REV and OFF. As practice shows, most users choose REV.
Next, you need to go back to the preset menu and select the SW SETTING2 sub-item, where we first indicate the frequency (recommended value 50 HZ), and then the power level (ranging from -6 to +6). In this case, you should choose the ranges based on the characteristics of the installed speakers and your hearing perception.
The last action in this paragraph is to regulate the loudness of the radio, for which we go to the menu and look for the LOUDNESS item, where we select the HIGH value.
How to set up the radio
There are three types of radio settings in Pioneer radios:
- Press or look for the FUNC button/menu in the menu, and then look for the BSM sub-item, which is responsible for automatically searching for radio stations. The search is activated by pressing the up or right key, after which the first station found will automatically turn on.
- While in receiver mode, which can be accessed by pressing the BAND button, hold down the right key and hold it for several seconds, then release it, thereby starting the process of scanning radio stations. After the station is found, scanning will be paused, after which the user can remember the radio station by pressing and holding the corresponding key - for example, 1. If the station is not needed, press the button to the right again, and the scanning process will continue.
- While in the radio station menu, briefly press the key/joystick to the right or left until the required wave of the radio station is found, then press the button (1–6) to memorize it.
Radio in the car
Stations in the radio can be tuned in three ways. Depending on the model, 18 or more stations can be memorized.
For convenience, we assume that the receiver is already turned on - switching to it is done by pressing the Band button once.
Method one is the easiest
- Knowing the frequency of the station, briefly press the left and right buttons to dial it on the display.
- Then hold one of the six buttons (1–6) below the display. The dialed station will be stored in memory, and a corresponding indication will appear on the screen in the form of a number repeating the button number.
- Dial the next frequency and press the next free button.
- Wait for indication on the display.
This is repeated 6 times - for six different stations.
Stations 7 to 12 and 13 to 18 are stored in the following memory banks. Switching between them is done by pressing Band once.
Method two
- While in receiver mode, hold down the right button for one second.
- The radio will begin searching for a station.
- Having found the first one, it will go into playback mode.
- If you are satisfied with the station, save it by pressing the buttons below the display.
- Then repeat steps 1–4 to select further stations
Storing the station and selecting banks is the same as in the first option.
Method three
- From the main menu you go to the functions menu.
- Scrolling through it, you find the BSM parameter.
- Select by pressing the up or right arrow.
- They wait for a while.
- The radio will check the entire range, find stations and arrange them according to signal strength.
- Then it will play the first one.
- You can save stations in the same way as in other methods.
You can scroll through the selected ones by single short presses of the buttons under the display. There is one thing about this method - not all domestic radio stations are included in the list of those found for various reasons. If you have gone through the entire list, but have not found the desired station, you can proceed as follows: - Exit to the main menu of the radio receiver (exit is carried out in the same way as to the main menu of the entire device - see above).
- Having looked through it with the volume knob, they find an inscription like FM:... Instead of dots there will be some numbers, usually 100.
- After playing with the left and right buttons, select FM:50 and confirm the choice.
- After exiting the menu, start the search again.
- Since the frequency step has just been halved, you need to be patient here.
- Maybe this option will find the right station.
You can experiment with the search step, but if there is still no station, it will be faster to select it using the first of the described methods.
A few words on the topic of memory banks - there is no need to overwrite any stations to free up cells. If you want to replace the selection, just write the new frequency in the selected cell. The old frequency will be deleted automatically.
Setting up a radio receiver for video
Video: finding radio stations on Pioneer tape recorders
Setting up the equalizer
To configure the equalizer, go to the EQ SETTING1 menu item, where you can set the signal amplitude level for mid, high and low frequencies. In the EQ SETTING2 item, which is also located in the main settings menu, the user can select the center frequency of the signal correction, as well as the width of the adjusted range. All this is available for HF, MF and LF.
To configure the equalizer, go to the corresponding menu
It is necessary to select settings based on the capabilities of the speakers and the personal preferences of the listener.
How to enable AUX
To activate the AUX mode, which is not active by default, you need to turn off the radio, and then turn it on by long pressing the FUNC button, after which we look for the inscription AUX: OFF and use the up/down buttons to select the AUX: ON item.
External ports
- In addition to the radio, the radio can play music from external devices or CDs (older versions).
- To be able to connect external devices, you will need the same “System” menu described earlier in setting the time.
- Go to the menu as described above.
- Scrolling through the menu, select the AUX, USB or Bluetooth option (if this feature is supported).
- Use the arrows on the sides (or tilt the handle itself) to switch the position. There are two options available - enabled (On) or disabled (Off).
- Choose to enable the desired port.
- Press the joystick once to confirm.
- In the same way as in setting the time, exit the menu.
- Further connection depends on the models of the radio and the connected device.
Bluetooth connection
It should be remembered that for the connection via Bluetooth to work correctly, like most other devices that support this function, pairing will be required. The PIN code is entered on the radio and repeated on the device (sometimes, especially if the device has already been connected via Bluetooth, you will only need to enter it on the radio).
To enter the pin code on the radio, take the following steps:
- They turn it off.
- Hold down the power key and go to the initial menu.
- Rotate the joystick to find the PIN CODE INPUT function (will appear if BT is enabled).
- Move the joystick up and down to enter the code. If you need to move between symbols, do it by swinging the handle left and right.
- Confirm by pressing the knob once.
- Exit the menu.
Now you can activate the mode on the device and try to find the radio. Those who like to assign clear names to devices can use the above method, but they must select EDIT DEVICE NAME rather than PIN CODE INPUT. The remaining steps are identical.
Important!!! Pressing to confirm must be done once. Clicking on the same menu again will reset the code and require you to enter it again.
In the radio, the photo of which is presented below, the 3.5 AUX jack socket is located to the right of the radio control buttons, and the USB is behind a plug with the USB brand logo.
Radio "Pioneer" without CD, but with USB and AUX support
Video: an easy way to make AUX on any car radio with your own hands
Important: entering the function menu can be done by holding down another button, for example, SRC or SOURCE.
Turn on Bluetooth
In order to activate Bluetooth, you need to go to the main settings menu and find the BT AUDIO sub-item there and select ON. After that, turn on Bluetooth on your smartphone/tablet and look for the radio.
After the radio is found, we connect to it, which may require entering the security key - by default “0000”.
How to set the clock
To set the clock, you need to enter the main settings menu, which can be done by turning on the turned off radio by holding down the SRC button or holding down the center button of the joystick. After which we find the CLOCK SET block, where you can set the format and the time itself. There is also a CLOCK OFF block in the menu, by changing the indicator you can enable or disable the time display on the device.
Video: pioneer 4019 clock setting
Also, in some Pioneer radios, you can call up the clock settings menu by simultaneously pressing the CLOCK + FUNC keys or by going to the SYSTEM item and finding the corresponding sub-items CLOCK SET/CLOCK OFF, which is located in the main settings block.
How to change language
To change the settings language, go to the system settings (SYSTEM), located in the main settings block, which may require holding down the SRC or SOURCE buttons. After this, we find the LANGUAGE sub-item, where we select the language we need.
Video: “deep” settings menu + disabling DEMO mode + disabling time
Turn off the demo
To disable the demo mode, turn off the car radio, and then turn it on again by long pressing the SRC button (maybe the SOURCE button), after which we get to the start settings menu, where using the joystick or the right-left buttons we find the DEMO ON sub-item, and then change it parameter to OFF.
How to adjust the bass
To adjust the bass level, you need to switch the rear speakers to subwoofer mode, which is described in detail in subparagraph 1. Also, to obtain richer bass, correct adjustment of low frequencies through the equalizer, as well as activation of the BASS BOOST function, which is disabled by default, can help. To do this, turn off and then turn on the radio using the SRC (SOURCE) button, and go to the preset menu, where we look for the BASS BOOST sub-item, after which we activate it.
Depending on the Pioneer audio recorder used in the car, there may be other parameters, which you can familiarize yourself with by carefully reading the instructions for the device, which is included in the kit or can be downloaded via the Internet.
What is sla in pioneer radio
Good day, readers and guests of my blog. In a recent post I described the connection and installation of the Pioneer DEH-1901UBG radio and the MYSTERY MSK 12.3 subwoofer kit based on the MK2.80 amplifier and a 12″ cabinet subwoofer with an MJB120 bass reflex. After installation, the sound was... well, nothing. It was decided to try to create all this happiness on our own. I surfed the net, watched a video on YouTube and decided to set it up. Here I want to share my experience, which does not claim to be correct or to be called an instruction, but rather to hear advice. Maybe someone will correct it, someone will advise something. I'm a complete newbie in car audio, so this is all new to me. Illustrations of the devices will be taken from the Internet, since taking out the amplifier and taking pictures of the radio screen was not fun. So, let's go... First of all, I set up the subwoofer amplifier. The connected subwoofer was a bridge. The photo showed how and where. There is a sea of information on the Internet, as I understand, the amplifier model is old, simple but reliable. There are a lot of reviews and other good stuff on the internet. The main thing is not to confuse “+” and “-“, you won’t burn it, but there will be no sound.
Then we move on to setting up the amplifier controls. We connect the tulips coming from the radio to the INPUT connectors on the amplifier. We also try to maintain the white/red polarity. Next we have three knobs and one switch. Let's start with the X-OVER Selector switch, as I understand it, this is a kind of frequency filter. Since our amplifier is used only with a subwoofer, it must be switched to the Low Pass position, that is, all high frequencies must be cut off. We don't need them. The sub should not sing, but should only produce the bass. — A small digression: A subwoofer is an acoustic system that reproduces low-frequency sounds, including infrasound (from approximately 5 to 200 Hz). © Wikipedia It hurts your eyes when you read “subuffer”, “subbuffer”, etc. on the forums. Be literate, gentlemen.) - Which is what I did. If you are using an amplifier for the front speakers or rear pancakes, then you can, I think, set it to OFF or High Pass - to cut off the low frequencies. In my case, I repeat, the switch is set to Low Pass. Then to the right there is a Low Pass control, which makes sense just when the switch is in the appropriate position. With this we choose to what frequencies to cut the input signal. I set the control to about 80Hz. This seemed sufficient to my ears. Well, in the future I’ll go again, listen, and play. This is a preset. I set the next Bass Boost control to 0. Because it is not needed yet. We will enhance the bass using the GU settings. And finally the LEVEL regulator. It is configured next. way: set it to 0. Turn up the volume on the radio, well, in my case it was 35, and begin to gradually increase the level with the LEVEL control. Until distortion appears. Then unscrew it back a little. For me it was in a position slightly further than the middle. It may be different for you. I think there is no need to talk about the Power and Protection lamps, the first should be on, the second should not be on during normal operation of the amplifier. There is no need to do anything else on the amplifier.