How to connect a portable speaker
Modern portable speakers often provide the ability to connect via Bluetooth, but this method is only available for modern TVs with a built-in Bluetooth module. You will need to turn on Bluetooth on the speaker, go to the TV settings, select the “Blutooth” section, search for available devices and pair. Some models of portable speakers, such as JBL models, also provide alternative connection methods: via a special USB-Jack 3.5 cable or via HDMI. Connecting via HDMI will give you the best sound quality.
How to connect a smart speaker
The latest in fashion are portable stations that provide voice control of the TV, help in choosing movies and have many other auxiliary functions. A striking example of such a station is “Alice”, made on the basis of the Yandex browser voice assistant. Connecting the Alice speaker to a TV is not difficult, but it is worth considering that such systems can only be connected to TVs that have an HDMI connector. You just need to connect the portable station and the TV using an HDMI cable (IN-IN), and the system will do the rest itself.
We are on Telegram
- 100
Sound settings
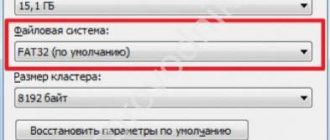
To adjust the sound, you need to go to the PS4 menu and open the Sound and Display options. Then select "Audio Output Settings" and click "Primary Output Connector". Next, you need to select the digital output port.
IMPORTANT! This setting is only necessary the first time you connect speakers via the optical output. In other cases, you do not need to change these settings.
Possible difficulties in outputting sound to speakers
The main problem with sound output to speakers is poor cable connections. To do this, just check the functionality of the connectors and plugs on other devices.
Problems can also arise due to incompatible connector formats. In this case, you should use an adapter. But you need to remember: the more adapters used along the signal path, the worse the final sound quality.
PS4 has taken gaming to a new level. But in order for the sound to match it, you must also connect speakers to the PlayStation 4. However, this functions only indirectly, since the High-End game console only has digital audio outputs.
First of all, since the Sony Playstation 4 connects to your TV via HDMI, your home theater speaker system can, of course, be connected directly to your TV device. You only need to use the speaker jack directly if you want to use a computer monitor to display images.
PlayStation 4: connecting speakers to PS4
The PS 4 is connected directly to the speakers using an optical digital cable (TOSLINK cable). It is not included with the console and, depending on the length, can cost about 450 rubles. You must insert this cable into the optical audio output of your PlayStation 4, which is located on the back panel near the HDMI interface. You need to plug the other end of this cable into the digital audio input of your speakers, which looks exactly the same as the already enabled audio output on the PS 4. If your speakers, like most active systems, do not have a digital audio input, then you You will also need a Toslink-Miniplug adapter to use the classic audio interface. It costs from 500 to 1000 rubles.
Note: Many audio systems without a digital audio input cannot handle a fiber optic connection via a standard audio jack. Thus, using a Toslink-Miniplug adapter does not always allow success.
How to change sound settings on PlayStation 4
- To begin, select the “Sound and Screen” option in your PS 4 menu.
- After that, click on “Audio Output Settings”.
- There you should select the “Main output connector” field.
- Then set the value to “DIGITAL OUT (OPTICAL)”.
- There you will also find additional options for fine-tuning.
Photo: Manufacturing companies
When buying a set-top box, the last thing you want to do is spend time connecting and setting up peripherals. But the “plug and play” principle does not always work. So that you don’t have to search for information for a long time, let’s take a closer look at the options for connecting acoustics to the PlayStation 4.
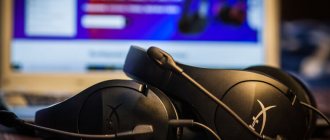
What are the best headphones to use for the console?
If you are a true fan of Sony manufacturers, you can purchase a special headset at a specialty store. Of course, as with any standard headphones, this equipment has certain differences between models. The main headphone options are presented as follows:
- By type of design: plug-in, overhead or full-size versions. Depending on what headphones you are used to using, purchase the appropriate model.
- Depending on the type of connection to the PS3, there are wired and wireless options. Of course, it is more convenient to use a wireless system, but you will have to pay a little more for such convenience.
- By sound quality: low, medium and high resolution. It is better to clarify this parameter in the technical specifications or ask a consultant.
- The price range also varies significantly: there are budget, mid- and premium models. Focus on your financial capabilities and buy good headphones. In any of these categories you can find an excellent combination of price and quality.
Based on the parameters described above, you can choose a headset that suits you. Analyze and compare several options to choose a truly good device.
TIP : According to many players, it is most convenient to use wireless on-ear or full-size headphones. The absence of wires will give you freedom of movement, and by placing ear pads on your ear, you create the effect of immersion in the events taking place on the screen.
Possible problems
If we are talking about a wired connection, then problems with sound are mainly associated with a malfunction of the cord and connectors. But with Bluetooth everything is a little different.
Despite the fact that pairing is successful in most cases, sometimes users encounter the following problems:
- synchronization does not occur;
- there is no sound, although the connection is established;
- the smartphone does not see the audio speaker;
- Most errors can be corrected by simply rebooting the device.
- If this does not help, you need to unpair the Bluetooth gadget and re-bind it.
Bluetooth not enabled
The most common problem is that pairing mode is turned off. In this case, synchronization does not occur, since the Bluetooth module is disabled and the phone cannot detect the gadget. To resolve this error, you must enable search mode on your audio device. To do this, you need to hold the power button on the speaker for several seconds until a sound signal is heard or the color indicator changes color. After this, you need to open the smartphone settings again and select a music device from the list of found ones.
Dead battery
If the speaker does not respond to button presses, the LEDs do not light up or blink, then it is most likely discharged. It's quite easy to check. Press the power button located on the case. If there is no beep and the lights do not blink, the battery needs charging. Modern Bluetooth speakers work for 5-10 hours on a single charge, and you must remember to recharge them in a timely manner.
Connection established with another smartphone
Sometimes, the phone cannot connect to the Bluetooth speaker because there is another gadget nearby that was previously connected. Most likely the pairing happened automatically.
You need to disconnect the acoustics from the other device and try synchronization again using the method described above.
Large distance between devices
Bluetooth works at a maximum distance of 10 meters, but if there are obstacles in the form of walls or household appliances, the footage is reduced to 3-4 m.
Instructions on how to connect headphones to ps4.
The process of connecting headphones is quite easy and does not take much time. Every person can do this. Usually there are no problems, but if this is your first time encountering such a device and you don’t know the procedure, it is better to refer to the instructions. For convenience and a quick start, we suggest using the classic diagram for connecting the headset to the set-top box, in which each item is discussed in detail. Follow the instructions and perform all the steps step by step:
- Connect all devices to the network by pressing the power button and activate the system.
- Take the joysticks that come with your PlayStation 4 in your hand. Take a close look at their case; there should be a special headset jack on it. Usually it is located in the middle next to the connector for connecting the wire from the joystick charger.
- Take the wire from your headset and insert it into the corresponding socket on the joystick body.
- Now you need to synchronize the devices so they can work together.
- In the main menu of the main screen, use the control buttons on the joystick to go to settings.
- In the list provided, select “devices” and then “audio devices”.
- Now click on the line for outputting all sounds to the headphones.
If all actions were performed correctly, the sound should appear. With a model combined with a microphone, it will also connect and you will be able to talk immediately. This is only possible if the devices are in working order and connected to the network.
IMPORTANT : The connector involves combining the operation of a headphone and a microphone. If you connect only headphones, you will not be able to use the microphone separately, and accordingly, you will not be able to communicate with other users.
Connecting wired speakers
Step 1: Choose a set of laptop speakers. If your laptop has a USB port or a headphone jack, you can connect most wired speakers to your personal computer.
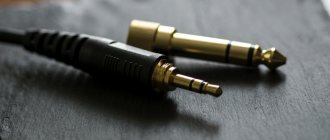
- Most computer speakers have a small 3.5mm audio jack (1/8″ mini jack, suitable for smartphones, iPods, PC sound cards) that plugs into a standard headphone jack. This type of speaker usually connects to a power source; 3.5mm audio jack on most speakers
- USB-powered speakers plug into your computer to supply power, so you don't have to plug them into a 220V outlet. If your laptop has "extra" USB ports, this may be a preferable option. USB speakers with a regular audio jack
Step 2: Place the speakers in your work area. Most PC speakers are labeled "Left" (L) or "Right" (R) on the back or bottom of the device.
Place the speakers correctly
If your speakers have a subwoofer, you can place it behind the system or on the floor.
Place the subwoofer behind the system or on the floor
Step 3: Turn down the speaker volume: This is usually done by turning the volume control on one of the speakers all the way to the left.
Reduce speaker volume
Step 4: Left-click on the sound icon in the bottom right corner of your desktop. Adjust the volume to about 75%.
Left-click the sound icon in the lower right corner of your desktop
Use the slider to adjust the volume to about 75%
Step 5. When you click on the "Mixer" option, several sliders will appear, use the slider that says "Applications").
Click on the "Mixer" option
In the slider labeled “Applications”, set the sound to 75%
Step 6: Turn on your laptop and connect the audio cable (USB or 3.5mm) to the appropriate port on the laptop.
- If you are using a 3.5 mm jack, look at the sides of the laptop to find a small jack with a headphone or speaker model. Find a small jack with a picture of headphones or a speaker, connect the speaker jack.
To connect, do not use the jack with a microphone model - If you are using USB for audio, connecting speakers may trigger driver installation or the system will automatically install the driver.
If the operating system asks you to insert a disc, insert the one that came with your connected speakers and follow the on-screen instructions. To connect USB speakers, use an available USB connector on your laptop. Insert the driver disc that came with your USB speakers.
Step 7: Turn on the speakers using the "On" button, usually located on the back of one of the speakers. Sometimes the power button is combined with the speaker volume control.
Turn on the speaker with the corresponding button responsible for power
If you have a power cord, plug it in
Step 9: Play Audio on Laptop: Stream Music, CDs, YouTube Videos, etc.
We play any sound on a laptop
Step 10: Find a comfortable listening volume by slowly turning the volume control on your speakers until you reach the desired level.
Adjust the volume on your speakers for comfortable listening
Method 2: Using Bluetooth transmission
To do this you will need:
- Any wireless Bluetooth headphones or AirPods
- Any Bluetooth transmitter with Aux support
There are small devices called dongles that plug into a port (like your laptop) to give it extra functionality or allow pass-through access to the device, or both. A regular one costs about 1,900 rubles. and works with all devices equipped with a 3.5mm jack.
Not only do you need to connect your AirPods to your PS4, but you can also use it to watch TV without disturbing others, or connect the Dongle to your stereo or turntable so you can listen to music on wireless headphones or AirPods. Sounds great? Here's what you need to do.
Connecting Dongle to TV
With your TV input set to PS4 input, connect the Dongle to your TV using a 3.5mm Aux cable.
Pairing devices
Put the key into pairing mode by pressing and holding the button on the key. Then put your AirPods into pairing mode by pressing and holding the button on the case. The white light should flash.
The headphones and dongle should connect and you are ready to go. This method is simpler, but requires a transmitter device that you may have to purchase.
Stereo 2.0:
- The recommended distance between speakers is at least one and a half meters. In addition, they must be parallel to each other. In order for the user to get the desired sound, the speakers must “look” at the listening position, for example, on a sofa or desk. The placed satellites should visually resemble a triangle.
- Placing devices in the corners of the room is a mistake, due to which the low bass is noticeably lost.
- For the “correct” sound, it is recommended to use stands that are positioned so that the satellites are 40-50 cm from the floor. The ideal location is at ear level.
- The acoustic system should not be blocked by furniture or installed in niches. This will disrupt the movement of the sound wave and result in loss of sound quality.
- It is also not recommended to place speakers close to the wall, as this upsets the frequency balance.
Advice for owners of 2.1 systems: do not place the subwoofer in the center - you will end up with a sound mess. Read more about subwoofer placement below.
Multichannel 5.1 audio
- A pair of “fronts” is installed identical to a stereo pair 2.0, as described above.
- A pair of rear speakers should ideally be a mirror image of the front stereo pair.
- The central - speech - channel is installed as close as possible to the monitor, which makes it possible to comfortably and holistically perceive dialogues and vocal parts.
- The subwoofer is installed on the floor. You should not place it in the center, as the powerful bass will drown out other frequencies, and the low frequencies will be too saturated. You can experiment when choosing the optimal location based on a specific room.
Main connectors
Before connecting, you should first make sure that the appropriate socket is available. Modern Samsung TV receivers use many audio connectors, for example:
- Scart
- "RCA".
- "OUT" linear type.
- Jack for headphones or headset.
- HDMI.
- Optical digital audio port.
When interacting via Scart or RCA, it should be taken into account that the speakers have an amplifier and they will have to be selected according to the power level. The line connector and headphones are used only if there are no other connections. This type of device does not have a built-in amplifier and is connected via a mini jack or 3.5 mm. Digital optical ports are used in all modern technical devices. For example, a home theater, the sound of which is sometimes not inferior to a real cinema. Almost all modern TVs have outputs for HDMI or an audio port.
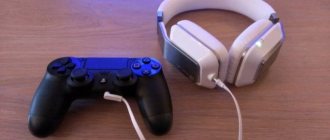
Connecting wired headphones to Play Stataion 4
The easiest way to connect headphones to Play Stataion 4 is through the console's joystick.
Step 1 - take the joystick in your hand. Near the battery charging connector on the joystick there is an audio jack for connecting headphones using a regular 3.5 mm audio jack. The nest is combined, i.e. if you connect headphones with a built-in microphone, the microphone will also work. If you connect headphones without a microphone, you will have sound, but there will be nowhere to connect the microphone and you will not be able to talk. Connect headphones to the joystick.
Step 2 - Play Station settings for audio output to headphones
Now you need to tell the box to output all the sound to your headphones. To do this you will need to go through the following menus:
- Settings;
- Devices;
- Audio devices;
- Headphone output - all sounds.
If you did everything correctly, the sound should come through the connected headphones. If the headphones have a built-in microphone, then you can talk.
How to switch audio from HDMI to speakers in Windows 10
First you need to go to the audio playback device control panel. To do this, find a clock icon in the lower corner of the screen, and to the left of it there will be a “Speaker” icon. You need to right-click on it. A pop-up window will appear in which select the “Sounds” item and left-click on it.
To switch audio from HDMI to speakers in the Windows 10 operating system, you need to:
- go to sound settings;
- go to the “Sound Control Panel”;
- select “Playback devices”.
All other sound settings do not differ from the standard parameters, so even beginners will not have any difficulties. The only thing you have to do is find the playback device (TV) in the list of the window that opens. Typically it is labeled as "Digital Audio Device (HDMI)".
Outputting sound from a microphone to a speaker
Switching audio from microphone to speakers is even easier. To do this, you need to find the microphone in the list of connected audio devices and right-click on it. Next, you need to open the “Properties” tab.
In the window that opens, go to the “Listen” tab and check the box next to “Listen from this device.” After enabling this function, the sound will not be output to the microphone, but to the speakers or headphones.
Switching sound from computer to speakers
To switch sound from your computer to your speakers, you will first have to go to the audio devices control panel in the Windows 10 operating system.
To do this, find the clock icon in the lower right corner of the screen. To the left of it is the “Speaker” icon. You need to right-click on it. A window will open in front of the user in which he must select the “Sounds” tab and left-click on it.
In the future, the user will be able to switch between headphones and speakers in just a few clicks. To do this, right-click on the Audio Switcher icon in the notification area. Next, a pop-up list will appear in which you only need to select the desired playback device.
Method 1: Using a computer
For this to work, you will need the following components:
- PlayStation 4
- AirPods
- Aux cable
- Computer with 3.5 mm microphone jack
Connect AUX and HDMI
Connect your PS4 to your TV using an HDMI cable. Then connect your Windows computer to your TV using an Aux cable. Most TVs are equipped with audio output ports. It can be RF, optical, 3.5mm or a combination of all three. Connect the Aux cable to the 3.5mm port on the back of your TV, and then connect the other end of the cable to your computer.
Some computers have separate headphone and microphone ports, although newer models will have a hybrid jack for use with headphones and a microphone. Connect the Aux cable to the microphone port.
Add a new device to the OS
Now you need to configure some settings on your computer. Open Control Panel on your computer and select Hardware and Sound. A page will open where you can add new devices.
Checking the microphone and sound operation
Click on Sound to open the sound settings. This option will show you all the devices connected to your computer, including the microphone you just set up.
Checking the microphone properties
Go to the Recording tab, making sure that the Aux cable is connected to the computer's microphone input port or is not listed. Now right-click on the external microphone option in the list and click to open the properties window.
Checking microphone operation through speakers
In the Properties window, click the Listening tab and check the Listen to this device checkbox. Your computer will now listen for audio from the microphone port and play it through the connected speakers or headphones. You should know the next step - you will want to play audio on your AirPods.
Connect AirPods to your computer
Finally, connect your AirPods to your computer and start playing the game and the audio will be routed to the AirPods. However, this method has one drawback. This is a workable solution only if you don't need to use in-game voice chat. Since only audio is sent to AirPods, you won't be able to use voice chat. If you are going to play multiplayer games, then you can buy PS certified headphones.
From simple to complex
The most common way to connect a console is HDMI. The interface allows you to transmit video and audio simultaneously, which reduces the number of cables.
But what to do if the TV has a mediocre sound system? Or the set-top box needs to be integrated into a home theater system. Here HDMI will also be useful. Starting with HDMI 1.0, there is support for eight-channel audio, which is enough to build a full-fledged 5.1/7.1 home theater. In this case, a receiver with speakers is added to the connection diagram.
In the case of PS4 and PS4 Slim consoles, any AV receiver will do. The order of connecting components in the diagram:
The HDMI cable from the console is connected to the HDMI connector of the receiver. Such devices, even of the entry-level class, have several ports on board (from 6 pieces). The cable from the set-top box must be connected to the port marked “HDMI IN ”Game” - especially for game consoles. If there is none, go to any free “HDMI IN” connector. The HDMI cable from the TV is connected to the HDMI connector of the receiver marked OUT. In case of several outputs, it is preferable to choose one labeled ARC. This connection will provide additional functionality to the system. For example, the receiver will automatically turn on when you turn on the TV, and you only need the TV remote to adjust the volume. The acoustics are connected to the corresponding connectors of the receiver (Speakers)
At this stage, it is important not to confuse the audio channels. Otherwise, the effect of presence will be ruined.
For PS4 Pro, the above is true, but the receiver must have HDMI version 2.0a or older. This is required to play HDR content.
How to choose headphones for the console?
Among the many different models, it is difficult to choose something specific; each option has its own advantages and disadvantages. If you have free time and experience in purchasing such equipment, you can look at the comparative characteristics of various devices. With accurate analysis and comparison of important operating parameters, you can choose a really good model.
But in cases where time is limited, you should pay attention to the following indicators:
- Clear sound without interference.
- Convenient design and comfort during long-term use.
- Easy to connect.
- Set-top box compatible.
- Favorable price-quality ratio.
Based on these simple parameters, you can choose a completely decent version. Feel free to try wearing the headset in a store and turn it on after listening to a few tunes. It is impossible to define quality in any other way; the sound must be pleasant and rich to create the desired effect.
Possible difficulties in outputting sound to speakers
The main problem with sound output to speakers is poor cable connections. To do this, just check the functionality of the connectors and plugs on other devices.
Problems can also arise due to incompatible connector formats. In this case, you should use an adapter. But you need to remember: the more adapters used along the signal path, the worse the final sound quality.
PS4 has taken gaming to a new level. But in order for the sound to match it, you must also connect speakers to the PlayStation 4. However, this functions only indirectly, since the High-End game console only has digital audio outputs.
First of all, since the Sony Playstation 4 connects to your TV via HDMI, your home theater speaker system can, of course, be connected directly to your TV device. You only need to use the speaker jack directly if you want to use a computer monitor to display images.
PlayStation 4: connecting speakers to PS4
The PS 4 is connected directly to the speakers using an optical digital cable (TOSLINK cable). It is not included with the console and, depending on the length, can cost about 450 rubles. You must insert this cable into the optical audio output of your PlayStation 4, which is located on the back panel near the HDMI interface. You need to plug the other end of this cable into the digital audio input of your speakers, which looks exactly the same as the already enabled audio output on the PS 4. If your speakers, like most active systems, do not have a digital audio input, then you You will also need a Toslink-Miniplug adapter to use the classic audio interface. It costs from 500 to 1000 rubles.
Note: Many audio systems without a digital audio input cannot handle a fiber optic connection via a standard audio jack. Thus, using a Toslink-Miniplug adapter does not always allow success.
How to change sound settings on PlayStation 4
- To begin, select the “Sound and Screen” option in your PS 4 menu.
- After that, click on “Audio Output Settings”.
- There you should select the “Main output connector” field.
- Then set the value to “DIGITAL OUT (OPTICAL)”.
- There you will also find additional options for fine-tuning.
Photo: Manufacturing companies
When buying a set-top box, the last thing you want to do is spend time connecting and setting up peripherals. But the “plug and play” principle does not always work. So that you don’t have to search for information for a long time, let’s take a closer look at the options for connecting acoustics to the PlayStation 4.
Methods for connecting a speaker to PS4 (PS4 slim, PS4 pro)
There are several basic ways for speakers and console to communicate. Here are the most basic ones.
Connect directly to PS4
itself is connected via HDMI , which, in addition to high-quality images, can also output sound.
REFERENCE! The device does not have analog outputs, so additional equipment is connected via a digital output.
The connector is located next to the HDMI port
. This is where you need to connect the optical digital cable (TOSLINK). The other end of the cable must be connected to the speaker system itself.
If the speakers do not support this format, you should use the Toslink-Miniplug adapter. It allows you to convert the signal so that you can use the classic interface.
At the speed of light
HDMI is convenient for its versatility and transmission of video and audio signals through one wire. In the event that its use is impossible, the speakers must be connected separately. One method is fiber optic cable.
This solution transmits up to six channels of sound and will allow you to build a 5.1 home theater around the console. The only limitation will be the presence of the necessary connector on the amplifier for speakers. It is labeled Optical IN.
On Play Station 4, audio is sent via HDMI by default. In order to switch the output to the optical connector, you need to make the following settings:
- In the console menu, select the “Sound and Screen” field.
- Go to “Audio Output Settings”.
- Select the item “Main output connector”.
- Set the parameter value to “DIGITAL OUT (OPTICAL)”.
How to reduce the volume on headphones on Android?
In Settings -> Advanced Settings, tap on Volume Level and you will have 3 options: Normal, Low and Ultra Low. The default is Normal, so try the other two.
Interesting materials:
How to apply highlighter palette? How to wear coats and culottes? Navel piercing how to care for the healing process? Which braided cord is better? Which tile adhesive for the bathroom is better? What is the best rolling jack for a crossover? Which rolling jack is better? Show me how to wear leather pants? How long does eyebrow tinting last? How long does henna eyebrow dyeing last?
Through what connectors can you connect speakers to your TV?
To properly connect external speakers, a stereo system, or expensive equipment with a subwoofer, you need to determine which outputs the TV is equipped with. Usually, to connect various types of acoustics, modern models of TV panels are equipped with different interfaces:
- HDMI RCA digital output. The most advanced type of digital solution, which is supported by almost all modern models of LCD panels. The backward compatibility channel provides high sound quality due to the operating mode when the equipment does not receive data, but sends it to external speakers.
- Interface – Scart. Multi-plug connector of the European standard, used to connect multimedia equipment (LCD panels, external speakers, speaker systems). Provides high quality audio signal transmission, both digital and analogue.
- AV input and output. The composite AV interface is still used on older equipment. The audio signal is transmitted using an RCA cable (tulip), characterized by a high loss of sound quality and low noise immunity.
- Linear output “AUX OUT”. Standard connectors designed to transmit low-frequency audio and video signals. The signal level is standardized and does not change, ensuring compatibility of equipment from different manufacturers.
- TRS or mini jack. The socket connector outputs sound to the headset (headphones).
- TOSlink optical audio output. Transmits data in digital format and is designed for specific acoustics. The channel does not convert the signal, thanks to this a high transmission speed is achieved without loss of quality.
Can I connect regular headphones?
Despite the fact that the company has its own branded accessories that complement the collection and create a complete look, you can also use non-original devices. Since the connector used in the joystick is a standard 3.5 mm input, absolutely any headphones can be used. Of course, this will not match the overall look and will clearly not suit connoisseurs of Sony products, but it can be done. The main condition that must be observed is the matching of the connectors. Completely outdated versions with a flat wire will not work.
But if you decide to buy a good headset, or you already have such an option, you can safely use it. The connection is made according to the same scheme described above.
IMPORTANT: Do not think that only your own headphones will provide good sound, this is not the case. The sound quality will not be affected, and the main indicators will depend only on the capabilities of your device.
Connecting the speaker system to the projector
The classic option for connecting a speaker system is wired. The first step when making this type of connection is to familiarize yourself with the available ports on your projector, or better yet, do this before purchasing it. For example, in our reviews the specifications always indicate which ports the device supports. Naturally, the ports on the projector need to be matched with the ports on the speaker system. The fact is that some speaker systems have an analog connection type, while all modern technology has switched to a digital type of audio and video signal transmission. And projectors were no exception. Perhaps the easiest way to connect a high-quality 5.1 or 7.1 audio system is to have a receiver that has all kinds of connection ports for all occasions, and does an excellent job of decoding any audio signal.
Another question is that such a receiver will not cost you a lot, and this equipment is not particularly compact. And then ingenious guys from China come to our aid, offering us a number of solutions to this problem.
Digital-to-analog converter (DAC)
The operation of this magic box is extremely simple, after connecting it to the power supply and your speaker system, you can output sound from the projector via an optical audio cable (Toslink), which most projectors support (usually the port is labeled as S/PDIF), or via a coaxial cable . A nice bonus is that in addition to connecting the projector to the audio system, you can also connect, for example, a TV set-top box.
You can purchase a similar converter here and, for example, here.
For 5.1 audio systems this or this one is suitable.
A video with an example of connecting a 5.1 audio system via a digital-to-analog converter, together with a TV set-top box, can be viewed below.
HDMI Audio Extractor
Another very useful converter that allows you to isolate an audio signal using an HDMI connection, in other words, HDMI ARC technology - a digital interface with a two-way audio channel. Using this device, you can connect an audio system to a projector that has no other suitable outputs other than HDMI. Along the way, the device can provide a combination of several devices into one system, but to do this, you should definitely check whether your projector’s HDMI controller supports such technology. If the documentation indicates support for v1.4 and higher, then everything should work correctly.
You can find and purchase a similar extractor here and here.
A video of the connection, using the example of a combination of a TV, computer and 5.1 audio system, can be seen below.
External Sound Card
In the vastness of AliExpress you can find a fairly popular device called a 5.1 optical USB audio adapter. But don't rush to rejoice. Unfortunately, it's not that simple. This device is intended primarily for personal computers and laptops, as it requires the installation of a special driver to identify the device. If you connect an external sound card directly via the USB port to the projector, most likely nothing will happen. The projector simply will not be able to detect such a device. But in case you have become the owner of this box and now don’t know how to use it, or you also like the idea of outputting sound from a PC to a 5.1 speaker system, we will leave you a link to one of the most popular models here.
And also a link to a video review of working with it below.
What is AUX for on PS4?
On the back of PS4
AUX
port , which is used to connect the PlayStation Eye camera. PlayStation 4 takes 21 seconds to boot. However, this measurement was carried out on a debug version of the console, which is not connected to the Internet.
Interesting materials:
What raw materials are used in non-ferrous metallurgy? What effect do alloying elements have on the properties of steel? What animal eats jellyfish? What date is the pension transferred to the Sberbank card for January 2022? What date are salaries paid? When are pensions paid to military pensioners? What year of birth will women retire in 2022? What type of stresses arise in the cross section during tension and compression? What color should cast iron be? What color dress should I wear to my wedding for the second time?
Connecting headphones to Sony PlayStation using a USB Bluetooth adapter
Another convenient method, in addition to using a special receiver or receiver, can be a small USB adapter, shaped like a flash drive. With its help, you can at any time broadcast sound to any device that receives the signal via Bluetooth. To pair using this method, you will need to purchase a high-quality USB adapter and do the following:
- Before you start pairing and connecting your equipment, make sure you have all the necessary wires to connect the gaming platform, controller and headphones. Connect the set-top box by connecting the corresponding wires to the TV and plug the power cord into the outlet. Start the system by pressing the appropriate button on the front panel of the console.
- Now connect the USB adapter to the corresponding connector on the game console.
- Pair the equipment; usually, this requires holding the power button of the connected equipment for a long time until a characteristic sound or light signal appears.
- Now, using the controller, you need to enter the main system settings and activate the headset connection to output sound to it. To do this, go to the settings section and select devices, then log in to audio devices.
- In this section, you'll need to change key settings to stream game audio to your headset. From the proposed list of devices for outputting an audio signal, select a headset, in the line for selecting output to devices, select the “broadcast to everyone” option, and in the line for selecting a device for broadcasting, click on the headphones connected to the Dualshock controller.
After completing these manipulations with the console, the option to output the sound in the game through a headset will become available to you. This will help you enjoy the gameplay and not disturb others in their daily activities. However, it is worth considering that with this method, the use of the microphone will become unavailable to the user, so if necessary, you will have to install it separately.
Connecting wired headphones to Play Stataion 4
The easiest way to connect headphones to Play Stataion 4 is through the console's joystick.
Step 1 - Take the joystick in your hand
Near the battery charging connector on the joystick there is an audio jack for connecting headphones using a regular 3.5 mm audio jack. The nest is combined, i.e. if you connect headphones with a built-in microphone, the microphone will also work. If you connect headphones without a microphone, you will have sound, but there will be nowhere to connect the microphone and you will not be able to talk. Connect headphones to the joystick.
Step 2 - Play Station settings to output audio to headphones Now you need to tell the console to output all audio to your headphones. To do this you will need to go through the following menus:
- Settings;
- Devices;
- Audio devices;
- Headphone output - all sounds.
If you did everything correctly, the sound should come through the connected headphones. If the headphones have a built-in microphone, then you can talk.