What to do if the audio system stops reading CDs.
Recommendations for cleaning lasers in CD players. This material is based on the experience of servicing Aiwa audio centers. The recommendations presented here can also be used when repairing CD players from other manufacturers. Dirt getting on the laser optics is the most common reason why a CD player stops working normally: the device “stutters”, does not “recognize” or does not spin discs.
How does dirt get on laser optics?
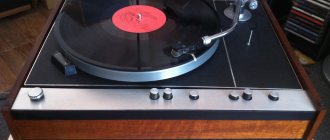
The CD player unit in the most common series of AIWA NSX-*** mini-systems is located at the top of the device, in close proximity to the ventilation holes. This makes the laser optics vulnerable to dust, which is brought in either from the external environment by room air or internal air currents. Lasers really do not like smoking near the device - the tars contained in cigarette smoke settle on the optics and are very difficult to remove. And inquisitive cockroaches, for some unknown reason, love to climb inside the laser. If the cockroach is large, then it cannot turn around inside - it’s cramped. But the cockroach does not know how to reverse. The lack of food and the slowly frying laser beam do their job and soon the curious insect dies. But the player refuses to work.
Before we begin the repair, let's look at the schematic design of the laser. The Aiwa NSX mini-system models use the following types of lasers manufactured by Sony: KSS-210, KSS-212, KSS-213.
Laser in technical English is called pick-up assy. This is a rather complex device consisting of a semiconductor laser (2), a special prism (4), a focusing lens with a correction mechanism (3) and a panel with photodiodes (1).
The laser beam (red arrow) is reflected from the prism, passes through the focusing lens and falls on the disk (5). After being reflected from the disk, the beam (green arrow) returns, passes through the prism and falls on the reading photodiodes.
As you can see, contamination of a lens or prism doubly impairs the passage of the beam, since it ends up in its path twice.
How to clean the laser?
Appearance of the laser (Using the KSS-210 as an example)
The “eye” of the focusing lens is clearly visible. The black surface around the lens is a plastic cap that protects the internal structure of the laser from external influences. Contamination of the focusing lens is the most common and simple malfunction. It is best to blow off dust from the surface of the lens. But, of course, don't just blow on it - this will only pollute it even more. Professionals use special aerosol cans with compressed purified air. A can costs from 150 to 370 rubles, depending on the volume. You can buy it in specialized stores. In St. Petersburg, these are Mega-Electronics or AV-Center stores. This can is enough to clean a hundred or two lasers.
A thin plastic tube extends from the head of the can, allowing you to direct the air to the desired location. To clean the laser, point the tube at the lens and “blow” on the laser for 1-2 seconds.
The surface of the lens can also be cleaned with a cotton swab. If the contamination is severe, you can use ethyl alcohol. Do not press hard - this will erase the special anti-reflective layer on the surface of the lens. And the lens suspension mechanism is very delicate; pressing it can damage it.
ATTENTION: Do not use acetone under any circumstances - the lens is made of plastic and you will irreparably damage it.
If cleaning the surface of the lens did not help, then dust probably got inside the laser, onto the surface of the prism. This is a more complex contamination, but it can be dealt with. But to do this you will have to disassemble the laser. After pressing out the tucks, remove the safety cap and you will see the following:
View of the laser with the cover removed.
A complex structure near the lens is a special electromagnetic suspension. It is part of the automatic beam focusing system. During playback, the electromagnet continuously adjusts the position of the lens, maintaining a constant distance between the lens and the disk. This is necessary because when the disc rotates, it oscillates significantly in the vertical plane, and without an automatic focusing system, normal operation of the CD player would simply be impossible.
Useful links about laser heads and reading mechanisms
When you are looking for a laser for transplantation, the first thing you need to do is look at Vasily’s list of CD players for a possible donor.
- List of DACs and transports from Vasiltech.
There is also a cool list of lasers - incomplete, but at the same time very detailed for some manufacturers:
- Lampizator: Laser List from Japan
It would also be nice to read about the format itself.
Interesting information about the history of CD creation:
- BBC News: How the CD was developed
About the Red Book standard:
- Red Book (Audio CD Standard)
And -
- Article on English Wikipedia
- Answers: How is a compact disc player made?
How to clean your computer's DVD drive
First, remove the DVD drive from the computer. You don't need to do this on a laptop.
Turn it upside down and unscrew the 4 screws that secure the lid.
Very carefully remove the lid and set aside. We will see a board with electronic components.
Now we place the drive so that its front panel faces us. We insert our straightened paper clip into the small hole intended for emergency opening of the drive tray. Feel free to press on the paper clip until the tray comes out of its place a little.
We manually pull out the tray to about half its length. Now remove the front plastic panel. To do this, you can press the side latches with a screwdriver.
Now turn the drive over with the cover down and carefully remove it from there.
Now you can see the very laser lens that needs to be cleaned. Look at it carefully. Most likely you will find small hairs or dust on it.
Do not try to remove dirt with your hands. There may be greasy stains that will be difficult to remove.
Take a cotton swab and lightly brush the dirt off the lens. There is no need to polish the lens, just remove dust and hair.
After this procedure for cleaning the drive, you need to reassemble it in the reverse order.
Before you start
- Do not complete the following steps if your VCR is still under warranty or an extended service plan. Take it to an authorized technician.
- Make sure you have the correct screwdriver(s), cotton swabs, chamois, cleaning solution, etc. before you begin the first step of this process.
- Lifewire is not responsible for damage to your VCR, including any steps in the process. If you have any doubts about your skill after opening the cover, don't proceed.
Remove the tape from the VCR and unplug it from the wall outlet .
Disconnect all cables from the VCR (cable, antenna, composite or S-Video, audio, etc.).
Place the VCR on a flat surface covered with newspaper or cloth to protect the surface.
The most incredible way to get my hair back!
This is just a DISASTER ! And after all, my hair did not start falling out in one day, but systematically - day after day I watched how the hair left my head: while combing, washing, even while sleeping. (read more…)
Carefully remove the VCR cover using the correct screwdriver.
Check the housing and the area around the loading belt and dust drum for balls or other loose foreign objects that can be cleaned by hand (very easy).
The head drum is a large shiny round cylindrical object slightly off-center inside the body. Take a chamois cleaning stick with isopropyl alcohol and place it on the head with light pressure.
Do you like guys with long hair?
Not really
Manually rotate the drum head (it rotates freely) while holding the chamois handle stationary, allowing the liquid to clear the drum. Never move the chamois handle in a vertical direction - you may disconnect the head tabs on the drum.
Clean the erase head , usually located to the left of the drum head when viewed from front to back.
With fresh chamois tips and alcohol, clean the stationary audio head, capstans, rollers and gears . Check for dust. Do not take excessive amounts of liquid in any part.
Clean belts and pulleys with fresh chamois tips - do not use too much liquid.
Remove dust from the circuit boards using a mini vacuum cleaner and/or compressed air (apply enough force).
After completing the above process, leave the VCR for a few minutes to allow the moisture to evaporate and remove dust.
With the VCR still open , connect it to the wall and TV, turn on the VCR and insert the recorded tape. (Do not touch the inside of the VCR or the inner metal case.
Press Play on the VCR and make sure everything works correctly and the picture and sound are restored.
How I found my ideal hair growth product
Hello dear! I want to share with you my solution to the sensitive problem of hair loss . The problems are very serious, at least for me. I would never have thought that this misfortune would touch me, especially at the age of 29 (read more...)
Repeat steps 1-11 if you find the video and audio playback results are unsatisfactory.
When the CD-ROM drive needs cleaning
The most obvious signal is when your DVD drive refuses to work properly. This can be caused by many things, but disk cleanup
may I help.
Another sign is when your computer has difficulty reading disks. The third signal is a strange sound when the drive tries to open the disk or even during extension and retraction.
Another sign is when the drive you are using jerks (though then it could be the drive's fault). These are just the most common symptoms.
The general conclusion is this: if your CD-ROM/DVD is not working, clean it. If this does not help, try cleaning it again, and if this does not help, the drive is probably faulty and you should replace it with a new one or send the existing one for repair.
The main ten reasons why discs cannot be read
- in accordance with “my extensive experience” in this matter - this is:
1.
CD disc inside the player, left in the tray after moving. The disk falls inside the “guts” of the CD and blocks the mechanism. When the owner inserts a second disc inside, the player naturally shows an error.
— Treatment: The first cure that comes to my mind is to open the disk and remove the stuck CD.
2.
The twenty-year-old belt that powers the tray begins to slip or breaks. After closing the tray, the disk does not fit correctly onto the spindle.
— Treatment: replace the belt.
3.
CD player operating in a dusty environment. Dust or cigarette tar has settled on the laser optics. Dust causes beam dispersion. The laser loses focus.
— Treatment: open the player and clean the surface of the laser head using an ear stick. First, with a wet tip moistened with cleaning liquid, then with a dry tip. If this is not enough, clean the laser INSIDE the read head. But this is for the advanced. It's better to give this job to a watchmaker. Below are a few photos.
4.
The power supply to the laser circuit is faulty: either the voltage is too low, or is noisy, or begins to fluctuate due to poor filtering or regulation. The cause may be dried out electrolytes.
— Treatment: replace all electrolytes in the digital part of the board, or even better, replace everything.
5.
There is cold soldering in the laser circuit. — Indeed, soldered connections can corrode and fail over time. Even the best players from 20 years ago are guilty of this. A connection made by hot soldering, such as the regulator leg, or the point where the voltage is rectified, or the laser power controller - the heat causes them to wear out faster - a mixture of oxidation, flux burnout and tin evaporation.
- Treatment: Look at all the solder joints, especially around the cable connectors going to the laser power, around all the regulators, around the places that look burnt, brownish or boiled - and re-solder these joints, adding some fresh solder with fresh flux.
6.
Moving cables or tapes break after millions of bends.
— Treatment: Check continuity in the bends of the tapes leading to the laser, tray or driving mechanism.
7.
The driving mechanism accumulates dirt, hair and dust on the greasy part and the head cannot return to the center, its original position. With each “ride”, the dirt is pushed away and forms a kind of “bumper” that remains on each side of the path.
— Treatment: clean the tracks, axles and rods on their edges.
8.
The main motor does not maintain the correct speed. It looks like the laser can't read the disk, but it's simply a matter of incorrect rotation speed. This may be caused by the disc slipping on the spindle, or a defective motor, or something blocking the CD, such as rubbing against the surface of the tray, causing a corresponding sound. For example, the spindle can wear out its lower bearing and the entire mechanism will be lower by one tenth of a millimeter. The laser loses focus and the top clamp will not press well. In any case, the spindle must be returned to these tenths of a millimeter.
— Treatment: if the motor is the simplest Mabuchi for 5 bucks, it’s better to replace it. If it is a CDM or KSS magnetic series with brushless motors, then simply adjust the spindle height.
9.
Hair or something else is stuck inside the laser focusing mechanism. The laser cannot move up and down freely. If the CD is highly electrified, it attracts hair, dust and pet fur. During playback, they may get caught under the laser focusing pendant.
— Treatment: remove the obstacle.
10.
The CD does not spin. After closing the tray, nothing happens and an error is displayed. This may be the result of the CD not spinning at all. The CD drive should be examined.
Indication of a dead laser circuit (not necessarily the laser itself)
If you observe the entire startup procedure with the cover removed and after properly loading the CD into the spindle the disc does not spin at all, there is a high probability that the laser is dead. Turn off the room lights and repeat the process of closing the tray WITHOUT the disc. Look at the laser: does it emit a red beam - does a VERY small dot appear inside the lens for an instant? It is only activated during the first 2-3 seconds after closing the tray, and always moves up and down while focusing the lens. (of course, don't look too close or straight at it - just look at it at an angle). If there is no red dot, there is no laser radiation. But perhaps this is a scheme?
Another thing to check is whether the lens moves up and down 2-3-4 times. This is a process where the laser tries to catch the focus on the reflection from the CD. If there is a red dot, but there is no calibration, the focusing circuit is dead. However, there is no need to change the head. Check it out without a CD - just open and close the tray, initiating the focusing procedure.
If the laser moves the lens up and down and it is reflected, the spindle motor is signaled to rotate clockwise.
If the laser works, chances are good that the player can be repaired. Electrical circuits during CD reading:
There are four chains that are responsible for the entire process. Each of them has settings and its own dedicated power management chip (which is often a problem with Sony machines). They can be specialized chips, op-amps or transistor pairs. The power controllers of the chips, in turn, are controlled and monitored by a servo processor, which issues all commands and checks if everything is OK. This is called logic. It also addresses the management problem: should I try and when should I give up.
Circuit No. 1:
Laser focusing - controls an electromagnetic motor that brings the laser lens to the desired height.
Circuit No. 2:
Laser power - controls the radiation.
Circuit No. 3:
Tracking - controls where the rails should be in relation to the track being played. To check the circuit, open the player without the disc and gently move the head away from the center with your finger while the player is OFF. Turn on the power and see if the head comes back to the very center. If not, the tracking is screwed.
Circuit No. 4:
Reading the circuit - the laser beam begins to be read by the photodiodes and the data transfer process begins.
Needless to say, there is also a drive speed control circuit
.
On higher end machines like the KSS-151A, KSS-152, KSS-190, BU1 and other large and heavy HAAL mag rail motors, the movement mechanism requires a lot, a lot of power. Much more than on modern mechanisms such as DVDs, PC CD-ROMs and game consoles, where tracking is carried out using a worm drive. The circuits that send enormous current to the electromagnets are very large, their transistors and chips get hot and break easily, and also burn the solder under their connections.
These cars were great when new, but after 20 years they may break down.