| This article includes a Link List, Related Reading or External Link, but its sources remain unclear because it lacks embedded quotations . |
To make a scientific measurement using a microphone, its exact sensitivity must be known (in volts per pascal). Since this may change over the life of the device, measurement microphones must be calibrated regularly. This service is offered by some microphone manufacturers and independent testing laboratories. Microphone calibration in certified laboratories must ultimately be traceable to the primary standards of a (National) measuring institute that is a signatory to the International Cooperation for Laboratory Accreditation. These may include the National Physical Laboratory in the United Kingdom, PTB in Germany, NIST in the USA and the National Institute of Measurements, Australia, where reciprocity calibration (see below) is an internationally accepted means of implementing the primary standard. Laboratory standard microphones calibrated using this method are in turn used to calibrate other microphones using comparative calibration techniques ("secondary calibration"), comparing the output of the "test" microphone with the output of a reference laboratory standard microphone.
Microphone sensitivity varies with frequency (as well as with other factors such as environmental conditions) and is therefore usually recorded as several sensitivity values, each for a specific frequency band (see frequency spectrum). The sensitivity of a microphone can also depend on the nature of the sound field to which it is exposed. For this reason, microphones are often calibrated in more than one sound field, such as pressure field and free field. Depending on the application, measurement microphones must be inspected periodically (usually every year or several months) and after any potentially hazardous event, such as a fall or exposure to sound exceeding the operating range of the device.
Reasons for the quiet sound of a telephone microphone
All problems with microphones are divided into 2 groups:
- Hardware.
- Software.
The first are associated with water or dirt getting under the smartphone’s body, which causes a number of malfunctions. Hardware failures include mechanical damage after a fall. When you try to disassemble the gadget yourself, there is a risk of damaging it. Therefore, it is better to hand the device over to specialists who will fix the problem in a short time.
However, in most cases, the device stops working normally due to software glitches. In this case, you can strengthen the microphone yourself by restoring the default settings or rolling back the firmware.
Program crash
Software glitches are among the most common causes of a quiet phone microphone. To troubleshoot, you should restart the device and make a voice call. If there are no positive results, you will need to connect the phone to the PC via a USB cable and make sure that the updated version of the software and drivers is available.
Before doing this, you should connect Bluetooth headphones to the device and check if they work. If the wireless accessory transmits sound normally, there are no problems with the software.
Speaker contamination
If a smartphone is used for a long time without proper care, it becomes clogged with debris and requires cleaning. Over time, the connectors and openings become filled with dust particles, causing various sound problems. Before you set up the microphone on your phone, you need to clean the connectors. This can be done without much effort using the following devices:
- toothpicks;
- needles;
- cotton swab.
When starting cleaning, it is important to be careful not to damage the chips and important parts of the mobile device.
Oxidation of contacts
Often the need to increase the microphone volume arises due to oxidation of the contacts. In this case, you will need to dismantle the faulty part and put a new one in its place. To successfully solve the problem, you need to have skills in working with soldering equipment.
Poor contact or poor-quality soldering are common reasons why the microphone does not work. Part replacement is carried out according to the following algorithm:
- Disassemble the smartphone case.
- Remove the battery, SIM cards and removable storage.
- Remove the fasteners and remove part of the back cover to get to the board.
- Take out the faulty microphone sensor (in many Android smartphones, including Samsung, Nokia, LG, Xiaomi, etc., it resembles a tablet).
- Solder the new part.
- Reassemble the gadget in reverse order.
Water ingress
As a result of moisture penetrating inside the smartphone, the microphone may completely lose its functionality. The problem is eliminated by stripping the oxidized elements.
If moisture gets on the recording part, you will need to completely replace it, following the instructions from the previous paragraph.
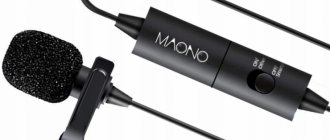
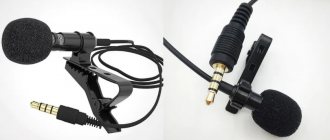
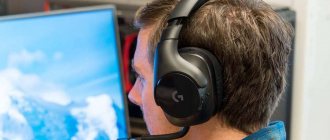
Headphone microphone malfunction
Problems with microphones in headphones occur for 2 reasons:
- Damage to sensor or input. To identify and eliminate the defect, you need to connect identical headphones to the phone. If they don't work, the connector has been damaged.
- Select zero sensitivity in settings. This happens when there is a software failure or intervention in the engineering menu without proper experience. To get rid of troubles, you need to increase the microphone sensitivity on Android in the settings through the engineering menu.
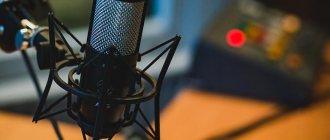
Calibration using piston phones and sound calibrators
A piston telephone
is an acoustic calibrator (sound source) that uses a closed coupling volume to generate precise sound pressure for calibrating measurement microphones.
The principle is based on a piston being mechanically driven at a given cyclic speed, pumping a fixed volume of air into which the microphone under test is connected. It is assumed that the air is compressed adiabatically and the sound pressure level in the chamber can potentially be calculated based on the internal physical dimensions of the device and the adiabatic gas law, which requires that PVγ
is a constant, where
n is
the pressure in the chamber,
V
is the volume of the chamber, and
γ
is the ratio of the specific heat capacity air at constant pressure to its specific heat at constant volume. Piston microphones are highly dependent on ambient pressure (correction for ambient pressure conditions is always required) and are generally designed to reproduce low frequencies only (for practical reasons), typically 250 Hz. However, piston microphones can be very accurate and stable over time.
However, commercially available piston phones are not computational devices and must themselves be calibrated using a calibrated microphone in order for the results to be monitored; although generally very stable over time, there will be slight differences in the sound pressure level produced by different piston headphones. Since their power output also depends on chamber volume (mating volume), differences in load shape and volume between different microphone models will affect the resulting sound pressure level, requiring the piston phone to be calibrated accordingly.
Sound calibrators are used in the same way as piston telephones, providing a known sound pressure field in the cavity to which the test microphone is connected. Sound calibrators differ from piston phones in that they operate electronically and use a low impedance (electrodynamic) source to provide a high degree of volume-independent operation. Additionally, modern devices often use a feedback mechanism to monitor and adjust the cavity sound pressure level so that it is constant regardless of cavity/microphone size. Sound calibrators typically generate a 1 kHz sine wave; 1 kHz is chosen because the A-weighted SPL is equal to line level at 1 kHz. Sound calibrators should also be regularly calibrated by a nationally accredited calibration laboratory to ensure traceability. Sound calibrators are generally less accurate than piston telephones, but are (nominally) independent of internal cavity volume and ambient pressure.
When does increased sensitivity help?
If a problem occurs in the software of your smartphone or tablet, the sensitivity may automatically drop to zero. To fix the problem, you will have to adjust the microphone on your phone and strengthen the signal reception manually.
Methods for Android and iOS
Android device users can adjust the volume settings individually for videos, music, voice calls, and alerts. It is also possible to change parameters for external audio devices.
However, many gadget owners are unfamiliar with the features of microphone settings.
The first method involves using developer mode. To activate it, you must enter a special code (it differs depending on the brand of mobile devices). An example of such a combination is *#*#54298#*#* or *#*#3646633#*#*.
To open the section, enter the code and click on the call icon. Then the system interface with many items will be displayed on the screen. Depending on the Android version, the appearance of this section may differ. From the available list of words you should find Audio.
The following sub-items will appear in the section that opens:
- Normal Mode – responsible for playback from speakers.
- Headset Mode – designed to adjust the volume in headphones.
- Loud Speaker Mode – changes the sound in loudspeaker mode.
- Headset Loud Speaker Mode – allows you to adjust the volume during a conversation through the headset.
- Debug Info – restores default settings.
In each mode, 2 values are available - the current and acceptable level. The first indicator can be added to the level of the second. After selecting the optimal parameters, you should confirm the changes with the Set button.
Mobile device manufacturers do not select the maximum volume to prevent negative effects on the user's hearing and to extend the life of the equipment.
Sensitivity adjustment is performed through the engineering panel. Before carrying out the procedure, you should understand the following markings:
- Sip – is intended for adjusting the parameters of online calls.
- Mic – changes the parameters of the built-in microphone.
- Sph/Sph2 – responsible for speakers.
- Sid – adjusts sensitivity in voice call mode.
- Media – is responsible for the volume of playback of multimedia files.
To change fine settings, open the Mic section. In the Level sub-item, select the 6th position and indicate Value.
If you cannot launch developer mode, you should download a specialized program via Google Play - MTK Mobile Uncle Tools Pro. The utility works without obtaining root or administrator rights.
To change the sensitivity, you need to do the following:
- Download and run the application on your smartphone.
- Enable the engineering menu to access additional functions.
- Open the Engineer Mode item.
- Select the Audio tab.
- Click on Normal Mode to change the settings.
- In the Type column, activate the volume control of the sound and microphone signal.
- In the Level section, adjust the volume sliders.
- Save changes by clicking Set.
There is virtually no headset sensitivity adjustment for iPhone and iPad; the default setting is “Automatic”. If you use only one wireless earphone, it will allow you to organize voice communication. If your AirPods refuse to record or play sound, they may have been damaged, the connection with your smartphone has been lost, or a software glitch has occurred. The last 2 problems are resolved by switching the Mute key on the iPhone.
Through the engineering menu
Now let's talk in more detail about how the adjustment is carried out. First, let’s consolidate the information regarding how to launch the engineering menu:
- Open the dialer.
- Enter the USSD request relevant for your smartphone manufacturer, or use the universal command *#*#36.
- Press the call button.
Important. Some smartphones do not have an engineering menu.
After launching the menu, you just need to take a few simple steps to access the options you need:
- Open the “Hardware testing” tab.
- Go to the “Audio” section and then “Normal Mode”.
- In the “Type” item, indicate for what type of calls you want to configure the microphone. Select “sip” for conversations via instant messengers or “mic” for regular calls.
- In the “Level” item, set the sensitivity level of interest (it is recommended to use “Level 6”).
- In the “Value” line, enter the volume value.
After clicking the “Set” button, the new parameters will take effect. Do not rush to set maximum indicators on all fronts. For example, in the “Value” line it is recommended to set the value to “64”, and only increase it if the volume is insufficient.
Reduced sensitivity
To reduce the microphone sensitivity on Android, turn on the engineering menu and omit the selected values. You can also install a number of software tools that are available in the Play Market.
Settings are changed in the Audio panel and in the Mic sub-item. Having opened it, you should determine the optimal level from 1 to 6 and confirm your choice with the Set button.
Via the mixer_path.xml editor
This is a more complex option, requiring the user to first obtain root rights, which in turn entails many consequences, from removing the device from warranty to blocking transactions. If this doesn't stop you, follow the instructions:
- Install ES Explorer.
- Open the application settings by pressing the button in the form of three stripes.
- Activate the “Root Explorer” and “Hidden Items” options.
- Go to the /system/etc directory.
- Open the mixer_path.xml file.
- Set the desired values opposite the “Voice” items.
The mixer_path.xml file uses the same values as when using the engineering menu. As with the previous method, it is not recommended to immediately set all parameters to maximum. Start with averages.
Turning on the microphone through headphones
If the microphone in the headphones is disconnected, this may be due to the following reasons:
- Problems with the recording sensor or damage to the connector. The check is performed by connecting a third-party device.
- By selecting zero value in the sensitivity settings.
It is better to entrust the problem to specialists. Independent attempts often do not pay off and lead to additional failures.
If you have skills in managing the developer section, you should open the Earphones and Mic item and change the signal level.