A microphone is a device that perceives sound waves and converts them into electromagnetic waves. Thanks to its high sensitivity, the microphone can perceive extraneous signals that create strong interference. Noise and interference in a microphone occurs for a number of reasons, which can become a serious problem when recording audio or transmitting voice messages over the Internet. In order to remove interference in the microphone, you must first find out why it happened.
Method 1: Reduce Microphone Gain
The appearance of microphone hiss does not always indicate the presence of hardware problems. Quite often the cause is software errors or incorrect settings, so first of all try to solve the problem through Windows, and only if there is no result, pay attention to the device itself. Most often, hissing occurs due to too much amplification, at which the equipment malfunctions. This is typical for the most part for budget microphone models, but can affect absolutely anyone.
- Open Start and open the Settings app.
- In it you are interested in the first section called “System”.
- Through the panel on the left, go to “Sound”.
- There are no necessary items in this category, so you will need to open the “Sound Control Panel” by clicking on the line with the appropriate name.
- In the new window, switch to the “Recording” tab.
- Double-click the microphone you are using to open its properties.
- Go to the "Levels" tab and lower the gain value to the minimum or at least half of the current slider position.
All changes take effect immediately and can be tested even simultaneously through the device's built-in listening tool or other solutions. This is described in detail in a separate article on our website, where you will find information about all available microphone testing methods.
Read more: Check your microphone in Windows 10
How to remove background microphone noise using standard OS tools
Find the speaker icon on your taskbar. Next:
If it is a laptop, then in addition to the microphone, the built-in device of the PC will be displayed. Open the “Recording” tab, click on the device you are using.
Next:
Adjust the volume level while speaking into the microphone. Open the “Levels” tab:
Next, open the “Advanced” tab:
Adjust the sound quality (as described above). Now the question of how to remove background noise from a webcam microphone will not arise.
Driver problem
Your PC does not have the necessary drivers or the installed drivers are not working correctly. How to check? Press “Win+X” again, as in the screenshot:
Next:
I recommend choosing automatic updates.
Standard microphone settings
The next step is to remove the software enhancement of the digital audio signal:
- Right-click on the "Speakers" icon and select the "Sound Settings" menu item.
- Open the appropriate "Sound Control Panel" option.
- In the new window, go to the “Registration” tab. Select the device with the cursor and call up its properties.
- In the “Levels” tab, set the volume to 100% and the microphone gain to 0 dB. It is best to choose the value experimentally (it can be up to 10 dB).
- Go to the "Listen" tab, check the box with the same name - you need to talk into the microphone to check the settings.
- In the "Advanced" tab, set the bitrate and sample rate to 16 bit, 48000 Hz. The higher the frequency, the more hiss you will hear.
- When you are satisfied, uncheck the “Listen...” checkbox, apply and save the changes.
Via Control Panel
- Open the control panel through the Run window (Win + I - control command - Enter).
- In the list, find the “Troubleshooting” section and open it by left-clicking.
- Go to the “Hardware and Sound” subsection.
- Select Record Audio.
- A new window will open - click the “Next” button.
- The system will start looking for the problem.
- Select a device from the list and click Next.
- The instrument may or may not detect the problem. If you encounter a problem, you must follow the onscreen instructions to correct the error.
- After the process completes successfully, close the window.
Method 2: Manage Built-in Enhancements
If the actions you just performed did not bring the desired effect, do not rush to leave this menu, since there are several more parameters in it that can affect the noise. Go to the "Enhancements" tab and check which options are checked. If noise reduction and echo reduction are disabled, try enabling these options and then test their effect. It is better to disable other improvements related to sound effects, since they do not always function correctly.
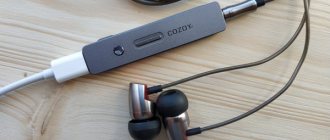
Noise Canceling Accessories
Some accessories help eliminate background noise:
- The preamp makes it easier to transition between the microphone and other equipment.
- A laptop power adapter does a great job of reducing static noise, especially if you are using multiple sections of recording equipment.
- Shock Mounts – Mounting them on the microphone stand will reduce background noise caused by shake and vibration.
- The wind shield fits over the head of the microphone and cuts out unwanted wind noise and heavy breathing.
Method 3: Change the default format
There is currently no definitive information on how the sampling rate set for the microphone settings in the operating system affects audio capture, but it is known that in certain cases the selected settings can cause hiss to appear. Open the "Advanced" tab and select a different bit depth and sample rate from the drop-down list. Do this several times, simultaneously checking the effectiveness of the actions being performed.
Types of noise
Depending on their nature and source, noise is divided into pulsed, wide- and narrow-band. Additionally, electrical and environmental sounds are detected. When dealing with insufficient recording quality, it is advisable to distinguish between these types in order to choose the right way to deal with noise.
Broadband
Broadband noise is also called continuous noise. It is characterized by a wide frequency range. This category includes, for example, hissing and buzzing.
Narrowband
Narrowband noise has a relatively small frequency range. The sound level in this case is constant. Most often, narrowband noise occurs due to poorly shielded cables connecting microphones or insufficiently good grounding. Narrowband noise refers to any unwanted signal that persists for a long time.
Image by Pete Linforth from Pixabay.com.
Pulse
Any sharp signals are called impulsive. For example, pops and clicks. They have high frequency and low duration.
Electric
The source of electrical noise is the recording equipment itself. This category includes, for example, signals arising from a poor Internet connection. Electrical noise often occurs due to the proximity of the microphone to third-party cables or improperly connected equipment.
From the environment
The noise from the surroundings is most often irregular. This group includes sounds from rain, traffic, outside conversations, etc. Noise reduction or changing location will help make your voice clearer.
Method 4: Update the sound adapter driver
The sound card driver and separate software from the device developers are responsible for the correct operation of the microphone in Windows if you use professional peripherals. You should definitely check for updates and install the latest driver, which often comes with special software designed to configure the microphone. Its default settings are quite enough to improve sound quality if the problem really was an outdated or missing driver.
Read more: Download and install the sound driver
How to remove noise from a computer microphone
This defect most often occurs in laptops, where the small size of the device does not allow sufficient distance between the device that is sensitive to sound waves and some electrical drives. Most often, noise in the microphone can be caused by the hard drive motor or fan cooler. But sometimes noise in the microphone is also caused by certain computer operating modes. If the power saving mode is set in Windows, this may cause noise. To make sure of this, you need to go to the “Energy Saving” settings item and switch from the energy saving mode to the “High Performance” mode. After you restart your computer, the noise may go away.
Another cause of interference could be incorrect devices connected to the computer. They are usually connected via a USB port and receive power from the same port. If the external device is poorly assembled, the power supply will send noise to the headset. This is not directly related to the microphone, although some electrically driven external devices may emit vibration that will reach the headset or speakers through the microphone channel. You can check for the presence of an external noise source by disconnecting all external devices from the ports one by one.
Method 5: Using Audio Manager
If we are talking about Realtek sound drivers, then usually a graphical application designed to control sound is installed along with them. Of course, it also supports microphone operation, so it can be useful for reducing hiss. If the Manager does not start automatically and you cannot find it, use the instructions from the article at the link below.
Read more: Methods for opening Realtek HD Manager in Windows 10
After this, all that remains is to perform a few actions in the graphical interface of the software. These are similar to those discussed earlier, but can have a completely different effect on the functioning of the microphone.
- In the program itself, open the section or tab called “Microphone”.
- Click on the button highlighted in the following screenshot, which is responsible for going to the gain settings.
- Make it minimal or lower it gradually, checking the result at the same time.
- On the Microphone Effect tab, turn on noise reduction or echo, and if the parameters are already turned on and hiss appears, you should turn them off.
- Finally, go to the “Standard Format” tab and change the sample rate and bit depth in the same way as mentioned in Method 3.
Types of microphones
The following types of sound recording media are distinguished:
- dynamic;
- electret;
- capacitor.
The last 2 types are connected to the computer without the use of auxiliary equipment. An amplifier is used to connect a dynamic microphone. When connecting the device directly to the sound card, extraneous noise appears. In this case, it is necessary to amplify the voice that has a lower level.
Capacitor devices receive phantom power (information signals and direct current are transmitted through the wires). These microphones are highly sensitive. Not only the user’s speech is amplified, but also the noise around him.
To fix the problem, lower the recording level in the settings menu and install the device closer to the sound source.
Method 6: Using Krisp
Krisp is an all-in-one solution for content creators and everyday users, offering features to improve microphone performance and adjust it while recording. Krisp is available both as a desktop program and as a plug-in for OBS or other video capture programs. Try using it to eliminate input device hissing.
Go to download Krisp from the official website
- Open the main page of the Krisp website and select the version for yourself. If you don't use a capture program, give preference to the regular desktop version.
- You will need to create an account or log in through Google, after which the download will continue.
- Wait for the executable file to download and run it.
- Follow the standard instructions for installing the program in the window that appears, and then launch it for further configuration.
- Find the Krisp icon on the taskbar and click on it to display the graphics window. Through it, log in to the previously created profile and click on “Start Setup”.
- The control panel will appear as you see in the following screenshot. Make sure that the microphone is selected correctly, and then activate noise removal for it.
- As for OBS, Skype or other tools, you will also need to open their settings to change the input device used.
- In programs for recording video or voice, this is done through the “Audio” section, where you are asked to specify a microphone from a drop-down list.
No further action is required from you, as Krisp does the rest automatically. Noise and hiss suppression occurs using a unique algorithm developed specifically for this software, so it can be considered the best of its kind. After completing the setup, open the software you are using and check how the microphone sounds under the influence of the software processing of this solution.
How to Suppress Background Microphone Noise When Recording
If there is noise coming from the microphone, it may be due to a broken ground or common wire. In this case, a low-frequency hum will be clearly audible in the speakers. To eliminate this cause, you need to carefully check the cable and restore the broken connection. Microphone noise suppression can be attributed to eliminating poor connections anywhere in the amplifier path.
Microphones can be remote or integrated into a technical device. In the case of remote devices, in addition to interference in the connecting cable, there may be external causes of extraneous noise. One of these reasons may be the excessive sensitivity of the preamplifier channel, which generates feedback between the blocks. In this case, you will hear a hum from the speakers, which may change if you change the position of the audio device. You can remove beeps and unnecessary microphone noise by lowering the level of your audio equipment.
In some cases, you can get rid of microphone noise by simply choosing a different mounting point for your device. There are times when an audio device picks up external noise or the sound of operating equipment. In this case, microphone noise can be eliminated by installing a protective screen on the working part of the device. It is usually made of foam rubber and is most often used for outdoor recording.
Using external tools
If your microphone or amplifier has a special input level control, it must be moved down.
If such a device is not available, the sensitivity of the equipment can be reduced. with toggle switch.
Through internal settings
In the tray, you need to activate the speaker icon, and then go to the “Recorder” item. In the window that opens, select the desired voice recorder and right-click in the hidden menu and go to the “Properties” block. Then use the "Sound Level" tab. Microphone and gain control are two types of controls. Try reducing them, you will get a significant reduction in noise.
The source of unnecessary sound is often an incorrect setting of the recording extension or errors in the sound card settings. To correct the default audio track formats, you need to follow the path: adding speaker-recorder properties.
In the window that opens, you will see a list of allowed extensions - try installing one of the first three, they are usually less prone to including extraneous sounds.
To change the card settings, you can use the Realtek app. In the control panel, you need to activate the “Microphone” tab and enable echo cancellation and noise reduction on it.
The driver glitch is very easy to fix. To do this, you need to use the installation disk if you have one. And if you don't have it, you can go to the manufacturer's website, download and then install all the necessary software. Please note that there are no special drivers for the microphone, so select your PC model and install the operating system version on the open page with the additional software block.
The cause of background noise during recording may also be a more serious problem:
- broken contact inside the device;
- interference with the membrane;
- electronic board failure.
Of all the above problems, only contact problems can be attempted to be corrected by the user himself. To do this, you need to disassemble the microphone body, find the location of the breakdown and use solder to fix the problem. If the membrane is damaged, it must be replaced. However, due to its high price, this measure is only relevant for high-quality equipment. If you have cheap equipment, then it will be more profitable for you to buy a new device.
Failure of the electronic board can only be repaired at a service center. since in this case it is necessary to use accurate diagnostic methods to determine the location of the fault.
Method 7: Using SoundSoap+
Finally, let's talk about a program called SoundSoap+, which allows you to process an existing recording. It is distributed both as standalone software and as a plugin for various DAWs. As part of the instructions, we will show you how to quickly improve the quality of the finished recording, while eliminating hiss.
Go to download SoundSoap+ from the official website
- SoundSoap+ is available for a fee, but you can also use a free demo version.
- Enter your email address to confirm the start of the trial period and mark the desired operating system with a marker.
- On the new tab, click on the “Start Trial Download” button.
- After downloading the executable file or archive, open it.
- Select a local storage location and confirm that you accept the terms of the license agreement to begin installation.
- Wait for the installation to complete, then close the window and proceed with further steps.
- By default, SoundSoap+ does not create a desktop shortcut, but you can simply find the executable file to launch it in Start.
- In the program itself you will see toggle switches responsible for the efficiency of noise absorption and the activation of additional functions. A player window will appear nearby, drag the finished voice recording into it and begin adjusting the tuners, monitoring the changes. At the end, save the finished recording if you managed to eliminate the microphone hiss.
These were all software methods for eliminating microphone hiss on a computer. If none of this helps and you can’t even edit the finished recording, most likely the problem is hardware in nature and only replacing the microphone or the entire headset will help.
We are glad that we were able to help you solve the problem. In addition to this article, there are 12,721 more instructions on the site. Add the Lumpics.ru website to your bookmarks (CTRL+D) and we will definitely be useful to you. Thank the author and share the article on social networks.
Describe what didn't work for you. Our specialists will try to answer as quickly as possible.
Where does the noise come from in the recording?
Let's talk a little about where the noise in the recording comes from. The source of noise, friends, is fans and electrical equipment.
The main culprit of noise is the fans and cooling system in the computer system unit. Of course you can fight them.
You can buy a more powerful cooling radiator for a solid price and powerful fans.
But it is impossible to eliminate noise 100% with the help of such components. There is also an option.
The most effective way to remove noise from a recording is to buy a condenser studio microphone.
This microphone will delight you with its high-quality and clear recordings. But this microphone will knock your pocket.
And in the end I would like to tell you that in addition to this program on the Internet there are many programs like
Adobe Audition, Sound Forge Pro 11.0, audacity, which help combat noise in recordings.
I will write separate articles about these programs. In my practice, I used these programs that can remove noise from a recording
but they all have one but. Some programs require professional skills to achieve maximum results.
Other programs greatly distort the sound, which leads to worse results. Therefore these options are not suitable especially for beginners.
And with the help of FL Studio, you can remove noise from a recording in a couple of clicks and achieve a good result.
I still use this FL Studio program to this day and am pleased with its results.
Of course, I’m not saying that this program is the best and use only it, but I’m just sharing what might come in handy for you.
But this is where I end this post, I hope that the information will be useful to you. Write your opinions in the comments.
Poor contact
The first reason why the microphone hisses is poor contact when connected. Yes, no matter how trivial it may sound, the plug may not be fully connected to the connector, resulting in hissing.
Sometimes poor contact appears due to the fact that the connection connector is very “loose” and the plug seems to be “dangling” there. This also leads to the formation of noise and hissing.
Solving a problem is not always easy. If, for example, the plug is not inserted all the way, then this is quite easy to fix, but if the connector inside is “loose”, then it will be difficult to bend the contacts. There are quite real cases when it was necessary to resolder the connector to a new one.
Removing noise and hiss after recording
If a noisy recording has already been made, then you often have to deal with what is there. If the noise is not too strong, then it can be cleaned up using modern sound editors.
Reaper
REAPER is a software environment for processing audio files. It has wide functionality for recording, creating and editing sound and is actively used in a professional environment. a 60-day trial version on the official website .
In Reaper, you can “clean” a track of extraneous sounds using the ReaFir plugin . To do this, press the FX button :
reafir in the search field that appears and select the appropriate filter by double-clicking:
Next, you should select the exact editing mode (Edit Mode – Precise) and the mode of operation by “subtracting” noise (Mode – Substract). You also need to start automatically building a noise profile by clicking on the checkbox next to “ Automatically build noise profile ”:
Now you need to move the filter plug-in window to the side so that it does not overlap the track, listen to it, select the area where only noise is heard. To do this, left-click on one end of the fragment, and then, while holding Shift, click on the other. reset the selection using the Esc key. Now turn on loop playback with the R button and press Play. If the area is selected correctly, after several “passes” the filter will recognize and clear the noise. Now you can turn off looping by pressing R again, turn off “ Automatically build noise profile ” and deselect the sample fragment.
Error reboot and select proper boot device
Audacity
For the vast majority of home users, REAPER's capabilities are redundant. You can also remove noise from a recording using Audacity.
Audacity features sample-based noise reduction system To use it, you need to select a segment of the recording in which only noise is heard, and open Effects - Noise Reduction :
Next, click “ Get noise profile ”:
Now you need to select the entire track by pressing Ctrl+ A and open Effects - Noise Reduction again. Now you can click “ Listen ” and evaluate the filter’s performance. If you wish, you can try adjusting the settings. If you are satisfied with the result, you can click OK and save the cleared track.
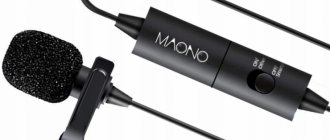
Consider a Noise Canceling Microphone
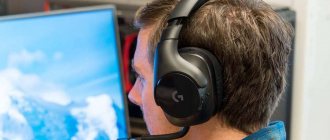
If nothing else works, you may need a better microphone. Some microphones are designed to filter or reduce ambient noise. For example, they may have two built-in microphones: a main microphone for recording your voice and a secondary microphone for recording ambient noise. They can then filter out ambient noise. They are often marketed as "noise-cancelling microphones."
Even if you don't get a mic designed specifically for this purpose, a better mic can make a big difference in audio quality over your laptop's built-in mic or that old headset you had lying around.
RELATED: 6 Best Free Video Conferencing Apps
Causes of the problem
Almost every Internet user who likes to spend their leisure time in online games or voice chats will encounter problems with sound transmission. Moreover, this can happen to anyone, since microphones among all peripherals are especially sensitive, and their software settings are confusing for users unfamiliar with the topic.
Typically, the following reasons are identified for poor performance of the audio input device:
- Hardware damage. This category includes damaged plugs, AUX inputs, broken wires, a cracked membrane, and even the absence of a windproof foam covering for the membrane. Cheap microphones are already defective and have a lisp from the factory, or become so after a day of use. This is normal, because a high-quality micro costs at least 3,000 rubles.
- Incorrect setting. Inexperienced users think that it is enough to play with the parameters inside Discord. Not at all, before this you need to configure the connected device in the OS itself, then adjust the connection mode to the motherboard (works on ASUS boards), and only after that turn to the Discord settings. And if a Bluetooth connection is also used, then this is a separate case. In general, you should not omit the settings for connected microphones.
- Sound enhancement effects are turned off. In principle, these effects should have neutralized the two reasons listed above, but if you turn them off, then, of course, it will only get worse.
These reasons lead to one problem: instead of your voice, the interlocutors hear only an annoying “pshshh”.
Use noise reduction software or features
Popular communication tools are becoming increasingly sophisticated with noise-canceling features that work on calls. Some programs promise to remove background noise when recording any application on your computer. Here are some tools you can use:
- Google Meet: Google added noise cancellation to Google Meet on April 22, 2022. Google Meet automatically filters out background noise.
- Enlarge: Zoom has a built-in background noise reduction feature that is turned on by default. To check these options, open Zoom's settings window from its menu, select Audio from the sidebar, and click the Advanced button. You'll see Suppress Constant Background Noise, Suppress Intermittent Background Noise, and Echo Cancellation options. These audio processing features are set to Auto by default, but you can turn them off or set them to be more or less aggressive.
- NVIDIA RTX Voice: With NVIDIA RTX Voice Once you install the app, you can enable the Remove Background Noise feature, which uses machine learning and the power of the NVIDIA GPU to remove background noise from your microphone in any app on your system. According to NVIDIA, this software only works on systems with NVIDIA RTX GPUs. However, Ars Technica reports that it can run on PCs with older NVIDIA graphics hardware.
- Discord: Discord now has Krisp.ai's noise reduction feature built-in. To enable it during voice chat, click the Noise Suppression button in the bottom left corner of the Discord sidebar and enable Noise Suppression.
Krisp.ai, available on Discord for free, also offers a software product that can enable noise cancellation in any app - like NVIDIA's RTX Voice software, but for PC without it. It has a free tier that offers 120 minutes of noise cancellation free every week, but after that you'll have to pay $3.33 per month.
Many other video conferencing apps also have built-in noise reduction features. You can configure them from the application settings window. If you're using an ancient video conferencing tool that doesn't have noise cancellation built-in, your organization may be better off upgrading to a modern solution that does.