Introduction
When it comes to high definition audio played from a Blu-ray player on a computer, many tend to think that the presence of an HDMI interface on the motherboard or video card automatically allows you to play high definition audio formats such as Dolby on your TV and home theater. Digital Plus, DTS-HD High Resolution, Dolby TrueHD and DTS-HD Master Audio. However, with the exception of a few interesting possibilities, in most cases this is completely not the case. Even relatively new, high-end HDMI-equipped motherboards, video cards and sound cards may not be able to handle such large streams of audio data on their own. It all ultimately comes down to what type of input signal they can accept and what kind of signal they can output.
In this review, we will look at all HD audio formats, their bitrate (stream) and delivery requirements to the playback medium. In Part 2, we'll continue to explore how digital audio streams may (or may not) be handled in typical PC components. After reading both articles, you should come away with a deep understanding of why so many home theater system users use multiple analog cables (three for 5.1-channel audio and four for 7.1-channel audio) instead of HDMI to get multi-channel audio to where they need to go. . We'll also cover some alternative solutions to converting digital to analog in a computer rather than a receiver or preamp, which is often the most accessible option for achieving optimal quality HD audio. Finally, you may understand why you should wait a little longer to buy a Blu-ray player for your home theater system; this will allow you to take advantage of some new benefits that should be available before the end of 2008, but are not quite ready yet (at least not ready at the time of this writing).
In the first part we will cover the following points.
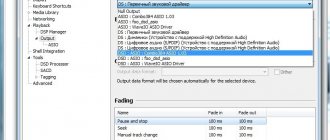
- Blu-ray audio formats: Pulse Code Modulation (also called PCM, or sometimes LPCM from Linear PCM, supported by most audio devices), three types of Dolby (Dolby Digital, Dolby Digital Plus and Dolby TrueHD) and DTS (DTS, DTS-HD High Resolution and DTS-HD Master Audio).
- The bitrate (or stream) associated with each format, as well as the number of channels, sampling rates, and bit depths used to encode the formats.
- Can the SPDIF connector provide the required stream for each format, and what types of HDMI interfaces does each format work with?
In Part 2, we'll look at PC software codecs to find out what formats they work with, as well as the types of interfaces that HDMI-equipped motherboards, video cards, and sound cards can support. And since new chipsets and interfaces have recently become available (or will be available relatively soon), we'll also explain how new and upcoming hardware could provide simpler solutions for PC high-definition audio, which is currently in a sorry state.
High definition audio formats (HD audio)
Blu-ray discs can contain movie soundtracks in one of the following formats.
- PCM (Linear PCM, or LPCM);
- Dolby Digital;
- DTS;
- Dolby Digital Plus;
- DTS-HD High Resolution;
- Dolby TrueHD;
- DTS-HD Master Audio.
Before we move on to a detailed examination of the above formats, we note that Dolby technologies originated at Dolby Laboratories
renowned provider of professional, semi-pro and consumer noise-canceling and multi-channel surround sound technologies.
The DTS format (also called Digital Theater Systems) in turn originated from DTS, Inc.
is also a well-known supplier of digital audio technologies, competing with Dolby Labs technologies.
How to enable Dolby Digital on Samsung TV?
Select "Settings". Select "Dolby Digital" depending on your TV's menu options: Select "Display & Sound" → "Audio output" → "Dolby Digital Plus output" → "Dolby Digital" .
Interesting materials:
How to distribute unlimited internet to mts? How to distribute Internet via bluetooth? How to distribute the Internet via USB? How to distribute the Internet from a modem? How to split an Internet cable into two? How to post a photo on the Internet? How to distribute Internet with Huawei? How to distribute Internet from PC to Android? How to save Internet traffic? How to copy an image from the Internet?
Digital Audio: DSD vs PCM
Digital sound. How many myths revolve around this phrase. How many disputes arose between lovers of convenience and digital quality and adherents of the “lively airy” vinyl sound multiplied by the “warm tube” sound. In addition, there is a lot of controversy among digital lovers: is 16x44.1 enough or is 24x192 needed? Which is better: multibit or delta-sigma? CDDA or SACD? PCM or DSD? In this article I will try to explain the basics of digital sound in simple language, and will also dwell in more detail on the comparison of two types of analog signal encoding to digital: DSD and PCM. First, let's answer the question, what is digital sound? How is it different from analog? To put it briefly, in mathematical language, an analog audio signal is a continuous function, a digital audio signal is a discrete function. What does it mean?
Analog signal
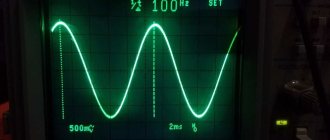
If we draw a graph of a sinusoid in our imagination (this is how a sound wave is most often depicted): then no matter how we magnify it, trying to consider all the details, we will always see a smooth smooth line: this is an analog sound signal (Fig. 1).
Rice.
1. Analog signal Analogue sound (recording) has many parameters with which you can evaluate its quality. Let's look at the three most important ones: frequency range, dynamic range, distortion.
Frequency range is the set of frequencies contained in sound. It is generally accepted that the frequency range of human hearing is 20... 20,000 Hz (sometimes indicated as 16 - 22,000 Hz). In itself, the frequency range of music is of no interest in terms of assessing quality (for example, the frequency range of the same plane taking off will be very wide, but the vocal part of a tenor will be much narrower). A qualitative parameter of, say, headphones is the potential frequency range, and it is estimated using the amplitude-frequency response (AFC). An ideal frequency response—a straight line over the entire hearing frequency range—means that the sound source does not enhance or attenuate any individual frequencies, which means that the extracted sound coincides with the original.
Rice. 2. Frequency response of MP3 file 256 kbps
Dynamic range (DD) is the difference between the quietest and loudest sound. Loudness is measured in decibels (dB). It is generally accepted that the maximum volume that does not cause injury to a person is 130 dB - the sound of an airplane taking off, and the minimum audible volume is 5 ... 10 dB - at the level of the rustling of leaves in low windy weather. Naturally, it will be impossible to make out the rustling of leaves against the background of a plane taking off, and listening to music with a level of 130 dB is extremely unpleasant. Therefore, it is generally accepted that a comfortable DD for listening to music is 80... 100 dB.
Distortion is nothing more than a deviation of the signal from the original.
Principles of digital sound representation
What happens when analog audio is digitized? We won’t delve into the technical aspects, let’s analyze everything, as they say, on paper: to do this, let’s draw our imaginary “ideal” sinusoid and measure the signal value at regular intervals (this process is called sampling or quantization): we will get a certain sequential set of values - this will be our digital signal obtained by pulse code modulation (PCM) (Fig. 3).
Rice. 3. Convert analog signal to PCM
The two main parameters of PCM signal quality are frequency and bit depth. Frequency is the number of measurements per second; the more there are, the more accurately the signal is transmitted. Frequency is measured in hertz: 44100 Hz, 192000 Hz, etc. Bit depth is the number of possible signal magnitude values (magnitude transmission accuracy). The more options, the greater the accuracy of the signal. Bit depth is measured in bits: 16 bit (65,536 possible values, DD 96 dB), 24 bit (16,777,216 values, DD 144 dB), etc.
But this is not the only option for representing a sound wave in digital form. There is a way to get rid of such a parameter as bit depth, leaving only two amplitude levels: -100% and +100% (0 or 1). To achieve this without losing quality, you need to repeatedly increase the frequency of reading the signal value (Fig. 4).
Rice. 4. Convert analog signal to DSD
This type of digital audio representation is called pulse-density modulation, most often the abbreviation DSD is used for it. In fact, the only qualitative parameter of such a signal is frequency. But since the frequencies used are very high (from 2,822,400 Hz), such numbers are difficult to remember; it is customary to divide the frequency of the DSD signal by 44,100 Hz. The resulting number is an indicator of quality: DSD64 (DD 120 dB), DSD128, DSD256, etc.
Restoring an analog signal from a “digital”
But digitizing an analog signal is half the battle. To listen to digital music, you need to do the reverse conversion. First, let's look at how to turn a digital DSD stream into sound. As we already know, this stream is a high-frequency (2.8 MHz or more) two-level signal, the average value of this signal changes with the audio frequency. That is, if you approach solving the problem as simply as possible, you need to filter out all high-frequency components of the DSD stream, leaving only the useful audio signal (frequencies up to 20...22 kHz). This is done using an analog low-pass filter (LPF). The simplest low-pass filter is an RC chain. The signal received after passing through this chain is shown in Fig. 5.
Rice. 5. Restoring analog signal from DSD
As you can see, the resulting graph only vaguely resembles the original sinusoid. But do not forget that we “applied” a simple filter; by improving the filter circuit, you can achieve an almost complete absence of high-frequency noise and obtain analog sound with good quality indicators.
To restore an analog signal from digital PCM, just an analog low-pass filter is not enough; you must first decrypt the digital data; for this, digital-to-analog converters (DACs) are used. There are different types, but it is not the scope of this article to describe them all. Let's look at the 2 most common types in audio technology. Firstly, this is the so-called ladder DAC (also called multibit). As you probably guessed, such a DAC converts a PCM stream of digital data into a stream of audio signal values, which look like a ladder on the graph (Fig. 6). As with DSD, it is imperative to use an analogue filter to smooth out the "jades".
Rice. 6. Analog signal recovery from PCM
Often, such converters use intermediate resampling of the digital PCM signal to higher frequencies (for example, 192 kHz): this reduces the “steps”, which allows simplifying the analog filter circuit.
The second type of DAC - delta-sigma - uses resampling to even higher frequencies while simultaneously reducing the bit depth to one bit. Doesn't remind you of anything? This is the familiar DSD signal! We have already discussed above how to further process such a signal and turn it into analog.
Application of PCM and DSD, advantages/disadvantages
Where can we find each of the coding methods?
PCM format is very common: CDDA discs, DVD Audio, MP3, FLAC, ALAC, AAC files, sound in films, and on and on, it’s easier to say when it’s not PCM. Super Audio CDs, DSD discs, DSF files, DFF are DSD format. What is better anyway? When playing which format will we get better sound? Articles devoted to the DSD format describe many advantages over PCM, but are all the described advantages true or are they myths invented for ordinary people who do not understand the technical component in order to win the market, which is heavily occupied by the PCM format? Let's briefly go through the list.
- The first advantage that DSD supporters like to cite is rather vague - noise immunity and reduced error impact. It’s strange to hear about different noise immunity in the digital world: both formats are susceptible to interference just as much as a book in digital format is susceptible to interference. The duration of storage of any digital format or the quality of its transmission between devices depends only on the medium/method of transmission, and not on the format itself. So, the noise immunity is the same. What about reducing the impact of errors? Let's say we store 2 albums on optical discs (one PCM, the other DSD), what happens if the disc is scratched? Errors will occur when reading damaged media, but how critical are they? PCM encoding uses multi-digit numbers, an error in the most significant digit is very critical (for example, the difference between the decimal numbers 11 and 91): it will be heard by ear as a click. In DSD encoding, one bit of information has little weight in the overall stream; infrequent errors will only cause an increase in background noise, which will be less noticeable to the ear.
- The second advantage is described a little more specifically: greater dynamic range compared to PCM. Well, there is some deceit here, the DD is only larger compared to the classic CDDA format: 120 ... 140 dB versus 96 dB. If we compare, for example, with DVD Audio, the DD is approximately the same.
- Third advantage: DSD is technically simpler. There is nothing to argue with here: simpler signal decoding, no need for synchronization and buffering of the stream when transmitting a signal from one device to another - a complete victory for DSD. By the way, against the background of this advantage, it is strange to see sky-high prices for equipment that supports DSD playback.
- Well, there’s one more advantage that DSD fans like to cite: music in this format is closest to the original analog sound. This is justified by the fact that modern analog-to-digital converters (ADCs) operate on the principle of delta-sigma modulation, that is, these ADCs produce a digital DSD stream. And here’s the trick again: the recording will be completely original only in the case of a direct recording of a live performance or when digitizing a finished analog recording from a high-quality medium. Operations of mixing, applying effects, mastering, even simple volume adjustment - all that the creation of a studio album cannot do without - are impossible for digital DSD recording due to the lack of normal processing algorithms. This means that all these operations are performed in PCM format, and only after that the finished PCM recording is converted to DSD. However, it should be noted that the conversion PCM > DSD and vice versa is quite accurate: the noise increases only slightly outside the real dynamic range (Fig. 7). This means that it doesn’t really matter what format you listen to the recording in: PCM Hi-Res or DSD - both formats are very similar in quality characteristics. Also, in fact, there is no point in buying a separate sound card for DSD playback, having listened to the advice of a friend who is a fan of this format.
Rice. 7. Dynamic range/noise when converting between DSD and PCM
conclusions
So should you choose DSD or PCM? There is no definite answer and cannot be: PCM 24 bit 92 kHz and DSD128, for example, are very similar in quality characteristics, and these characteristics are better than the equipment on which these formats will be played, which means a further increase in the quality of digital formats for playback on at this stage is inappropriate. When assessing the sound quality of different high-definition formats, subjective sensations come to the fore, because the human brain is not fed by quality alone: the design of the equipment, its cost, and, most importantly, the well-being and mood of the listener have a much greater effect on the experience of listening to music. This means choose what you personally like and do not impose your opinion on others. Happy listening everyone!
Part 5: Convert PCM to WAV with Bigsoft Audio Converter
If you need some other Audio Converter for your computer, Bigsoft Audio Converter is one of the audio converters that support PCM files. It provides a simple process to convert RAW PCM, WAV PCM or PCM audio from CD or DVD to WAV files. Here is the detailed process of converting PCM to WAV with program.
Step 1: First download and install the PCM converter from the official website. After starting the program, you can click the "Add File" button to add PCM files to the program. Or you can also drag and drop QCP files directly into the program.
Step 2: Select the output format as WAV from the Profile drop-down list. There are several options you can choose MP3, AAC or AIFF from the "General Audio" option to convert.
Step 3: After that, you can click the "Convert" button to start converting PCM to WAV. If you want to get high quality WAV output for another device, it will take a whole period of time.
Part 4: Convert PCM to WAV by Adding a Playable Title
As mentioned, you only need to add the title you're playing to RAW PCM, which will turn the PCM into WAV files. This must be a difficult task for regular users. But if you are a technical person, you can follow the below codec written with Objective-C and C.
(NSURL *) getAndCreatePlayableFileFromPcmData: (NSString *) filePath { NSString * wavFileName = [ stringByDeletingPathExtension]; NSString * wavFileFullName = ; ; NSArray * dirPaths = NSSearchPathForDirectoriesInDomains(NSDocumentDirectory, NSUserDomainMask, YES); NSString * docsDir = ; NSString * wavFilePath = ; NSLog(@"PCM file path: %@", filePath); FILE * fout; short NumChannels = AUDIO_CHANNELS_PER_FRAME; short BitsPerSample = AUDIO_BITS_PER_CHANNEL; int SamplingRate = AUDIO_SAMPLE_RATE; int numOfSamples = [length]; int ByteRate = NumChannels * BitsPerSample * SamplingRate / 8; short BlockAlign = NumChannels * BitsPerSample / 8; int DataSize = NumChannels * numOfSamples * BitsPerSample / 8; int chunkSize = 16; int totalSize = 46 + DataSize; short audio format = 1; if ((fout = fopen(, "w")) == NULL) { printf("Error opening file"); } fwrite("RIFF", sizeof(char), 4, fout); fwrite(&totalSize, sizeof(int), 1, fout); fwrite("WAVE", sizeof(char), 4, fout); fwrite("fmt", sizeof(char), 4, fout); fwrite(&chunkSize, sizeof(int), 1, fout); fwrite(&audioFormat, sizeof(short), 1, fout); fwrite(&NumChannels, sizeof(short), 1, fout); fwrite(&SamplingRate, sizeof(int), 1, fout); fwrite(&ByteRate, sizeof(int), 1, fout); fwrite(&BlockAlign, sizeof(short), 1, fout); fwrite(&BitsPerSample, sizeof(short), 1, fout); fwrite("data", sizeof(char), 4, fout); fwrite(&DataSize, sizeof(int), 1, fout); fclose(FOUT); NSMutableData * pamdata = ; NSFileHandle * handle; handle = ; ; [process writeData: pamdata]; [process closeFile]; return ; }
Part 1: Best Way to Convert PCM to WAV
As we know, PCM file is not supported by most media players and portable devices, their compatible audio format is MP3, WAV and others. If we want to listen to PCM audio file on our Apple device like iPod touch, iPod nano, iPad, iPhone and other players like Sony Walkman, iRiver, PSP, PS3 and others, we need to convert PCM to WAV, MP3 and More.
AnyMP4 Video Converter Ultimate is a popular PCM to WAV converter tool that helps you convert PCM to WAV and can trim audio length, merge audio files and customize audio effects. This article is a step-by-step guide that will show you the detailed steps to convert PCM to WAV with very high quality.
Step 1: Download and run the program for free
Here you can download the PCM to WAV Converter program and install it on your computer. And then you can run the program to open the main interface.
Step 2: Add PCM Audio and Select Output Format
Click the "Add Files" button and open the PCM folder saved on your PC's local drive to add them to the program one by one. Or you can click the "Add Files" drop-down button and select the "Add Folder" option to load the entire audio folder into the program at one time. You can then go to the "Convert All To" box in the top right corner of the window, select the "Audio" category, and select the "WAV" format as the output format.
Step 3: Edit Audio for Personalization
AnyMP4 PCM to WAV Converter has a function that helps you trim video length and adjust audio volume. You can click the Cut icon and open the Cut widow, here you can drag the slider to change the start and end as you like under the preview column. Or you can enter a value in the corresponding field to set the start and end time, and the unwanted part will be removed as desired. Then you can click the "Save" button to complete the trimming function.
Step 4: Convert PCM to WAV
Click "Convert All" button and the program will enter into the conversion process, the converted number and process will be shown here, also you can stop or pause the conversion, after a while the PCM to WAV conversion will be completed.
Lossless stereo is not a priority
Today we have a situation where even more or less well-equipped video production teams almost never include a PCM track in the final master. Although, of course, such a possibility exists.
For example, Atomos monitors/recorders capture the stream from an external camera via HDMI using professional AVID DNx and Apple ProRes codecs with crazy bitrates by household standards and color subsampling up to 4:4:4. At the same time, they can record 24-bit/48 kHz PCM tracks captured by the camera microphone into the same file.
After the editing and post-production stage, the customer is given a file significantly compressed tens of times for broadcasting, where not only the video has been re-encoded (for obvious reasons), but for some reason also the track has been converted to Dolby AC-3 or AAC, i.e. into audio codecs with inevitable loss of original quality.
The same Netflix can add at least multi-channel Dolby Atmos to its broadcasts. But despite the impressive bitrate of 640 kbps, Atmos is still a lossy format relative to PCM. As for the rest, no one really tries, the most washed-out bitrates are produced - like government-issued underpants in a nursing home.
They will object to me, they say, you are telling such horrors here, excuse me, but where did the music Blu-rays with the LPCM track come from? Indeed, on some audiophile publications you can sometimes find sampling parameters as high as 24 bit/96 kHz.
But this is only the result of authoring a BD-ROM disc, when an external audio stream is attached to the STREAM folder with video files, which can be anything - even 24 bit/192 kHz. Of course, the sound itself for the Blu-ray edition was recorded on a separate recorder, then properly prepared in the mastering studio and synchronized with the video content.
But forget about native 24-bit/96 kHz on video footage. Believe me, a person who has been on film sets. During the recording process there, on any hardware (whether audio or video), the only PCM sampling frequency has been prescribed for many years - 48 kHz.
And it’s unlikely to be higher - they have enough. But it would be fine if the phonograms in this form were preserved safe and sound for the viewer. But besides AAC and Dolby AC-3, there are no other official options to expect.
Let's remember and compare what kind of damage awaited stereo phonograms in certain video containers.
DVB-T2 set-top box functions you might not know about
The most ordinary DVB-T2 set-top box has functions that you might not even think about. Meanwhile, some of them may be useful.
The first four functions relate specifically to digital television. By default, any DVB-T2 set-top box supports functions such as:
These functions are activated from the remote control by pressing the corresponding button.
In addition, we will talk about such a rare option in DVB-T2 set-top boxes as an RF modulator, and we will also touch on some “useful little things” - standard functions of a TV set-top box such as an on/off timer. etc.
Teletext (TTX).
Teletext is something like an electronic book, where some information is placed on the pages. Teletext usually conveys the TV program schedule, but for some channels it provides weather forecasts and even exchange rates.
Not all TV channels have teletext. I didn’t find it in entertainment ones.
After “playing” with my set-top boxes, I learned that subtitles can also be transmitted via teletext. They are activated when teletext is turned on (TTX or TEXT button) and three eights (888) are dialed on the remote control - the teletext page number.
The transition between teletext pages is carried out by pressing the colored buttons on the remote control (red, green, yellow, blue). The screen usually displays page numbers and the color of the corresponding button.
TV Guide EPG
DVB-T2 also has such a useful thing as EPG ( Electronic Program G uide , - “Electronic TV Guide”) . The TV guide looks like an on-screen menu that lists the schedule of TV shows and programs. Each item usually has a brief description. The TV guide menu opens by pressing the EPG (less often TVG) button on the remote control of the set-top box.
The appearance of the TV guide window may differ for different set-top boxes. This is what the TV guide menu looks like on the Telefunken TF-DVBT207 set-top box.
And this is what the program TV guide looks like on the Lumax DVT2-4100HD set-top box.
It should be noted that using the TV guide you can schedule viewing of a program. This is very convenient if you do not want to miss the beginning of the program or movie you are interested in. We select the program we are interested in from the EPG list. Then click “OK” (Schedule).
In the next step, you can change the parameters of the scheduled event.
You can leave everything as it is if you want the TV set-top box to simply switch to the desired channel when the selected TV show starts broadcasting ("View" mode).
In addition, it is possible to enable the “Record” mode.
In this case, the set-top box will record the selected program or movie to an external hard drive or USB flash drive. Naturally, recording mode is only possible with a connected USB drive.
The scheduled event will be indicated in the “ Schedule ”. If necessary, it can be edited or deleted.
The functionality that will be discussed below requires connecting to the DVB-T2 set-top box an external HDD/SSD hard drive, a USB flash drive or a USB card reader with a flash card of a suitable format and memory capacity.
I used everything that came to hand - a 32Gb Toshiba USB flash drive (32 GB), and also connected an external hard drive with a 240Gb 2.5" solid-state SSD drive. Both the flash drive and the disk were pre-formatted on the computer into the NTFS file system.
I did not find any problems with the operation of DVB-T2 set-top boxes in conjunction with external drives.
Part 3: Convert PCM to WAV using FFmpeg
If you are a technician familiar with FFmpeg, you can also use an excellent PCM to WAV converter. FFmpeg is open source available for Windows, Mac and Linux, you can check the process of getting your desired WAV files from MAC as shown below. Make sure you enter the following codec for conversion.
Step 1Open a terminal on your Mac, go to the directory containing the files you want to convert PCM to WAV. If you are using Windows, you can enter the command line for the codec.
Step 2: After that, you can enter the following codec to convert PCM to WAV.
ffmpeg -f s16be -ar 8000 -ac 2 -acodec pcm_s16be -i input.raw output.wav
Step 3: Make sure the extension is the same as your input files to convert PCM files to WAV format accordingly.
To reap or not to reap?
As for video, it is almost impossible to store, transmit and process it in lossless form. The count will go to gigabytes after the first seconds of recording. Therefore, developers have always used various tricks to reduce the volume, discarding part of the information from the brightness and chrominance channels. Perhaps this habit played a role in the fate of audio channels. If we're compressing the picture, why not compress the audio as well?
As you know, the bitrate of a 16-bit PCM signal in uncompressed form is 1.5 Mbit/s. Mere pennies in today's times. For 24-bit audio, this figure will be less than 2.5 Mbit/sec. How did it happen that in modern video recording devices, with the exception of professional models, there was no place even for these basic formats, not to mention high-resolution ones?
It would seem that in some MKV you can pick up a FLAC track; the format allows a similar procedure, but it is considered non-standard. Only nerds do this in special cases for some kind of guerrilla dubbing. Today, wherever you point—in streaming services or in gadgets—nobody stutters about lossless sound for a long time, but often simply does not know that such a thing can exist.
With varying degrees of lousiness, the recordings of tiktokers and other bloggers wander back and forth, edited and re-saved with the next portion of lossy coder poison. And then they are uploaded to the social network, where they are processed again (sic!) by a lossy encoder with loss of quality. As a result, the environment is littered with the eerie croaking sound of streams from telephone speakers.
MPEG2/HDV (1996/2003)
Later, it became possible to record 1080i/720p signals on DV cassettes and even flash media. Moreover, at the same bitrate of 25 Mbit/sec, but using the then new H262/MPEG-2 codec with 4:2:0 color subsampling. Actually, MPEG-2 was the basis of the first Blu-ray discs, and before that - the DVD specification.
I won’t hide the fact that HDV is still my favorite in terms of picture quality among household and professional digital video. Of course, this is not a competitor to 35mm film - HDV has a special place in the industry. In the 2000s, a lot of spectacular documentaries were shot using this technique, and let’s not forget about the Blu-ray tuning discs for calibration.
Moreover, even on tiny consumer cameras of the Canon HV series it was possible to get amazing results in picture plasticity. But, alas, PCM sound no longer had a place in the HDV container. The audio was encoded using the MPEG-1 protocol (i.e., almost the same as MP3) - however, with the highest possible bitrate of up to 384 kbps.
For the same bitrate, two scenarios of the MPEG-1 psychoacoustic model are proposed. It is not possible to guess which one will be chosen by video equipment. But according to one option, at the maximum bitrate, the frequency response for some reason is severely and very early cut off at 13 kHz. According to another scenario of the psychoacoustic model, the cutoff is moved further to 18 kHz, but still, in the area from 13 kHz it already becomes troubled by artifacts.