Articles
How to cover a subwoofer with carpet
You can learn how to cover a subwoofer with carpet from this article. In general, this process is not too difficult for those who prepare in advance. After all, in order for carpeting to be successful, you need not only to purchase a suitable material, but also to choose the technology by which the operation will take place. You will learn how to cover a subwoofer with carpet without spending a lot of time and effort.
Reasons for pasting
There are only a few reasons why you may need to cover a subwoofer with carpet:
- If the old coating has worn out and lost its proper appearance. Because of this, the speakers (see) will spoil the style of the car;
- If the subwoofer housing was created with your own hands. In this case, pasting with carpet will be the last step in creating the column.
Note: the subwoofer can be covered not only with this material, but also with leather, dermantin or some other material.
How to make a subwoofer with your own hands
It's hard to imagine any car without. After all, almost every driver loves loud music so that his ears ring. To achieve high-quality sound, it is not enough just to choose a good speaker system, it must also be installed correctly. Sound insulation also plays an important role. Let's look at how to make a subwoofer with your own hands, paying special attention to the last stage of work.
Stage 1 and material selection
The choice of material from which the subwoofer will be made (see) should be approached responsibly. The quality of the sound produced will largely depend on this. The material must meet three basic requirements: it must be strong enough, dense and provide good sound insulation. Therefore, at present there are only a few materials suitable for making a subwoofer box:
- Chipboard. It is inexpensive, but at the same time combines all three necessary characteristics;
- Multilayer plywood. Its advantage is that it is easy to process, but it should be remembered that this material is exposed to moisture and swells;
Note: For safety reasons, it is better to install subwoofers made of this material in dry places.
- Chipboard is slightly inferior to its competitors, but it is used quite often. The fact is that it costs even less, but it is less durable;
- You can also use plastic to create a subwoofer, but in this case the sound quality will be poor.
Stage 2 or assembly
Assembling a subwoofer involves several basic steps:
- To make it easier to cut out all the details, you can make templates on cardboard. In this case, it is very important to take into account the dimensions of the future box;
- Transfer the template to the material;
Note: for this you can use chalk or a piece of soap (if you need to erase), or a marker (if the stripe will not interfere).
- Cut out the sides of the box using a jigsaw. We must not forget that a hole should be made for the future speaker. It should be round. It is desirable that its diameter be several mm smaller than the diameter of the speaker itself;
- The weak point of the future subwoofer is the terminal block. A short circuit may occur here. Therefore, it is advisable to make protection for this vulnerable spot in the form of a small box;
- The box must be fastened using self-tapping screws, since all parts must be securely screwed to each other;
- Another important step is leveling the surface of the subwoofer. To do this, first of all it should be sanded, and only then leveled using putty.
- The cracks in the box must be sealed, since there should be a good resonance inside the box. And if there are a huge number of cracks in it, then the music will sound different
Stage 3 or decoration
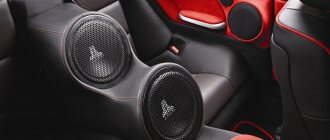
The most popular decoration method is painting. But you can approach this more creatively and cover the subwoofer with carpet. For this you will need the following materials:
- Carpet. It is usually sold in shoe stores;
- Solvent for degreasing;
Note: gasoline will not work - it is too rich.
- Glue. It's better not to use rubber;
- Brush.
Pasting with carpet occurs like this:
- First of all, you need to estimate how much material should be needed for gluing. This depends on the size of the subwoofer;
- You can take about a meter of material and cover the subwoofer with it, and cut off all the remains;
Note: to cut out carpet parts, you can use ready-made templates that were made during the creation of the body;
- Take an unnecessary rag and thoroughly lubricate the surface of the box with solvent;
- Let it dry. After the subwoofer has been lubricated, it is not advisable to touch it with your fingers, as grease marks may remain;
- Take a brush and thoroughly coat the box with glue;
- Take the cut out parts and carefully attach them to the intended place. It is important to consider that it is better to make the joint not at the edges, but in the middle of the sides. This way the carpet will be better sealed;
Note: you can smooth the material using a wallpaper spatula.
- Let dry;
- The edges of the subwoofer can also be decorated.
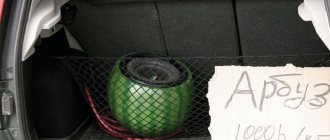
After this, you can install the created subwoofer anywhere. Most often, the speaker is placed in the trunk of a car. Sometimes they find a place for it on the back shelf. In any case, the appearance of the subwoofer is very important, so it should also be given sufficient attention. Thus, you can make a wonderful subwoofer with your own hands at home. Naturally, the price of such a device will be much lower than a ready-made one. Our instructions will definitely help you cope with the operation. But before starting work, you can also familiarize yourself with additional photos and videos on this topic, of which there are many on the Internet.
Those who improve acoustics are like car enthusiasts who invest enough money in their “nines” to buy a good foreign car. Let's share some fairly simple techniques for modifying speakers that allow you to achieve a significant increase in sound quality at a low cost.
Before you start modifying your speaker systems, see what your analog signal source will be. Integrated codec? SB Live sound card? If so, then keep in mind: you will not get really good quality sound, since the sound card (codec) will greatly distort it. Of course, you will notice an increase in quality, but there will be little joy from it. The ideal option would be, of course, external CD players, DVD players, and so on. If you are concerned about good sound, try to find something from this list.
Before you begin any modifications, find out as much as you can about your speaker system. Depending on what it is initially, you can achieve a greater or lesser increase in quality from it.
What is acoustic fabric used for?
Acoustic fabric is now successfully used in car sound insulation.
Acoustic fabrics (radio fabrics) are produced for the design of protective grilles of acoustic systems, both automobile and stationary. This modern fabric is made using a special weave of polyester threads, which allows sound waves, regardless of frequency, to pass through the sound-transparent fabric without losing sound power. Today, car acoustics are available to everyone, interior sound insulation is becoming the most fashionable tuning, and of course you can’t do without acoustic fabric.
Features and types of acoustic fabrics
This material is ideal for decorating any acoustic systems, as it allows you to create an excellent acoustic environment. In production, threads of various thicknesses and any shades are used, thereby obtaining a wide range of textures. Distinctive features of all acoustic fabrics are:
- Their high strength
- Wear resistance
- Resistant to any chemicals
- Practically do not absorb moisture
- Some acoustic fabrics have fire-fighting properties
Types of materials
In acoustics, two types of similar fabrics are used, completely opposite in their properties and purpose:
- The first option is a decorative material for speakers (see Pioneer acoustic speakers: their proper installation and varieties), combos, and other acoustic systems. It should be noted that this material, in addition to a purely decorative value, also performs a protective function - it protects the diffuser from possible mechanical damage dynamics
- The main requirement for this material is maximum acoustic transparency. It should not delay sound or introduce any extraneous sounds.
- Specific fabrics are produced for various types of acoustics, but ordinary materials are often used, for example, viscose or synthetic chiffon
- Many people want to make their unique speaker system a decorative element of the interior design of the salon; for this, the material is painted or a beautiful pattern is applied (like batik)
- The second option is sound-absorbing fabric, which is used for finishing rooms, as well as internal structures of any acoustic systems
- In this case, the main requirement becomes maximum sound absorption
- This kind of material is used to prevent the reflection of all sound waves and to cause interference (sound amplification effect) in a room or inside any acoustic device
- The material is very dense, very thick and porous, it can only be purchased in companies selling technical fabrics
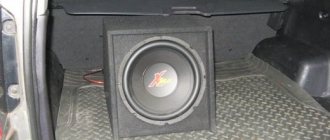
- Acoustic fabric is also used as a car accessory, used to protect or produce car audio enclosures, podiums or home-made subwoofers
Application in car
Today, car acoustics and acoustic fabrics are offered in many online stores:
- Among these you can find products from foreign manufacturers and leading domestic ones.
- The fabrics are of excellent quality and ease of use, they have a wide selection of color options, this allows you to embody the most incredible ideas of designers
- Price also for different budgets and needs
- Automotive acoustic sound-absorbing fabric carpet (carpet) is also a material for finishing the inside of speaker systems and subwoofers (see How to cover a subwoofer with carpet: we do it ourselves)
- In addition, it is used for standard finishing of car interiors, making floors and rear shelves, and for finishing internal surfaces in the trunk.
- The widest direction for using this material is in car audio - when covering false panels and various shelves for installing audio components
- Since the material is widely used for the manufacture of rear acoustic shelves in cars of the VAZ family, especially the tenth and ninth models, this fabric is simply not replaceable when reupholstering or upholstering the shelf when installing hidden rear car acoustics. The material is very simple to work with, it forms well, and the joints of the fabric are obtained almost invisible
- Carpet is a non-woven material that stretches in all directions, it is used in any car for covering acoustic shelves, podiums, subwoofers, door trims, roofs, all kinds of plastic parts in the car interior, to create good acoustics, perform interior tuning, and simply decorative covering
- In addition, carpet smoothes out any unevenness on the working surface Carpet in any color has a black speck, thanks to this it is non-marking, dirt and stains formed on it are almost invisible
There are some external differences, for example:
- Mystery carpet differs from Shumoff in its smoother surface
- It turns out that the carpet from Shumoff (photo below) is fluffy to the touch, but the carpet from Mystery is not fluffy
Carpet Shumoff
Carpet Mystery
- Carpet Mystery, accordingly, is a denser and thinner material (its thickness is approximately 2 millimeters)
- Shumoff carpet is not so dense and is thick (thickness is about 3 millimeters)
- Which one to choose - Mystery or Shumoff - it's up to you
- Carpets, as a rule, differ in color, so you can choose by color, when the colors are similar (for example, black and dark gray), you cannot confidently say that any of them is better, and any specific one is worse
- It's a matter of taste, some like Carpet Mystery more, others choose Shumoff
What needs to be improved?
It makes sense to refine the acoustics that initially had some potential. The greatest potential for improvement is with “average” acoustics - those that are in the middle price category and have sound quality that can be called decent. As a rule, it is almost pointless to modify high-quality systems - replacing or changing the properties of one component will require replacing all the others. That is, with the same success you can immediately assemble new acoustics from scratch. However, some things can be improved in them; The quality, of course, will not increase significantly, but you can get a noticeable increase. The best option for modification is domestic acoustics produced in the Soviet Union and its republics. The middle ones are of the greatest interest from the point of view of improvement (it makes no sense to list such systems, since there are a huge number of them).
What glue to use for carpet - an overview of the best options
Working with carpet is really not difficult, the most important thing is to choose the right adhesive composition. Both specialized and universal brands of glue are suitable for covering plastic, metal and wooden parts.
We present the most popular of them:
Aerosol adhesive 888 Ultra reinforced formula (Russia) is a specialized synthetic adhesive that can quickly and reliably glue various materials, such as wood (including plywood), carpet, carpet, leather and leatherette, rubber, plastic in any combination. For ease of application, the can is equipped with a sprayer with an adjustable glue supply.
This innovative, versatile product is capable of permanently bonding a variety of materials. A wide range of operating temperatures (from -40 to +120°C) allows for cladding even in a cold garage. The glue has virtually no drawbacks, except for the price.
Refinement of columns
The hardest part remains - modifying the speakers. It makes sense to modify the filter only in the simplest form - replace standard elements with higher quality ones of the same ratings. If electrolytic capacitors are installed in the filter, they can be replaced with film, metal film or metal paper ones. Coils made of thin wire and with a metal core can be replaced with similar ones, but without a core and wound with thick copper wire (cross-section approximately 1 mm2). With this approach, you can achieve a good increase in quality with little cost. It may be worth replacing the standard wires running from the amplifier to the speakers (as well as those running inside the speaker cabinets) with thick copper wires (you can use special speaker cables).
For small acoustics, cables with a cross-section of about 1-1.5 mm will be quite enough (most likely, the terminals will also need to be changed - do not forget to seal the speaker housings), for large ones, at least 2.5 mm2. True, there is a risk that the remaining components will not allow you to get an increase in sound quality from replacing wires and terminals, or it will be very insignificant. Unfortunately, this can only be verified experimentally.
Modification of the case
In addition to modifying the electrical circuit, it is useful to work on the speaker housings (in systems with a subwoofer equipped with small-sized satellites, it makes sense to modify only the subwoofer housing). As a rule, they are very far from ideal. In theory, they should be sealed, rigid and correctly calculated - have a volume corresponding to the parameters of the speaker. Many cases of mainstream systems do not meet any (!) of these criteria. As a result, such constrolabes hum (mumble, as many home-made people put it) at low frequencies, swell and emit sounds that are not included in the phonogram (this is not noticeable to the eye, of course, but noticeable to the ear), and the speakers dangle and introduce distortion into the sound, therefore that unsealed enclosures do not support them.
If we eliminate these shortcomings, the increase in quality will be significant, approximately as noticeable as from changing and modifying the power supply, but of a different nature - there we fought with transient distortions, and here we will reduce the level of linear and nonlinear distortions.
First of all, let's deal with rigidity using ties or spacers. One spacer will be more than enough between the top and bottom walls; it would be nice to install two between the side, front and rear walls (if the cases have a volume of about ten liters or more). The simplest option in terms of technical execution is to tighten the opposite walls with thick metal bolts, drilling holes of the appropriate diameter in them. Not very aesthetically pleasing, but simple. Another way is to install 15x15 mm wooden blocks from the inside of the cases as spacers, attaching them to the walls with glue and screws. Naturally, they must stand in a spacer.
If the speakers on the front wall of the speaker system are located close or, due to some other design features, it is impossible to install a spacer between the front and rear walls, you can increase the rigidity of the cabinet using wooden blocks attached to the corresponding edges of the cabinet (running from the front wall to rear). Not a very effective solution, but still better than nothing.{mospagebreak}
Topic: How to cover the inside of the sub?
Theme Options
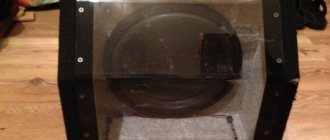
I heard that if you tape the sub inside, the sound will be much better! But the question is what to paste over? A search on the Internet gave several options: 1. Cotton wool 2. Felt 3. Foam rubber 4. Bitoplast Tell me which is better. Sorry if I repeat the topic
Yes, a similar topic has been raised more than once. The sub plays low frequencies at all, you only need to fight for the strength and weight of the case walls, and only if they are large in area and not made of MDF but chipboard and so on.
The rest seems completely useless.
We were talking about the walls, about pasting, that is, and not about filling.
The body is made of 19mm chipboard, there are bars inside, but they were made only in the corners to make it stronger. By the way, I just decided to add ribs. That is, you shouldn’t put anything on it, it won’t do any good? I read that if you cover it with cotton wool/felt it will increase the volume, but my body is right next to each other. But there is a bag of cotton wool
Any change in the internal volume by an additional structure or the introduction of an absorber changes the resulting parameters of the system. Such correction is applied according to necessity and understanding of WHAT you are going to correct in this particular case.
Can you formulate what is better?
Astronaut
, with suggestion he will become better
I pasted the inside of the walls with StP automobile, there is like bitumen or guerlain on ribbed foil, and on top to compensate for the volume there is 5mm thick isolon. I used to coat everything inside with automotive mastic, the result is great, but it stinks a lot and then it takes a long time to dry.
YARiddiK
, vibration isolation is better, there is less vibration of the case walls + dampens all internal resonances of the walls, well, the mass plus a couple of kg) But the sound absorber is of no use, unless, as they said above, to increase the volume if there is a mistake in the calculations
dixyl
, but realistically, how much does it dampen? I think a lot. Probably weighs like a pregnant elephant? Is rubber suitable?, cover the walls for a moment
Source
Sealing
After strengthening the housing, take care of its sealing. To do this, remove all the stuffing from it - filters, speakers, wires, padding polyester or other absorber. And carefully treat it from the inside with some viscous sealant (the necessary materials can be found in hardware stores or car enthusiast stores). It is best to use bitumen mastic, sold in bottles with sprayers - it is quite easy to treat columns with it, and it copes with its task one hundred percent. Never use substances that become hard and brittle after curing.
It is best to carry out the treatment and dry the speakers after it in the open air - the smell of bitumen mastic, silicone and other similar substances will be such that even the neighbors will cough :). After the cases have dried, it is useful to repeat the processing and drying procedure. Ready? Great. The final touch is to make soft rubber gaskets under the speakers and the back cover (the one with the terminals) and screw the speakers with the cover through them. When you finish the modifications and close the case, you can apply putty or other sealants to the joints of the speakers and the back cover with the case for greater reliability.
Preparation of materials and tools
First of all, you need to list a list of tools and materials to get started:
- scissors;
- stationery knife with blades;
- spray paint (matte black);
- ruler;
- roll of self-adhesive carpet;
- soldering iron (for processing carpet around the edges of holes).
Paint is necessary to paint the port so that it does not stand out against the background of the box. You can also paint the joints where the sheets will be connected. It will be enough to paint these places with a small strip. Once you have prepared all the tools and materials, you can begin covering the subwoofer box.
Volume
If the speakers are humming, it is useful to slightly increase the internal volume of the case (it is simply not possible to increase it significantly). No, you don’t need to bore it - just put fluffy cotton wool in it. But first, suspend the synthetic padding mat that was already inside the case (if the manufacturers, of course, put it there). There should be 25 grams of synthetic padding per liter of body volume. Not enough? Add cotton wool, previously well fluffed. The normal amount is 10-15 grams per liter. In principle, you can put more, but it only makes sense to do this if the low-frequency hum has not stopped. You will lose a little bass, but the unpleasant hum will disappear.
There is another procedure, but it is quite tedious and not as effective as those described above. The walls of the case can be covered from the inside with felt or, at worst, with batting. This measure will reduce the number of reflections of sound waves inside the housing, which will lead to a reduction in the distortion introduced by the housing into the sound. If you decide to do this procedure, when attaching the material to the walls, do not use too much glue so that the felt or batting does not become dense and useless. Apply glue in small dots. Personal recommendation: do not use padding polyester with a thickness greater than 15 mm.
What did you use to cover the inside of the subbuffer?
Can you tell me what sound-absorbing material to cover the inside of the subwoofer with?
In other words, which material has the highest damping coefficient? Thank you. I used hermeton30. It even turned out a lot when I covered the entire surface. part then removed
I used hermeton30. It even turned out a lot when I covered the entire surface. part then removed
How did you determine that there was a lot? The volume has decreased.
When I sealed the entire surface with sealant, the bass became too fat, I removed it a little, it seemed to be just right, but maybe I’ll remove it again)
Have you tried adjusting the resonant frequency?
below the subsonic at 15 Hz above the low-pass filter at 70 Hz, the bass boost is, of course, turned off.
Speaker resonance is about 30 Hz.
what do you call resonance tuning?
Probably the same as you. If there is a lot of sealant, then the volume has decreased, which means the speaker is not in its mode (i.e. resonance)
the volume increases due to the presence of filler
but I’m not convincing) I’m too lazy to argue, smoke the search yourself)
According to your reasoning, you can make a box of ten liters, push cotton wool into it and get 30 liters :-) Let's not argue :-)
no, it won't be 30 liters. but as if 12-15 could turn out www.drive2.ru/l/248701/#post read a smart person)
I read it, thanks for the link. And I advise you to read more carefully)
According to your reasoning, you can make a box of ten liters, push cotton wool into it and get 30 liters :-) Let's not argue :-)
the volume will really increase
Damping is the absorption of sound waves! What doesn't suit you about the question? It won't increase!
When they talk about damping the walls of a subwoofer enclosure, they mean removing the sounds and resonances that arise in the enclosure wall, thin material, or its high resonant frequency (thin plywood is an example of this).
+1. I explained to a friend about damping, but he argues) And the sound insulation should be taken care of by the box itself made of deaf thick material)
to the point =) the volume just increases from the presence of filler
Opinions about sabsonics in WL vary. I care less about the lower 15 Hz than about the safety of the speaker. Maybe when I set everything up, I’ll try to reduce the lower cutoff frequency, maybe even to zero. this is if the question is about my sub)
So what material should you use? Tell.
Source
Further tuning
Like any tuning, the process of modifying speakers tends to drag on and over time turn into a favorite hobby. Perhaps the improvements made will not seem enough to you, and you will want more. And after some time, you will become interested in what is, in principle, possible to squeeze out of your system.
A deeper and more thorough modification for each system is individual and requires not only more time and money, but also certain knowledge. In addition, you will need some experience in assessing sound quality by ear, the ability to select test material, and work with ready-made tests (for example, FSQ). If you want to dig deeper, look for information on the Internet. Find like-minded people online, use search engines to get scanned books and articles on relevant topics.
If you have small plastic speakers installed, there is no point in modifying them. Even if your pockets are not full of money, try to get hold of a system of dollars for 100-60 first, so that you can then make the most of it. It is basically impossible to achieve anything good from cheap plastic speakers. According to the laws of pricing, what reaches retail sales increases in price at least three times. Accordingly, it turns out that the developers of acoustics for ten dollars spend no more than three and a half dollars on everything. And everything is an amplifier, speakers, housing, filters, power supply (by the way, even a low-power, but high-quality power supply unit costs 5-10 dollars), small nonsense like wires and packaging materials (which also cost money). The development engineers also had to be paid something, out of the same ten dollars.
Do-it-yourself acoustics modification.
You have a pair of speakers on your hands, or maybe not a pair. Active or passive. Floor or shelf. It might even be a subwoofer and not speakers.
This article will help you learn about ways to improve the sound quality of your acoustics without extra costs. The most effective methods for improving acoustics will be described, which are easy to implement with your own hands. This can be called polishing what the manufacturer could not implement, due to the feasibility of production and its payback.
All instructions and tips from this article are suitable for any acoustics with a bass reflex, including subwoofers and floor-standing speakers. Many tips will also apply to other types of speaker systems.
So, let's begin.
Upholstery of the body with sound-absorbing material and strengthening of the structure.
First, let's find out for what purposes this procedure is being performed.
Opening the columns.
Disassembling the column is very simple.
If this is an active speaker, then on the active speaker you need to unscrew the amplification unit from the back, which is screwed on with screws.
You need to remove the block very carefully, without sudden movements. If there are plugs that come unfastened, disconnect them and place the amplifier unit nearby without over-tightening the wires. On passive speakers, you just need to unscrew the screws on the midrange speaker and carefully remove it without damaging the wires.
*All these operations must be carried out carefully and without sudden movements, in order to avoid damage to wires and circuits.
Strengthening the body.
This modification is worth carrying out if you doubt the structural strength of your acoustics and there are no additional rigidity structures inside the case (reinforcing strips, “plugs” on the walls, screeds between the walls). Almost always, speakers need additional strengthening.
For this procedure you will need small 1x1 - 1x2cm bars and rubber glue. We will glue the beams along the corners
, on which there are no bars, which will strengthen the fit of the side walls to each other. We measure and cut, apply and estimate, spread plenty of glue on the beam and the place to which it will stick. We glue over all the corners where the manufacturer saved wood. Naturally, we use the beams as spacers, and not just glue.
It is also worth laying the beams along
long
walls
, if there are none. As shown in the picture, or diagonally. The beams should fit snugly at the edges.
It is also advisable to make horizontal struts between the walls, this will significantly strengthen the structure. This is especially true for large speakers with long walls (for example Microlab Solo 7
).
After this procedure, we get a stronger structure that creates less resonance of the walls, as well as less vibrations when micro-friction and walls touch each other.
To carry out this procedure, we will need double-sided tape.
and
sound-absorbing material
.
For what purpose
it's being done.
All this action is carried out to reduce the reflection of sound waves
from an acoustic body with a bass reflex.
If this is not done, then often, instead of bass, incomprehensible buzzing and whistling sounds will come out of it. The upholstery gives a more even
and
balanced bass
, which becomes softer
and
better audible. It removes the buzzing, resonating sounds that arise in the acoustic body due to the collision of sound waves. This also allows you to slightly expand the lower range of reproduced frequencies.
As sound absorbers
padding polyester
are best suited (can be found at any clothing market, but can also be found in an old jacket