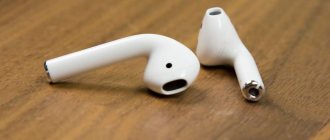
In 99.9% of cases, the laptop is equipped with a built-in microphone, which allows you to record voice, communicate in programs with voice calls, record video from a webcam, etc. without additional equipment. Today we will take a closer look at the problem when the built-in microphone in a laptop refuses to work.
The problem of the microphone not working is quite widespread for both laptops and desktop computers, which, as a rule, require the installation of a separate microphone. The occurrence of such a problem can be influenced by various factors, which will be discussed in more detail in the article.
Reason 1: lack of necessary drivers
This is one of the most common causes of the problem, but in this case, as a rule, the sound from the built-in speakers of your laptop will not work either.
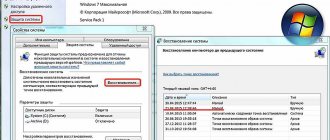
Since the equipment (in our case, the microphone) is built into the laptop, in order to establish its operation between the laptop and the operating system, it must have special software, better known as drivers. Our first step is to check whether there are drivers for the microphone at all.
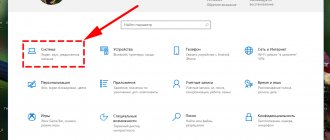
To do this, open the “Control Panel”
, and then go to the
“System”
(to make it easier to find the desired section, you can use the search bar or set the menu item display mode to “Small icons”).
In the left area of the window, select the “Device Manager”
.
A new window will appear on the screen in which you can monitor the status of drivers for a particular device. In our case, we will need to expand the item “Sound, gaming and video devices”
. If under this item you see a parameter, for example, “Unknown device”, or next to the name of the microphone there is an icon with a yellow exclamation mark, we can conclude that the problem lies precisely in the drivers for the microphone.
You can fix the problem as follows: go to the official website of your laptop manufacturer and search the site, indicating the exact model of your laptop.
In the search results, you will need to go to your laptop’s page, and then open the section with additional software and drivers, indicating your version of the operating system (bit depth also matters). In the drivers section, you most likely won't find a driver specifically for your microphone, so you'll need to download audio drivers, which will usually include a driver for your laptop's built-in microphone.
After downloading the necessary software, you will need to install it on your computer (this is done in exactly the same way as installing any other program). Finally, all you have to do is restart your computer.
Reason 2: Microphone malfunction
Windows OS may not always work correctly, and therefore individual devices may periodically malfunction. It can be assumed that this is where the problem with the microphone’s operation arose.
First of all, restart your computer. Then right-click on the speaker icon in the tray and select “Recording Devices”
.
“Recording” tab active.
.
It should show your microphone. If not, right-click on any free area in this window and in the pop-up window, check the boxes next to “Show disconnected devices” and “Show disconnected devices”
.
Right-click on the microphone. If you see the “Enable”
, activate the microphone.
If you see the Disable
, click on it, and then turn on the microphone (this is necessary to reboot the device).
Now say something or make noise into the microphone. Next to its icon there is a ticker that records the noise level of the microphone. Normally, of course, it should move. If you see that this strip responds to sounds, then the microphone is working normally.
Troubleshooting the microphone in the headset
First of all, check the physical connection. If the headphones are wired, inspect the wire for damage. Change the connection connectors; there are usually several USB ports. If you are using a trs connector (3.5 mm jack), and some PCs only have one, check how the headset works on another computer. If possible, connect other headphones with a microphone.
Inspect the device carefully. Many of them are equipped with a remote control for switching sound modes, as well as controlling the volume and microphone. If the above does not help resolve the problem, move on to other methods.
Method 1: Setting up and updating drivers
First of all, run the troubleshooter. Perhaps the system will independently detect and correct errors. You need to check that the microphone is configured correctly and that it is given priority over other audio input means. Be sure to update your drivers, otherwise the microphone will not work even with the correct settings. If the update does not help, remove the old software and download the latest version from the official website of the motherboard or sound card manufacturer. We wrote about this in more detail in another article.
Method 2: Issuing permits
After major system updates, system settings sometimes change. For example, if previously the microphone was allowed on the computer, then after the update this parameter often has the opposite meaning. Even if it is enabled in the settings, it will not work without permissions. Be sure to check out this version.
- Right-click on the Start menu and select Settings.
Open the “Confidentiality” section.
In the “Microphone” tab, go to the “Allow access to the microphone on this device” block and make sure that it is turned on. If this is not the case, click “Change” and activate it.
At the bottom of the window, you can individually grant permissions to Microsoft Store programs.
As well as some classic applications downloaded from the Internet.
Method 3: Special software
Along with a sound card driver package, special software is usually installed to control audio playback and recording devices. Applications may vary depending on the driver provider. Using the example of a Conexant sound card and its accompanying SmartAudio voice and sound processing tool, it looks like this:
- In the Windows search, enter “Control Panel” and open the application.
Go to the “Volume Mixer” tab. If there is sound in the headphones, we are only interested in the block with icons in the form of microphones. There can be several recording devices. In this case, click on the icon of the microphone to which we want to give priority. A green check mark should appear. Now click the speaker icon under the volume bar to turn on the microphone.
Method 4: Increase the volume
Even if the microphone is working, is enabled and enabled everywhere, but its volume is reduced to the minimum value, it will still not transmit sound.
- Go to “Settings” again and open the “System” section.
In the “Sound” tab, go to the “Input” block and check that the headset is selected correctly, then click “Device Properties”.
Make sure that the “Disable” box is not checked and look at the volume level. If it is completely reduced, move the slider to the right.
In some applications that use an audio input device, you can control the volume separately. If it is added in the “Settings” of Windows 10, but, for example, the microphone still does not work in Skype, check the messenger settings.
- Go to the Skype menu by clicking on the three dots icon and open “Settings”.
Expand the “Sound and Video” tab and in the “Sound” block check that the desired device is selected. Now turn off automatic microphone setup. A scale will appear with which you can change the volume. We increase it if the level is set too low.
Method 5: Check for viruses
Malware often causes crashes in applications, system components, and devices connected to it. There is little hope for Windows Defender. Install an antivirus that will scan the system and then monitor the situation in real time. Use antivirus utilities that don't require installation and can detect additional threats. You can read about how and how to clean your computer from viruses on our website.
Reason 3: Incorrectly configured microphone
It can be assumed that Windows has incorrectly adjusted the microphone sensitivity level, which is why it seems to you that it is not working at all. To check this probability of cause, right-click on the speaker icon in the tray and select “Recording Devices”
.
Select your microphone with one click of the left mouse button, and below click on the “Properties” item.
Go to the "Levels"
. If both sliders are low, you will need to move them further to the right. Save the changes and check the functionality of the microphone.
Troubleshooting
What is the first thing Windows tries to start when it encounters an error? Troubleshooter (or troubleshooter) is a built-in tool for solving problems that arise with the system and its components. With each new update, this tool is improved and increasingly helps users. According to Microsoft representatives, problem-solving tools work using artificial intelligence technologies. This means that every new bug report will teach it and make it better.
So, to find out why the microphone on your headphones or other Windows 10 device is not working, follow these steps:
- Open Windows Settings (Win+i or Start menu)
- Open “Update & Security” settings
- Go to the “Troubleshooting” tab
- Open the “Sound Recording” troubleshooter and follow its instructions
- Once finished, restart your PC
This software tool solves software problems. For example, it naturally will not solve the error when the microphone does not connect to a Windows 10 computer due to a hardware problem.
Reason 4: the microphone is occupied by another program
If, for example, while trying to talk in Skype you encounter a problem with the microphone not working, then you can think about the fact that the microphone could be occupied by another program.
Launch the task manager using the keyboard shortcut Ctrl+Shift+Esc
, and then carefully review the active programs on your computer. If you see a program running that appears to be using a microphone, be sure to terminate it. This is the best way to deal with all programs whose operation you do not currently need.
Please note that some web services that you work with in the browser can also “hijack” the microphone, for example, if you turned on an online communication service or a web application to record video from a webcam. If possible, close unused browser tabs or close the web browser altogether.
Privacy Options
These settings are responsible for providing applications with access to certain system functions - camera, location, microphone, notifications and many others. These settings may interfere with the microphone's normal operation. What you need to do:
- Open Windows Settings (Win+i or Start menu)
- Open “Privacy” options
- And open the “Microphone” tab
- First of all, grant access to the microphone if access is limited
- Give apps access
- And select the apps that can be given microphone access (if required)
If this option does not help, then move on to the sound drivers.
Reason 5: microphone is not selected in the program
If you have other microphones connected to your computer, be sure to turn them off. Now, using Windows search, find the standard program “Voice Recorder” (“Sound Recorder”)
. Click the microphone icon to start recording.
If, after listening to the finished recording, you understand that the microphone works fine, but in your program, for example, in Skype, the microphone refuses to work, you can think that the microphone is simply not selected in the program.
For example, in order to select the desired microphone in Skype, you will need to click on the “Tools”
, and then go to the
“Settings”
.
In the left area of the window, go to the “Sound Settings”
and make sure the correct device is selected in the
Microphone
. In addition, by deactivating automatic microphone volume adjustment, you can set the sensitivity level yourself, for example, by setting the slider to the highest position.
The microphone does not work in Skype: what to do
If the other person can't hear you during a Skype call, there's most likely a problem with your microphone. But if this is not a hardware failure, what could be causing the problem? Firstly, the device may not be included in the program itself. To launch it, go to the settings and select the microphone installed on your PC to work with.
Secondly, when making a call, pay attention to the microphone icon: if it is crossed out, the device is not activated. Click on the icon to make the microphone work.
If the problem is related to the drivers, you will have to update them or reinstall them.
Reason 6: Microphone not working
The final reason for the problem we are considering. In this case, the built-in microphone may not work at all in your laptop. The problem can be quite simple, for example, the required cable was accidentally disconnected, but it can also be much more serious - the microphone is completely out of order.
In this case, we see two solutions: contacting a service center where they can diagnose the laptop, identify the cause of the problem and fix it in a timely manner, or connecting an external microphone through a special output (as a rule, in laptops, the headphone and microphone outputs are taken over by one and same connector).
We hope that any of the methods given in the article helped you solve the problem. In addition, if you have your own troubleshooting method, share it in the comments.
When connecting an external microphone to a computer, problems may arise, for example, the PC simply will not detect the device. Another common problem is that the microphone cannot be seen by certain programs. This may be due to hardware malfunction, problems with software settings, or incorrect connection. To resolve problems, it is not necessary to contact a service center; it is enough to follow the instructions exactly.
The camera and microphone do not work on the laptop: what is the reason for this?
A simultaneous malfunction of the camera and microphone on a laptop can be a consequence of its fall: this causes the connectors and plugs to become disconnected. In this gadget they are connected to one board. We check by carefully unscrewing the computer case and, if necessary, insert the cable into place. Watch the video where this problem is explained in detail.
Dear readers, if you are faced with a problem related to the incorrect operation of your microphone, but have not found any answer, describe your problem in the comments, and we will answer you soon.
Description of the problem
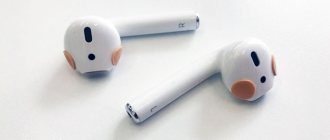
Every laptop has a built-in microphone, but its quality leaves much to be desired. Users have to buy external devices for high-quality voice transmission. They differ in connection type:
Wired microphones are the most vulnerable, since over time the wires become unusable and cease to perform their function. Difficulties with connecting wireless devices can only arise at the setup stage. You can check the equipment through the standard Windows Voice Recorder program.
Problems with connecting a microphone can be divided into two groups: those that you can solve yourself, and those that can only be fixed in a service center.
You can fix the following on your own:
- Incorrect connection;
- Outdated drivers;
- Incorrect PC settings;
- Viruses on the computer.
Serious malfunctions that require the involvement of specialists:
- Damage to the USB port and microphone port;
- Malfunction of the device itself;
- Problems with the audio card.
Checking your microphone settings
Before taking your headphones to a service center, you should check the settings. To assess whether your microphone settings are correct, perform the following steps:
- Select “Control Panel”, find the “Sound” section.
- In the “Recording” and “Microphone” items, click “Properties”.
- The user must check all the tabs that open.
Checking may show that not all parameters are configured correctly. Or the device may not be connected correctly. After correcting the settings or reconnecting the headphones with a microphone, you need to check their functionality.
Headphones with microphone for PC
Adjusting Volume Levels
To improve sound quality, you should adjust the volume. This can be done in Realtek HD Audio or in the recording devices tab.
- You need to set the gain to 0% and the volume to 50%. Then use the program to check the sound quality.
- If the sound parameters remain unsatisfactory, you can try increasing the volume to 80%.
- If the result still does not suit the user, you can add software enhancement. As the recording quality improves, increase the gain step by step. After this, you should return to the volume settings.
- If the volume is set to maximum and the problem remains, it means that the headphone model is not suitable for this PC or is damaged.
Some headset models do not have a software amplification option. You can only adjust the volume. In this case, the user will have to either choose another model, or move the microphone closer.
Setting up a microphone on a computer
Windows Troubleshooting Wizard
Let's start simple.
- Call Settings using the Win + I key combination or another method.
- Visit the latest Update & Security section.
- In the vertical menu on the left, click on “Troubleshooting”.
- Scroll down the list of subsections on the right to the “Sound recording” item and click on it.
- Click “Run the troubleshooter...” and wait for the procedure to complete.
The tool will detect and solve most software problems, for example, the audio service does not work, the driver is not installed. It will also notify you about hardware problems, for example, the device is not connected (the cable is damaged, the wrong connector is used for switching). Allows you to select which audio recording device will be the main one in the system when two devices are detected, including virtual ones.
Web application
The third method is the online service WebcamMicTest.
- Follow the link or visit the main page of the resource, and in the upper right corner click “Test microphone”.
- Select the recording device if the computer did not detect it correctly, and open access to the equipment.
- Say something to evaluate the incoming signal.
Based on the test results, the web application will conclude that the device is working. The icon to the left of the cross switches the view of the diagram, displaying the dynamics of sound over time in the form of a diagram and a wave.
A similar test can be performed in any application: standard Voice Recording, voice capture function in AIMP, Audacity and dozens of other programs.
As a result, you will conclude whether there is a problem with a specific program or the microphone does not work everywhere.
Incorrect microphone connection
If the device does not work, experts advise checking the cable for mechanical damage. You also need to inspect the headset itself with the microphone. If defects are found, the cable or device will have to be replaced.
The cause of the malfunction may be an incorrect connection of the cable to the PC. You can choose a different socket: connect the wire to the rear panel or vice versa. If the headphones are wireless, you need to insert the Bluetooth connector into the socket. Next, find the device on your computer and activate it. After connecting the headset, you need to go to the settings of the “Sound” section on the computer and check all the tabs.
There are computer models that have only one option for connecting a cable. In this case, it must be inserted into the connector near which the headset is drawn.
General recommendations
The first thing to check if the laptop does not see the microphone is whether it is connected correctly. USB models are inserted into a USB port and there are no problems with them. A device with a jack wire needs to be inserted into the connector on which the microphone is drawn, most often it is pink. Also, on wired models it would be a good idea to check the integrity of the wires. If they are interrupted in some place, the microphone will only work in a certain position. In half of the cases, these simple steps help to find the cause of the problem.
When connecting a Bluetooth headset, you need to enable data transfer to the PC. After that, go to the “Control Panel”, subsection “Hardware and Sound”. Click on “Add a new device”, find the desired model and connect.
Conductor break
Often the problem is due to a faulty wire
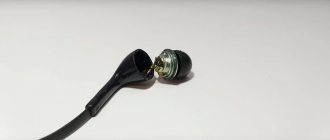
In 90% of cases, problems with the sound in headphones or the microphone signal that arise during the operation of the headset are associated with a violation of the integrity of the electrical circuit. The most sensitive areas to breakage are the joints of conductors:
- TRS connector standard 3.5 mm, 6.35 mm or other;
- audio line branching unit (usually made in the form of a separate block with a volume control and control buttons);
- positive and negative microphone contacts;
- Bluetooth module connectors in wireless models.
Smoothly moving the wire in different directions near the junction area will help detect such a problem. Usually, a signal appears periodically; in some positions of the conductor it can even be relatively stable.
If you have skills in repairing electrical appliances, try testing the headset circuits with a multimeter. The figure below shows the pinout of the most popular 3.5 mm Mini-Jack combo connector.
Pinout of the combined Mini-Jack 3.5 mm connector
However, some manufacturers use connectors with a different pin arrangement. First of all, this is typical for older phones from Nokia, Motorola and HTC. If a break is detected, it can be easily repaired by soldering. If you have never worked with a soldering iron before, it is better to contact a specialized workshop. Of course, this is only relevant for expensive and high-quality headphone models; repairing a “disposable” Chinese headset is impractical.
Can it be fixed and how?
If this malfunction is detected, it can be easily eliminated by soldering. This option is suitable for those who have experience with a soldering iron. But this is true for expensive and branded models. There is no point in repairing cheap Chinese headphones in this way.
The computer does not recognize the built-in microphone
If the built-in device used to work well, but suddenly stopped, the reason may be outdated drivers. You can update them without leaving your home; equipment manufacturers make them freely available on official websites.
How to update the driver:
- You need to go to the computer manufacturer’s website in the “Drivers” section.
- Find your PC model and operating system.
- Download the necessary drivers and install them.
- Reboot your laptop.
There is another way to update the software. In the “Control Panel” you need to go to the “Windows Update” section and select outdated drivers.
Nuances of different versions of Windows
The instructions listed are only suitable for the Windows operating system. The settings may be named differently in different versions. In Windows 7, updating drivers and adjusting sound occurs in the ways described above.
Noise in headphones on microphone - how to remove it
When using an external headset with a microphone, you may encounter problems such as noise, crackling, and other problems with recording quality. There are several proven solutions for this situation.
Disable and enable the device
The noise may be due to the microphone input. You need to remove the plug from the connector and reinsert it. If the problem persists, you should turn off the device programmatically using the Task Manager.
Realtek HD Settings
The Realtek HD application interface includes a software noise reduction option. If your laptop does not have this program, download it and find the setting in the "Advanced" section. Using this utility, you can make other improvements to the quality of the microphone.
Third party setup programs
In addition to standard tools, third-party applications are provided to adjust sound parameters. Among them is a utility for setting up audio, developed for a specific laptop model. It can be found on the website of the manufacturer of your gadget.
Mechanical damage to the microphone
In case of mechanical failures of the microphone, the noise problem can be either temporary or permanent. To eliminate it, you should check the device, find the location of the damage and repair it.
The laptop does not recognize the microphone from the headphones
If the headphones work properly and the wires are not damaged, the cause should be looked for in the computer’s software settings. You need to right-click on the sound icon on the taskbar and select “Recording Devices”. All connected microphones will be displayed in the window.
You need to double-click on the device you are using and go to the “Levels” section. All sliders need to be set to their working position and the changes saved.
Next, in “Recording devices” you need to right-click on the selected microphone and click the “Use” or “Use as default” button.
Options for connecting headphones to a PC
You can connect headphones to your computer in different ways. Here are a few of the most common:
- USB - microphone and headphones are connected via one cable and port. The connection is considered very reliable, but is rarely used. The PC recognizes two devices at the same time, determines the type of device and independently configures its correct operation;
- Jack is a well-known connection method. There are two plugs and two 3.5mm jacks. Your task is only to connect the corresponding sockets and wires;
- Bluetooth is the most convenient, but technologically complex connection. There will be no additional wires that are prone to wear. You need to turn on Bluetooth headphones and add a new device in the computer settings.
Note! Connecting any Bluetooth device is only possible with a special wireless module. Laptops have it built into the system by default, but stationary equipment most often does not.
The laptop does not accept the external microphone
If you have problems connecting an external microphone, you should check all of the following reasons:
- Wires and connector on a laptop;
- Correct Bluetooth connection settings;
- Relevance of drivers;
- The “Recording Device” settings are correct.
If this does not help, the problem may be with the device itself. You can test it by connecting it to another computer. If it breaks, you will have to return it to the store under warranty or take it to a service center.
If the microphone is definitely working, you should check your computer for viruses. They often damage important parts of the system and cause external devices to not work properly. It is recommended to download free programs from the official websites of software manufacturers, and purchase official versions in stores.
Additionally
If the previous options did not help, use a selection of tips that may also help you.
Reconnect and test on another PC or device
If the microphone is detected but does not work in Windows 10, the connection may be incorrect. There is always a chance that the cable is not fully inserted into the microphone jack or that the jack itself no longer works.
To make sure the microphone is working correctly, check it on other devices, if we are talking about a headset or a separate microphone (not built-in). The connector is checked in the same way.
Inplace Upgrade System Update
Finally, if all of the above methods do not help, you can try updating the system without losing data - this is called Inplace Upgrade.
To perform Inplace Upgrade, download the Media Creation Tools utility from the official website (https://www.microsoft.com/ru-ru/software-download/windows10) and run it.
After that, select “Update this computer now” - after this, the download and subsequent update of system components will begin. This process takes from 15 minutes to a couple of hours, it all depends on the performance of the computer.
In this short article, we tried to talk about possible solutions to the problem when an application or system does not see the microphone in headphones or a headset in Windows 10. We hope that this information was useful to you.
What to do if Skype does not see the microphone
Skype has several ways to check if your microphone is working:
- Call the subscriber, test the sound;
- Call Sound Test Service and check the result yourself;
- In the main settings, find “Sound Settings”, start talking, the volume control will start to fluctuate if everything is fine.
If sound works on your computer, but not in Skype, most likely the problem is in the program settings. Here you can select the microphone and speakers you need and change the volume.
If the microphone on Windows 7 is noisy
There are several reasons why there is a lot of background noise from the microphone:
- Low quality of the device itself. It is recommended to buy proven equipment with sufficient sensitivity for high-quality sound recording.
- Incorrect settings in Windows 7. You should check the hardware configuration through the “Volume” menu.
- The computer is connected to electricity without grounding. This situation can cause noise.
- Problems with the integrity of the switching through which the microphone is connected. It is necessary to check the wires for defects and repair them if found.
- Hardware incompatibility, outdated drivers, incorrect Realtek HD configurations. The listed problems can be easily solved by reinstalling the software or changing the settings.
What to do if Alice can't hear the microphone
If Alice cannot hear what the user is saying, you need to change the sound settings on the computer. In Windows, you need to go to “Recording Devices”, select the desired microphone and set it as default. After this, you can test the program: click on the voice control icon and say the phrase. If the round icon is pulsating nearby, everything is working.
To talk with Alice, it is not necessary to click on the microphone icon every time. In the program settings, you can enable voice activation, then it will immediately respond to calls by name.
Voice commands for Alice may be blocked by an antivirus or ad blocker. It's worth disabling them and testing the program. If this does not help, you can contact Yandex technical support.
How to fix a microphone problem: video guide
Most sound problems on a laptop can be resolved within half an hour.
Every device tends to break down, however, this is not a reason to immediately send it for recycling. In this article we will try to analyze in detail the types of malfunctions in both a personal computer and a laptop. In addition, we will find out what to do in this or that situation: how to get rid of the source of the defect. By finding out why the microphone on your laptop or headphones does not work, you can fix the problem.
Contact contamination
During operation, the connectors may become dirty.
In some cases, for example, after long-term storage or with frequent exposure to dust and moisture, the connector contacts may accumulate dirt and oxidize. This is easy to detect externally - there will be lumps of dust, brown or greenish spots on the plug or socket. Of course, they break the electrical contact between surfaces, preventing the headset from working properly.
You can remove dirt from the nest with a thin wire or a toothpick. The plug is even easier to clean - any flat, but not too sharp, object will do. Try not to leave deep scratches on the surface - they will become a source for subsequent oxidation of the connectors. Final cleaning is carried out with cotton wool soaked in alcohol.
The microphone on the laptop stopped working - reasons
Below are possible explanations for the problems in order of their prevalence:
- First of all, you should check your drivers. Since in this case the mechanism itself is built directly into the design, it requires a special program that would establish functionality between the operating system and the laptop. Therefore, for this purpose it is necessary to double-check its presence. To do this, it is advisable to open the control panel and go to the “system” section. Next, you will have access to a window where on the left side you need to find the line “device manager” and click on it. In the opened department you need about. If you see unknown names in it, then a driver update is really required.
- In addition, the headset may malfunction. It is clear that Windows is not always able to carry out its activities properly. Accordingly, problems may arise with one or another auxiliary mechanism.
- The possibility of incorrect settings cannot be ruled out. Often the user makes a mistake with the connection beforehand. And because of this, the system incorrectly adjusts the indicator for sensitivity.
- It is also possible that the product is being used by a different application. Most often this concerns Skype, which is why the microphone does not work.
- Next, it’s worth checking to see if another device is connected that is interfering with recording your own voice.
- In conclusion, we need to consider such issues as the malfunction of the mechanism itself. It may completely fail, which indicates the need to replace it.
Sound Options
Windows 7 users remember that all system settings could be found in the Control Panel. Now, in Windows 10, all settings are divided between two sections - Control Panel and Windows Settings. Some of which can simply be duplicated (be in both settings), or be unique for some settings, such as Update for Windows Settings and Device Manager for Control Panel.
The situation is approximately the same with Sound Options - most of the settings are available in the Control Panel. You can get through them in 2 ways:
- Right-click on the sound icon in the taskbar and click on “Open sound settings”
- Or open the Control Panel (open the Run window and type control) and launch the Sound settings
In these settings, we need the “Recording” tab. All available devices for recording are displayed here - both turned off and disabled. Right-click on a free area and turn on the display of all devices - disabled and disconnected.
- If a microphone appears with the message Windows 10 not connected, then it is possible that this is a previously used device or, if it is active, it has problems connecting - try reconnecting it again.
- A device labeled Disabled - right-click on it and select Enable. After that, check its functionality.
- The microphone is connected, but does not work in Windows 10. Right-click on it and select it as the default device. There is a possibility that the main microphone chosen is not an analog device, but a digital one.
Microphone settings
Next, let's look at the settings of the microphone itself, which can be set through the sound parameters. To do this, in the “Recording” tab, right-click on the desired device and select Properties.
Go to the “Enhancements” tab and check the “Disable all sound effects” checkbox.
In the “Advanced” tab, click the “Default” button to reset the advanced microphone settings.
These are the basic tips regarding sound settings in Windows 10. But there are also system privacy settings due to which the microphone on a Windows 10 computer may not be heard.
Options for solving the problem
For each defect, an individual method is selected to eliminate it. Therefore, the most appropriate option can be found below:
- You can correct the situation in which the required driver is missing in the following way: first you should go to the manufacturer’s official website, where you need to search directly. The exact model of the existing laptop is entered in the line. As a result, you need to specify your own version of the software. And then find the driver that is intended for the microphone. It must be downloaded and installed on your computer.
ATTENTION. Do not forget to reboot the equipment at the end of the procedure.
- If there is a failure, click on the tray at the bottom of the screen, namely the speaker icon. In the menu that appears, you need to select the line called “recording devices”. Then click on “record” in the tab. If your headset is not displayed there, you will have to click on any space in the window. Next, an area will open in which you need to check the boxes next to all the proposed parameters. After this, you can complete the action using “save”. Then it is recommended to check the functionality again: say a few phrases. In a positive outcome, the noise level will change near the icon.
- If the mechanism is configured incorrectly, you need to view the indicators by first clicking on the “properties” item. Through this tab, go to “levels” and specify the parameters that you want.
REFERENCE. Finally, click “ok” to save the updated data.
- When the device is busy with another program, you need to launch the task manager using the simultaneous combination of Ctrl+Shift+Esc. If you find an application in the section that may interfere with the microphone, you should turn it off.
- If other accessories are attached to the structure, it is advisable to remove them from the connector. Then check the functionality using “voice recording”. When listening to audio, either the voice will be heard or not. In the latter situation, the program does not select the required invention. Most often we are talking about Skype, therefore, you need to log in to it. There, select “settings” and make sure that your headset is selected there.
Why the computer does not see the headphones - a quick solution:
- To determine this you will need a device manager .
- Start - My Computer (right click) - Properties - Device Manager.
- In it we need to go to the “Sound devices” section or “Audio outputs - Audio inputs” and find the name of your sound card.
- In my case it's Realtek High Definition Audio.
- We type into the search “realtek high definition audio drivers“.
- Go to the official website and download the latest version of drivers for your system.
Installing a driver is a standard installation of any program. As for setting up the utility (the driver you downloaded), everything is simple here too. All you need to do is:
1) In additional settings, separate all input jacks as independent input devices. It's just 2 mouse clicks.
This is done so that the audio stream goes simultaneously to all input devices, and not just to the speakers. The same applies to the microphone from the headphones (if it is connected via a separate plug).
2) Disable front panel socket detection.
Correct installation of Realtek sound card drivers
After these manipulations, you will hear sound when you connect headphones to the front or rear panel and forget that your computer does not see the headphones . For each sound card, the settings are different, some do not need settings at all, but the principle remains the same. I hope we have answered this simple question.
With bluetooth headphones the situation is much simpler. In order for Copm to see the headphones, they must be found using the Bluetooth module in your computer . Not all laptops are equipped with a built-in Bluetooth transmitter (for desktop PCs you need to buy a Bluetooth transmitter that looks like a USB flash drive), so first check its presence in Device Manager:
If there is a transmitter, we move on; if it is not there, you need to buy it separately (it looks and connects like a flash drive).
2) Next, you need to find the headphones, after turning them on . As a rule, the headphones have a power button, after its activation a blue, red, or some other backlight lights up. Add a new Bluetooth device through the panel below:
Then open the playback devices:
Among them should be your wireless headphones . The hardware installation is automatic, so all that's left to do is establish the connection.
It is impossible to work on all modern computers without an audio system. Basic notifications of system operation are expressed in the form of sound signals. So, you can use speakers or headphones. However, it is not always convenient to listen to music on speakers if there are people sitting next to you who do not want to listen to your music, or other various sounds made by your computer. In this case, it is appropriate to use headphones.
Today you can find many different models of headphones that have different functionality. In addition, there are not only wired headphones, but also wireless devices. Often users encounter a problem when headphones do not work on the computer. So why doesn't the computer see the headphones? Typically, each computer comes with specific sound card software. Sound card outputs can be on the front panel of the system unit or the rear panel, and when connecting headphones, the sound card software must be set with the appropriate connection parameters (headphones, rear speakers, line output). Almost all headphones on computers have microphones. Using this headset you can talk on Skype, as well as other programs. As a rule, when you connect headphones with microphones to your computer, the latter is reflected on the panel. But many people ask the question: why doesn’t the computer see the microphone on the headphones?
The first thing you need to do is visually assess the condition of the headphones. Check cable integrity. If the device does not work on your computer, try checking its functionality on another device. But it's best to use a regular MP3 player. It will definitely not have any installed drivers necessary for the headphones to function properly.
If they do not work on other devices, then it is obvious that something is wrong with them. Some people are able to find the problem in the wire. Here, armed with a soldering iron, insulation and scissors, you can repair the headphones yourself. When the speaker itself does not work, it cannot be accurately repaired. But it’s better to contact specialists so as not to completely break your headphones.
If the computer does not see headphones plugged into the jack, then the reason may be in the jack itself. Most often the problem lies in the sound card. Obviously, headphones and even speakers will not work this way.
What to do if the computer does not see the headphones? There are even such trivial situations when the Windows panel simply has minimal sound. However, if everything is in order here, then you need to start checking the drivers. In the “device manager” we find the sound settings and check the status of the drivers. If there are no red exclamation marks next to the installed programs, then everything is in order.
When the computer does not see the microphone from the headphones, then you need to accurately look for the appropriate drivers. Expensive headphone models come with a CD on which the drivers are recorded. If the disk was not present when you purchased it or it was lost, then the software can be found on the Internet. You just need to download them only from official websites to ensure full compliance of the devices.
Some users have a problem with bluetooth headphones. By the way, you can buy Bluetooth headphones wholesale on the website itsellopt.com.ua.
If your computer does not see bluetooth headphones, then obviously there is a problem with the drivers. Changing the player you use to listen to music also helps. Or perhaps the bluetooth module is damaged. When Bluetooth headphones are synchronized with a laptop, Bluetooth is already built into it. On desktop PCs, Bluetooth is an add-on in the form of a small chip, similar to a flash drive. A very common reason for Bluetooth headphones not working is the lack of correct settings. Computer doesn't recognize bluetooth headphones? You shouldn't take them for repairs. Try the settings again carefully according to the instructions.
Modern Monster Beats headphones, which have a microphone, are equipped with two plugs and a USB connector. If the microphone jack is not connected, the headset will not work. Check the quality of the connection between the plug and the socket. Perhaps the contacts have oxidized or you simply mixed up the plugs. To be on the safe side, there are special connectors on the computer panel for headphones and a microphone separately. There are corresponding notes. Don't confuse them when connecting.
Practice shows that it is headphones that cause the lack of sound. You only need to purchase headphones that have a warranty period. If you find defects or discrepancies in parameters, you can always return the device to the seller. You exchange non-working headphones for new ones or withdraw funds.
Do not try to repair expensive headphones yourself. Please remember that tampering with the device automatically voids the warranty period. If you are not confident in your own knowledge to help repair your headphones, contact a service center.
The laptop does not detect the microphone from the headphones - what to do?
If the equipment just does not find your device connected, it is likely that the first one contains viruses. To check for their presence and eliminate them, you must follow the following instructions:
- First, you need to find a special spy program on the Internet and download it directly. The best of all is SpyHunter 4.
- Then you can scan your computer to detect possible pests of the unit.
- After which you should eliminate all malicious information.
- It is now possible to run a deep scan of the operating system. To carry out this manipulation, you will need any antivirus.
- All potentially dangerous files will need to be disinfected. Of course, this procedure cannot happen to everyone. The part that could not be cured must be removed.
- Finally, you need to restart the laptop and update the built-in drivers.
It is possible that the above method will not help. In this case, contacting a service center is inevitable.
The main reasons for the microphone not working on Windows 7
To find the reasons why Windows 7 does not see the microphone, you need to check that the connection is correct. If the device is not visible from the front panel connector, you should try connecting it through the interface on the rear of the system unit. By default, the socket is indicated in pink. Often, due to the actions of unscrupulous assemblers or technicians from the service center, the panel with connectors is not connected to the motherboard, which leads to various failures with audio devices.
In case of problems, you need to check that the device is connected to the computer correctly.
Sometimes errors occur after updating the operating system or installing third-party software that affects the operation of the sound card.
If your PC refuses to respond to a connected microphone, this may be due to a lack of suitable drivers or hardware incompatibility. Software causes of problems can be detected using standard Windows tools, but to solve hardware failures you will have to diagnose the audio recording device manually.
What to do if the laptop does not see the external microphone
In such a situation, it is advisable to adhere to the following actions:
- At the beginning of the process, you need to go to the tray, where you should right-click once on the volume control icon.
- After this, a window labeled “sound” will be available to you. Thus, you can find the “record” tab on it. This is precisely what should be noted.
- Next, the “properties” section will open. Then you need to go to “advanced” to select the “default format” section. The available options need to be expanded and it is advisable to familiarize yourself with them. It is usually recommended to select the line in the same place that says about the presence of two channels and studio recording.
REFERENCE. After performing the manipulations, you must agree with the changed settings, and also confirm them using the “apply” button.
Therefore, after this, the microphone should perform its functions with full functionality. To confirm, you can turn to a special program or “dictaphone”, or use any other applications in this matter. Both Skype and Facebook can act as them. In addition, the presented method has one or another effect on the device, despite the sound card model.
Remember that before embarking on particularly important methods for correcting defects, it is worth understanding those that are directly on the surface. This category includes, first of all, such moments as: double-checking the volume of the sound produced or basic verification of the reliability of the cable connection.
What to do if the computer does not see the headphones. Why can't my computer see my headphones? Where did the sound go?
if it is not there, go to Start - Control Panel - Realtek Manager. On Windows 7
Usually this connection is here only once. This type of connection is very often used in console headsets. More information about connectors. Audio jack connectors come in two sizes: 3.5mm and once 6.35mm. The fork width and length are different.
On the left in the picture we see two connectors. The left jack is a 6.35mm jack and the right jack is a 3.5mm jack. By the way, there are adapters in both directions, that is, from 3.5 mm to 6.35 mm and in different ways. Depending on your needs there are basically two options that are more or less useful. Once you discover the possibilities this feature offers, you won't want to miss it again.
if it is missing there too, try to find it in the folder
C:\Program Files\Realtek\Audio\HDA file RtHDVCpl.exe and run it, you should see the main window of the Realtek manager, if you don’t have a Realtek folder in the C:\Program Files folder, then you need to download the updated version of the driver for your sound card on the Realtek website and install it; how to do this is written in detail in our article. When you launch Realtek Manager in Windows 7, click the Speakers button, then click on the yellow folder in the upper right corner and the Connector Settings window appears.
This gives the now older controller the ability to play on the computer back to its old form.
- Besides the fantastic sound quality, the handsets are portable.
- This allows you to quickly bring the speaker into the kitchen.
- Or use it somewhere else.
This is especially important for laptops, and if you want the key to be installed for a long time, so that no harm can happen where you work with a prominent key, where.
If you're not technically savvy, driver installation is usually done automatically. This, as mentioned, is especially important for laptops, where a protruding piece of hardware becomes a hazard during transport. The risk of damage is minimized by the smallest possible key.
In reality, it's also much more uncomplicated than it seems - the entire installation procedure is identical to installing a video card and is performed in basically three steps.
we see a warning If detection of front panel sockets does not work properly, check this box in the Disable detection of front panel sockets item, check this box and click OK.
After these steps, the front soundbar should work. In the Windows XP operating system, Realtek Manager looks a little different, but the essence is the same. Left-click on the button with the wrench
Strictly speaking, the latest version is 0, but it was released just a few days before this article was published and is not yet available on the market. Note. If you have a 3.5-inch headset, never pull on the headphone cable when you remove it from the remote. To remove the headset from the remote control, pull out the headset jack housing.
If you're using headphones connected to the 3.5mm port, go to Settings, select Devices & Accessories, then select the knob and adjust the audio settings. Try using a different controller or a different headset to see if the hardware is working properly. Update your remote control to ensure you have the latest software. Make sure your headphones are not muted. . If these solutions do not resolve the issue, try the following solutions.
and in the window that appears, check the option Disable detection of front panel sockets and OK,
The front soundbar should work.
We can also click on the Additional device settings button in this window and adjust everything as we need, for example, check the item - . This means that when you connect headphones to the front sound panel, the speakers connected to the motherboard at the back will immediately turn off.
They are not intended for use with any other device. In the Online Privacy & Safety section, you can enable chat messaging based on your child's profile. The adult account responsible for the child account you are having problems with. If you hear an echo, it is usually from the person speaking, not from the person hearing the echo.
For example, if you only hear an echo when someone else is talking, the problem may be related to the speaker's headset connection. The following conditions may cause echoes or noise when playing.
- The microphone detects ambient noise.
- This includes voice transmission from the headset.
- The headphone jack is not inserted correctly into the remote control.
If you or other players hear echoes or other noises while playing, try one of the following solutions.
Now I am answering the second letter. It happens, friends, that the drivers for the sound card are installed and sound is present in the system, but the front sound panel does not work, there are usually two reasons for this.
Firstly: your front sound panel works according to the slightly outdated AC"97 standard and the cable coming from it is connected to the connector on the motherboard AAFP analog audio front panel (designed specifically for connecting front panel audio connectors).
- Turn down the volume on your TV or stereo.
- Unplug and plug the headphones back into the control port.
- Never pull the cable out of the headphones when you remove it from the remote.
If you can hear others in your group or game but they can't hear you, try these solutions.
Solution 1: To test your headphones, run a group to test the sound.
- The software can warn you when the battery is low.
- You may also need to replace some rechargeable batteries.
- Make sure the correct types of batteries are installed in your device.
- Replace all batteries and replace them with new ones.
- Press the button on the wireless transceiver.
- Click the "Connect" button at the bottom of the device.
The wireless radio and device must be positioned correctly.
- Note: AC'97 is an already outdated standard audio codec, a veteran, one might say, it was developed by Intel in 1997, it is used in motherboards, as well as cases with a front-panel audio solution. But the sound subsystem built into your motherboard operates according to a newer standard - High Definition Audio or HD Audio, because of this the front sound panel may not work. Intel High Definition Audio is a relatively new specification for audio codecs, developed by Intel in 2004, characterized by improved digital audio quality, an increased number of channels, and a higher bandwidth compared to AC97.
You can solve this problem using BIOS, where you can set the operating principle of the front sound panel. Usually there are two options: default HD Audio and more. Reboot and go into BIOS. Go to Advanced, then Onboard Devices Configuration
Try the following solutions. If you have a wireless mouse and keyboard, place them at the same distance from the transceiver.
- Place the wireless device closer to the wireless transceiver.
- Turn the transceiver so that it is on its side or upside down.
Some wireless and non-wireless objects may interfere with your wireless device. To avoid interference from the transceiver, avoid using the device near objects such as.
and finally the option responsible for the front sound panel Front Panel Type, it can also be called: Front Panel Support Type, High Definition Front Panel Audio, Legacy Front Panel Audio, it is by default in the HD Audio position,
move it to position, save the changed settings and exit the BIOS. After rebooting, the front soundbar should work.
Checking headphones, connection and audio output on PC
There are several points that need to be checked first.
- Test your headphones on another device. Surely you have a mobile phone, tablet, laptop, another computer, or even a TV in your house. We need to make sure that the headphones are working. If they don't work, then most likely the headphones are broken. If they work, we look for the reason in the computer.
- Very often the headphones (on the wire) have a special remote control on which you can adjust the volume. Check, maybe the volume there is completely twisted, so there is no sound.
- Make sure you have connected your headphones correctly. If there is no sound when connected to the output on the front panel of the computer, then try connecting them to the output on the rear panel. Instead of speakers. Typically, this audio output is painted green (light green).
If there is sound when connected to the rear panel, but not from the front panel, then you need to check whether the front headphone output is connected inside the system unit. More on this below in the article. - Perhaps the volume on the computer is simply turned down completely, so there is no sound from the headphones. Check this by clicking on the sound icon in the Windows tray (bottom right corner). And in the application through which the sound is played. This could be some kind of player, browser, games, etc. It may have its own volume settings.
For many people, the computer does not see the headphones only when connected to the front panel (this is much more convenient). The problem may be that this output is simply not connected to the motherboard. You can check. But you will have to open the system unit.
First, I recommend checking if everything is in order with the sound settings and drivers in Windows itself. Read more about this using the example of Windows 10 and Windows 7 below in this article. And after that, open the system unit.
Causes of the problem
When the headset owner tries to use the microphone, he may see the message “Input device not found” on the screen. In this situation, applications do not recognize the recording device and do not recognize the person's voice. At the same time, audio playback through headphones works without any complaints.
There are several reasons for this problem:
- applications are prohibited from using the recorder;
- disabling the microphone in the PC or program settings;
- system failure;
- outdated or faulty drivers;
- Incorrectly installed OS update.
As you can see, there are quite a few factors influencing the performance of the headphone microphone. In addition, to the indicated reasons, you can safely add viruses, which also affect the condition of certain hardware elements.
Late sound on microphone
The application is free and supported in many languages.
The problem of audio delay when recording from a microphone often occurs when using drivers for built-in audio cards. You can try installing the ASIO ALL package, which interacts with the hardware on the computer and supports the following options:
- Adjustment of response time.
- Reduced system resource usage.
- Integrated resampler for sampling frequency conversion.
Possible malfunctions in headphones from different companies
Due to the shortcomings of engineers, headphones from different manufacturers differ in their inherent disadvantages. Marshall, for example, has a weak point - the transition of the cable to the plug. Wires often break there. In some models of headsets for phones from Sennheiser, Sony and other brands, when the plug is disconnected, the insulation slips, making the cables vulnerable.
In the case of Logitech on Windows 10, sometimes you have to install a sound driver for Windows 7. Razer requires you to completely remove the proprietary software and then reinstall it. JBL are characterized by problems with the Bluetooth driver. HyperX products require an audio driver update.
To solve problems with headphones in Windows, you will have to be smart - analyze the circumstances of the problem, go through several options for eliminating them.
Headphones do not work when connected to the front panel of the computer
It would be good to make sure that this special headphone output, which can be found somewhere on the front or top panel of the system unit, is generally connected to the motherboard, and connected correctly. It’s not uncommon, even during the process of assembly or some kind of repair, that these outputs are simply not connected, or are connected incorrectly.
I'll show you using my computer as an example. The following plug labeled Audio :
For me it connects to a port that is signed as JAUD1 .
Like this:
I also checked it on a new computer with a modern motherboard. Almost everything is the same there. The connector is called JAUD1 , only HD Audio .
Some more information on this topic can be found in the article connecting the front panel connectors of a computer.