Articles
- 2 Review Kenwood KMM-157
2.1 Device features
- 3.1 Technical capabilities
- 4.1 Technical capabilities
- 5.1 Technical capabilities
Car radios with Flac support
Car radios with Flac support have their fans and admirers. This is almost always an inexpensive option for head units. Flac support will make it possible to download files with this format. In addition, when it comes to sound quality, the advantages of Flac compared to other methods of storing information are obvious. Flac car radio is a full compression of files without loss of quality. You no longer need mountains of disks or a lot of hard drive space - that's what Flac support is.
A little about Flac
Flac car radios
This is a popular free codec. Its purpose is to compress audio data without any loss of quality.
Note. Not only Flac, but also many other audio codecs provide file compression. These are MP3/AAC/WMA and other codecs. But they perform compression with mandatory losses.
In contrast, Flac does not remove any information from the audio stream when compressed. This codec is ideal for both listening to good music and archiving audio collections. In other words, Flac files have all the advantages of a CD (see How to burn a disc for a car radio so that there are no problems later) and the convenience of using flash drives. All this turns car radios that support this format into a unique and very useful device.
Car radios flac
Where to download music in hi res?
Hi res audio download sites
| Name | Description | Free high resolution audio downloads |
| Bandcamp | WAV, FLAC, AIFF, mp3, aac, etc. | |
| Blue Coast Records | DSD up to DSD256(256fs, 11.2 MHz), WAV/FLAC up to 192 kHz | Free hi res audio downloads |
| Bravura Records | 44.1 kHz / 24 bit | Free music |
| Chandos | Classical music store |
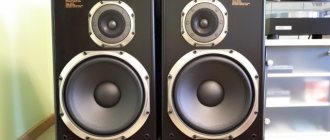
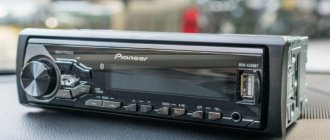
Review of Kenwood KMM-157
Flac car radio
Car radio produced in 2013. Its cost is small. For only 2 thousand rubles you can buy it in stores in Russia.
Device Features
So:
- The device is a digital media receiver with USB/AUX on the front panel;
- The front panel of the car radio is removable;
- Supports all known formats, including Flac/WAV and others;
- Built-in attenuator with smooth sound volume restoration;
- Built-in digital clock with 24-hour display;
- Availability of built-in connector and ISO connector;
- Fluorescent display with 13 segments and 11 characters. There is a demo mode and Russian text;
- The front and decorative panels, as well as the volume control wheel, are painted in black piano lacquer;
- A good radio tuner with radio text and search functions based on PTY programs. Radio signal ranges: FM/AM/MW/LW. 24 presets and Mixed preset memory function with 6 presets. There is a stereo/mono selector, but only in the FM range;
- Maximum output power – 4x50 W;
- The power supply runs on transistors;
- There is an additional front input for mini-jack;
- Installation of the car radio is carried out using a convenient Molex to ISO connector;
- While talking on the phone, you can use 2-way muting of the audio system;
- USB full speed with FAT 32/16/12 file system.
This car radio has no analogues in the “budget” category (see Budget car radios and their review). The low cost of the device did not in any way affect the convenient operation, high-quality radio, excellent melodic sound and an excellently readable screen.
PERSONAL EXPERIENCE
The process of playing files under the control of the application is simple and intuitive. Both from the flash drive and via Bluetooth, everything promised is read, all tags (if any) and even album covers (if available). For both a flash drive and a Bluetooth connection, you can search by title, by genre, by artist, by album, or start a playlist. The file names are displayed, there are no problems with the Cyrillic alphabet.
The flash drive appears in the signal source selection menu only if it is connected. In the settings, you can set automatic switching to a flash drive when it is connected, but you must first set up application control via Bluetooth.
The sound quality is traditionally high, with the style: dynamic, without loudness or excessive ringing. Listening was carried out in standard mode from linear outputs through a decent home path; for evaluation, an already proven set of phonograms of various genres was used.
To test dynamic correction, small-sized speakers with an innate tendency to overload in the low frequencies were used. The result is impressive bass without any “artificial” features, so this feature will not be superfluous even with solid bass acoustics. Loudness compensation of the first level mainly corrects low frequencies at low volume levels; at the second and third levels, the correction begins earlier and is felt more strongly. It is not forbidden to use these functions simultaneously.
Advanced Sound Retriever is definitely useful for compressed files, the equalizer works great, and the presets live up to their names. Manual equalizer adjustment via the Pioneer Smart Sync app is especially convenient. The “express setting” function for time delays works great, tested with an asymmetrical listener seating. In general, the adjustment limits cover all reasonable (and even unreasonable) needs when arranging a two-way channel front with a subwoofer, both with and without amplifiers, and there are time delays with level correction.
JVC KD-X215EE
Car radio with flac support
A car radio, which is a 1 din size media receiver. It will provide its owner with high-quality sound during long trips. It has almost all the functions needed today. The manufacturers of this car radio can be praised for a practical amplifier, perfectly built-in USB/AUX, support for Bluetooth technology and the flac format. The device allows you to listen to music recorded on mobile gadgets while traveling. In addition, the model is compatible with various devices based on Android and IOS, which makes it possible to easily connect a tablet, smartphone or something else to the receiver.
Note. The JVC Music Control and Playlist Creator applications deserve special attention. They make it possible to significantly simplify music playback from various media and gadgets.
And of course, we cannot help but describe the equalizer of this device separately. It is very convenient and gives you a chance to enjoy your favorite tracks in the best performance, regardless of their genre. Not just one, but several equalizers will allow the owner to flexibly adjust the sound.
Technical capabilities
So:
- Typical size – 1 din;
- Case color – black;
- Supports various formats, including flac;
- Monochrome display;
- Ability to adjust brightness;
- Built-in amplifier and equalizer;
- Digital tuner;
- The front panel is removable;
- Radio receiver with support for FM/MF/DV/VHF;
- USB;
- Bluetooth;
- iPod support;
- Ability to control from the steering wheel;
- Device power (maximum) – 4x50 W.
A good car radio that can be purchased for 3 thousand rubles.
MEASUREMENTS
First - common to all adjustment modes. Let's start with the easiest thing - with the equalizer. The equalizer remains the same in all setting modes; only the set of available options changes, the nature of which depends on the control mode - from the panel or through the Pioneer Smart Sync application.
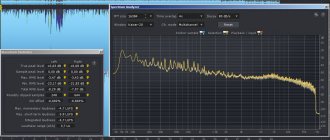
When configured from the panel, the equalizer is 13-band with 2/3 octave band spacing: 50-80-125-200-315-500-800 Hz, 1.25-2.0-3.15-5.0-8.0 -12.5 kHz. The control range is exactly 12 dB plus and minus, in steps of 2 dB. When configured through the application, the equalizer already receives 31 bands in 1/3 octave increments; whatever you draw on the screen is what you get. In a “simple” equalizer, the control bands are combined into three groups (LF, MF, HF).
The inscriptions on the graphs repeat what appears on the device display, and the graphs are grouped for convenience
We are not looking for easy ways, so this time we will also show the correction curves, depending on the set volume level, on the general graph. This will make the difference between these characteristics more noticeable. Loudness compensation follows the spirit (but not the letter) of the classic Fletcher-Manson curves - raising the extreme frequencies of the range, adjusted for automotive specifics. The maximum degree of correction is achieved at a level of 35 dB and below.
Dynamic correction D BASS processes only the meatiest parts of the range - mid and upper bass, and as the volume increases, the degree of correction decreases so much that it is replaced by a roll of low frequencies at maximum volume. The illusion of powerful bass is created by synthesizing the harmonics of the low-frequency signal, and the weakened “foundation” eliminates speaker overload.
Pioneer's degrees of correction are traditionally translated as LF, MF and HF, although they mean: “weak”, “medium” and “strong” (low, mid, high). Instead of a fixed increase in low frequencies (bass boost), dynamic correction D BASS is applied (two levels - strong and weak, with the same translation features)
Standard and network path configurations differ, by and large, only in the crossover settings. Any of the filters (except for the high-pass filter in network mode) can be disabled. In the standard configuration, the front and rear channels serve independent high-pass filters with an extended tuning range from 25 to 250 Hz (in one-third octave steps) and a slope from 6 to 24 dB/octave. Exactly the same frequencies are provided for the low-pass filter of the subwoofer, but two more slope values are added.
The tuning range of the HF filters of the front and rear channels is from 25 to 250 Hz, 10 values, slope 6-12-18-24 dB/oct.
The subwoofer has exactly the same range of tuning the cutoff frequency, but two more slope values have been added - 30 and 36 dB/oct. This gives flexibility when setting up. In network mode, the low-pass filter of subwoofer channels is adjusted in the same range, but the slope is 6 dB/oct. disappears as unclaimed. The default slope is 18 dB/oct. and 80 Hz
In the “network” mode, the subwoofer linear outputs remain as such, the front becomes an output to the tweeters, with its own high-pass filter, the rear turns into the mid with independently adjustable high-pass filter and low-pass filter. In all configurations, the subwoofer can be turned off if necessary, and the polarity of its connection can be quickly changed.
Midbass in network mode receives a bandpass filter (HPF 25 – 250 Hz, LPF 1.25 – 12.5 kHz), all slope values are available from 6 to 24 dB/oct. in any combination, up to disabling one of the filters. The tweeter's high-pass filter cannot be switched off and can be adjusted in the same range of 1.25-12.5 kHz and with the same slope values. The graph shows special cases; the default crossover frequencies are 100 Hz and 8 kHz, with a slope of 18 dB/oct. for subwoofer and 12 dB/oct. for others
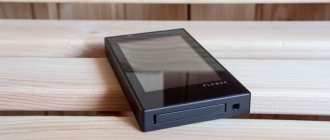
Pioneer MVH-170UL
Car radios din 1
Budget car radio with Flac format support. Its price is only 4 thousand rubles. According to experts, this GU is a car MP3/USB receiver with support for various digital media. The way it is. The Pioneer car radio even supports iPod. In addition, the car radio has a removable front panel. The USB connector and Aux-in audio input are also located here on the front. Flash drives, an external hard drive, a smartphone or an audio player can be connected without difficulty.
Note. As was said, one of the main advantages of this model is support for the FLAC format, which allows the driver to enjoy an unlimited number of music tracks in high quality on the road.
Separately, I would like to dwell on the maximum output power of the device. It is 4x50 W. But that's not all. A nice feature of the model is that it is possible to send sound to a separate subwoofer or external amplifier, which will enrich the front or rear acoustics. The radio is controlled by buttons, but it is possible to move it to the steering wheel.
Note. The radio receiver, which is equipped with automatic or manual search, also deserves special attention in this receiver. This receiver is capable of receiving stations operating in the FM/AM bands. 24 stations can be stored in the device's memory for quick recall.
Technical capabilities
So:
- Typical size – 1 din;
- Production – Japan;
- Case color – black;
- Supports various formats, including flac;
- Monochrome display;
- Equipped with an amplifier and equalizer;
- The front panel is removable;
- Equipped with a radio tuner with long-range reception and RDS support;
- USB;
- iPod support;
- Maximum output power – 4x50 W.
We recommend it as a high-quality device for little money.
OWN INTERFACE
As usual, when you turn it on for the first time, in addition to selecting the language, setting the date and time, and the receiver grid, you need to select the audio system operating mode: “Standard” (front + rear + subwoofer) or “Network” (two-channel front + subwoofer). After this, in the system settings you can configure the operating mode of Bluetooth, USB, and work with applications. In the “Backlight” section you can set the color scheme of the buttons and display and set the brightness. Microphone sensitivity and vocal suppression of the original soundtrack for karaoke mode are adjusted in the “Microphone” submenu.
This illustration shows the top-level menu items using graphics. All settings are intuitive and as convenient as possible
The audio settings menu has been reviewed in detail more than once, but nothing new has appeared there. In order not to be distracted, we will consider the details later in the “Measurements” section immediately with graphs. For now, let’s dwell only on the operation of the “time machine”, that is, signal delays - they are not assigned graphs.
In standard mode, the listener position options are front left, front right, front to . In network mode, the “ALL” item disappears, since there is no more rear... For the “Front” and “ALL” positions, manual adjustment of delays is not provided, only average values. Which, in general, is quite reasonable - with this option it is impossible to satisfy all listeners equally.
For the driver sitting on the left, you need to choose the RIGHT position. FRONT (and vice versa). Due to adherence to the traditions of left-hand traffic (and traditions in general), “Left-Right” in the settings, as they once swapped places, remains in this state to this day. Old followers of the Pioneer brand don’t forget about this, but it’s not a sin to remind new ones
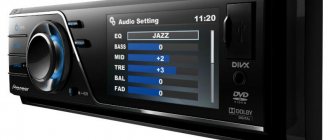
These are the distances for the RIGHT position. FRONT. Typical values correspond to the average interior of a passenger sedan, and then we straighten it according to location. The signal levels of the speakers are adjusted in the same way - the near ones are quieter. The less bright characters in the photo actually flicker - this is an adjustable setting. If you press the encoder, the numbers will flash, adjust by turning the encoder
The already familiar Advanced Sound Retriever function, which improves the sound quality of compressed audio formats, has been improved to include a version for “wireless” streaming audio, Advanced Sound Retriever Air. It improves the transmission of low frequencies and synthesizes harmonics in the high frequency region. The new version provides two levels of processing, the first is enabled by default. For uncompressed audio files, it is better to disable this feature.
Likewise, by default, the D.BASS (dynamic bass enhancement) function is enabled. Instead of "head-on" amplification of the entire low-frequency range, individual frequency regions are saturated with synthesized harmonics, which makes the bass "full" without overloading the speakers. The level of “additives” depends on the signal level; details are in the “Measurements” section.
We will get acquainted with the operation of filters in the “Measurements” section, and now a few words about the equalizer. In its normal state, it is 13-band (it becomes 31-band only when connecting a smartphone with the Pioneer Smart Sync application installed), it provides six proprietary presets, a linear frequency response (it is called “simple”) and two user settings. We won’t get distracted by the equalizer now; details are in the “Measurements” section.
Controlled by Pioneer Smart Sync, the process of using the receiver becomes more convenient and safer. We have already discussed the operation of the application in detail in previous publications, so now we will only recall the main points.
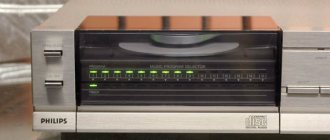
Pioneer SPH-DA120
2 din car radios
The car radio is not budget. It has a convenient and simple interface. There are few buttons here, and if there are any, they are located outside the touch screen. The driver does not need to learn how to operate this device: everything will happen by itself, you just need to follow the instructions on the screen.
Note. Touch control differs from the usual one in that instead of buttons, icons are displayed on the screen, which you should click on (touch them).
The screen itself is quite large - 6.2 inches WVGA. It gives access to all the main capabilities of the head unit, including control of various applications, Bluetooth, radio and so on.
HONEY & TAR
The final opinion can be expressed in one word: “must take it.” A processor path with rich capabilities, an equalizer, a crossover, various “improvers” and all this - for an amount that is not burdensome by today’s standards. The settings system is very user-friendly, and when working with the Pioneer Smart Sync application, the setup and control processes become clear and convenient. There's even karaoke.
I’ll still add a fly in the ointment: a noticeable drawback remains the inconsistent translation of the Russian interface - the levels of current compensation and dynamic correction D.BASS are better indicated by numbers, and the adopted “LF-MF-HF” are absolutely meaningless.
Issue price: 9,990 rub.
Learn how to adjust the sound of speakers and subwoofer on a Pioneer radio with your own hands
Setting up the Pioneer radio in the car begins with resetting the current settings. As a result, the equalizer filters for the HPF speakers and LPF subwoofer will return to the factory settings. This can be done in two ways: find the corresponding section in the car radio menu or disconnect the ground terminal from the battery. Note that the following method for setting up the radio is designed for an entry-level user, and there is nothing overly complicated in it. But also, the quality of the reproduced sound depends only 33% on the composition and quality of the audio system components. Another third depends on the correct installation of the equipment, and the remaining 33% depends on the correct setup of the audio system.
General issues
Is it possible to compress material from lossless to lossy - for example, from FLAC to MP3?
It is possible and often necessary. For example, if you want to listen to music in “camping” conditions from a portable device without audiophile habits, and your source material is stored in a lossless format, then before transferring it to a portable device, it makes sense to convert the necessary tracks to lossy. This way you will reduce the file size and be able to save significantly more music on your mobile device. You most likely will not feel any sound degradation from such a transformation at all.
Is it possible to compress material from lossy to lossless - for example, from MP3 to FLAC?
Is it possible to compress material from lossy to lossy - for example, MP3 with a lower bitrate to MP3 with a higher bitrate?
If you want to get an improvement in quality from such compression, then no, you don’t need to do this - the sound will not only not improve, but will even deteriorate slightly. If your goal is to reduce the file size and the sound quality is not very critical, then compressing from a higher to a lower bitrate is quite justified.
Which lossless format is better in terms of sound quality - FLAC, Monkey's Audio, WavPack?
As mentioned earlier, lossless formats compress data without loss. This means that in terms of sound quality they are all absolutely identical. You should choose a lossless format for use in each specific case, focusing solely on its compatibility with software/hardware and your personal preferences.
Do the choice of encoder and its settings affect the sound quality when compressing material into MP3?
Significantly influence. I will tell you below which encoder and with what settings provides the optimal result.
Does the decoder affect the sound quality when listening to MP3 material? What's the best way to play MP3 on PC?
The MP3 decoder may affect the sound quality. Some (especially old) decoders noticeably distort the sound when playing MP3, which can create a false impression that this format as such is inferior. To play music on a PC, you should use proven player programs, preferably the latest versions. I use foobar2000, which I recommend to everyone - it has no problems with the playback quality of MP3 or other supported formats.
Do encoder settings affect the sound quality when compressing material in FLAC? What compression ratio is better to choose?
The FLAC encoder settings do not affect the sound quality at all. Only the size of the resulting files and the time spent on compression can depend on them, and even then insignificantly. Therefore, most often I don’t bother and encode in FLAC with default settings, which I advise you to do too. In rare cases, when you need to get files of a minimum size and have to save every byte, it makes sense to increase the compression ratio to the maximum value.
Does the decoder affect the sound quality when listening to FLAC material? What's the best way to play FLAC on PC?
In the case of FLAC and other lossless formats, the decoder does not affect the sound quality; the original audio data is restored with bit accuracy during playback. Therefore, to listen to FLAC, you can use any player that supports this format and that you personally like. However, I will once again recommend foobar2000 as a time-tested universal solution for playing music under Windows.
▣ Is it possible to somehow transfer the entire media library to Lossless and Dolby Atmos at once?
Yes, if you are sure that you have enough space on your device for such tracks (let me remind you, we multiply the weight of the media library by 8). You will delete your entire media library from your device and then download it again. Here are instructions on how to do it correctly.
1. First, make sure that both Dolby Atmos downloading and uncompressed music saving are enabled on your iPhone or iPad in Settings -> Music.
2. Next, I recommend creating a special smart playlist on your computer (in the Music application on macOS or iTunes on Windows).
► open Music/iTunes. In the top menu, select File -> New smart playlist.
► in the menu that opens, select the rule Location -> coincides with -> iCloud.
► click on OK. This smart playlist will appear on all your devices and will show which tracks from your library are only in iCloud, and not in local memory.
Now it will be very convenient to download the entire media library at once in case of deleting downloads (which is what we plan to do). Like any playlist in Apple Music, this one is downloaded by clicking on the “down arrow” icon in the upper right corner.
3. Go to your iPhone or iPad in Settings -> Music -> Downloaded music. Click on Change in the upper right corner, then on the “minus” sign opposite the first item All songs.
As soon as the deletion is completed (this will take from several minutes to hours, depending on the weight of the media library), return to the recently created smart playlist and set it to download. I recommend connecting your device to a charger, the fastest Wi-Fi possible, and forgetting about it for a few hours, or even a whole day.
Once the download is complete, you'll have both Dolby Atmos and Lossless tracks stored locally on your device—if there are any in Apple Music right now.
Tuning radio stations on PIONEER radios
Tuning PIONEER radios to FM radio stations is difficult. A large number of site visitors search for this information every day. Apparently with the development of the Internet, it is much easier to ask search engines how to do this than to read the instructions. It’s true that searching for information sometimes takes hours, but who’s counting them...
So, there are 3 options for setting the radio to the stations we need or to all those received in your city.
Option one:
We are looking for the FUNC button on the radio. By clicking on it we get to the functions menu. If there is no such button, then look for this item in the main menu of the device and go into it. Next, scroll through the menu and look for the word BSM. It is this inscription that activates the automatic search for stations in a given range.
By pressing the right or up key, we start the process of scanning stations. For some time nothing happens (for us, that is, visually), while the device searches for stations with the most powerful signal and arranges them in order of signal weakening. When the process is completed, the first most powerful station will automatically turn on for reception.
It should be noted that if the reception is weak, then the automatic search may miss some stations and you may not find your favorite stations when checking. Then do the following. In the main menu of the device (which may be hidden), we have already answered how to get into it in the “radio settings” section, and find there the inscription “FM: 100“. It is this discreteness that the device uses when searching for stations, that is, the search proceeds with this step. By pressing the “left” or “right” button you will change the step to 1/2 of the basic setting and you will see the inscription FM:50.
Run the scan again. Perhaps now your favorite station will appear in the list of remembered radio stations. You can check this after the first station found sounds. By pressing buttons 1 to 6 you will move through the found stations.
Perhaps this option did not work or you were not satisfied with the result. Then try
Option two:
While in radio mode, and you can get there by pressing the BAND button, just press the button to the right and hold it for a second, then release it. A search will begin for the first possible station in this range. Having found it, the device will stop scanning, turning on the station for playback and will wait or memorize the station on the channel you need, which is done by pressing the channel button, say 1, and holding. In this case, the station will be memorized to button 1, about which a corresponding inscription will appear (for example, the number 1). Or you can, if you don’t need this station, press and hold (briefly) the right button again. The scanning process will continue until the next station found.
This way you can memorize 6 stations in one bank.
Next, by pressing the BAND button you will be taken to the second bank (which will usually be displayed as F2), where you can memorize 6 more stations in the same way, and then to the third bank. As a rule, there are 3 banks. Sometimes there are more. In total, 18 stations become available to you.
Option three: (if all the previous ones did not suit you)
While in radio mode, just very briefly, with short presses of the left or right button, you manually “click” to the desired station, if you know what frequency it is on, and remember it by also holding down the button of the desired channel (1,2,3,4 ,5,6). After memorizing the station, briefly click further to the one you need.
That's all. It’s not very difficult, or rather, not difficult at all, if you think about it and understand how it’s done.
Video clip showing the setup process.
Automating compression using foobar2000
Working through the console is, of course, good, but for regular use, I would like to make the format conversion process simpler and more convenient. The foobar2000 player, which I already mentioned above, is perfect for solving this problem. This player has a built-in file converter, the configuration of which we will look at step by step.
First, let's add presets for LAME to the converter:
1) Open foobar, add several files to its playlist. Right-click on any track from the playlist, select Convert >... In the Converter Setup window that opens, in the Current Settings block, select Destination - here you can configure where and how foobar will save the created files. If necessary, adjust these parameters, then click Back.
2) Click Output format > Add New, in the window that appears, fill in the fields as in the screenshot:
In the Encoder file field you should specify the full path to the lame.exe file. After everything is filled in, click OK, then Back.
3) Returning to the Converter Setup window, save the created preset with the Save button. We go through steps 2 and 3 again, but this time in the parameters and name of the preset we change “standard” to “extreme”. As a result, two items will be added to the Saved presets list, launching LAME in standard and extreme modes. Now you can re-encode any files from the foobar playlist to MP3 by simply selecting them with the mouse and selecting Convert > the name of the desired preset in the context menu:
Setting up FLAC is even easier. In the Converter Setup window, in the Current Settings block, select Output format, then select FLAC in the list of presets, and click Back. Returning to Converter Setup, save the new preset with the name FLAC:
That's it, now FLAC compression is available through the Convert context menu in the same way as MP3 compression. A caveat: when you first start the conversion process, a window will open in which you will need to indicate where the flac.exe file is located.
By the way. Users often have a question about how to split an album into separate tracks, downloaded as one large FLAC file with an addition in the form of a Cue sheet markup file. Having configured foobar as described above, we can do this in a few clicks: open the file with the .cue extension, select the tracks that appear in the playlist and convert them into separate files via the Convert > FLAC context menu.
What is Spatial Audio in Apple Music
Using this technology, the listener creates a sense of presence that could previously only be achieved using 5.1 or 7.1 speaker systems. Songs in Apple Music will start to sound like you're in the same room as artists across the room.
Spatial audio in playlists is marked with a Dolby Atmos icon.
The main condition for listening to music in Spatial Audio format is that you must have headphones that support Dolby Atmos.
In fairness, it is worth noting that not all songs in Dolby Atmos will delight you when listening. Some compositions may be clearly spoiled by this sound.
External ports
- In addition to the radio, the radio can play music from external devices or CDs (older versions).
- To be able to connect external devices, you will need the same “System” menu described earlier in setting the time.
- Go to the menu as described above.
- Scrolling through the menu, select the AUX, USB or Bluetooth option (if this feature is supported).
- Use the arrows on the sides (or tilt the handle itself) to switch the position. There are two options available - enabled (On) or disabled (Off).
- Choose to enable the desired port.
- Press the joystick once to confirm.
- In the same way as in setting the time, exit the menu.
- Further connection depends on the models of the radio and the connected device.
Bluetooth connection
It should be remembered that for the connection via Bluetooth to work correctly, like most other devices that support this function, pairing will be required. The PIN code is entered on the radio and repeated on the device (sometimes, especially if the device has already been connected via Bluetooth, you will only need to enter it on the radio).
To enter the pin code on the radio, take the following steps:
- They turn it off.
- Hold down the power key and go to the initial menu.
- Rotate the joystick to find the PIN CODE INPUT function (will appear if BT is enabled).
- Move the joystick up and down to enter the code. If you need to move between symbols, do it by swinging the handle left and right.
- Confirm by pressing the knob once.
- Exit the menu.
Now you can activate the mode on the device and try to find the radio. Those who like to assign clear names to devices can use the above method, but they must select EDIT DEVICE NAME rather than PIN CODE INPUT. The remaining steps are identical.
Important. Confirmation must be pressed once
Clicking on the same menu again will reset the code and require you to enter it again.
In the radio, the photo of which is presented below, the 3.5 AUX jack socket is located to the right of the radio control buttons, and the USB is behind a plug with the USB brand logo.
Radio "Pioneer" without CD, but with USB and AUX support
Human hearing and its limits - psychoacoustics
The fact is that the main task of the Fraunhhofer Society is the development of psychoacoustic models of human sound perception.
And there are many subtleties here. The main thing is that we are not dolphins. Secondly, there are certain restrictions on the number of simultaneously perceived sounds. A person can simultaneously hear no more than 250 sounds from 24 ranges (and the number of simultaneous sounds in the range is also quite small).
Thirdly, the audible range ranges from 16 Hz to 20 kHz and decreases by almost half by the age of 60. Ideally, and with training (yes, yes, it needs to be trained!).
All frequencies below 100 Hz are perceived not by auditory cells, but... by the skin. Then the low waves are reflected in the auditory canal - these waves are perceived as infrabass. (This is from the area of bone conduction.)
Moreover, the number of cells that record acoustic waves is different for each person. Why, for each individual person their number in the right and left ear is different.
By the way, the perception of each ear is different. Swap the channels in your favorite song and get a new sound.
If you dig deeper, it turns out that each frequency of sound is perceived only at a certain volume. When it is reached, silence is replaced by a sharp and quite distinct sound. Afterwards, a person can hear a quieter sound of this frequency.
Another interesting property of hearing is that the lower the volume level, the lower its resolution and the smaller the number of perceived sounds. When the volume is lowered, high frequencies are better perceived, and when the volume is increased, low frequencies are better perceived. And they do not complement, but replace each other.
A person does not perceive some sounds, concentrating attention on others. Please note - usually one instrument or vocal is heard clearly and consciously
Everything else turns into a background or a single consonance. And no matter what we concentrate on in the composition, we cannot increase the number of perceived basic sounds.