It's no secret that the most common malfunction of any headphones (plugs, earbuds or large over-ear ones) is a broken wire near the plug. In this situation, there is nothing left to do except change the plug on the headphones. This is easy and can be done by anyone who has ever held a soldering iron in their hands. The only thing that would be desirable is to understand the intricacy of the wires (in some headphones there are as many as 6 wires under the cable insulation!)
Today we’ll talk about how to solder headphones to a plug without making any mistakes.
You don't need to think about anything, just follow the step-by-step instructions provided and you can easily repair your favorite headphones.
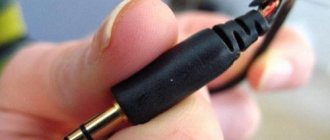
1. Ruthlessly bite off the plug: 2. How to replace the plug on headphones? For this we will use the old connector. Let's gut it using a sharp stationery knife, ripping it right along the seam. This method allows you to disassemble almost any plug: Open the plastic shell and take out the insides. Do you see a group of contacts with pieces of wire soldered to them? We remember the pinout of the headphone wires (or better yet, write down on a piece of paper which wire was soldered to which contact). Here is the standard wiring of headphone wires by color:
- green wire is the left channel;
- the red wire is the right channel;
- yellow (copper) wire is common.
You will find more detailed information about which wire in the headphones is responsible for what later in this article (scroll to the very end).
3. Now you need to clean up the headphone wires a little. What the result should look like: we connect the common wires (which are in colorless varnish) together and tin the very ends: A few words about how to re-solder the plug on the headphones. It will be bad to pick, because... the wires are covered with varnish insulation. To make the process easier, you can lightly burn the very ends with a lighter.
How to tin wires from headphones using an aspirin tablet, as shown in this video:
Personally, I made do with an ordinary knife, which I used to carefully clean off the enamel coating from the wires. And after that I tinned it in the usual way - with solder and rosin.
4. Now we find an old unnecessary pen somewhere:
and separate the very tip from it: This will be the body of our new plug.
5. Prepare a piece of heat shrink that will protect the wires from sharp bends at the exit from the plug: 6. It's time to solder the headphone wires to the plug. You need to solder in full accordance with the colors of the wires in the headphones (we remember where which color was soldered or look for our piece of paper where everything is written down):
7. Make sure everything works. To do this, turn the multimeter into dialing mode, plug the headphones into your ears and alternately touch the probes to different contacts. All sorts of rustling and clicking noises should be heard in different channels.
Or you can try to plug this unfinished plug into your phone or MP3 player and start playing music. In the latter case, it is important to make sure that the right and left channels work independently of each other (use the balance adjustment).
8. If everything sounds as it should , we shrink the heat shrink using a hair dryer or a regular lighter: 9. Apply a couple of drops of epoxy glue: glue everything together and leave for several hours until complete polymerization.
10. We are happy with how we fixed the headphone plug!
Look at the photo of how I managed to solder the new plug to the headphones:
In my opinion, this is the easiest way to fix a headphone plug of all those proposed on the Internet. Despite the fact that the result is quite decent. If you don’t look closely, it’s not even clear that it’s homemade.
By the way, at first I had the idea to make a paste from baking soda and superglue to use it instead of epoxy resin. But it turned out that this mixture hardens so quickly (almost instantly!) that this option had to be discarded as unsuitable.
That's all. Now you know how to make headphones if the plug is broken and which wire in the headphones is responsible for what. Always try to figure out how everything works, how to repair the plug on your headphones with your own hands, save your money!
Additionally about the colors of wires in headphones
How to properly solder wires to a headphone plug is out of the question if you are not familiar with the colors of wires in headphones and their meaning (for example, do you know what the green wire is responsible for?)
A different number of wires may come to the headphone plug:
- 2 wires (for mono headphones);
- 3 wires (for mono or stereo headphones depending on the connection diagram);
- 4 wires (for stereo headphones);
- 5 or 6 wires (for stereo headset with microphone).
2 wires
I don’t think anyone needs to explain how to repair a headphone plug if they only have two wires. It is basically impossible to confuse anything here.
3 wires
There are always two wires coming from each ear - plus and minus, but sometimes the manufacturer combines the minuses of both speakers together and it turns out that only three wires come to the plug. To make it clearer, here is a soldering diagram for a headphone plug:
This picture explains even more clearly where to solder the wires to the headphone plug:
Most often, the wires are coated with varnish of different colors:
- red – right channel;
- green, blue or white wire – left channel;
- colorless varnish – common wire (ground).
Of course, there are no strict standards and colors may vary. Here's what it looks like in real life:
Let's see how to properly solder a wire to the headphones (3 wires):
4 wires
If your plug has 4 wires, then there may be options.
Option one: you have regular headphones without a microphone and without buttons (the plug has only 3 contacts). Then these four wires are simply two pairs of wires from each of the speakers. Their disadvantages are the same color (copper), and their advantages are different (usually blue and red or green and red):
In this case, common wires (those of the same color) are connected together and soldered to the common contact of the plug. You should immediately understand how to solder 4 wires from the headphones to the plug from the figure:
Read also: Vacuum-creating installations with vacuum pressure stabilization
Here's how to solder headphones to such a jack:
Option two: you have a full-fledged headset (i.e., headphones with a microphone) and the plug has 4 contacts. Then, most likely, these four wires are one wire from each speaker, one signal wire from the microphone, and one common wire for all.
Schematically, this can be indicated as follows:
And here's how to make a plug on the headphones (correct soldering of headphones when there are 4 wires):
Most often, a microphone wire only looks like one wire, but in reality it is two wires: a thin wire in white PVC insulation completely wrapped in enameled copper wire (in colorless enamel). Something like this: And in this case it would be more correct to say that the headphones have not 4 wires, but all 5.
5, 6 or more wires
Depending on the implementation option, there may be 5 or more wires inside the cable from the headset. Up to 10! Be that as it may, they always try to make the signal wire from the microphone in its own “ground” braid.
In short, if you gutted your cable and it looks something like this:
or even this: no one will immediately tell you how to properly solder the plug to such headphones. There can only be one piece of advice here: take a tester and test all the wires until you determine where the right ear is and where the left is. The remaining wires are to the microphone.
Determine by color which wires may be common and connect them all together. Solder all signal signals according to the connector pinout (see pictures above).
Then test the headphones and microphone. If something is wrong, look for the reason. No one will really tell you anything here; proceed using the scientific dildo method.
Health and good mood to everyone! Here I have collected pinout diagrams and instructions on how to solder a plug to headphones of all types known to me. I provide instructions on how to repair headphones with your own hands and how to connect the wires without an electric soldering iron. It will be interesting.
I'll start by listing the known types of audio plugs.
Self-clamping terminal blocks WAGO
In addition to terminal blocks with bolts, there are also terminal blocks with clamps. They are more expensive than usual, but they allow the connection to be made much faster, especially in connection with the new requirements of the PUE and the ban on twisting.
The most famous manufacturer of such terminal blocks is WAGO. Each terminal is a separate device with several holes for connecting wires, each of which is inserted into a separate wire. Depending on the version, it connects from 2 to 8 conductors. Some types are filled inside with conductive paste for better contact.
They are available for both detachable and permanent connections.
The stripped wire is simply inserted into the terminals for a permanent connection and spring tendrils fix the wire inside. Only hard (single-core) wire can be used.
In plug-in terminals, the wire is clamped using a folding lever and a spring clamp, making it easy to connect and disconnect wires.
Since the wires do not touch each other, the terminals allow you to connect wires of different sections, single-core to stranded, copper to aluminum.
This method of connecting conductors has proven to work best at low currents and is most widespread in lighting networks. These terminals are small in size and easily fit into adapter boxes.
Standard plugs
According to Wikipedia, there are the following types of jacks:
- TS/TRS 6.3mm diameter (for microphones, electric guitars, mixing consoles, old professional headphones, etc.)
- TS/ TRS / TRRS with a diameter of 3.5 mm (the most common, used for modern headphones, microphones, acoustics, flashes, etc.)
- TS/TRS/TRRS with a diameter of 2.5 mm (for mobile phone headsets, webcams, flashes, etc.)
There is also a type of TRRRS connector, which is used to transmit not only audio, but also video signals.
By the way, this designation is adopted according to the principle: T - Trip (latch), R- Ring (ring), S - Sleeve (sleeve).
How to properly solder a new plug to the headphones, observing the pinout of the wires
To properly solder a headphone or headset plug, you need to know the pinout. It is shown in the table below and taken from the website about connectors.
Minijacks for speakers and microphones also have the same pinouts for 2- and 3-pin plugs.
Plugs and their pinouts for more specialized devices (video cameras, headsets) by manufacturer (Nokia, Samsung, Sony, Panasonic) are shown in the following table.
How does a three-pin jack work?
A regular three-pin stereo jack is designed according to the coaxial principle. Each contact is located in a dielectric sleeve (bushing) and is located inside another sleeve.
The plug contacts are separated from each other by plastic bushings. So this plastic is afraid of overheating, it begins to melt and the contacts will dangle. So if you want to solder a headphone plug, then you should remember about overheating the contacts with a soldering iron.
It's time to go to a repairman.
If none of the tips listed above help, this means that the problem is not as small as we would like. If your smartphone is still under warranty, your best bet is to simply contact the seller or manufacturer. Explain the problem to the company and send it in for repair or replacement. In some cases it may take a long time, but at least it's free.
The second solution is definitely the worst. You may need to have the device repaired by the manufacturer or someone else who knows and understands this. You'll have to open your wallet and pay to get it fixed, but at least you'll be able to use the headphone jack again. Otherwise, you can simply opt for a pair of wireless Bluetooth headphones, which will also solve the problem. Well, sort of.
How to repair a headphone plug yourself
To repair a headphone or headset plug with your own hands, you need to carefully remove it from the case if it has not yet fallen out. Usually the plug is filled with rubber. When disassembling, we cut this body along the seam with a sharp knife. The neater the cut, the easier it is to restore the body after repair.
Finding out the cause of the headphones malfunction
The malfunction of headphones most often consists of a break in one of the wires in the plug. Less often, a break occurs near the speaker contacts or the wire breaks due to a violation of the integrity of the insulation.
To determine the malfunction, you need to use a multimeter and ring the plug contacts. From the diagrams above we already know where the common wire and the left and right audio channels are. If the resistance between the contact of one channel and the common wire is more than 20 - 120 Ohms, then most likely there is a break or break in the wire. Remember that the typical winding resistance of modern in-ear headphones is 32 ohms.
The breaking of the wire is determined by the jumping readings of the multimeter when the wire is bent.
The easiest place to find a break is near the headphone speakers. It is often easier to open the speaker housing than to cut the rubber-filled plug. If the wires to the speakers are soldered well, then you should remember about faults in the plug.
Do-it-yourself troubleshooting
Once you have determined the location of the malfunction, you need to get to it and see with your eyes. Then it will become clear how exactly to solder the plug or headphones.
Let's say that a wire break occurs inside the headphone plug. To disassemble the packaged minijack shown above. Ideally, you should record or photograph the wiring and update the connector soldering. Remember that flexible stranded wires are coated with a good varnish and it is difficult to tin them just like that. First you need to burn the varnish, for example with a soldering iron, lighter or mini-burner. After this, you can tin the wires with rosin or other flux.
It is better to leave 2 - 3 mm of bare wire without braiding to increase the strength of the structure. When we return the plug housing to its place or fill a new housing with sealant, it is necessary to create as large a contact area as possible between the braid and the outer sleeve of the plug. Thus, during jerks, the load will be transferred to the most massive part of the plug, and not to the weak contacts of the left and right channels.
After soldering the headphone plug, its internal contacts can be filled with hot melt glue, epoxy glue or sealant. After drying, file to the desired shape.
Twist connection
The easiest way to connect wires is twisting. Previously, this was the most common method, especially when wiring in a residential building. Now, according to the PUE, connecting wires in this way is prohibited. The twist must be soldered, welded or crimped. However, these methods of connecting wires begin with twisting.
In order to perform high-quality twisting, the connected wires must be cleared of insulation to the required length. It ranges from 5 mm when connecting wires for headphones to 50 mm if it is necessary to connect wires with a cross-section of 2.5 mm². Thicker wires are usually not twisted together due to their high rigidity.
Read also: Torque booster wrench with heads
The wires are stripped with a sharp knife, insulation stripping pliers (ISR) or, after heating with a soldering iron or lighter, the insulation is easily removed with pliers or side cutters. For better contact, bare areas are cleaned with sandpaper. If the twist is supposed to be soldered, then it is better to tin the wires. Wires are tinned only with rosin and similar fluxes. This cannot be done with acid - it corrodes the wire and it begins to break at the soldering site. Even washing the soldering area in a soda solution doesn’t help. Acid vapors penetrate under the insulation and destroy the metal.
The stripped ends are folded parallel into one bundle. The ends are aligned together, the isolated part is held firmly with your hand, and the entire bundle is twisted with pliers. After this, the twist is soldered or welded.
If there is a need to connect the wires to increase the total length, then they are folded opposite each other. The cleaned areas are placed crosswise on top of each other, twisted together by hand and tightened tightly with two pliers.
You can only twist wire made of the same metal (copper with copper, and aluminum with aluminum) and of the same cross-section. Twisting wires of different sections will turn out uneven and will not provide good contact and mechanical strength. Even if it is soldered or crimped, these types of wire connections will not ensure good contact.
How to solder a wire to a headphone speaker
When the wiring breaks near the headphone speaker, it is best to solder it back to the headphone and renew the soldering from the factory. This is how the wires are soldered inside my ancient Aiwa earbuds.
Pay attention to the knot that is tied - it does not allow thin wires to come off when jerking. Before soldering the earphone, be sure to tie the same knot at a certain distance, slightly greater than the distance to the narrow hole.
The question arises - what determines the polarity of connecting the wires to the speaker. The answer is simple - the headphones are connected in the same way so that they work in phase. When the polarity of the headphones is reversed, the sound is smeared and becomes quieter than common-mode sound. If you have a broken wire in one speaker, for proper connection you need to look at the wires and soldering in the other earphone.
Read also: Technology of vacuum drying of wood
What to do if the wire breaks inside the earphone
The most unpleasant thing is when the wire breaks inside the earphone. This means that the speaker winding wire has broken , which is shown in the figure.
The speaker winding is usually glued to the diaphragm and breaks off at the point where the wires are attached to it. Over time, they simply break due to micro-movements.
It is extremely difficult to restore such a break, but it is possible under a microscope. When repairing headphones, you need to be extremely careful not to tear the diaphragm or damage the geometry of the winding. Particular attention should be paid to microdust trapped between the magnet and the winding. Magnetic debris can be easily removed with chewing gum or plasticine.
Terminal block connection
A development of the bolted connection is the terminal connection. Terminal blocks come in two types - with a rectangular pressure washer and with a round one. When using a terminal block with a pressure washer, the insulation is removed to a length equal to half the width of the terminal block. The bolt is released, the wire is slipped under the washer and the bolt is clamped again. On one side, you can connect only two wires, preferably of the same cross-section and only flexible or only single-core.
Connecting to a terminal block with a round washer is no different from using a bolted connection.
The connection of the wires is reliable, but cumbersome. When connecting wires with a cross-section of more than 16 mm², the connection is unreliable or the use of lugs is necessary.
How to solder headphones with a microphone
To properly repair headphones with a microphone, you need to know the connection circuit and the purpose of the four-pin jack pins. A typical soldering diagram for a microphone plug and a button in a stereo headset is shown in the picture below.
For most manufacturers of simple headsets, the microphone should be soldered as in the picture.
How does a four-pin jack work?
A four-pin jack has the same structure as a three-pin jack. Coaxial design and separation by plastic bushings with standard sizes into 4 wires is present on all TRRS plugs. The pinout of 4-wire plugs differs by manufacturer. There's a lot of people here. To correctly replace the headset plug, look at the pinout of the minijacks in the picture.
The picture shows the following symbols: M - microphone, G - common contact, R - right channel, L - left channel. Now it’s clear that soldering headphones onto 4 wires is not an easy task. The wiring diagram of the plug greatly depends on the brand of the headset.
Main symptoms of a malfunction, identification of possible faulty elements
In order to determine the specific location of the fault, you must have experience with a multimeter. To repair headphones, a simple digital multimeter is enough.
Possible signs of malfunction:
1. There is no sound from one dynamic driver.
The first step is to ring the chain. To do this, you need to use a multimeter and a headphone circuit. Typical circuit for headphones without a microphone with a three-pin connector.
In the case of coaxial conductors, the circuit looks like:
Thus, in order to ring the left channel, you should connect the multimeter probes (in resistance measurement mode at a limit of 200 Ohms) to the outermost contacts of the connector. To control the right channel - to the first and second contacts from the connector body.
Depending on the type of dynamic emitters, the resistance can be from units to tens and hundreds of ohms. Zero resistance indicates a short circuit in the circuit, infinite resistance indicates an open circuit or a speaker malfunction. To obtain a more precise cause of the malfunction, you need to move the cord at the junction with the connector, emitters, splitter and regulator.
At the junctions of conductors to these headphone elements, conductor breakage (broken) most often occurs. If contact appears when the cord is touched, the speakers are most likely working. This way you can determine the exact location of the wiring break.
2. The emitters work, but the volume is lower and mono sound comes from the headphones.
The reason for this is a break in the common wire. In this case, the headphones will not ring in any of the options presented in Fig. 5. They will ring when the multimeter probes are connected between the outer and middle contacts of the connector.
3. Both dynamic drivers are not working.
In this case, there is usually a double fault: both emitters do not work, two conductors are broken, or a conductor plus a non-working emitter. This malfunction occurs when there is a strong mechanical impact on the headphone cord, or as a result of prolonged use with one inoperative channel.
4. Crackling sound when adjusting the volume control.
The malfunction is the result of wear on the variable resistor. It should be changed. You can remove the crackling noise for a while by rubbing the working area of the resistor with a pencil lead.
5. The microphone does not work.
The microphone is usually connected to pin 4 of the connector.
In this case, it is necessary to ring 1 and 4 (outer) contacts of the connector. If the headphones use a condenser type microphone, it may not ring. An oscilloscope is required to monitor its serviceability.
6. The sound in one of the speakers became quieter.
The sound channel of the emitter may be clogged. You can blow it out using a regular bicycle pump (in no case with your own breath).
About the colors of wires in headphones
Headphone wire colors are usually standardized. The wire colors for standard headphones with 3 wire types are shown in the photo below.
However, there are still manufacturers who use non-standard wires for soldering headphones and marking channels. For example, Apple uses two-color wire markings in its AirPods headphones.
In such cases, the Internet or the method of checking with a 3-volt battery or multimeter comes to the rescue.
When voltage is applied (with a battery or a multimeter in ohmmeter mode) between the contacts of the speaker, a rustling sound will be heard in it. It's simple. It’s more difficult with headsets, especially if they have buttons. This is where circuitry comes into play. Because manufacturers often use a minimum of pairs of wires to transmit a large number of signals.
How to do without a soldering iron when repairing headphones
It often happens that a person does not have a soldering iron or socket at hand, and the headphone plug does not work. In this case, we can resolder the plug in several non-standard, but acceptable ways.
The first method is to use conductive glue to glue the wires to the mini jack pins. Everything is done simply and neatly. The reliability of such fastening is of course poor, and the electrical resistance of the glue can be tenths of an ohm. If the headphone impedance is 4 -16 ohms, the glue may affect the sound volume. The good thing is that the drying time for conductive glue is usually 10-15 minutes.
The second method is to heat a nail or piece of copper wire in a candle flame. This is a way for romantics : twilight, candles, plug, headphones and you. In this case, it is better to use scented candles. But seriously, you can solder a headphone plug using a fire and coals. The main thing is not to forget good solder and flux.
The third way is to make a gas soldering iron from a lighter with your own hands. You need to take a piece of single-core copper wire and attach it to the lighter so that part of the wire is in the flame. Heat is transferred over a certain distance through a copper wire, as can be seen from the photo.
If you use this method, pay special attention to the place where the wire adheres to the lighter body. A hole may form there due to heating. Be careful! For more details on how to make such a mini soldering iron from a lighter, watch the video.
Not everyone has a soldering iron these days. But almost everyone has headphones, and even more than one. And as everyone knows, any headphones tend to die... And as always, at the wrong time. So today we will get out and you will learn how to fix headphones without a soldering iron. tools you need are a knife, a lighter and tape.