Replacing a standard car radio is a common procedure performed by car enthusiasts. Main reasons for replacement:
- breakdown of the standard radio;
- desire to expand the functionality of the device;
- increase in power and sound quality in the cabin.
When replacing the radio, it is important to connect new speakers or speakers. Indeed, connecting a new head unit to an old speaker system can reduce all efforts to zero. If the new radio has increased power, then the acoustic parameters of the interior may even worsen.
When replacing speakers or installing additional speakers, it is important to make the connections correctly. Errors can lead to failure of the car radio or poor quality sound from the speaker system.
Schemes for connecting speakers to the radio
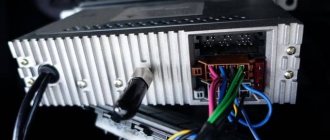
Currently, most car radios use a standard ISO interface for connecting external speakers and speakers. Its functional diagram and pinout of pins on the connector are shown in the figure.
The diagram shows that connector B is responsible for connecting speakers and speakers, from which wires of different colors extend. The primary color wire is connected to the positive terminal of the speaker, the two-color wire is connected to the negative terminal. In many radios, the signal is transmitted through a single-color wire, the two-color wire is common (ground).
Video - connecting speakers to the radio by color:
Some car enthusiasts, in order to save conductor and time, combine the mass, and the signal is routed only through a single-color wire. Under no circumstances should this be done. The circuits of many radio amplifiers with high output power are of the bridge type. There is no common wire at their output: one output is “swinged” by the first arm, the other by the second in antiphase. Grounding one of the terminals leads to failure of the arm amplifier. An example of a bridge circuit for a radio amplifier.
In order to correctly connect the conductors, it is better to find a color scheme for connecting the speakers or speakers to your radio. She looks something like this.
This diagram clearly shows how to connect the speakers and which wires on the radio go to the speakers. But you shouldn’t rush to connect. First you need to install the speakers correctly and select the conductors.
Final stage
Now is the time to use a tester, with which you need to check each cable for the presence, or rather, the absence of a short circuit. If there are no problems with the electrical wiring, you can connect it to the connectors and install the head unit in its place. All the actions we describe must absolutely not be carried out with the battery on.
When all the steps are over, you can check the speakers for resistance. Its indicator should be at 4 ohms. Now you can put the acoustics in its permanent place in the car and connect the electrical wiring. At this stage, we exercise extreme caution and do not allow the terminals from the speakers or metal from the car to touch.
All that remains is to check how well our audio system connected to the radio works.
How to properly connect speakers to a car radio
From the point of view of acoustic properties, the car does not have the best characteristics. The interior has a complex architecture; it contains structures made of various materials: metal, upholstery, plastic, rubber, etc. It is rare that a manufacturer specifically optimizes the interior to ensure high-quality sound.
However, standard speaker installation locations are selected to ensure the greatest sound propagation efficiency. Usually they are located in the doors, on the front panel, under the rear window. If you decide to install more powerful speakers, you will need to remove the old system, measure their mounting dimensions (diameter in inches and depth) and purchase speakers of the same size but with better characteristics.
It is also necessary to choose speakers (speakers) with exactly the same internal resistance. The standard resistance value is 4 Ohms. There are high-power radios that allow a load of 2 ohms. If you connect them to 4 ohm speakers, you will lose power. If you are connecting a new car radio, you should use reference books or technical descriptions to accurately determine the power and load resistance. If the speakers have less resistance than the radio allows, the latter may fail; if it has more resistance, it will not be possible to “swing the system to its full potential.”
You cannot connect additional speakers or speakers in parallel. In this case, the load resistance decreases. At best, the speakers will wheeze, at worst, the radio amplifier will burn out.
Many car enthusiasts install additional speakers in the trunk. In this case, they must be firmly secured. Firstly, it will improve the acoustic parameters. Secondly, it will protect the speakers from premature failure.
Some radios have a complex system for connecting speakers, speakers and subwoofers. It may include isolation filters, amplitude coupling devices for outputs and inputs, and additional amplifiers. In this case, you need to find an original diagram for connecting the speakers to the radio, similar to this one.
If you decide to install a system of this level, but do not have the appropriate skills, it is better to use the services of a specialist. At the same time, you should think about additional noise and sound insulation of your car.
Choosing a place
Initially, you will need to decide on a location for the future speaker system. Some cars have a special place allocated by the manufacturer for speakers. This can be considered a great success. Please note that it is best to install the front speakers on the outermost sections of the dashboard or place them in the door body. These two options are equally good, but the second one is the most popular, since the speakers can be fixed better and more reliably. Additionally, an acoustic podium can be built into the door.
We carefully measure the columns, in particular their diameter. We transfer the resulting dimensions to the doors with a sharp knife or jigsaw. To eliminate the possibility of errors, you can use patterns to transfer dimensions.
Relative to the second pair of speakers, a place in the rear of the car is selected. Most often, car owners choose a shelf in the trunk for this purpose, but you can also consider the option with doors. There is no way to do it without modifications. The standard shelf, which serves more of a decorative function, must be dismantled. Acoustics with podiums are installed in the vacant space. We strongly advise you to do this so that your passengers are not irritated by rattling plastic, which will react this way to loud music coming from the speakers.
Selection of connecting wires
Installing audio leads is different from normal electrical connections. The fact is that an alternating sound signal propagates through the conductors going to the speakers and speakers. It has a frequency ranging from 20 Hertz to 20 kilohertz. In principle, the frequency is low, but linear distortions, electromagnetic interference, and interference are possible. They degrade the sound quality. Therefore, along with observing the rules for choosing the cross-sectional area of the wire, the type of conductor is selected.
The cross-section is usually chosen from the following consideration: for every 10 watts of amplifier power - approximately 1 sq. mm of wire cross-sectional area. That is, with a radio power of 40 watts per channel, the cross-section of the conductor leading to the speaker must be at least 4 sq. mm.
You should think about choosing the type of speaker cable if the radio is capable of providing high-quality sound. On the Hi-end equipment market you can find many different speaker cables with unique parameters and prices.
The feasibility of installing such expensive conductors for a middle-class car radio is zero. The main thing when connecting is to ensure that the phases of the speakers and speakers are synchronized. Otherwise, the interior will be filled with cacophony instead of high-quality sound.
Coaxial or component
Choosing the right speakers is not that easy. There are currently two types of car speakers in use: coaxial and component. Coaxial speakers include several speakers at once, the so-called strips. There are two-, three- and even four-way speakers. Component speakers are designed to reproduce only a certain segment of frequencies: low, high or medium.
Let’s make a reservation right away that the price tag between coaxial and component speakers varies very, very much; component speakers belong to HI-FI and HI-END equipment and are expensive, and also require a professional amplifier (possibly more than one) and competent installation. Moreover, the location of such speakers in the car is of no small importance for the overall sound quality.
How to determine plus and minus on a speaker
In heavily worn, dubious speakers and loudspeakers, polarity information may be missing. In this case, the polarity of the speakers is determined using simple experiments.
Multimeter
The speaker impedance is low (from 2 to 4 ohms). It can be checked with a multimeter, but it rings equally in both directions. However, when connecting the red (positive) probe to the “+” speaker, the negative (black) probe to the “minus” speaker, the diffuser will move slightly forward (towards the listener). This movement is best determined by touch with your finger rather than visually.
Using a battery
When connecting the plus of the battery to the + of the speaker, the minus of the battery to the minus contact of the speaker, the cone will also move frontally, along which the speakers can be phased. Even if you phase all the speakers in reverse polarity, the sound quality will be the same as in direct polarity. The main thing is that all speakers work in the same phase. The battery should be connected for a short time (one or two seconds), otherwise you can “burn” the speaker.
Video - how to find out the polarity of the speaker:
Under no circumstances should you check the polarity of speakers and speakers using a car battery or charger. Even a short-term connection of the speaker to the battery can damage it.
Using a battery and a sheet of paper
Sometimes (for example, in a speaker) the speaker cone is covered with mesh or fabric. In this case, you can put a light sheet of paper on its surface. When voltage is applied, the sheet of paper will move forward or backward due to the sound pressure of the air. By the direction of movement one can judge the polarity.
We do electrical wiring
If there are no special holes in the doors through which the cable can be routed, you will need to make them yourself. This is where a drill with drill bits comes in handy. It must be remembered that the cable cannot be pulled without insulation through metal or plastic in the machine. Unless, of course, you want to short-circuit the system. To avoid similar problems in the future, you need to use spacer rings that are securely fixed on the inside of the structure.
To route the cable to a pair of rear speakers, you need to use the edges of the machine. The place under the rugs is not suitable, no matter how tempting it may be. The speaker cable can be added to the general wiring. To do this, you will need to remove the trim from the car and disassemble the dashboard. But it’s better to install everything well right away than to face problems and correct defects later.
The cable must be insulated using corrugation. When it is tensioned, you need to apply a marking that shows the relationship of the cable to the front and rear speakers. Being conscious now will make it easier for you to do the rest of your work in the future.
After the casing is disassembled, you can begin to pull the cable. When installing rear speakers, the cable for them must be routed along one side and secured with plastic clips.
In any case, some of the wires will run along the floor. They will need to be wrapped in durable corrugation, similar to that used when installing electrical cables. Do not forget about the markings, which must be carried out on all wires. This is especially true for the negative wire, which is often forgotten.
Number of speakers in the car
Should you put 2 speakers or 4 speakers in your car, or maybe 6? The purity of sound is determined by the quality of the speakers, not their quantity. Many car owners are limited to two mid-frequency component speakers in the front doors and tweeters on the pillars, while a subwoofer is placed in the back, which plays low frequencies. Thus, the entire spectrum of sound in the car is revealed.
Also popular is the option of installing 4 coaxial speakers, 2-3 way in the front doors, 3-4 way in the rear parcel shelf. The number of speakers that can be installed is limited only by the size of the car and the desire of its owner. At various car audio competitions you can see cars with dozens of speakers installed throughout the car. 2 speakers in the front doors may well be enough for you, it all depends on your musical preferences.
Connection
When replacing speakers or installing new ones, pay attention to the quality and condition of the wiring. Thin wires with twisted connections are not capable of transmitting sound efficiently and without loss. There is special wiring for transmitting the audio signal - it is a multi-core copper or silver shielded cable.
For clear and high-quality sound, installation of such wiring is necessary. Pulling new wires to replace the old ones is quite simple; tie a new cable to the end of the old wiring and carefully pull it through the other end of the wire. During the connection process, it is very important not to confuse the polarity; the wide terminal on the speaker is the positive contact.
When connecting speakers through an amplifier, the wiring from the radio is stretched to the location of the amplifier, and from it diverges to the speakers. The amplifier's power wires should not be pulled together with the audio wiring; it is advisable to space them away from each other, this way you can avoid interference from pickup. The amplifier heats up during operation; free space is required for its normal cooling.
It is important not to forget to connect the audio system through a fuse, the power of which is calculated using the formula “Output power / 12 volts = number of amps of the fuse.” For example, 4 speakers are installed, 40 W each /12 = 13.3, we install a 15A fuse.
Speaker placement
When installing high power rear channels, they must be installed correctly. Oval speakers are mounted on the rear parcel shelf so that the speaker axis is directed diagonally across the vehicle. The rear right column should be aimed at the driver, and the left column at the front passenger. Only after proper installation has been carried out can the speakers be connected to the audio system.
To ensure high-quality sound, the speakers cannot be covered - they need more space to work properly. As for the tweeters, they need to be installed on the windshield pillars. If you mount them away from low-frequency speakers, you can achieve a bright quad effect. The direction of the tweeters is done in a similar way - the front left one is directed towards the passenger, and the right one - towards the driver. The wiring must be secured securely.
Source
Choosing amplifiers for speakers
An external power amplifier for car speakers is a surefire way to provide yourself with high-quality sound. In order for the amplifier to really help fix the problem, you need to carry out proper installation, choose good wires and pay attention to details.
To start installing an amplifier, you must first select it, having first understood the existing types of these devices. An excellent option is a monoblock, which should work in conjunction with a subwoofer; in addition, the amplifier can consist of several channels. When choosing a subwoofer, it is worth considering that it has two channels at once.
An amplifier may have a certain class: AB and D. Units of the latter class work in conjunction with subwoofers. Please note that they get very hot and are difficult to cool. An excellent option for choosing this technique is an amplifier with a fan. As a last resort, you can supplement the main equipment with a computer cooler. The amplifier cannot be placed in a closed place, because it needs free space for heat dissipation and cooling.
Every car owner will be able to install speakers in his car. This undertaking cannot be called complicated, so you can save on contacting specialists and do all the work yourself.
What to do?
The following article outlines the basic principles of frequency control. This is the starting point for your journey into the wonderful world of equalizers, but of course it is not dogma. These recommendations will save you time searching for the frequencies you need to highlight the positive properties of various musical instruments.
The operating algorithm is as follows. To begin, turn on the “solo” mode on the track you are working with. Most sound engineers start building their mix around the drums and gradually work their way up through the frequency range (kick, snare, toms, hi-hat, overheads). Every instrument has a specific frequency band in which it sounds and resonates, so if you're miking a kick drum, start at the bottom.
Set up the optimal low end and go on the attack. Very often, after adjusting the sound of a kick drum, some parasitic overtones creep out, such as ringing or hum, even though your low end is excellent and the attack is great. Your next step is to cut out the parasites with a narrow-pass filter. Once you feel comfortable with the sound of the kick drum, mute the track and move on to the next instrument.
Take your time with equalization. The painstaking work will bear fruit, the sound will become more intelligible and clearer. Each instrument will take its place and shine in the mix. Here are some more useful tips:
Read more: Adjusting headlights with your own hands: subtleties and nuances
Practical installation operations, connecting amplifier, speakers
The standard location of the factory radio sets the geometric parameters of the new head unit, since it is quite difficult to independently upgrade the dashboard and dashboard. There is no room left to install the amplifier in the dashboard. Among tuning enthusiasts, the glove box (with the lid removed) or the additional shelf underneath it have become popular places to install reinforcement.
When using an additional shelf, it must be made of durable materials (steel, duralumin corners). Rigid mounting of the amplifier is not recommended; it is better to use rubber dampers. Additional lighting is made from an LED strip or a lamp embedded in the bottom of the glove compartment.
The location of the amplifier and equalizer on an additional shelf under the glove box allows you to minimize the length of the power cable. Additional devices are connected to the car battery using copper cables of increased cross-section. The cross section is calculated using a special table that takes into account the total power of the head unit and amplification equipment. It is necessary to install an additional fuse (no closer than 30 centimeters from the battery).
When choosing a front-facing system, installation of acoustics in the front doors comes to the fore. The simplest option involves using inexpensive, compact coaxial speakers. Such speakers fit into the standard places of the factory speakers. Before purchasing, you need to check the speaker connectors in the standard radio to avoid re-soldering the connections.
Simple operations for disassembling the door panel are available to novice tuners, but you need to disassemble the door carefully, remembering the sequence of operations. The most vulnerable point is the plastic clips, which are easy to break. There is no need to drill new technological holes for wiring when installing coaxial speakers. Inexpensive speakers, unfortunately, will not allow you to achieve hi-fi sound quality; for this you need to use component speakers.


