Among modern music players, Foobar2000 occupies, perhaps, one of the most significant places. Some users who have not fully understood its capabilities mistakenly claim that Foobar2000 is a good audio player with a clear interface. But to say that he is simply good is to say nothing. The fact is that it contains so many diverse and sometimes very unexpected software solutions that sometimes you just wonder how the developers managed to combine all of them in one package. In the material presented below, we will try to consider how Foobar2000 is configured for maximum sound quality using absolutely all the basic and hidden features, which, however, can be implemented exclusively by installing additional components, the most important of which will be presented below. But first things first.
Available modifications
Apparently, the developers of this player approached its creation very thoroughly. It is not surprising that on the official website, where this software is available for download completely free of charge, you can find the latest version of the player for Windows systems, Foobar2000 for Mac and mobile platforms.
To download, you just need to select the desired link and click on it. But here you need to pay attention to the fact that for the same Windows systems you can download the installation distribution directly via a link on the resource or get the application from the “Store”. To start downloading for Apple and mobile operating systems, you will need to follow the redirection link to the appropriate storage facilities. Unfortunately, Foobar2000 for Linux is not presented on the site, but the installation can be launched, say, on the Ubuntu platform with Wine, provided that the system is configured as a modification of Windows XP. But since Windows systems are considered the most common in our country, we will consider all the main aspects related to installing and configuring the player exclusively for them.
Main features, pros and cons of the musical combine
As for the possibilities, it is simply unrealistic to describe everything in one article. At the very least, we can confine ourselves to the fact that the most basic direction in using this music player is the reproduction of high-quality uncompressed lossless audio format, although the player itself accepts almost all known audio formats without the need to install additional codecs (they are needed only to expand the functionality of the player and obtaining the purest possible sound, which will be discussed a little later).
The undoubted advantages of the Foobar2000 music player, in addition to supporting the maximum number of audio formats, include flexibility of settings, the ability to connect additional software modules in the form of DSP effects and hardware devices for playback, support for integrating additional audio drivers, codecs and decoders, and much more. The only downsides include the lack of preset settings for built-in effects, as well as the complete absence of a Russian-language interface.
Installing the main program
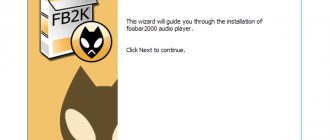
Finally, you have decided on the choice of platform and downloaded the installation distribution, which is currently available as version 1.4. For now, we are not considering the installation of additional components, but are taking into account only the installation of the main program. Based on the description of the system requirements presented on the official resource, the player can easily work even on outdated i686 processors and relatively outdated operating systems of the Windows family. In the seventh modification and higher, as usual, the installer is launched as an administrator (provided that the super administrator account is not disabled by the user himself), after which you need to agree that the application is trusted by the UAC control service, and then follow the prompts of the corresponding “Wizard” " There is nothing complicated here.
If desired, at one stage you can choose either a full or portable installation. If you select a full installation, you do not need to change the default components.
First launch and preliminary quick settings
So, the program is installed. Now is the time to get acquainted with the player interface and configure the sound in the Foobar2000 player based on the capabilities that are presented in the main software package. After launching the application, for example, through a shortcut created on the “Desktop”, the quick settings window will appear automatically.
Here you can select design colors, distribute and sort tracks into playlists, set additional information blocks, etc. All interface elements change automatically when you click on the corresponding options item. After this, you can open a track, several files or folders to add them to the player. Please note that even if the selected directory contains videos, their audio tracks can also be played. The main parameters can be viewed through the file menu by selecting the appropriate item (Preferences).
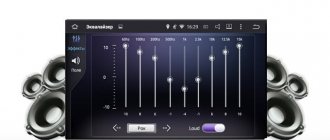
Initially, the “factory” setting of Foobar2000 is such that, in general, there is no need to change the set parameters. At best, you can experiment with the equalizer, which is located in the DSP effects section presented in the View menu.
Installing Additional ASIO Drivers
Now let's move on to installing some additional components, through which you can improve the sound quality. For playback, owners of computers and laptops with powerful sound cards (including external ones) can use the installation of special ASIO drivers, which are superior to the primary sound drivers of the system in all respects. Apparently, musicians working with virtual studios and sequencers do not need to explain what this is, since ASIO drivers are required to obtain the cleanest possible sound in many such programs. To configure Foobar2000 (in Windows 7, for example), such software is also provided. You can also download it on the official resource. To connect the downloaded driver, the foo_out_asio file must be placed in the Components directory in the main installation directory of the player, then run it and agree to adding the component.
After this, you need to activate the copied element by clicking the Apply and OK buttons. After restarting the player, you can select your preferred driver with its bit depth.
In the ASIO panel settings, it is best to set the buffer to the maximum value (2048 samples).
Note: when selecting playback via ASIO directly in the Output section, the buffer value can be increased to 30,000 ms.
Audio output via WASAPI
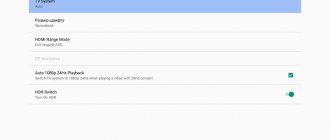
If under WASAPI the audio interface does not support a reference frequency machine, then the sampling frequency in Windows must match the sampling frequency of the music file, otherwise there will be an error during playback. Additionally, it should be taken into account that the playback frequency of the music file must be supported by the sound device. For example, if the maximum supported frequency of the DAC is 96 kHz, then a file with a sampling rate of 192 kHz will not be played directly. For such files it is necessary to use forced resampling.
The signal width must be selected in accordance with the driver bit depth, usually 24 bits. Some devices will not work if the wrong bit depth is selected, for example the Audiolab M-DAC only understands 24 bits. If there is support for both 16 and 24 bits, it is better to choose 24 bits.
For DACs without 24-bit support, or multibits, where the DAC chip physically supports only 16-bits, the output must be set to 16-bits with the dither activated when playing audio files with a bit depth higher than 16-bits.
Installing an additional streamer
Since ASIO drivers are not supported by some integrated sound cards (with the exception of sound cards with support for High Definition Audio), their owners can configure Foobar2000 for increased audio playback quality by installing a special component Kernel Streaming Support, which must also be downloaded from the developer’s official website in the form dynamic library. It, like the ASIO component, must be moved to the above directory, and then activated in the same way in the output settings in the program itself (Output), selecting for playback the component whose name begins with the prefix KS.
conclusions
The Sound eXchange resampler clearly outperforms other DSPs and is ideal for real-time resampling. SSRC, although slightly, is superior to SoX in quality, although it is slow (3 times slower). As you already understood, there is no need to use a third-party SSRC component - now the newer version is built into the player (if fully installed). And one more thing: there is also another component - SSRC X, with the ability to fine-tune, but at the highest settings it is still inferior to the dbPoweramp version.
Considering the processing speed, PPHS also gave acceptable results, but SRC9 and Speex, although they provide high quality, are too slow.
It is not recommended to use the resampler built into ASIO4ALL, because Although it will get rid of lower-quality software oversampling by drivers of some sound cards, it can still produce audible distortion.
PS In order to fully reveal the potential of the resampler, it is better to test it on material with a high bit depth - 24 bits and higher. When processing 16-bit material, the nonlinear distortions introduced by the processing (for these resamplers/their operating modes) are below the quantization noise. Testing the operation of resamplers with material of a higher quantization depth is irrelevant, because Most of the material in our music collections is 16-bit, and higher quality audio, such as DVD-Audio, usually has a sampling rate of 48 or 96 kHz and often does not require a resampler.
Setting up Foobar2000 to play SACD format
To use plug-ins and a digital-to-analog converter (DAC), the player can be configured to play the improved SACD format, which replaces regular CDs. First you need to connect the playback device and install the appropriate control software for it, downloaded from the equipment manufacturer's resource. Next, you will need to install an additional decoder for Super Audio CD, which, as is already clear, can be downloaded from the website of the developer of the software player Foobar2000
General sound quality matters of an audio playback
In this part, we discuss general audio playback issues without referring to certain software.
Playing DSF, DFF SACD ISO (DSD files) on PCM DAC may be performed in 2 ways:
- directly on an audio player (real-time conversion DSD to PCM), or
- PCM files, that pre-converted from DSD files offline.
If DSD files are played back at DSD DAC, offline or real-time resampling (at some playback software) may be applied.
When we use way #1, we no need to do something with files.
Way #2 may be preferable, if an offline conversion sound quality is better than a real-time one. Backup of original audio files are recommended for offline conversion. Because:
- further player and/or offline conversion software may use more advanced DSD to PCM conversion by sound quality or
- new equipment will be bought (read below).
Sample rate and bit depth of played back file may be a matter for a players software (except bit-perfect mode) and equipment (including DAC). Read details >
Sound quality may be compared via measurements or via hearing.
DOWNLOAD FREE [WINDOWS]
DOWNLOAD FREE [MAC]
Some SACD ISO files contain 2.0 and 5.1 channel variants of an album. If your audio system is stereo, you have options:
First option is preferable because we can suppose that “human mixed” stereo variant is better than “auto mixed” one.
But there is no guarantee, that it is so for any case.
Also the quality of an automatic downmix depends on implementation.
Downmix may be done inline, during playback.
Installation and configuration of the decoder
After unpacking the archive, all its contents must be placed in the player components folder, as was shown in the example of the streamer.
After this, you can activate the additional DSP processor and decoder. When you confirm the operations, the player will restart.
The installed components will then appear in the list.
Changing the program interface
As for changing the appearance of the player, setting up Foobar2000 provides some options for controlling the interface elements.
This feature must first be activated as shown in the image above, and then you can use the RMB menu on the selected element or information field to change its appearance, properties, etc.
Installing the ASIOProxy component
Another additional setting of Foobar2000 is related to the ASIOProxy component, which is designed for DSD playback. This utility comes complete with the decoder described above, and its actions are absolutely identical to everything described above.
Among other things, you can manually install a special ASIO transcoder by running the installer from the dsd_transcoder folder, which is located in the directory with the codec. After this, the specified item will appear in the list of drivers for playback.
Full customization of Foobar2000 due to the advanced capabilities of third-party skins
However, as practice shows, it is possible to reveal absolutely all the built-in hidden capabilities of the player only by installing additional themes (skins). So, when you select the popular Xchange Br3tt shell, you can easily display additional information about the artists (biography and photo), display song lyrics, etc.
After downloading the theme content, you should first place the contents of the fonts_xchange folder in your system fonts directory (WindowsFonts). The files from the components_exchange folder need to be copied or moved to the player components directory, and then the skins folder with the downloaded theme should be copied directly to the main player installation directory.
To select a skin, after restarting the program, a window will appear in which you need to check the ColumnsUI item and agree to the change in settings.
After this, in the display settings, you need to import preferences for the selected skin in the FCL importing and exporting window, specifying the path to the xchange directory configuration file in the copied skins folder, and then confirm the operation of adding all selected elements. And only after this the appearance of the player will be transformed beyond recognition, and the same hidden capabilities that were mentioned above will become available.
Grand total
As you can see, it’s impossible even in principle to call Foobar2000 a good audio player. This player is so unusual and interesting that it can easily outdo the most famous software players combined, both in terms of sound quality, and in the flexibility of settings, and in its unheard-of additional capabilities, which, so to speak, need to be “awakened.” True, the lack of a Russian-language interface and built-in effects, or even the lack of video support, is somewhat disappointing, but all this can be called trifles compared to the most powerful capabilities of the player, which are revealed through the installation of additional components. Well, it’s best to evaluate the sound quality yourself by making the settings described above. It, as is already clear, is beyond praise, since few modern players can boast of such high parameters, and even with the ability to work with new CD and audio formats, as well as in terms of connecting external hardware devices to the application. As for the Foobar2000 player for mobile devices, there are not as many settings in it as in the stationary version, but in any case, the sound quality is an order of magnitude higher than that of all those players that are offered for installation on mobile platforms.
Foobar2000 is a powerful player for PC with a simple, intuitive interface and a fairly flexible settings menu. Actually, it is the latter, as well as ease of use, that make this product so popular and in demand primarily among experienced users and connoisseurs of high-quality audio. For beginners, mastering it will also not be a difficult task, especially after reading this article, which will be devoted to setting up Foobar2000.
Speed test
3.1 Test methodology
As a test file, we will select the signal generated by the RightMark Audio Analyzer program with parameters of 16 bits 44.1 kHz. The test is performed using the Decoding Speed Test plugin for foobar2000 with the inclusion of one of the tested DSPs (resampler settings are similar to those shown in the screenshots above).
To minimize errors, we will increase the number of passes to ten, enable full buffering of the file in memory, and also increase the priority of the process.
3.2 Results
As a result of the test, we obtain a log, which is given below for each resampler.
PPHS
Total length: 11:47.906 Info Read time: 0:00.000 Opening time: 0:00.008 Decoding time: 0:22.330 31.701x realtime
SSRC
Total length: 11:47.906 Info Read time: 0:00.000 Opening time: 0:00.008 Decoding time: 0:30.914 22.899x realtime
dbPoweramp/SSRC
Total length: 10:44.414 Info Read time: 0:00.000 Opening time: 0:00.000 Decoding time: 0:18.893 34.107x realtime
SRC
Total length: 11:47.906 Info Read time: 0:00.000 Opening time: 0:00.008 Decoding time: 1:00.065 11.785x realtime
SoX (Best, Passband 99%, Allow aliasing)
Total length: 11:47.906 Info Read time: 0:00.000 Opening time: 0:00.008 Decoding time: 0:07.665 92.356x realtime
Speex
Total length: 11:47.906 Info Read time: 0:00.000 Opening time: 0:00.008 Decoding time: 1:50.764 6.391x realtime
3.3 About the results
The speed indicator is the ratio of the duration of the file to its processing time (for example, 10x realtime).
SoX turned out to be the fastest, which is explained by support for SSE3 instructions. The standard PPHS and SSRC resampler showed good speed. SRC9 and Speex in these modes turned out to be very slow and will put a heavy load on the processor during playback (especially on weak ones).
Setting up Fubar2000 player
Foobar2000 supports all current audio formats, but most often it is used for listening to Lossless (WAV, FLAC, ALAC), since its capabilities allow you to squeeze maximum quality out of these files, or rather, simply not cut it down, as most players do. Next, we will talk in detail about how to configure this audio player for high-quality and clean playback, but we will not forget about its external conversion.
Step 1: Installation
After downloading this audio player (use the link above), install it on your PC. This is no more difficult to do than with any other program - just follow the step-by-step instructions of the Installation Wizard.
Step 2: Pre-configuration
When you launch the player for the first time, you will see a Quick Appearance Setup window, where you can choose one of 9 standard design options. This is far from the most mandatory step, since the appearance settings can always be changed in the View → Layout → Quick Setup menu. However, by completing this step, you will make Foobar2000 not so primitive. Having decided on the basic parameters, click “OK” to close the window and move on.
Step 3: Playback Settings
If your computer has a high-quality audio card installed (or one connected to it) that supports ASIO technology, we recommend downloading a special driver for it and the player, which will ensure optimal quality of audio signal output through this module.
- After downloading this small file, place it in the “Components” folder located in the following path (if the default installation location of the program has not changed):
C:Program Files (x86)foobar200components
Run this file and confirm your intentions by agreeing to add components. Foobar2000 will be rebooted.
Now you need to activate the ASIO Support module in the player itself.
Open the menu File → Preferences → Playback → Output → ASIO and select the installed component there, then click “OK”.
Go to the step above (File → Preferences → Playback → Output) and in the Device section, select the ASIO device, click “Apply”, then “OK”.
Oddly enough, such a simple little thing can really transform the quality of sound reproduction in Foobar2000. At the same time, owners of integrated sound cards or devices that do not support ASIO should not despair either. The best solution in this case would be to play music bypassing the system mixer. This requires the Kernel Streaming Support software component.
With it you need to do the same as with the ASIO Support module: add it to the “Components” folder, launch it, confirm the installation and connect it in the player settings along the path File → Preferences → Playback → Output, finding the device with the KS prefix in the list.
Step 4: Setup for SACD Playback
Traditional CDs, which provide high-quality sound from audio recordings without compression or distortion, are no longer so popular. They are slowly but surely being replaced by the SACD . It is guaranteed to provide higher quality playback, giving hope that in today's digital world there is still a future for Hi-Fi audio. Using Foobar2000, a couple of third-party plugins and a digital-to-analog converter, you can turn your computer into a high-quality DSD audio playback system, the format in which SACD recordings are stored.
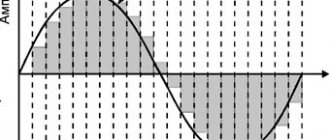
Before you begin setup and installation, it should be noted that playing DSD audio recordings on a computer is impossible without PCM decoding. Unfortunately, this does not have the best effect on sound quality. To eliminate this drawback, DoP (DSD over PCM) technology was developed, the main principle of which is the representation of a single-bit frame (frame) as a set of multi-bit blocks understandable to a PC. This allows you to avoid problems associated with the accuracy of PCM transcoding, as they say, on the fly. The image below shows how DoP works.
Note: This method of setting up Foobar2000 is only suitable for those users who have special equipment at their disposal - a DSD DAC , which will process the DSD stream (in our case this is a DoP stream) coming from the drive.
So, let's start setting up.
- Make sure that your DSD DAC is connected to the PC and the software necessary for its correct operation is installed on the system (this software can always be downloaded from the official website of the equipment manufacturer).
- Use the link below to download and install the software required to play SACDs. This is done in exactly the same way as with the ASIO Support module, which we placed in the root folder of the player and launched.
Download Super Audio CD Decoder Next, you need to connect the installed foo_input_sacd.fb2k-component directly in the Foobar2000 window in the same way as described above for ASIO Support. Find the installed module in the list of components, click on it and click “Apply”. The audio player will reboot, and when you restart you will need to confirm the changes.
Now you need to install another utility that comes in the archive with the Super Audio CD Decoder component - this is ASIOProxyInstall. Run the installation file in the archive and confirm your intentions for installation, then simply follow the step-by-step instructions.
The installed component also needs to be activated in the Foobar2000 settings. To do this, open File → Preferences → Playback → Output and in the “Device” item select the ASIO component that appears: foo_dsd_asio. Click "Apply" then "OK".
Go to the item below in the program settings: File → Preferences → Playback → Output -→ ASIO.
Double click on foo_dsd_asio to open its settings. Set the parameters as shown in the following image:
In the first tab (ASIO Driver) you need to select the device that you use to process the audio signal (your DSD DAC).
Your computer and Foobar2000 are now ready to play high-quality DSD audio.
Step 5: Changing the Background and Block Arrangement
Using standard Foobar2000 tools, you can customize not only its color scheme, but also the background, as well as the display of blocks. For such purposes, the program provides three schemes, each of which is based on different components.
Default user Interface is what is built into the player shell. In addition to this display scheme, there are two more: PanelsUI and ColumnsUI. However, before you move on to changing these parameters, you need to decide how many layouts (windows) you actually need in the main Foobar2000 window. Let's figure out together what you exactly want to see and always keep in front of you - this is obviously a window with an album/artist, an album cover, perhaps a playlist, and the rest is optional. You can select the most suitable number of schemes in the player settings: View → Layout → Quick Setup.
The next thing we need to do is activate the editing mode: View → Layout → Enable Layout Editing. A small window will appear with a hint:
By right-clicking on any of the panels, you will see a special menu with which you can edit blocks. This will help further customize the appearance of Foobar2000.
Additionally: Installing third-party skins
To begin with, it is worth noting that there are no skins or themes as such for Foobar2000. Everything that is distributed under this designation is ready-made configurations containing sets of plugins and configuration files. These components are imported into the player.
If you have the latest version of the program, we strongly recommend using themes based on ColumnsUI, as this guarantees the best compatibility between the components. A large selection of design themes is presented on the official blog of the player developers.
Unfortunately, there is no single mechanism for installing “skins”, like any other plugins. First of all, it all depends on the components included in a particular supplement. We will look at this process using the example of one of the most popular themes for Foobar2000 - Br3tt .
- First, unzip the contents of the archive with fonts (third, last link above) and place it at the following address
The contents of the archive with components (second link above) must be added to the appropriate “Components” folder, in the directory with Foobar2000 installed.
Note: You need to copy the files themselves, not the archive or the folder in which they are located.
Having done this, launch Foobar2000 - a small dialog box will appear in front of you in which you need to select “ColumnsUI” and confirm this by clicking “OK”.
Next, you need to import the configuration file into the player. To do this, go to the menu File → Preferences → Display → ColumnsUI, select FCL importing and exporting and click “Import”.
Specify the path to the contents of the "xchange" folder. The default location is the following:
C:Program Files (x86)foobar2000foobar2000skinsxchange)
Perform the import by opening the appropriate configuration file in the program.
This will not only change the appearance, but also expand the functionality of Foobar2000.
For example, using this shell you can download song lyrics from the Internet, get biography and photos of performers. The approach to placing blocks in the program window has also changed noticeably, but the main thing is that now you can independently choose the size and location of certain elements, hide unnecessary ones, and add necessary ones. Some changes can be made directly in the program window, some in the settings, which, by the way, have now become noticeably wider.
Software and PC configuration
The following software was used in the test:
Microsoft Windows 7 Ultimate SP1 x64
Core (2011-06-05 09:16:20 UTC) foobar2000 core 1.1.7
foo_benchmark.dll (2011-08-23 09:44:06 UTC) Decoding Speed Test 1.1
foo_converter.dll (2011-06-05 09:13:50 UTC) Converter 1.5
foo_dsp_resampler.dll (2011-08-23 09:42:57 UTC) SoX Resampler 0.7.0
foo_dsp_spxresample.dll (2011-08-23 09:42:25 UTC) Speex Resampler 0.1
foo_dsp_srcresample.dll (2011-08-23 09:42:40 UTC) Secret Rabbit Code Resampler 0.1
foo_dsp_ssrc.dll (2011-08-23 09:43:14 UTC) Resampler DSP (SSRC) 0.57
foo_dsp_std.dll (2011-06-05 09:14:22 UTC) Standard DSP Array 1.0
foo_input_std.dll (2011-06-05 09:13:58 UTC) Standard Input Array 1.0
foo_ui_std.dll (2011-06-05 09:14:24 UTC) Default User Interface 0.9.5
ASIO4ALL 2.10
18/11/2015
: foobar2000 1.3.9 with dbPoweramp/SSRC Resampler
RightMark Audio Analyzer 6.2.3
Adobe Audition 2.0
Sony Sound Forge 10.0c
Computer configuration:
ASUS P7H55-V Intel Core i3 530, 2.93 GHz; (Instruction sets x86, x86-64, MMX, SSE, SSE2, SSE3, SSSE3, SSE4.1, SSE4.2) 2x2Gb DDR3 1333 MHz