The article is devoted to replacing the suspension on the QUADRAL Allsonic SM 90 II bass speaker, but with minimal changes, a similar technique can be used to replace the suspension of other compression speakers. Technical characteristics of the speaker
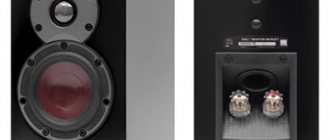
Model: Allsonic SM 90 II Number of bands: 3 Rated power: 60 W Maximum power: 90 W Frequency band: 44–22000 Hz Impedance: 4/8 Ohm Dimensions: 20.0 × 31.0 × 19.0 cm Housing: wood, closed type Weight of one speaker: 4.2 kg Manufacture: Germany Relatively long ago, in the year 2001, I saw in a small music studio small bookshelf passive 3-way speakers QUADRAL Allsonic SM 90 II. They were used as studio monitors. Upon closer examination, the speakers turned out to be systems not only of small volume, but also of a closed type. They sounded like a studio: neutral, clean and solid. Without any additional coloration of the sound, which, in general, was what was required of them. As I understand it, at that time, they were one of the best speakers in their price class.
↑ So what are we going to do now?
In the distant past, I happened to successfully rewind a burnt-out 10GD-36, but at that moment I did not yet know how to repair the gimbal.
Apparently, my speakers are of a respectable age, about 20-25 years old, so finding original replacement speakers seemed very dubious to me. And I went to the Internet, and Google, as you know, knows everything. First, I came across a suggestion to glue the suspension on both sides with rubber glue. The idea is certainly cheap, but Alexander Sergeevich warned us all: “Don’t chase after cheapness!” On another site, the author suggests making a mold from paraffin, removing the gypsum matrix and punch from it, and finally casting a suspension from car glass glue. It’s also somehow labor-intensive and the result is in question.
The following link suggested soaking a rubber ring in solvent (cut from a suitable sheet of rubber), stretching it onto a suitable blank, securing the edge and drying it in the hope that you will get the perfect hanger shape. Well, yes, theorists rule...
SPEAKER REPAIR
Recently they brought in a dynamic head for repairs whose suspension was worn out. I decided to share a simple technology for repairing speakers with you, dear radio amateurs. So, everything is very simple, but for repairs we need to have on hand transparent tape and instant glue (rubber, waterproof), if such glue is not available, we can get by with a universal waterproof one. We take tape and cover the holes and torn areas of the suspension with it.After everything is pasted over, make sure that there are no small holes left (so that the poured glue does not leak). To give it a round shape, the tape should be slightly warmed (you can use a lighter).
Next, we begin the restoration of the speaker suspension. Take instant glue and spread it on the tape, try to do it as neatly and smoothly as possible. Make sure the glue sets evenly. Then you need to leave the head to dry.
The glue dries within 5-7 hours, and then turns into rubber. While the glue is drying, the head must be placed on a flat surface so that the glue dries evenly over the entire length of the suspension.
After a few hours, the dynamic head is ready for use. There is almost no difference between the factory and homemade suspension, the sound is clear and high-quality, by the way, the client really liked it, I hope you like it too.
In general, for many years, almost the same technology was used to replace the suspension of dynamic heads of radio equipment S-30. These heads have a fairly high-quality sound, they feel great at low frequencies (though the midrange is lame), in a word, a good head for a powerful subwoofer, but there is one drawback - the foam suspension. On deep bass at full volume it will last no more than 20 minutes. I used dozens of ways to replace the suspension of such a head, but none of them were satisfactory - sometimes there was wheezing, then the speaker became very hard, then the alignment was disturbed and the varnish was peeled off the coil, but then I just decided to make a homemade suspension for such a head using tape and glue. The result was amazing! The head became the basis for a powerful car subwoofer and has been used in a friend’s car for 3 years. The amplifier is powerful, built on the basis of the famous TDA7294 whose peak power can reach up to 110 watts! And imagine - the head can easily withstand this power, and the suspension does not break.
And here’s another secret to a homemade suspension: don’t skimp on the glue! The more you fill it, the better, and if you have dynamic heads at home with a worn-out suspension (this defect is very common), then don’t rush to throw them away, they will still serve you faithfully for several years! It is advisable to use super glue to pre-fix the tape. The dynamics parameters will not be affected by such an alteration, and the response to low frequencies will even be better than when the speaker was released from the factory - AKA.
Speaker Forum
Forum for discussing the material SPEAKER REPAIR
IN WHAT DIRECTION DOES THE CURRENT FLOW
In what direction does the current flow - from plus to minus or vice versa? An interesting theory about the essence of electricity.
We are converting a regular tractor toy into a radio-controlled one - photos of the process and the resulting result.
Homemade functional signal generator 0.1 Hz - 100 kHz on the ICL8038 chip.WIRELESS POWER CAPABILITIES
About the use of wireless power technology for various devices.
↑ Solution
Then it suddenly came out that, although my speakers are of vaunted German quality, the problem with the suspension is quite standard. And the wise Chinese “peppers” are already “baking” pendants with might and main, and their price on eBay is quite affordable - approx. 9 bucks per pair including shipping.
True, there is also a German offer, but for 40 euros (with a high probability that the product is from the same store).
Here, of course, delivery time plays a role - from China the wait is 3-5 weeks, and the Germans will deliver in 3 days. Well, the dog and him, I decided, I’ll buy it in China and wait a little. But the problems with the choice did not end there! The manufacturer offered a choice of material: sponge or rubber. Gnawing through a herd of sites with information about suspensions and their effect on sound, it was with great difficulty that I made a strong-willed decision in favor of rubber, since my sponge had already crumbled once. And the main argument was that on other Quadrals the bass speakers of the same 6 inches are rubber-mounted.
DIY subwoofer speaker diffuser repair
Subwoofers use very powerful loudspeakers. They provide 600-800 watts or more at peak, so their acoustic reflectors are made of dense and rigid material. How to repair a subwoofer speaker cone. The quality of work depends on the extent of the damage and the availability of everything necessary for repair. First you need to remove the speaker from the housing and clean the membrane from dust. The material for the patch is any household thin cardboard, including a candy box. Using scissors, a patch is cut to cover the damage by about one centimeter in each direction. If the curvature of the surface does not allow this, several smaller patches are used, which are glued overlapping. You need to coat the gluing area on the back side and the patch with Moment glue. The cardboard should be well saturated with glue. After 20-25 seconds, the patch should be pressed firmly onto the damaged area. To maintain pressure, a roller of elastic material is inserted between the patch and the basket.
↑ What's inside the Quadrals?
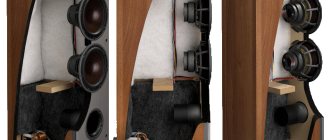
While my order was on its way, I decided to take a closer look at the design of the speaker, from the inside. What can I say, the cases are generally well made, glued chipboard, inside there is a muffling yellow mineral wool.
The filters seem to be assembled from a decent base, but they are glued with hot-melt adhesive, but it still holds without question.
True, the screws that secure the speakers are driven crookedly. And the print on the speaker logically explains this “curvature”: Quadral, made in Singapore.
↑ Games with impedance
But the most interesting thing was the impedance. Look at the triple terminal block.
According to the manufacturer's plate, the speakers can be used at 4 or 8 Ohms of this same impedance. How did the wise German engineers decide here? Everything is solved “elegantly” and very simply: whoever needs 8 Ohms connects 4 Ohm speakers in series with an additional 4 Ohm resistor.
Dashingly, I would say - congenially, it becomes clear why the sound at 8 Ohms is somehow modest. This means we use exclusively 4 Ohms.
Restoring the speaker cone
Some high power loudspeakers have acoustic reflectors molded from plastic. Damage to such a product can be repaired using a special adhesive. Polypropylene or other plastic materials are often used as membrane material. Since the power is very high, the most important thing when doing self-repair is the strength of the gluing. For this reason, “Moment” type glue is not suitable for the job. To restore loudspeakers with plastic reflectors, you need to use 3MDP 8005 adhesive. This is an acrylic two-component composition that provides the highest adhesive strength. The material for the patch is selected depending on the material of the diffuser. The gluing area should be thoroughly degreased.
↑ Repair of suspension
The Chinese sellers worked quickly and the pendants arrived within 3 weeks.
When examining the product I received, I was very pleased - it was made neatly and cleanly, all dimensions were normal, the rubber was soft, the thickness of the suspension was uniform throughout. The only thing I had to trim a little was the outer edge in 4 places where the holes for the speaker mounting screws are located in the basket. The replacement itself was more or less simple. To begin with, I took the speaker out of the speaker, carefully and without fanaticism tore off the plastic fastening ring, unsticked the former suspension and removed its remains along with the glue from the diffuser with a small screwdriver. I cleaned off a small piece 3-4 cm long, then poured a mini drop of alcohol on this area from a small insulin syringe and finally cleaned the area with a cotton swab. Why a syringe, and an insulin one at that? And in order to accurately dose the solvent, it has a thin needle, and the alcohol does not flow onto the clean area of the diffuser. By the way, I recommend it! I have never worked with solvent so sparingly. In my case, the suitable solvents were white spirit, gasoline for lighters, alcohol, etc. I took honey. alcohol, since it was available. For support, I placed my index finger under the diffuser on the back side, although this is a matter of taste and options are possible here.
The basket was cleaned using the same algorithm, but without the finger from below. And in the end, after the cotton swabs, cotton rounds for cleaning the face, borrowed free of charge from my wife, went into battle.
Then I glued the suspension to the diffuser with 88-gauge glue. I carefully applied glue to both surfaces - the diffuser and the suspension - laid the suspension evenly on top of the diffuser and immediately pressed the adhesive sides of the “sandwich”. I pressed it from below with my finger (there is a dry diffuser there), and from above with the handle of a screwdriver, although you can press with your finger.
When gluing, the centering of the suspension relative to the diffuser is extremely important.
The matter is greatly simplified by the fact that our centering washer is original and is already in place as it should have been from the factory. That is, the task is simple: lay it down as it lies, without stress or distortion. We lay it flat, don’t pull it - I was looking at the gap in the suspension relative to the basket. It must be said that the suspension went down willingly and effortlessly, and it happened much faster than the description of this action lasts.
And for a snack, I glued the pendant to the basket. Here the sequence has been slightly changed. Glue is applied around the perimeter of the hanger bent with a finger and it dries slightly. And then the glue is applied to a small sector of the basket and the “sandwich” is pressed gently and without tension. Then the next sector and so on.
It seemed appropriate to me to complete the gluing process (diffuser-basket) on a speaker inserted into the standard window of the speaker lying “on its back.” About a day later, when the glue had completely polymerized according to the instructions, I turned on the sound and checked the sound at low volume.
Subsequent final assembly of the speaker and testing of operation showed the full functionality of the newly repaired speaker.
But as soon as I turned up the volume, a new problem immediately appeared: the second speaker wheezed “in the same place, at the same hour,” strictly according to schedule, as it was supposed to happen.
I had to repeat all the points with the right bass, and now, after a month of daily use, I can say: the flight is normal, the sound is good, there are no complaints about the suspensions.
Thank you for your attention!
Replacing the suspension on an acoustic speaker
An acoustic speaker is both a complex and simple device. So it combines a certain genius and simplicity characteristic of it, because in fact, when the diffuser vibrates, sound mechanical waves (low frequency) are emitted, which our ear hears. However, such simplicity requires precision, because any axial displacement relative to the driving electromagnetic force in the coil, be it a displacement of the cast basket or diffuser or suspension, will lead to additional resistance and, even worse, distortion of the reproduced sound waves. That is why a speaker requires certain technologies during its production, and, accordingly, during its repair. It is about repairing the speaker, or rather about replacing its suspension, that we will talk about in our article.
An example of replacing the suspension will be given on the 10 GD-36 wideband speaker. Initially, the suspension is made of foam rubber, the material is very suitable for suspension, as it is light and elastic, but with one drawback - it is short-lived. It is the fate of decay, to which everything on our planet is subject, that befell the suspension, which will be replaced with a rubber one. Fortunately, speaker hangers these days can be bought in online stores, and in a variety of sizes. It is the most suitable suspension that should be selected for the speaker. By the most suitable suspension we mean the condition when the surfaces for gluing extend onto the diffuser and onto the speaker basket. Now let's get straight to the process of replacing the gimbal. This is how the speakers were before the renovation. The pendants turned into decay, what happens and what we talked about...
You must first tear off the rubber ring around the perimeter. Then remove what is left of the old suspension.
Now the most dreary part of the work is to wash the remnants of the hanger and old glue from the basket. We use acetone. Lots of acetone and cotton swabs. It should turn out something like this.
We turn on the hood, expel the fumes and wash the diffuser itself. You need to be careful here so as not to crush the diffuser.
Then peel off the mouthpiece. To do this, wet a soft brush and wet the mouthpiece with acetone. We wait 2-3 and carefully lift it. In no case do we wet the outer perimeter - the voice coil will come off, and this one already requires assembling the speaker from A to Z. So let’s say there will be more problems, especially with centering the coil and gluing it back.
Between the magnet core and the coil we insert something that will center the diffuser during operation. Some people use photographic film, but for us it’s paper.
It is also important not to move the diffuser up or down if possible. In this case, the diffuser should not be glued tightly. Otherwise, its rigidity will increase, the resonant frequency will shift, and sensitivity will decrease. In general, we are trying to restore everything as it was... We cut the new suspension according to the risks on it, everything is clear there.
We coat the new suspension with glue. It’s okay that it’s warped - it dries out and straightens out.
Apply glue to the basket and diffuser. It can be seen that the suspension has already straightened.
Assembling the speaker. There is one nuance here. The suspension sticks immediately and tightly and is difficult to remove. Therefore, you must first carefully “throw” it onto the basket so that the gaps around the perimeter are uniform. Then grab the diffuser along the opposite edges, without allowing tension and without moving the diffuser. Then gradually press along the perimeter. Once glued, we place the mouthpiece on a drop of glue. The need to glue the elastic around the perimeter depends on how the speaker is installed.
That's all, the speaker has received a new suspension and will now live a new and full life, delighting you with its sound.

