When car owners are not satisfied with the sound of the car radio, additional equipment is installed in the car. These may be the following nodes:
- Amplifier
- Crossovers
- Acustic systems
- Subwoofer
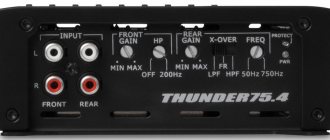
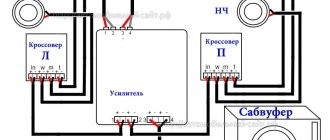
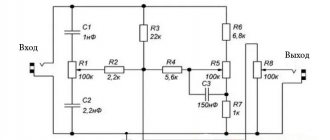
This set of technical means allows you not only to increase the sound volume, but also to significantly improve the quality of music playback. The question of how to connect a car amplifier is not as simple as it seems. The simplest version uses a ULF and two front speakers, providing high-quality stereophonic sound. A more complex option involves connecting two front and two rear speaker systems. The maximum configuration is implemented according to the 4+1 scheme and includes four speakers and a subwoofer. In addition, the automotive system provides crossovers, which are adjustable high- and low-pass filters. They also perform the function of frequency division of the signal into separate speakers for each channel.
Often, various problems arise when connecting on-board electronics. Typically, difficulties arise when supplying power to the output device and connecting speaker systems to it. You can connect a car amplifier yourself, but to do this you need to have basic skills in electrical engineering and working with tools. Most often, a crackling sound from the operation of the ignition system is heard in the speakers, and the sound in the speakers is distorted with limited high frequencies. There may be several reasons that cause such shortcomings. Often the sound quality is affected by the poor quality of the amplifier and speakers when technical equipment is purchased secondhand, but it happens that branded equipment sounds very bad. Correctly connecting the amplifier to the car will get rid of all problems.
How to properly connect an amplifier in a car
There are three main problems related to the layout of automotive audio equipment. This is the wrong choice of connecting wires, their illiterate laying and poor-quality grounding, or rather the connection of equipment to the car body. Connecting the amplifier to the car must be done with wires of the appropriate cross-section. Any metal wire has a certain resistance. The thinner the wire, the higher its resistance, so you cannot install it with SHVVP wire, which is widely used in everyday life. Many companies produce copper-plated wire containing steel conductors coated with a thin layer of sputtered copper. It is unacceptable to use such wires to connect a car amplifier. This will not only greatly reduce the sound quality, but may also cause a fire. To work, you need to purchase special cables designed for such installation.
To understand how to connect an audio amplifier in a car
, you need to calculate the current in the circuit.
To do this, you need to divide the amplifier power by the supply voltage. Since the device is powered by a car battery, the total power of the channels must be divided by 12 volts. A two-channel device with a power of 60 watts per channel has a total power of 120 watts. It is customary to increase the power by 1.5-2 times due to uneven consumption, so in this case a power of 240 watts is considered. 240 watts/12 volts = 20 amps. Based on this value, the wire cross-section is selected. The power of a four-channel system with a subwoofer reaches 800 watts or more, so all connecting cables must have the appropriate cross-section. The thin wire will heat up, which may cause a fire. When choosing a cable, it should be chosen with a reserve in terms of power and length. It is not recommended to wire the wires under tension. To reduce distortion, you often have to look for the correct position of the wires relative to each other. The connection diagram for speakers through an amplifier in a car does not allow parallel laying of power cables and wires going to the speakers. This leads to interference in acoustic systems.
Settings
Before setting up the amplifier, you need to consider what devices will be used in the system.
If you do not use a subwoofer for acoustics (only 4 speakers), this scheme is considered the simplest. In this case, experts recommend setting the following parameters:
- Bass Boost (bass enhancement filter) - set to 0;
- Level (amplifier power indicator) - 0 (8V);
- Crossover Selector (responsible for switching the LP-AP-HP filter) - set its position to FLAT.
After such manipulations, you should adjust the radio. This can be done automatically by selecting the desired equalizer. It is possible to manually adjust the powerful and soft sound of the car radio. After turning on the song, the volume is set to 90%. At this time, the Level control on the amplifier is slowly scrolled and the position with the loudest and clearest sound is found. Bass Boost can be added.
If you have a subwoofer connected through an amplifier, a slightly different approach will be required. The sub is connected to Rear, and the speakers to Front. In this case, the indicators may be the following:
- Bass Boost - at level 0;
- Level - 0 (8V);
- Front - the Crossover Selector control should be in the HP position, while FI PASS can be left in the range of 50-80 Hz;
- Rear - the Crossover Selector indicator in this case is on LP, and LOW PASS is set to the level of 60-100 Hz.
Setting up the amplifier is done in the same way. It is important to adjust the sensitivity of the front and rear speakers.
Additional manipulations may be required if the car enthusiast decides to install a microphone for a Chinese radio or other equipment.
Connect the amplifier to the car
To know how to properly connect a car audio amplifier in a car, you need to understand the markings of connecting cables. In automotive technical systems, it is customary to use the American wire cross-section standard - AWG. There, the wire cross-section varies from the thinnest “8Ga” - with a diameter of 3.2 mm to “0Ga” with a diameter of 8.2 mm. There are even thinner wires that are marked with numbers 10, 12 or 16, but they are not used in powerful audio devices. When choosing a wire cross-section, the length of the working segment is also taken into account. Since audio equipment is often placed in the trunk of a car, a wire length of about 5 meters is considered. With a current of 20 amperes and a working length of 5 meters, you need to choose a wire with a cross-section of “4Ga”, which corresponds to a diameter of 5.18 mm. The cross-section of such a cable is 21.15 mm2.
It is very important when connecting power to a powerful output stage to use a fuse, which should be installed on the positive wire at a distance of no more than 30 cm from the battery terminal.
There are several designs of fuses. The cable is tightened with screws on both sides, and the housing itself is easy to attach next to the terminal. Automatic fuses, which must turn off when a certain current is exceeded, are not popular among car enthusiasts, as there are cases of them sticking, which leads to serious damage.
Rear View Camera
There is no need to talk about the usefulness of this equipment. The rear view camera is an invaluable assistant for novice car enthusiasts who, as a rule, experience difficulties when performing parking actions.
Depending on the type (location and method) of installation, there are several types of rear view cameras:
- Standard installed cameras. In places strictly specified by the car manufacturer;
- Universal devices. The location is chosen by the driver himself;
- Wired;
- Wireless rear view cameras.
As an example, we use a universal wired camera and a Chinese 2 din radio.
Select the installation location. License plate frame, luggage compartment handle, etc. It is not recommended to place a camera inside the rear window.
We lay the cable connecting the camera and the GO. A five-meter long wire is included with the device.
Connect the camera to power. Any of the reversing lights acts as a source. Be sure to use a fuse in this circuit.
We connect the camera to the player via a tulip (connector). A separate exit is provided for this. If it is absent, the device is connected via the “video” input.
We adjust the picture and camera location.
Multifunctional steering wheel
This name means connecting a Chinese radio to the steering wheel of a car. That is, it is possible to control the standard player directly from the steering wheel.
To make this connection you will need:
- Steering wheel with built-in control buttons or a niche for their placement;
- Car radio;
- Two ISO adapters;
- Adapter devices for the antenna and combining the steering wheel buttons with the radio.
Let’s say right away that the process of connecting a multimedia system and adapting it with a multifunction steering wheel is not a complicated process, but it is painstaking and requires certain skills. This is explained by the fact that very often the pinouts of such connections between the car radio and the steering wheel do not match, although they are specified in the instructions. And therefore, we advise, if possible, to contact a specialized center that deals with this type of installation.
Connecting speakers to an amplifier in a car
Connecting a car amplifier to speakers is not difficult if there are only two channels. On the back wall of the device there are screw terminals for connecting speakers. They indicate the polarity of the connection. Signs “+” and “–” are also available on speaker systems. It is enough to use the correct connecting cables and not make the wrong polarity when connecting. The REM (Remout Control) wire or remote control is designed to turn on the amplifier from the car radio. When it is turned on, a control voltage of +12 V is supplied to the wire and the device turns on. The connection diagram of a car amplifier to the radio implies automatic control of the power supply of the power unit, but some car enthusiasts install a toggle switch and supply the switching voltage through it.
Principle of operation
To understand the operation of the device, you do not need to have the appropriate education and delve into the circuit diagram of the amplifier. It’s just necessary to take a closer look at how the signal appears that goes from the car radio directly to the amplifier itself. It is known that the signal that arrives at this device has a low amplitude. After it passes through the amplifier, it produces the appropriate level that is necessary to reproduce sound. However, this is only one side of this issue. More precisely, the amplifier generates a new sample signal. Moreover, this signal is a copy of the one that arrives at its input from the car radio.
Thus, the signal in its normal form is received from the car radio to the input. Next, it increases to an indicator that is capable of ensuring the functioning of the speakers on the device in their normal form. Therefore, the signals at the input of the amplifier and at its output differ only in power level.
It should also be noted that regardless of which amplifier is used to carry out this process, the design of such a system is based on three basic elements.
- First of all, this is an input type circuit.
- Next comes the unit that supplies power to the system.
- A special cascade is installed at the output.
How to connect a sound amplifier in a car
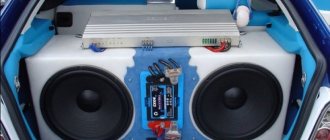
Organizing four channels, crossovers and a subwoofer poses some difficulties. The abundance of connecting wires imposes certain installation requirements. To connect the amplifier to the speakers in the car, use standard sets of connecting cables, which can be purchased in specialized stores. Connecting four speaker systems is carried out according to a similar principle, since all the necessary markings are on the device body. The main thing is not to confuse the polarity of connecting the speakers. Many car enthusiasts equip the interior of their car with a subwoofer. This is a powerful speaker system that allows you to reproduce low frequencies in the range from 20 to 120 Hz. Most models allow the connection of a subwoofer. This output of the final stage is organized using a bridge circuit.
Proper connection of the amplifier in the car guarantees high quality sound reproduction without interference or distortion. When connecting car audio equipment, it is very important to select a grounding point.
All components of audio equipment must be grounded at one point in the body. Otherwise, ground loops may occur, causing severe noise. The correct option is to ground the audio equipment to the negative terminal of the battery or to the point where it connects to the car body. For grounding we use stranded copper wires. The grounding point “under the bolt” must be thoroughly cleaned of oxides and degreased. To connect wires, it is best to use gold-plated terminals and connectors. Such connection of the amplifier in the car will provide
the most reliable contact, which will not depend on vibration and shaking. The housings of all elements included in the sound reproduction system must be reliably isolated from the car body. The wires leading to the speaker systems should not be parallel to the power cables.
2 din connection via ISO connector
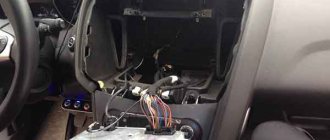
The connection diagram for a Chinese 2 din radio is described in detail in the operating instructions supplied with it from the manufacturer. To facilitate installation work, on the back panel of the player, as a rule, there is the necessary marking of all components and connections. Mostly, the difficulties for car enthusiasts who are faced with the installation of a standard or non-standard radio for the first time are caused by the correct connection of the car's electrical wiring to the receiver.
All work on connecting the car radio is carried out through the ISO connector, which consists of two plug boxes - A and B (each contains eight contact connections) or one combined box, where A is the plug for the power connections of the radio, B is responsible for the car acoustics.
The standard wire connection diagram (pinout) is as follows.
- Connector A. 1, 2 and 3 pins are not used.
- 4 - yellow power cable going to the car battery;
- 5 - blue wire, amplifiers and external antenna;
- 6 — orange cable, backlight;
- 7 - red - ignition;
- 6 - black. Weight.
- Block B. Everything here is also quite simple.
- Contacts 1 and 2 - purple, purple-black wire. Plus and minus of the right rear speaker (speakers);
- 3, 4. Gray. Gray-black. Plus or minus the front right column;
- 5, 6. White. White-black wire. Front left plus or minus;
- 7 and 8. Green and green-black wire. Rear left positive and negative contact.
When connecting a car radio, it is very important not to mix up the contact groups of wires. Since the sound quality of your equipment depends on them. And often the safety of the equipment itself.
Connection diagram for an amplifier in a car
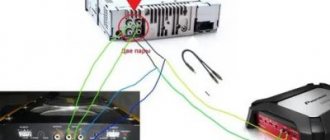
Connecting car speakers to an amplifier is carried out with copper stranded wires, which can be laid in the lower part of the cabin or on top under the decorative upholstery. The top connection is considered more reliable. The subwoofer is usually placed in the trunk of a car, so it should be securely mounted. The amplifier output is implemented in the form of screw terminals or via RCA connectors (Tulip). In the second case, it is better to purchase a ready-made set of connecting cables.
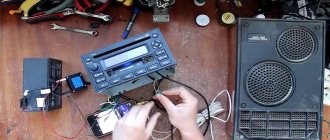
Connecting a car amplifier to a radio is not difficult , since its outputs and inputs of the amplifier are equipped with RCA connectors. The outputs of the left and right channels of the car radio are connected to similar input connectors of the terminal device. All screw connections should be tightened to maximum torque to ensure reliable contact when driving on any road. If you do everything correctly, according to the descriptions and drawings, then there will be no problems connecting a sound amplifier in the car.
Watch the video
When you decide to connect any electronics to your car, you should understand that this is a rather serious procedure that involves interfering with the car's wiring.
If you do not fully understand the car’s electronics, then it is better to seek help from specialists, since connecting an amplifier is not so much a complicated procedure as it requires specific knowledge. However, if you are determined, let's figure out how to connect a 4-channel amplifier to a 2-channel radio.
