Installation
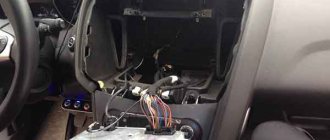
First of all, you need to understand how to properly install a four-channel amplifier without thereby spoiling the interior of the car and the amplifier itself. The amplifier should be easy to access to adjust the sound of the speakers. Let's look at the sedan body model and where the amplifier can be installed.
· Trunk
Rear seat back
· Space under the rear, front seat
Trunk lid
· Subwoofer housing
The trunk is one of the most convenient places, since the amplifier needs cooling for normal operation, it does not like confined spaces! You can install it on the right, on the left, to the bottom of the trunk through the podium, making sure that nothing damages our amplifier. We securely fasten the amplifier inside, the consequences can be sad, so do not neglect this important fact.
The rear seat back is also not a bad option. Well ventilated place, easy access, does not affect the interior. The downside is that if the back is frequently bent, the wires become broken and damaged over time.
The space under the front seat is not the best option. Cooling is poor, not aesthetically pleasing from an interior perspective and poor protection from external threats. There is little space under the rear seat, which will cause the amplifier to overheat.
The trunk lid is a bad option; you can quickly break the wires.
There is strong vibration on the subwoofer housing, the contacts will constantly weaken. Vibration also has a detrimental effect on the amplifier itself.
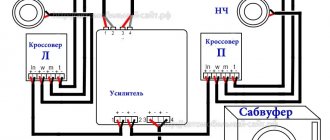
Bridged connection of a 4-channel amplifier to speakers in a car
External amplifiers are designed to increase the volume and quality of sound transmitted by the radio. A bridged 4-channel amplifier is designed to connect external speakers and a subwoofer for maximum sound power. The design of the amplifier allows you to configure the harmonious parameters of the combined sound of standard loudspeakers and a subwoofer.
Connection diagram
The connection diagram for a 4-channel amplifier requires reliable power supply, which is supplied from the positive terminal of the battery. The cables are connected through a fuse insert; the rating of the protective element is 5-10% higher than the ratings of the factory fuses in the amplifier housing. The cable cross-section is selected according to the table depending on the power consumption. When using a thin cable, overheating and destruction of the insulation occurs, leading to a short circuit and ignition of the structure or vehicle.
Which radio do you recommend buying?
The negative signal is supplied through a connection to the ground bolt welded to the car body panels. A lug is put on the cable, which is then pressed with a nut. On used domestically produced cars, it is recommended to remove power from the negative terminal of the battery, since corrosion on the surface of the bolt increases the contact resistance and degrades the power supply to the equipment.
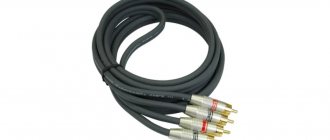
To automatically turn on the amplifier, a copper cable (with a cross-section of up to 1 mm²) is used, coming from the REM connector of the head unit. After turning on the radio, a control signal is supplied to the amplifier, activating the power circuits. To transmit the audio signal, RCA standard cables are used, equipped with a screen to protect against interference. Special metal tips are placed on the ends of the cords to ensure reliable contact. Interconnect cables must not be laid near power wiring due to interference.
Are you a car driver?! Then you can take this simple test and find out... Go to the test »
The head unit is equipped with a separate power circuit; a red-insulated cable is routed through the ignition switch or switch, which forcibly breaks the circuit. The radio's power supply is provided with an additional cable equipped with a yellow protective layer.
Connecting speakers
Now the question is how to connect speakers to a four-channel amplifier in order to enjoy the sound from the speakers.
There are several options here: we can connect several loudspeakers both in parallel and in series. You need to know the power and impedance of both the amplifier and speakers. The amplifier is afraid of resistance lower than stated! That is, the greater the resistance, the better for him.
If the amplifier has an output resistance of 4 ohms, then we connect the speakers so that their total value is at least 4 ohms. Otherwise, our amplifier will heat up. The operating temperature of the output transistor is 85 degrees. Anything higher can break our amplifier.
That is, when connected in series to one channel, our speakers in total must be at least 4 ohms. You can connect two or three speakers, 2 ohms each, which in total will be equal to or more than 4 ohms - this is the correct connection, which will have a positive effect on the sound quality. We do the same for the other three channels.
With a parallel connection (bridge), we connect one speaker or several to two output channels of the amplifier (we take plus from one, minus from the other).
Here you need to sum the two channels on the amplifier, in our case it is 4+4 ohms = 8 ohms. That is, the speaker, or speakers, should not have a resistance of less than 8 ohms. If more is good. But again, everything should be in moderation. There is no point in hooking up a bunch of speakers, thereby increasing the resistance; this will not increase the power, and the amplifier will work with overload.
Based on the above, we now know how many speakers can be connected to a four-channel amplifier, and how to do it correctly.
Goal setting
Connoisseurs can talk for days about car audio, good and different, and the chickens will get it too. At the same time, speakers do not always really understand what they are arguing about so passionately on forums. The development of modern technologies allows you to assemble an acoustic system of any quality in your car - if only you have the desire, and most importantly, the opportunity.
Location of the amplifier in the car
At the same time, it is completely unnecessary to spend thousands to achieve a completely acceptable sound - the quality of modern devices allows you to connect an amplifier without a radio, using a phone as the head unit.
Owners of car audio systems are conventionally divided into four categories:
- “He’s playing and it’s okay.” This is a very large category of users. They don’t chase “bass” and “treble” and other bells and whistles. The sound system in their car usually consists of a car radio, most often a standard one, and a standard set of speakers.
- Music lovers. With music lovers, everything is clear - people with manias are usually treated, sometimes with radical methods, or left alone if their manias are not dangerous to others. Fans of “good sound” understand not only the difference between high and low frequencies, but can also hear (or say they can) distinguish the numerical difference in harmonic distortion coefficient.
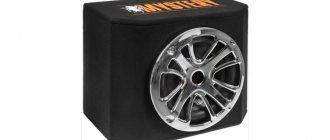
Dual coil woofer
The low-frequency speaker is a subwoofer, it comes with one coil and two. The one with two coils is no different in appearance from the one with one. But there is still one difference - a pair of additional terminals to which the wires from the amplifier fit. A speaker with one coil has 2 terminals, and a speaker with two coils has 4. Well, two coils have two independent windings. This was done for the flexibility of connecting such a speaker. So how do we connect a dual coil subwoofer?
According to the same principle as was considered with conventional speakers - in series, in parallel. Another connection option is independent.
Independent is when each independent speaker coil is connected to a separate amplifier channel (right, left). This type of connection is intended for amplifiers that do not have bridging capabilities.
It is better to connect such a speaker in series or in parallel, since a different signal for each channel can ruin our speaker. This type of connection must necessarily have the same signal for each speaker coil. And the signal for the right and left channels is provided to us by the recording studio, and we cannot know how each audio recording was recorded.
We connect two amplifiers
Now let's figure out how to connect two four-channel amplifiers in parallel to each other.
If you are a fan of loud and high-quality music, you may need two amplifiers for a more powerful sound output.
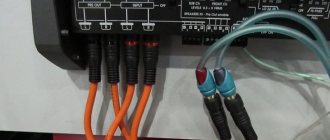
Both amplifiers can be powered from one power cable using a splitter (tee). The main thing is not to forget about the load on the wire: the more power you need, the larger the cross-section of the positive cable should be. The minus should be taken from one place so that there is no interference. Remote - wire for turning on the amplifier, we also make one for two, branch and connect. Well, we connect a four-channel interconnect RCA cable on one side to the linear output, on the other to the linear input.
Setup Instructions
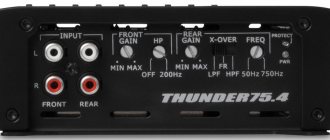
The amplifier is configured in accordance with the recommendations set out in the operating instructions. To adjust the parameters, buttons and rotary switches are used, covered with a protective panel. Rotating correctors are recessed into the body, which reduces the likelihood of accidental position changes. To rotate the element, it is recommended to use a flat blade screwdriver.
A control diode of the power supply is installed on the equipment case; further adjustment of the device is allowed only when the green lamp is turned on. When using standard factory settings of the equipment, the sound picture is blurry. Adjusting the parameters allows you to highlight low and high frequencies, as well as reduce sound distortion.
Amplifier setup for four speakers without subwoofer
After completing the connection of the four-channel amplifier and checking the operation of the electrical circuits, you need to configure the acoustics according to the following method:
- Turn the knob labeled Gain or Level to its minimum position.
- When using standard door speakers, you need to turn the HP filter control to the maximum position (indicated on the body as Full). If the car has small-sized acoustics with a diameter of up to 100 mm (in the instrument panel or front pillars), then it is necessary to set the corrector to the position corresponding to 120 Hz.
- Turn off the bass boost function and turn off the graphic equalizer.
- If you connected a 4-channel amplifier with channel separation, then you need to activate the HP and LP filters (for high-frequency speakers and mid-range speakers, respectively). The controls are set to the position corresponding to 4 kHz.
- The design of the amplifier unit has a HiLow Level switch, the position of which depends on the type of connection of the equipment to the head unit. When a signal is fed through speaker cords, the Hi position is set. If you connect the equipment to the linear outputs of the radio, the switch is moved to the Low position.
- Turn on the head unit, which contains a laser disc with musical compositions; you can install a removable drive with recordings in MP3 format (with a high bitrate). Check the position of the loudness selector (should be off), and then smoothly turn the volume control until wheezing appears in the sound picture. Carefully turn the corrector back, determining the boundary of the appearance of interference.
- Then the user adjusts the position of the Gain or Level control, the adjustment is made in the same way as adjusting the sound volume.
- Determine the broadcast volume for the rear channels, comparing the settings with the parameters of the front speakers. If the car owner has difficulty adjusting the acoustic equipment, it is recommended to contact a specialized service center.
Setting up an amplifier for a subwoofer and speakers
The adjustment is made by analogy with the adjustment of a system with standard acoustics. To ensure an improved sound picture, it is recommended to relieve the speakers from broadcasting low frequencies. This action allows the diffuser stroke to be reduced and improves the reproduction of mid frequencies. The HPF corrector is used for adjustment; the position of the potentiometer is determined by the user by ear. Some car owners do not turn on the HPF adjustment due to distortion of the sound picture.
The use of bass boost for a subwoofer is not recommended since it affects the band above 40 Hz. When using a subwoofer with a bass reflex, the subsonic filter is turned on, which is adjusted to a frequency 2-5 Hz below the bass reflex value (indicated on the equipment).
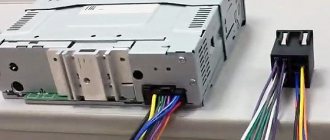
Many car owners without technical education do not know how to connect an amplifier to a car radio - for them it seems like too much of a time-consuming task. In fact, you shouldn’t rush to contact a car service center, since installing a car amplifier is not so difficult.
Maintenance by specialists will be expensive, so in order to save money, it is worth trying to understand the connection procedure, which this article will help with.
For high-quality operation of the amplifier you need:
- Give him good food;
- Give a signal from the radio. We looked at how to properly connect the radio here;
- Connect speakers or subwoofer.
More details on how to connect the amplifier can be found below.