It's been two years since AirPods were first dismantled, and in those two years, AirPods have become popular and popular. These second-generation modules look identical on the outside, but have a few notable upgrades on the inside. The real upgrade we're pinning our hopes on is repairability - it would be great if they didn't end up in a landfill after a couple of years of use. Is this upgrade worth the price increase? What does the "H" in "H1" mean? Will these AirPods be the evolution of the RepairPods we're hoping for? There is only one way to find out: by disruption! For more interesting news and updates, follow us on , and . For delivery, visit our.
Navigation
- Step 1
- Step 2
- Step 3
- Step 4
- Step 5
- Step 6
- Step 7
- Step 8
- Step 9
- Step 10
- Step 11
- Step 12
- Step 13: Final Thoughts
How to disassemble Earpods anyway?
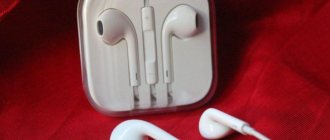
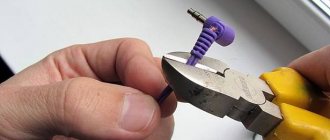
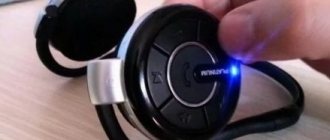
Unlike the previous Earpods model (on the fourth iPhone), the second one is much better in quality. For example, the headset in the area of the microphone and volume control is protected both at the top and bottom from kinks by thickening. Opening this part of the wire is not difficult: just use a pick or something thin that can be pryed, for example, with a scalpel.
Photo: Earpods structure
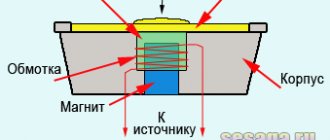
To partially open the funnel, remove the layer of glue using a scalpel. What we see after opening:
- paper membrane;
- postings;
- voice coil.
The case also contains one very important component - a magnet, which ensures sound quality.
Main problems and breakdowns in EarPods headphones
Partially open-back Apple headphones
Once you manage to break the adhesive layer, you will be able to open the EarPods. Don't pull them too hard in different directions, because... they are indirectly connected to each other by wire. As you can see in the photo above, a driver and an insulating membrane are attached to the inside; a wire goes to the driver, which passes through the inside of the earphone. Thus, if you pull the parts too hard in different directions, you will have a chance to tear the wire and damage the headphones.
What to do if one Airpods earphone does not work?
How to restart AirPods?
- Please note that both headphones charge unevenly: it is possible that one of them is not fully charged.
- Can't determine the charge level of your headphones? Perhaps it's the charging case. Check the indicator: yellow indicates that it can only charge the headphones once before they are completely discharged. If the indicator is green, the reason lies elsewhere.
- If one Airpods Pro earphone does not work, you should try charging it. Just 15 minutes is enough for 3 hours of work. While the ears are in the case, you can try the rest of the items on our list.
- Never disdain simple mechanical operations: even rebooting your phone or case can help you.
- If after rebooting one AirPods earphone still does not work, you need to try unpairing it with your phone. In the IOS system, the procedure is as follows: you need to go to the Bluetooth settings, select Airpods from the list of devices, click “Forget device” and confirm your choice. In Android we act similarly.
- After removal, the device must be placed back in the case. First we try to connect them without resetting. If the problem persists, you need to reset the ears themselves.
- We remove the paired device again, put the ears in the charging case for half a minute. After opening its lid, long press the button until the case indicator starts flashing. After this, you need to close the charger cover again and try to connect to the phone.
Remember! If after all the manipulations one ear still does not work, perhaps the problem is in the hardware itself. In such cases, you need the help of a specialist.
What to do if one earphone is quieter than the other?
First, check the volume settings on the wireless device and on the smartphone itself. If this is okay, resetting the settings, which we wrote about above, will help.
How to disassemble Airpods
It's very hard! iFixit brave souls donated a pair of expensive headsets. This couldn't be done without a soldering iron. It is impossible to open the headphone case and the headphones themselves without damage. This means that the device cannot be repaired and by default promises to serve for a long time.
Photo: Airpods disassembly - what's inside
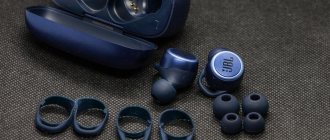
Airpods are significantly different from Earpods. There are a number of innovations here:
- optical sensors;
- dual microphones in each pair;
- voice accelerometer.
Problems and breakdowns in AirPods: what are they and how to fix them?
Post-warranty and non-warranty repairs
Repair at an official service center is the best solution that will suit most users whose headphones are broken.
In this case, you can be sure that nothing will happen to the headphones. This is especially important if they cost more than one thousand rubles. And after replacing components that have failed, continue to enjoy excellent sound without pitfalls.
Plus, you won’t have to sort through tons of DIY repair guides or look for a suitable basement workshop. And you will definitely get the expected result.
Do-it-yourself or basement renovation. When it comes to self-repair, each of us imagines a painfully long search for components on dubious Chinese sites and months of waiting.
This is often true. But some manufacturers - including Bowers & Wilkins, Philips - allow you to order specific spare parts (cables, ear pads, sometimes a case or headband) for replacement, if technically possible. On average it takes 2-3 weeks.
In my opinion, it’s easier to go to a service center.
But in this situation, you cannot be sure that you will correctly detect and fix the problem yourself or in an unofficial service. Therefore, perform all manipulations at your own peril and risk.
Why do you need to disassemble Apple headphones?
If the headphones are in good working order, then you need to disassemble the headphones for only one purpose - to clean the protective nets from the earwax, dust and dirt that have accumulated on them. If a lot of debris accumulates on the mesh, the sound will stop passing through it normally and you will feel that one of the headphones has become quieter than the other. Of course, this situation is unpleasant, which is why they want to disassemble the headphones.
Article on the topic: Is it possible to insert a memory card into an iPhone 6c?
However, just to clean the EarPods you can do without completely disassembling them. You just need to have some handy tools to clean the outer protective mesh and get your headphones back to their original volume level.
But if you are very interested in what is hidden inside the headphones for iPhone, I will show you in photographs so that you do not disassemble your own headphones.
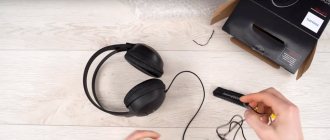
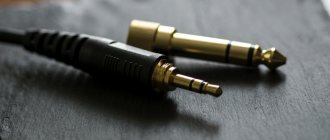
Replacing the cord in large headphones
Large gadgets, such as, for example, Philips headphones or Sven headphones for a computer, differ from in-ear ones only in the size of the speaker (diaphragms in small gadgets). Difficulties may arise when trying to get to the speaker in order to solder the wire contacts.
Different headset manufacturers have different methods for opening them. These may be latches that are difficult to detect or hidden screws hidden under soft “pads” - ear pads. For example, the question often arises: how to disassemble Sennheiser HD203 headphones?
This is done simply.
- Using a credit card or other flat object, press down the latches that hold the ear pad in place.
- Once the pads are removed you will see 4 screws that need to be removed.
- On the disassembled device, you will see contacts with wires soldered to them, which need to be unsoldered and replaced with new ones.
When repairing Steelseries Siberia headphones, the ear pads are held on with an adhesive base. You can remove them by carefully prying them up with a screwdriver, after which you can find the fasteners. Some models use latches instead of screws, which can be broken if pressed hard. If they break, you will have to glue the cups of the gadget together, after which they will become inseparable.
In the Razer Kraken headphones, the ear pads are not glued and can be easily removed.
After disconnecting them, the fasteners can be found under the glued paper.
In the Audio-Technica M30 or ES7 headset, they are also placed on the rim of the gadget’s cup. Philips headphones are no exception.
By the way, the Audio-Technica ES7 headphones have hinges for rotating the cups. Therefore, if you disassemble it while repairing a gadget, you must be careful.
The Philips SHD 8600 headset does not have all the disadvantages associated with replacing the plug and cable, since it is a representative of wireless devices.
What not to do when cleaning iPhone headphones
The main condition for quality headphone care is accuracy and attentiveness. It is advisable to carry out the work in a well-lit place to see all inconspicuous dirt. While working with the headset, do not put pressure on the mesh. Do not use water to clean the internal parts as there is a risk of the headphones flooding. If liquid does get inside, you need to leave the headset for a while to dry. Experts also do not recommend using aggressive detergents and abrasives.
Every owner of Apple and other brands of equipment should know how to clean iPhone headphones. There are several basic methods that can help restore a product’s cleanliness and attractive appearance in a short time.
Design of the driver and membrane of disassembled iPhone headphones
Now that we have completely disassembled the Apple headphone driver, we can take a look at the driver itself and the membrane with the coil.
The coil is attached to the membrane and, when assembled, is immersed in the magnetic field of the permanent magnet of the driver. The photo shows the membrane and driver on both sides. There is nothing else inside the earphone, except for the insulating membrane. These are regular EarPods, not AirPods, no electronics or additional sensors.
How to clean iPhone headphones - proven methods
Headphones are an indispensable item that allows you to enjoy your favorite music and movies anywhere.
The headset, being in the ears for a long time, gradually becomes dirty. Because of this, there is poor sound and the presence of dirt particles in the speakers. Every user should know how to clean iPhone headphones. In addition to aesthetic inconveniences, dirt residues on the headset can provoke fungal diseases. Article on the topic: How to use the health app on iPhone 6