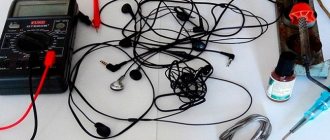
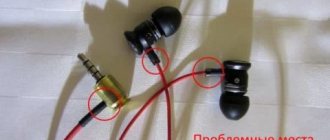
It's no secret that the most common malfunction of any headphones (plugs, earbuds or large over-ear ones) is a broken wire near the plug. In this situation, there is nothing left to do except change the plug on the headphones. This is easy and can be done by anyone who has ever held a soldering iron in their hands. The only thing that would be desirable is to understand the intricacy of the wires (in some headphones there are as many as 6 wires under the cable insulation!)
Today we’ll talk about how to solder headphones to a plug without making any mistakes.
You don't need to think about anything, just follow the step-by-step instructions provided and you can easily repair your favorite headphones.
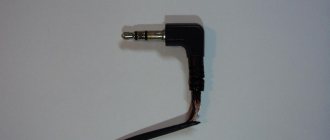
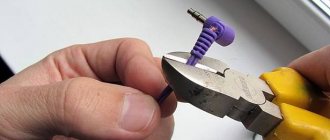
1. Ruthlessly bite off the plug: 2. How to replace the plug on headphones? For this we will use the old connector. Let's gut it using a sharp stationery knife, ripping it right along the seam. This method allows you to disassemble almost any plug: Open the plastic shell and take out the insides. Do you see a group of contacts with pieces of wire soldered to them? We remember the pinout of the headphone wires (or better yet, write down on a piece of paper which wire was soldered to which contact). Here is the standard wiring of headphone wires by color:
- green wire is the left channel;
- the red wire is the right channel;
- yellow (copper) wire is common.
You will find more detailed information about which wire in the headphones is responsible for what later in this article (scroll to the very end).
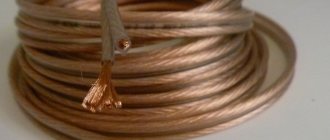
3. Now you need to clean up the headphone wires a little. What the result should look like: we connect the common wires (which are in colorless varnish) together and tin the very ends: A few words about how to re-solder the plug on the headphones. It will be bad to pick, because... the wires are covered with varnish insulation. To make the process easier, you can lightly burn the very ends with a lighter.
How to tin wires from headphones using an aspirin tablet, as shown in this video:
Personally, I made do with an ordinary knife, which I used to carefully clean off the enamel coating from the wires. And after that I tinned it in the usual way - with solder and rosin.
4. Now we find an old unnecessary pen somewhere:
and separate the very tip from it: This will be the body of our new plug.
5. Prepare a piece of heat shrink that will protect the wires from sharp bends at the exit from the plug: 6. It's time to solder the headphone wires to the plug. You need to solder in full accordance with the colors of the wires in the headphones (we remember where which color was soldered or look for our piece of paper where everything is written down):
7. Make sure everything works. To do this, turn the multimeter into dialing mode, plug the headphones into your ears and alternately touch the probes to different contacts. All sorts of rustling and clicking noises should be heard in different channels.
Or you can try to plug this unfinished plug into your phone or MP3 player and start playing music. In the latter case, it is important to make sure that the right and left channels work independently of each other (use the balance adjustment).
8. If everything sounds as it should , we shrink the heat shrink using a hair dryer or a regular lighter: 9. Apply a couple of drops of epoxy glue: glue everything together and leave for several hours until complete polymerization.
10. We are happy with how we fixed the headphone plug!
Look at the photo of how I managed to solder the new plug to the headphones:
In my opinion, this is the easiest way to fix a headphone plug of all those proposed on the Internet. Despite the fact that the result is quite decent. If you don’t look closely, it’s not even clear that it’s homemade.
By the way, at first I had the idea to make a paste from baking soda and superglue to use it instead of epoxy resin. But it turned out that this mixture hardens so quickly (almost instantly!) that this option had to be discarded as unsuitable.
That's all. Now you know how to make headphones if the plug is broken and which wire in the headphones is responsible for what. Always try to figure out how everything works, how to repair the plug on your headphones with your own hands, save your money!
Additionally about the colors of wires in headphones
How to properly solder wires to a headphone plug is out of the question if you are not familiar with the colors of wires in headphones and their meaning (for example, do you know what the green wire is responsible for?)
A different number of wires may come to the headphone plug:
- 2 wires (for mono headphones);
- 3 wires (for mono or stereo headphones depending on the connection diagram);
- 4 wires (for stereo headphones);
- 5 or 6 wires (for stereo headset with microphone).
2 wires
I don’t think anyone needs to explain how to repair a headphone plug if they only have two wires. It is basically impossible to confuse anything here.
3 wires
There are always two wires coming from each ear - plus and minus, but sometimes the manufacturer combines the minuses of both speakers together and it turns out that only three wires come to the plug. To make it clearer, here is a soldering diagram for a headphone plug:
This picture explains even more clearly where to solder the wires to the headphone plug:
Most often, the wires are coated with varnish of different colors:
- red - right channel;
- green, blue or white wire - left channel;
- colorless varnish - common wire (ground).
Of course, there are no strict standards and colors may vary. Here's what it looks like in real life:
Let's see how to properly solder a wire to the headphones (3 wires):
4 wires
If your plug has 4 wires, then there may be options.
Option one: you have regular headphones without a microphone and without buttons (the plug has only 3 contacts). Then these four wires are simply two pairs of wires from each of the speakers. Their disadvantages are the same color (copper), and their advantages are different (usually blue and red or green and red):
In this case, common wires (those of the same color) are connected together and soldered to the common contact of the plug. You should immediately understand how to solder 4 wires from the headphones to the plug from the figure:
Here's how to solder headphones to such a jack:
Option two: you have a full-fledged headset (i.e., headphones with a microphone) and the plug has 4 contacts. Then, most likely, these four wires are one wire from each speaker, one signal wire from the microphone, and one common wire for all.
Schematically, this can be indicated as follows:
And here's how to make a plug on the headphones (correct soldering of headphones when there are 4 wires):
Most often, a microphone wire only looks like one wire, but in reality it is two wires: a thin wire in white PVC insulation completely wrapped in enameled copper wire (in colorless enamel). Something like this: And in this case it would be more correct to say that the headphones have not 4 wires, but all 5.
5, 6 or more wires
Depending on the implementation option, there may be 5 or more wires inside the cable from the headset. Up to 10! Be that as it may, they always try to make the signal wire from the microphone in its own “ground” braid.
In short, if you gutted your cable and it looks something like this:
or even this: no one will immediately tell you how to properly solder the plug to such headphones. There can only be one piece of advice here: take a tester and test all the wires until you determine where the right ear is and where the left is. The remaining wires are to the microphone.
Determine by color which wires may be common and connect them all together. Solder all signal signals according to the connector pinout (see pictures above).
Then test the headphones and microphone. If something is wrong, look for the reason. No one will really tell you anything here; proceed using the scientific dildo method.
Almost everyone who uses headphones or a headset has encountered a situation where the gadget goes silent. What’s especially offensive is that there seemed to be no prerequisites for the device’s failure - you used the gadget carefully, didn’t drop it, didn’t plug it into wall sockets. Buy new headphones, which, by the way, even made in China don’t cost a penny? There is no need to panic or rush. The most common reason for the failure of this type of device is a break in the conductors in the cable, and it most often occurs at the connector (plug) itself, where the wire is constantly bent.
Why buy new headphones to replace ones that are practically intact if the jack can simply be repaired? Moreover, almost anyone who knows how to hold a soldering iron in their hands can cope with this task.
Direct soldering process
Repairing headphones comes down to restoring contact in damaged wires.
For this you will need:
- soldering iron;
- solder;
- rosin;
- stationery or construction knife.
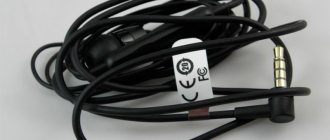
To ensure complete confidence in eliminating the problem area, a piece of cable approximately 1-3 cm long is cut from the earphone.
To remove the protective insulating casing, you need to scrape off one-half inch (1.25 cm) of the outer braid using wire cutters or a utility knife.
Using a construction knife, the outer insulation of the cable is stripped. Inside there are two wires, marked with different colors. Most often, the left channel is marked with red, the right channel with green, and the common channel is marked with either blue or yellow. Sometimes the common channel is bare copper wire.
In a section of about 0.5 cm from the end of the wire, it is necessary to remove the insulation.
Depending on the material, you can remove it in several ways:
- The polymer insulation is carefully removed using a knife so as not to damage the conductive material.
- Varnish and paint are removed by burning with a soldering iron or mechanically using a knife or fine sandpaper.
The stripped ends of the internal cores are tinned with solder. The soldering iron is plugged in and left for the time required to heat it up. Then take a small piece of solder with the tip of the soldering iron. The stripped end of the wire is installed on rosin. The soldering iron tip distributes the molten solder evenly over the entire cleaned surface. The wires are ready for soldering.
To do this, you must additionally take a tablet of acetylsalicylic acid (aspirin) or any aspirin-containing medicine. Even expired tablets will do. So, before you run outside, you need to look into your home first aid kit.
What types of connectors are there and what's inside them?
Almost all plugs used to connect headphones and headsets (it would be more correct to call them connectors) have the same design and differ only in size and number of contacts. They are grouped by size as follows:
The numbers indicated at the end of each name indicate the diameter of the connector pin in millimeters, and the devices look like this:
From left to right: micro-Jack 2.5 mm, mini-Jack 3.5 mm, Jack 6.35
There can be two, three, four or five contacts on the pins The first type is a mono jack. It is simple in circuit and design, has only two contacts and is not used in stereo phones, much less in headsets. The TRS connector has three pins and is used to connect stereo phones (headphones). TRRS and TRRRS are more complex and use them to connect headsets - headphones + microphone.
Below is a TRS type connector, above is TRRS
How to fix a headphone plug
As mentioned above, the headphone plug has three contacts, which means three wires are soldered to it. The diagram for soldering stereo headphones to the connector will look like this:
How to solder headphones to a plug
That's all in theory, it's time to get down to repairs. For this you will need:
- Soldering iron.
- Rosin and solder.
- Sharp knife.
- Pliers.
- Insulating tape.
- Heat shrink tubing (if possible).
Disassembly and preparation
First of all, it is necessary to determine the location of the damage . If the wire break is not visible visually, you can try to find the break by touch. Bend the cable at the connector - you can identify a serious break with your fingers. Couldn't find the damage? This often happens; you have to act based on logic. Most often, damage to the wire occurs directly at the connector, a maximum of a couple of centimeters from it. Cut the connector with one to two centimeters of cable using ordinary scissors.
If you have a new plug, then you can go straight to the “Soldering and Assembly” section. If there is nothing in stock, then you will have to tinker with what you just cut. Unfortunately (naturally, for yours, and not for the manufacturer), almost all headphones , except for professional ones, come with non-separable connectors, but this does not mean at all that they cannot be disassembled.
Take a knife and make two deep cuts along the plastic body into which the metal contact rod of the plug is pressed. Cut boldly and deeply from opposite sides, but without fanaticism. Now grab one plastic half with pliers, and try to remove the second by prying it with a knife. There's no need to rush here. By separating one half of the body, you can easily remove the other. If nothing works or only partially works, make a few more longitudinal cuts . As a result, you will see something like this:
Plug with housing removed
Now it's time to deal with the cable. Carefully remove 1-2 cm of insulation from it and find three, less often four wires of different colors:
Three-wire (left) and four-wire cords
In both cases, you have red and green (blue) wires - these are the leads for the right and left headphones. The copper-colored conductor (it's just copper and coated with a clear varnish or not coated at all) is the common wire for the left and right headphones. If the cable is four-wire, then there will be two such common wiring - separately for each of the speakers. How to solder headphones if they have 4 wires? In this case, simply twist the common wires together, making one common wire out of them.
The colors of the wires may be different, but the common wire in almost all designs is copper color . You can figure out where the right and where the left channel is using a tester or, in extreme cases, using the “poke” method - by soldering and listening.
Soldering and assembly
Now all that remains is to turn on the soldering iron and solder the plug to the headphones . First of all, the ends of the wires must be properly tinned without damaging either the conductors themselves or the insulation. You need to pay special attention to the last point. The fact is that to reduce the thickness of the cable (especially for headsets for mobile devices), the wires are made very thin, and they are insulated with varnish, which at the same time indicates the color. If you work carelessly, the varnish can easily be damaged, and this can lead to a simple short circuit, which can damage your gadget as soon as you connect sloppily repaired headphones to it.
So, the soldering iron is warmed up. Place the wires on a piece of cotton fabric or a board and, having put a little solder and rosin on the tip, begin using a longitudinal movements with slight pressure to rub the tip of the wire to the board, constantly turning it (the wires). The temperature will cause the varnish to crack, and the exposed conductor will become covered with solder and become tinned. Please note that only the ends 2-3 mm long need to be tinned, the rest of the wire should remain in the insulating varnish.
Cable, correctly (left) and incorrectly prepared for soldering
Important! Do not use open fire (matches, lighters, etc.) to remove nail polish, as “experts” advise. Thin wires will either burn in the flames, or you will loosen the copper until it loses its strength completely. In any case, the fire will overheat the varnish, and during assembly the latter will simply fly off the wiring. The result is a short circuit, permanently inoperative headphones and a good chance of burning out the sound output stages in your gadget or PC.
Now soldering. Fix the plug rod in a suitable clamp so that it lies horizontally with the conductive pads facing up. For these purposes, you can use the same pliers or tweezers with a rubber ring attached to the handles. A vice will also work, but try not to crush the rod into a cake - it is thin-walled. The conductive pads (there are 3 of them) are already tinned, the only thing is that if there are scraps of wires left on them, unsolder them. We have three wires and three contact pads. Which one should I solder where? The figure below will help you understand this:
Wiring diagram for headphone plugs
If you have a new connector at your disposal, then, naturally, there is no point in disassembling the one that you bit off during the preparation process. But, most likely, you are holding a plug whose contact pads look slightly different. How to solder headphones in this case? This photo will help you here:
Pay attention to the contact pad to which the common wires are soldered (there are 2 of them, since the cable is four-wire). It looks like a “crocodile” and is also a clip that prevents the wire from being pulled out if the headphones are handled carelessly. After soldering, place the insulated cable in it and carefully crimp it with pliers. Well, before soldering the wire to such a connector, do not forget to put the housing on this same wire that you twisted from the plug, getting to the contacts. After all, after soldering it will need to be screwed into place.
And one more note about this photo. It is quite obvious that the installer made the tinned ends too long and now they will have to be insulated before assembly, otherwise they will simply close together. This can be done using scraps of electrical tape. In my mind, of course, after tinning the ends had to be shortened, leaving 2-3 mm for soldering. As a result, you should get something like this:
If your plug is dismountable, then simply assemble it by screwing the cap onto the contact pin. You didn’t forget it on the table and strung it onto a wire before soldering, did you? Before assembling, do not forget to check the functionality of your headphones. But if you used an old connector for repairs, you will have to be tricky, since you cut the original case.
The easiest option is to use a piece of heat-shrink tubing of a suitable diameter, 4-5 cm long: put the heat-shrink on the soldering area and heat it in the flame of a gas lighter. The aesthetics of such a plug will be a four-piece, but a fairly flexible tube will prevent the wire from breaking again when using the headphones.
Insulating the plug using heat shrink tubing
If you have a heat gun at your disposal, you can fill the soldering area with plastic. After pouring, while the glue is still wet, shape it with wet fingers to give the desired look.
We isolate the wiring
We removed the varnish from the wires, which means now they have no insulation. If you close the twists together, you will either make yourself mono or cut off one channel. Therefore, they need to be isolated to prevent short circuits between themselves. First, we isolate each twist separately. In addition to the insulation itself, this will also strengthen the connections. For some reason I did this with masking tape, probably lying closer. It doesn't matter. Now let's wrap everything together with wide tape, 3-4 or 5 layers - a matter of taste) It is better to space the places of twists further from each other in order to eliminate as much as possible any short circuit.
How to replace the plug on a headset
The entire repair technique given for headphones is also suitable for a headset. The only difference is the presence of an additional wire going to the microphone. It is usually black or white in color. Since there is an additional wire, it means that there must be one more contact on the plug - the fourth:
Diagram of connecting the headset to the plug
If you have a tester at your disposal and know how to use it, then you can “calculate” which wire goes where by ordinary testing. In this case, the resistance of each headphone will be in the range of 24-35 Ohms, and the microphone - several kOhms. When you press the answer button, the microphone resistance should drop sharply to several tens of ohms or even to zero. How can I determine by dialing where the left speaker wire is and where the right one is? Aurally. When a call is made, the corresponding loudspeaker will make clicking sounds. Just put the headphones on your head and make a call.
Typical headset layout, where:
One final note. There are headsets in which the microphone wire and the general wire are swapped. If your headset does not work after repair, simply swap the wires indicated in the figure above as 3 and 4.
It's no secret that the most common malfunction of any headphones (plugs, earbuds or large over-ear ones) is a broken wire near the plug. In this situation, there is nothing left to do except change the plug on the headphones. This is easy and can be done by anyone who has ever held a soldering iron in their hands. The only thing that would be desirable is to understand the intricacy of the wires (in some headphones there are as many as 6 wires under the cable insulation!)
Today we’ll talk about how to solder headphones to a plug without making any mistakes.
You don't need to think about anything, just follow the step-by-step instructions provided and you can easily repair your favorite headphones.
1. Ruthlessly bite off the plug: 2. How to replace the plug on headphones? For this we will use the old connector. Let's gut it using a sharp stationery knife, ripping it right along the seam. This method allows you to disassemble almost any plug: Open the plastic shell and take out the insides. Do you see a group of contacts with pieces of wire soldered to them? We remember the pinout of the headphone wires (or better yet, write down on a piece of paper which wire was soldered to which contact). Here is the standard wiring of headphone wires by color:
- green wire is the left channel;
- the red wire is the right channel;
- yellow (copper) wire is common.
You will find more detailed information about which wire in the headphones is responsible for what later in this article (scroll to the very end).
3. Now you need to clean up the headphone wires a little. What the result should look like: we connect the common wires (which are in colorless varnish) together and tin the very ends: A few words about how to re-solder the plug on the headphones. It will be bad to pick, because... the wires are covered with varnish insulation. To make the process easier, you can lightly burn the very ends with a lighter.
How to tin wires from headphones using an aspirin tablet, as shown in this video:
Personally, I made do with an ordinary knife, which I used to carefully clean off the enamel coating from the wires. And after that I tinned it in the usual way - with solder and rosin.
4. Now we find an old unnecessary pen somewhere:
and separate the very tip from it: This will be the body of our new plug.
5. Prepare a piece of heat shrink that will protect the wires from sharp bends at the exit from the plug: 6. It's time to solder the headphone wires to the plug. You need to solder in full accordance with the colors of the wires in the headphones (we remember where which color was soldered or look for our piece of paper where everything is written down):
7. Make sure everything works. To do this, turn the multimeter into dialing mode, plug the headphones into your ears and alternately touch the probes to different contacts. All sorts of rustling and clicking noises should be heard in different channels.
Or you can try to plug this unfinished plug into your phone or MP3 player and start playing music. In the latter case, it is important to make sure that the right and left channels work independently of each other (use the balance adjustment).
8. If everything sounds as it should , we shrink the heat shrink using a hair dryer or a regular lighter: 9. Apply a couple of drops of epoxy glue: glue everything together and leave for several hours until complete polymerization.
10. We are happy with how we fixed the headphone plug!
Look at the photo of how I managed to solder the new plug to the headphones:
In my opinion, this is the easiest way to fix a headphone plug of all those proposed on the Internet. Despite the fact that the result is quite decent. If you don’t look closely, it’s not even clear that it’s homemade.
By the way, at first I had the idea to make a paste from baking soda and superglue to use it instead of epoxy resin. But it turned out that this mixture hardens so quickly (almost instantly!) that this option had to be discarded as unsuitable.
That's all. Now you know how to make headphones if the plug is broken and which wire in the headphones is responsible for what. Always try to figure out how everything works, how to repair the plug on your headphones with your own hands, save your money!
Thermal tube instead of tape
Using tape is not entirely kosher. Therefore, I propose to improve the technology a little, again without a soldering iron.
You will have to buy a heat-shrinkable tube, also known as thermal casing, at an electronics store or hardware store. This is such a clever tube that can shrink in diameter by at least half when heated. This miracle costs about $0.1 - $0.5 per meter.
We will need two thermal tubes with different diameters: 1-2 mm for the first and 4-5 mm for the second.
We put pieces of thin thermal tube on our twists. We cut the pieces with one and a half margin.
Now you need to heat the thermo tube. Usually I did this with a soldering iron, but we agreed that I didn’t have one, and the story was about how to fix headphones without a soldering iron, so I had to get out.
The method turned out to be quite effective and the thermo-tubes shrank. You can also use any other heater or put them in boiling water like Easter eggs. In principle, people can do it with a regular hairdryer.
While the thermotube is still hot, you can further flatten it with your fingers, then it will slightly stick together inside.
This thermo-tube must subsequently be put on the joint and also compressed with the heat of the lamp. In general, you can squeeze lighters on fire, but you can accidentally set fire to excess.
I used a piece 8-10 cm long. To strengthen the structure, the end of the thermal tube was put directly on the elastic band of the connector.
Additionally about the colors of wires in headphones
How to properly solder wires to a headphone plug is out of the question if you are not familiar with the colors of wires in headphones and their meaning (for example, do you know what the green wire is responsible for?)
A different number of wires may come to the headphone plug:
- 2 wires (for mono headphones);
- 3 wires (for mono or stereo headphones depending on the connection diagram);
- 4 wires (for stereo headphones);
- 5 or 6 wires (for stereo headset with microphone).
2 wires
I don’t think anyone needs to explain how to repair a headphone plug if they only have two wires. It is basically impossible to confuse anything here.
3 wires
There are always two wires coming from each ear - plus and minus, but sometimes the manufacturer combines the minuses of both speakers together and it turns out that only three wires come to the plug. To make it clearer, here is a soldering diagram for a headphone plug:
This picture explains even more clearly where to solder the wires to the headphone plug:
Most often, the wires are coated with varnish of different colors:
- red - right channel;
- green, blue or white wire - left channel;
- colorless varnish - common wire (ground).
Of course, there are no strict standards and colors may vary. Here's what it looks like in real life:
Let's see how to properly solder a wire to the headphones (3 wires):
4 wires
If your plug has 4 wires, then there may be options.
Option one: you have regular headphones without a microphone and without buttons (the plug has only 3 contacts). Then these four wires are simply two pairs of wires from each of the speakers. Their disadvantages are the same color (copper), and their advantages are different (usually blue and red or green and red):
In this case, common wires (those of the same color) are connected together and soldered to the common contact of the plug. You should immediately understand how to solder 4 wires from the headphones to the plug from the figure:
Here's how to solder headphones to such a jack:
Option two: you have a full-fledged headset (i.e., headphones with a microphone) and the plug has 4 contacts. Then, most likely, these four wires are one wire from each speaker, one signal wire from the microphone, and one common wire for all.
Schematically, this can be indicated as follows:
And here's how to make a plug on the headphones (correct soldering of headphones when there are 4 wires):
Most often, a microphone wire only looks like one wire, but in reality it is two wires: a thin wire in white PVC insulation completely wrapped in enameled copper wire (in colorless enamel). Something like this: And in this case it would be more correct to say that the headphones have not 4 wires, but all 5.
Fault diagnosis
You need to start by identifying the area of the defect. The headphones are a very simple design. In this article we will consider the option without a microphone. Soldering headphones with a microphone is a topic for a separate article. Structurally, the headset consists of two speakers connected by wires to a plug.
This means that defects may include a broken wire or burnout of one or two speakers. Most often, one of the cores fails due to frequent kinks. Not all manufacturers use high-quality stranded conductors. But even the highest quality wires will, sooner or later, break due to frequent bending.