A simple way to secure a box with a subwoofer in the trunk - Community "Autozvuk" on DRIVE2
Hello dear friends!
Many of us have probably encountered the problem when an unfixed subwoofer box dangles in the trunk while the car is moving and often hits the inner walls of the trunk when cornering and especially during sudden braking.
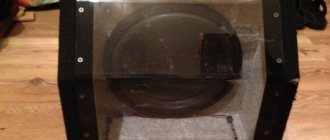
So, I propose to solve this problem with the help of the well-known Velcro for clothes and shoes (textile fastener).
We need the tough side
Basically, such Velcro is sold to households. shops or stores that sell accessories for curtains or textiles (buttons, needles, etc.).
This method will only work if the floor or wall cladding in the trunk has a carpet texture, as in many modern cars.
And so we cut the Velcro strips to size, it should be noted that the larger the contact area, the more rigidly the box will be fixed.
We fix the Velcro using a construction stapler
With lightweight boxes you don’t have to use a lot of Velcro, but I think I probably went too far for my 47 liter box.
The result was pleasing, the test showed that the subwoofer box was not moving anywhere.
Maybe many already know this method, but if someone found out for the first time and helped, I will be very glad))
Thank you for attention!
Important points when installing a subwoofer
Case weight
Bass energy causes surrounding objects to resonate.
Each of them begins to produce sound at its own frequencies, which leads to degradation of the musical bass. To produce the cleanest, most uncontaminated bass possible, the subwoofer cabinet should be as heavy as possible so as not to resonate itself and spread the resonance. If the car is not excessively heavy, then the more weight the body has, the better the bass. A good vibration dampening effect is achieved by using insulating material inside the housing, which is used in home speaker systems.
Material selection
For the speaker housing, you should choose a material that has the least resonance and does not drown out the sound. The most suitable material for car acoustics is wood. Fiberboard (fibreboard) is a very good material: cheap, heavy, difficult to resonate and easy to process. Birch and oak are also good: heavy and difficult to resonate, although the roads are difficult to process. It is best to use slabs thicker than 18 cm.
- How to make a subwoofer enclosure with your own hands
Sound-absorbing material is necessary, but not in too large quantities. Sound-absorbing material is needed to reduce the effect of standing waves inside the housing. But if you use too much of this material, the sound becomes compressed and the speaker's output decreases. Adhere sound-absorbing material to at least the back wall inside the case, or at most to the back, top, and bottom walls inside the case. It is better to use sponge material, because... it has better sound-absorbing properties.
CORRECT POSITIONING OF THE SUB-BAB (theory) — Lada Priora Hatchback, 1.5 l., 2008 on DRIVE2
Hello everyone guys. Today I wanted to touch on this topic:
How and where to install the sub?!
Before you start purchasing and installing speakers in your car, you should have a clear idea of what your overall audio system will look like.
And for this you need to have, if not complete knowledge, then at least a partial understanding of the topic. Agree, it’s one thing when you come to an installer without any understanding of how, what and where is being done, and another thing when you know exactly what you want - a completely different attitude towards you and a completely different conversation
First, a little theory:
Most often, four types of acoustic design are used in a car: - closed type (ZK) - housing with a bass reflex (FC) - bandpass type (PC)
— and an endless acoustic screen (free air).
If the sound pressure developed by the low-frequency head in the ZK (or free air) is taken as a certain value N, then by installing the same speaker in the FC, with some degree of approximation, we obtain an increase in sound pressure equal to 3 dB, and in the PC - 6 dB. Recall that that an increase in sound pressure level by 3 dB means an increase in sound volume by a factor of two, respectively, 6 dB means a fourfold increase
From all that has been said we can conclude:
The use of a more complex acoustic design for the low-frequency head allows the use of less powerful amplifiers at the same sound volume. And given that the cost of an amplifier grows in proportion to its power, this indicator is important for many car enthusiasts.
Another circumstance that worries many buyers when choosing a subwoofer is the number of voice coil windings. In stores you can find subwoofers with one, two and even four windings. Why is this done?
Increasing the number of windings is some trick of the manufacturers, allowing them to use several less powerful amplifiers instead of one very powerful one. This does not affect the sound quality at all, and is used only to obtain maximum sound pressure.
A few words about active cabinet subwoofers, especially since over the past year many models have appeared on the market that are attractive both in terms of sound quality and the sound pressure they develop. If the manufacturer takes such products seriously, then he tries to optimally select the combination “amplifier + LF- loudspeaker”, which ensures high sound quality and eliminates the need for you to make the necessary selection of components yourself. Moreover, active subwoofers are easy to set up, install, and are mostly equipped with high-level inputs for connecting standard head units.
The main disadvantage of active subwoofers is the lack of separate outputs of the built-in amplifier, so if it fails, the subwoofer will become useless.
The choice of acoustic design and location of the woofer head largely depends on the type of car body.
Structurally, all cars can be divided into three conditional classes: with a combined volume of the passenger compartment and luggage compartment (hatchback and station wagon type), with a trunk isolated from the passenger compartment (sedan type) and an open body (convertible type). Each of these cars has its own installation features, so let’s consider them separately.
How to install a woofer in a sedan car?
Cars with this type of body are the most difficult to install a subwoofer. If you simply “throw” the subwoofer into the trunk or install it in the side wall, then due to the acoustic shielding only the lowest frequencies will reach the cabin, and even then more due to vibrations of the body itself. Therefore, in order for the bass to be in the cabin, you have to make certain tricks and concessions.
Let's analyze several optimal subwoofer placement options
Rear shelf
It is considered the most successful location for installing the low-frequency head in cars with this body type. In this modification, you can use all acoustic design options.
The simplest way to install a woofer head, but it has a number of features.
Firstly, only specially designed low-frequency heads are suitable for this acoustic design. (Usually the speaker manufacturer specifies the type of acoustic design recommended, so pay attention to this.)
Secondly, you will need to completely isolate the trunk from the passenger compartment. In other words, seal all cracks hermetically. Moreover, for some car brands, performing such an operation may be more difficult than installing a cabinet speaker.
The rear shelf itself should undergo significant modernization. It is advisable to make it from a thick (18-20 mm) MDF board (chipboard or plywood is also suitable) so that the speaker does not shake at high volume. Sometimes for these purposes two panels of smaller thickness are used, glued together and additionally fastened together with screws. Increasing the thickness of the rear shelf allows not only to create a more rigid installation surface, but also to partially “pull” the speaker out of the trunk volume, and therefore reduce the technological holes in the rear shelf.
Thirdly, low-frequency heads designed to work in an infinite acoustic screen are very critical in reproducing the range below their own resonant frequency. Since the linear stroke of the diffuser in this range reaches a critical point, in order to avoid speaker failure, it is necessary to have a third or fourth order infra-low-pass filter. It should be set to a frequency of 25-30 Hz.
Another thing you should consider when installing a free-air subwoofer is that the nature of the bass will depend on how full the trunk is.
Closed case
Unlike a free-air installation, in this version the subwoofer is placed in a certain closed volume, which can be 15-30 liters. Thanks to this, strict requirements for insulation of the luggage compartment are removed, and due to the natural decline in the frequency response of the loudspeaker, the presence of a FINCH becomes unnecessary .
The disadvantages include the need for a deep modernization of the rear shelf (you will have to cut out a niche to install the box) and, as a consequence, for all cabinet woofers, the loss of useful volume of the luggage compartment.
Housing with bass reflex
As was said in the theoretical part, using a housing with a bass reflex allows you to obtain an increase in sound pressure of approximately 3 dB, while it is advisable to place the bass reflex port(s) as close as possible to the bass head. The installation of this acoustic design option is not much different from the installation of a closed-type cabinet; it will only be necessary to significantly modernize the rear shelf, since the required volume of the cabinet, as a rule, is larger than for a closed-type design, and depending on the woofer used, ranges from 20 to 40 l.
Strip type housing
As installation experience shows, with proper design calculations, this type of housing can be considered optimal for cars with a sedan body. Among the main advantages, the maximum increase in sound pressure (up to 6 dB) should be highlighted; the low-frequency head is completely closed and therefore protected from external damage, The bass reflex port is located in the rear shelf and, due to its small dimensions, practically does not violate its integrity. Another advantage is that the requirements not only for the quality of insulation of the interior and trunk space, but also for the rear shelf itself are reduced. That is, the funds that you invest in upgrading the interior and luggage compartment for other types of acoustic design may be much higher than the costs of building a strip-type body. Moreover, you can use ready-made housing designs by extending the bass reflex port (FI) by the amount necessary to bring it into the rear shelf.
True, this scheme works if the volume of the front (playing) chamber of the subwoofer is reduced by the extended volume of the port.
The main disadvantages of this design are the large installation dimensions of the housing and the complexity of its calculation.
Rear seat armrest
Many modern cars have a special window in the folding armrest of the rear seats, which is what many installers use. Everything that is said for installing a subwoofer in the rear parcel shelf is also true for this type of installation, only with some clarifications.
Care should be taken to ensure that the hole size is large enough and does not greatly obscure the woofer cone. Otherwise you won't get good bass.
If the dimensions of the hole are not sufficient to install the FI, then you should not extend it additionally, for example, into the rear shelf. It is better to think about changing its shape, for example, perform the calculation not for a round, but for a slotted phase inverter.
For those who like to listen to music louder, it makes sense to install a hard wall behind the rear seats, into which two large speakers crash into the diffuser facing the cabin. Loud sound is guaranteed - you may even have to strengthen the trunk locks.
How to install a woofer in a hatchback car?
It is generally easy for owners of cars with this type of body to get good bass - due to the fact that there are a minimum of obstacles between the trunk and the interior.
For the low-frequency head, you can use any type of acoustic design, except, of course, free air. However, there are little tricks here too.
It should be remembered that if there is some kind of hard obstacle in the way of the sound from the woofer, this, as a rule, allows you to get an additional increase in the volume level. For example, by installing the simplest subwoofer in a trapezoidal housing behind the rear seats and directing its diffuser to the rear window, you can get significantly more bass. However, it should be understood that the effect directly depends on the distance between the speaker and the glass (the greatest impact is obtained when the distance between them is commensurate with the diameter of the diffuser).
There are cases, especially in small cars, when a large 12-inch subwoofer and a powerful amplifier are used, but there is no loud bass. You open the door and the bass appears, when you close it, it disappears. This situation, as a rule, indicates that the volume of the woofer head housing is insufficient. If there is no room to increase the volume (the entire useful volume of the trunk is eaten up), then you need to take a speaker of a smaller size.
Moreover, as practice shows, subwoofers with 10-inch LF heads in small cars sound much more melodic and more accurate than their larger counterparts.
Well, here are the main points that I would like to note. Thank you all for your attention)
Issue price: 0 ₽ Mileage: 42,000 km
The role of an active subwoofer
Installing an active subwoofer in a car
Typically active subwoofers perform the following main role:
- An audio system of the highest quality is capable of playing frequencies that have a different range.
- The diffuser area is quite large, due to which it also becomes possible to reproduce low frequencies of sound.
- Also, a subwoofer (see How to make a subwoofer: practical tips) may also be needed when some moments played by the device lose their attractiveness.
Note: in this case, a passive subwoofer will definitely not cope (unless you carry out thorough special training, which only a professional can do), so you need to use only an active one.
Where to install
Installing an active subwoofer on a car
You can install the radio in any convenient place in the car. But at the same time we will consider the most popular of them:
- Trunk. This is because this is where it is easiest to install a subwoofer, since there is usually a lot of free space in the trunk. However, this will cause the sound frequency to become lower. However, once you find a suitable location for the speakers, you can easily adjust the quality of the sound produced.
Sub in the trunk
- In some cases, subwoofers are installed directly in the front panel. Of course, the sound produced will be of high quality. However, such a process will be more complex from a technical point of view.
Note: usually those owners who install subs here are true fans of high-quality sound and who are willing to do almost anything to get maximum sound.
- Subwoofers are often installed under the driver or front passenger seat.
Mounting the subwoofer in the trunk of the Tour. — Skoda Octavia, 1.6 l., 2009 on DRIVE2
I bought a cable with a sufficient cross-section at an electrical goods store.
Cable
The terminals accepted the cable well! :-)
Switching
The option of attaching the subwoofer with a mesh did not seem entirely reliable to me. The trunk is large, most of the time it rolls around empty, so it was decided to secure it rigidly! But at the same time, it is necessary to maintain the ability to easily and quickly unscrew and pull out the sub, for transporting something very important and necessary. For example, potatoes:-):-):-):-)
What will allow us to quickly unwind? That's right, lambs! Here they are:
Lambs :-)
The lambs will hold a board like this. Initially, it was planned to make do with little blood and cold weld the bolts. But smart people advised against this type of fastener, due to the extremely small area of the glued bolt... there! I seem to have explained it clearly :-)
Board
Boltik :-)
Anticorrosive
Now, the board needs to be given the appropriate look, for this we used black, very black carpet (the same on the subwoofer), very thick PVA and a furniture stapler:
Spread PVA
Nailed it with a stapler
This is such a cute product!
tablet
We screw this board to the bottom of the bass machine with a dozen black screws! :-)
Hello, tablet! Hello, subik! :-)
Turn over:
Picture
.tighten all three bolts (the fourth bolt did not fit, because there is a spare wheel there), but even with three bolts the subwoofer fits like a glove; being, now in essence, a continuation of the car! I am satisfied with the appearance and the safety and ease of removal/installation of this unit! Thank you all for your attention!
Picture
Installing a stealth subwoofer in the trunk of a car. — Car diagram — do-it-yourself car crafts
We will talk about how you can install a stealth subwoofer in the trunk of a car with your own hands. In this case, the purchased subwoofer will be disassembled, but this is not so important, the main thing is that there is a head or a speaker, whoever calls it... So; hanging in the trunk was a hefty Alpine SBG1244BP, which I bought only because of its design.
My first sub
It was decided to get rid of it and play with stealth, this is my first experience and I could have made mistakes, but before I started I looked at various installation options and went to disassemble the casing. I decided to make a bathtub from fiberglass and mold it along the body, and not along the skin, in order to squeeze out as much volume as possible. I sealed the future gluing area with masking tape and applied the first layer of fiberglass and left it to dry.
covering with tape and polyethylene
Result of the first procedure
The bathtub was removed extremely easily, the tape was peeled off, and the polyethylene was removed.
Removed bath
We begin adjusting to the casing, insert the bathtub into place, with a trembling hand we cut out a hole in the casing, put the casing in place and see what happens:
Fitting
Looks like it's good. I decided to connect the two parts with the same resin and fiberglass, since the casing absorbs the resin and the result is a very strong connection. I haven’t bought the speaker yet, because I had to estimate the final volume - pour water:
Water...
20 liters came in, and as you can see, there was still quite a bit of space left to the very edge, so I figured that it would end up being 30-35 liters. After looking at inexpensive options, I settled on the Pioneer TS-W310S4:
Maximum output power 1,400 W Nominal input power 400 W Impedance 4 Ohm Frequency characteristics 20 - 250 Hz Sensitivity (1 W/1m) 95 dB Woofer size (cm) 30.0 cm Cone material Seamless cone made of composite IMPP material Voice coil type Single Two 4? voice coils: 2 or 8? Yes Magnet holder type Extended and vented Connectors Plug-in type Weight 6.20 kg Suspension material Double-layer glass fiber reinforced elastic polymer Parameters Thiele/Small TS-W310S4 Qts 0.77 Fs [Hz] 37 Vas [ft3] 1.21 Xmax [mm] 10, 8
Xmax [inches] 0.42
The front parts of the subwoofer were cut out of plywood and a hole was cut for the speaker:
fitting
I didn’t have thick plywood over 19 mm, but I had 9 mm, it was decided to make it out of it by gluing two parts with resin and fastening them with self-tapping screws, it turned out very durable.
Front side
We connect the front part with the sheathing using resin and fiberglass, gluing all the joints from the inside of the box, and also gradually gaining the required thickness of the walls of the stealth.
Something is already emerging.
After this, we glue the contacts into the wall of the box, lubricating the edges with fiberglass putty and tightening it with self-tapping screws to the box, installing two perpendicular spacers, and vibrating the inner walls in order to make the walls less loud (although many do not approve of this). We measure the volume and at the same time check for leaks, it comes out to 35 liters. We put it in place and turn it on for the first time.
Example
Everything works - good. I had to cut the bottom shelves so that there was access to the bottom drawers:
Our hands are shaking, but we cut...
We cover the surface of the stealth with car carpet, assemble it, and put everything in its place. And now, after 1.5 weeks of torment, we get the desired stealth and free trunk
Open
Closed
cut out pocket, how I will miss you... How it began to sound. Of course, the difference with the previous sub is huge, but I don’t have the same hearing and have little experience in evaluating the sound of subs, but so far none of my friends who are involved in car audio have said that it sounds bad or that there are any problems, except for one...
This is my dull amplifier, for the previous sub it was quite enough, but here is a specific failure: Description of the Lightning Audio LA-4100:
Low-pass filter: 40-150 Hz; High-pass filter: 60-1200 Hz; Hi-level inputs; Line output; Bass Boost: 0-+12 dB (45 Hz), Rated power, bridged, 4 ohms: 200 W x 2 Rated power, 2 ohms: 100 W x 4 Rated power, 4 ohms: 50 W x 4
Number of channels (amplifier type): 4
Therefore, it was decided to eliminate this drawback and install Pioneer GM-D8601:
maximum output power1 x 600W (4?) 1 x 1000W (2?)
1 x 1600W (1?)
Power according to CEA 2006 (THD + N = 1%)1 x 300W (20Hz - 240Hz / 4?) 1 x 500W (100Hz / 2?) 1 x 800W (100Hz / 2?)
75 dBA (ref: 1W at 4?)
Continuous output power (RMS)1 x 300W RMS (4?) 1 x 500W RMS (2?)
1 x 800W RMS (1?)
Frequency response 10 - 240 Hz Distortion 10 W, 100 Hz ref. 100dB Bass Boost Remote Control Frequency 50Hz, Level 0-18dB
Low pass filter (LPF) 40 - 240 Hz (-12 dB/oct)
Also replace the wiring, and fix the little mistakes that I made with my crooked hands. Thank you for your attention
Installation
Subwoofer lanzar vctbs 8active, under the seat
Accordingly, the shape begins to dictate the speaker installation technology. In this case, everything is simple:
- Mounting the speakers involves installing them on a plane. In this case, the sound emitter must be directed upward;
- In no way should the head be positioned horizontally or even at a slight angle, as is the case with standard subs.
Emitters
As a rule, the drivers or heads in underseat subwoofers (see Installing an active subwoofer in your car yourself) are 8 inches. They are most often made in a “slim” design, which contributes to their convenient location in flat, thin cases.
Note. On the other hand, there are also heads whose size is much larger. 120 mm or 165 mm emitters are also placed in compact buffers.
Active subwoofers under the seat
You should not expect the following from both the first (8-inch) and second emitters:
- Serious sound pressure;
- Low nonlinearity indicators.
Naturally, much will depend on the design of the emitters themselves, but this does not exclude general patterns. Most underseat subs have a maximum sound pressure of 100 dB and no more.
Unexpected, or how to secure a sub in the trunk. — Lada 2107, 1.6 l., 2008 on DRIVE2
Today I finally decided to put things in order in the trunk, otherwise the amps and subwoofer were hanging around like shit in an ice hole, causing the wires to constantly pull out. In general, I mounted 1 amp for acoustics on the top of the trunk (under the acoustic shelf), and the second on the back wall of the box saba I attached a capacitor and a power divider to it. To prevent the sub from dangling in the trunk, I decided to secure it. I took 2 corners and screwed them to the floor of the trunk. I recently went to work (I work as a photographer), 30 minutes before shooting, it’s raining and snowing outside, I left the yard, I saw the battery light on the dashboard, I thought, okay, it happens, the voltage in the battery shows normal, as it was. I drive further and realize that neither the turn signal nor the turn signal are working. I drive another 50 meters, pull up to the side of the road, and go to see what’s wrong, open the trunk and then I realize that I’ve screwed up) the self-tapping screw that secured the corner to the trunk edge made a hole in the braid of wires, there was a warning and the fuses blew. I abandoned the car, called my father back, (luckily he lives 5 minutes away) he gave me a ride to the center, didn’t drop me off for the filming, everything is clear) After the filming, I picked up the car, started it, drove off, and then I understand that now it’s a plus not even 1 sensor on the tidy is working yet, bk, and there is no charge from the genes. go home 1 stop) It’s good that at least the wipers and headlights work) I arrived home, in the garage I rewound the torn piece of wiring, climbed into the fuse box, the result is - 4 preds at 10 a) + a lot of nerves)
These are the pies) Be careful with the wires)))))
Issue price: 100 ₽
DIY stealth subwoofer in the trunk part_2_final — Hyundai Coupe, 1.6 l., 1997 on DRIVE2
We continue in the same spirit.
For those who missed the stealth subwoofer in the trunk with their own hands, part_1
We take putty, polyester, universal, and apply it in a thick layer, and immediately try it on - at least it works
Everything fits, so we go to work, take a sander, and start sanding everything unnecessary
and try it on again
Everything is fire! I didn’t bother much with removal, since I refused to paint it right away, but there was a lot of carpet left.
Next, we seal everything inside with vibroplast, and on top with bitoplast
All that was left to do was to connect the whole thing, so I did the simple thing, bought new terminals, and stuck them in on the side. I made a cutout in the plywood for the power cables.
The difference is obvious, definitely smaller!
Once everything is ready, it’s time to cover it with carpet! There is nothing complicated about this, the glue is 88 as always.
In total we get, in pairs of pairs:
And finally, we weigh it, it was interesting how much all this will add to the figure
fat guy =)
I didn’t play too hard with the wiring, I bought a Mystery kit, the most expensive one there was for a 2-channel amplifier, and laid it out so that it wasn’t visible. For convenience, we remove the left fender and insert the wire into the interior
All wiring goes along the left threshold, then under the rear seat, and voila, exactly 5 meters is enough
I didn’t invent anything with the minus either, I screwed it to the rear strut bolt and took it out into the trunk
Aaaaand, put it in place, connect it, have fun =)
I said in advance that I am not a music lover, so I am happy with the sound as an elephant. The trunk remained empty, there was plenty of space, access to the spare tire was open around the clock!
I’ll say in advance about the gaps at the back and above the amp - I knew about them from the beginning, everything was done so that at any time you could move the sub and change the lamp in the headlight. Above the amplifier - all the wires are hidden there, I don’t see the point in sealing the gap itself, it won’t add aesthetics, but there will be a lot of problems.
That's probably all
Smooth roads everyone!
Page 2
We continue in the same spirit.
For those who missed the stealth subwoofer in the trunk with their own hands, part_1
We take putty, polyester, universal, and apply it in a thick layer, and immediately try it on - at least it works
Everything fits, so we go to work, take a sander, and start sanding everything unnecessary
and try it on again
Everything is fire! I didn’t bother much with removal, since I refused to paint it right away, but there was a lot of carpet left.
Next, we seal everything inside with vibroplast, and on top with bitoplast
All that was left to do was to connect the whole thing, so I did the simple thing, bought new terminals, and stuck them in on the side. I made a cutout in the plywood for the power cables.
The difference is obvious, definitely smaller!
Once everything is ready, it’s time to cover it with carpet! There is nothing complicated about this, the glue is 88 as always.
In total we get, in pairs of pairs:
And finally, we weigh it, it was interesting how much all this will add to the figure
fat guy =)
I didn’t play too hard with the wiring, I bought a Mystery kit, the most expensive one there was for a 2-channel amplifier, and laid it out so that it wasn’t visible. For convenience, we remove the left fender and insert the wire into the interior
All wiring goes along the left threshold, then under the rear seat, and voila, exactly 5 meters is enough
I didn’t invent anything with the minus either, I screwed it to the rear strut bolt and took it out into the trunk
Aaaaand, put it in place, connect it, have fun =)
I said in advance that I am not a music lover, so I am happy with the sound as an elephant. The trunk remained empty, there was plenty of space, access to the spare tire was open around the clock!
I’ll say in advance about the gaps at the back and above the amp - I knew about them from the beginning, everything was done so that at any time you could move the sub and change the lamp in the headlight. Above the amplifier - all the wires are hidden there, I don’t see the point in sealing the gap itself, it won’t add aesthetics, but there will be a lot of problems.
That's probably all
Smooth roads everyone!
Active subwoofer housing and its types
The device of active subwoofers
The housing of this speaker creates a unique acoustic design. However, some devices require a variety of designs. Active subwoofers can be installed in the following boxes:
- Closed box. It is quite simple to make. In this case, connecting a subwoofer with this design is carried out in a few simple steps. During installation, it is practically impossible to make any mistakes.
Note: you can make a closed enclosure for a subwoofer with your own hands.
- Strip box.
- Box with bass reflex. This is a box with a port of a certain length. The main advantage is that it can be used to create any pressure in the system. However, to install such a device, you must have a lot of knowledge and experience.
The main requirement for any type of box is that it must be as airtight as possible so that the subwoofer itself is effectively protected from external conditions. The manufacturer must take into account that the highest quality surface should be the one that comes into direct contact with the speaker. After all, there are usually gaps and cracks on the uneven surface, which can ruin all efforts to install the device.
How to fix a subwoofer in the trunk of a VAZ 2107: step-by-step instructions
Everyone knows the sad fact: despite the fact that the VAZ 2107 is truly a people's car (as well as other VAZ classics), the sound insulation and car audio circuit in them are deplorable. A pair of standard speakers, the ability to connect additional points, and a primitive radio – that’s all. But lovers of good, rich sound need the entire frequency range. The low frequencies that create the “bass foundation” of any musical composition can be provided by a subwoofer or bass speaker. Let's talk about the possibility of connecting it.
The scheme is as follows: since the subwoofer emits low frequencies, about 10-200 Hz, the speaker body will be larger than that of the tweeter, since the size of the vibrating part is inversely proportional to the frequency - the lower the frequency, the larger the parts that produce this sound. The approximate volume of the subwoofer is about 35 liters. Therefore, the subwoofer is usually placed in the trunk, especially since the trunk of the VAZ 2107 has a protrusion to which it is convenient to mount a bass speaker. In this case, as they say, “the wolves are fed and the sheep are safe” - the trunk is free and the subwoofer is installed. Connectivity options in the cabin are awkward.
Why do you need a capacitor for an amplifier?
In addition, under high load, the subwoofer can create “peaks” in current consumption that the VAZ 2107’s on-board network, including the generator and battery, cannot compensate for. Therefore, it is necessary to install a capacitor to avoid “failure” in the operation of the amplifier and on-board circuits.
The installation circuit of a large capacitor is made in parallel with the power supply of the amplifier. The operating voltage of such a capacitor reaches 24 V, and the distance from the amplifier to the capacitor should not be more than 0.5 m. Otherwise, there will be a “drawdown” in the bass, without connecting an additional device.
To correctly calculate the capacitance of the capacitor for the subwoofer, you need to remember that the capacitance of the capacitor should not be less than 1 Farad for every kilowatt of acoustic power at the output of the entire system. For greater guarantee, take an “allowance” for excess capacitor power so that the power circuit is not disrupted.
When choosing a subwoofer for the VAZ 2107, do not forget that:
- Selecting a speaker. The following characteristics are important to us in a speaker:
- Size: the most popular is 12 inches, while the volume will be about 25 - 35 liters; quite decent sound, the installation is time-tested;
- Voice coil resistance - the lower it is, the greater the output power. We take the ohmic resistance of the speaker coil at the rate of 2-4 ohms. Installing a speaker with lower impedance is not recommended;
- Do not chase the maximum power of the speaker, just remember that it should be greater than the maximum power of the “amplifier”.
As soon as you become the owner of a subwoofer, it is important to install it correctly in the trunk of a VAZ 2107. It must be said that simply throwing a subwoofer into the trunk is simple and quick, almost everyone does this. In this case, it can be quickly dismantled. The disadvantages of this arrangement are that there is a loss of sound waves in the trunk, it begins to “grumble” and vibrate, and if you buy a fairly powerful device, then this must be taken into account:
A more promising option for installing a subwoofer in the trunk of a VAZ 2107 is to install it so that the speaker is located in the cabin, in the projection of the rear seat armrest. In this case, sound vibrations will directly enter the cabin, rather than being “re-radiated” through the metal structure. Passing and resonating through the closed volume of the trunk, the sound acquires a timbre “like coming from a barrel.” This sound reflection scheme is not the best.
The disadvantage of this installation option is that in the interior of the VAZ 2107 the rear armrest is constantly open.
How to fix a subwoofer in the trunk so that it sounds into the interior of a VAZ 2107? Let's consider this installation option in more detail.
- A box is cut out of a sheet of plywood (18 mm thick) and assembled to be placed in a niche under the rear shelf. An amplifier and speaker (10-inch Crunch ds-10) will be mounted on it.
- To seal the trunk compartment, a partition is installed between the trunk and the passenger compartment;
- The side walls of the box are trapezoidal, since the partition is inclined. The box is assembled using self-tapping screws and “liquid nails”.
- Two bass reflex units are installed;
- When installing a subwoofer, sound insulation is carried out with Standardplast;
- After installing the seat back and the “design” of the armrest, it looks like this:
You can also listen to music with the center armrest closed. At the same time, the timbre changes slightly.
There is an amplifier in the trunk itself (on the back wall of the subwoofer).
As a result, there was so much free space in the trunk that another gas cylinder could easily fit there!
Types of subwoofers
Installing an active car subwoofer
Car subwoofers can be of the following main types:
- Woofers. They are usually used as a complement to more powerful devices.
- Active subwoofers. They differ in that an amplifier is connected to them.
- Passive subwoofers. The amplifier will have to be purchased separately.
They are different from each other. Many people believe that active subs are the best from this list. After all, it can be installed almost immediately, since it does not require preliminary preparation. The woofer is installed directly in the box, and the sound amplifier is concentrated outside. Therefore, installing such a subwoofer only involves laying and connecting all the necessary cables.