In the June issue of the magazine, we tested CD players for 21–35 thousand rubles. Today we are considering integrated amplifiers of almost the same price category, i.e. devices that can make an ideal stereo pair with “June” players. Test participants: amplifiers from 27,000 to 41,000 rubles.
Criteria for evaluation:
Fundamental is, of course, sound quality. Among the design features, it is important to have a balanced input and an input with a phono corrector (it is better if it is separate for the MMI and MC cartridge), as well as a headphone output. The functional set of a stereo amplifier is usually not rich, so we will not consider it specifically. An additional line input on the front panel for connecting a portable player is also useful. And if according to the Hamburg account, then an amplifier that meets the most modern requirements must receive not only analog, but also digital signals, including from USB devices.
Discover the benefits of registering your...
Pioneer receivers and amplifiers
- Image
- Text
Discover the benefits of registering your device online at www.pioneer.co.uk (www.pioneer-eur.com).
Integrated amplifier
User manual
Attention, Location: rear panel of the device
Page 2
- Image
- Text
Location: back of device
The lightning bolt with arrowhead symbol within an equilateral triangle is intended to alert the user that uninsulated “dangerous” voltage exists within the apparatus that creates a risk of electric shock to persons.
Warning:
TO REDUCE THE RISK OF ELECTRIC SHOCK, DO NOT REMOVE THE COVER (OR BACK) OF THE UNIT; THERE ARE NO USER SERVICEABLE UNITS INSIDE THE DEVICE. ALL MAINTENANCE WORK MUST BE CARRIED OUT BY QUALIFIED PERSONNEL ONLY.
The exclamation mark within an equilateral triangle is intended to alert the user to the presence of important operating and maintenance instructions in the literature accompanying the product.
Attention!
Warning
This device is not waterproof. To reduce the risk of fire or electric shock to the user, do not place any containers filled with liquids (such as vases or flower pots) near this apparatus, do not expose this apparatus to rain or splashing, or place this apparatus in a wet location.
Warning:
To prevent the device from catching fire, do not place any naked flame sources (such as lighted candles) on the device.
Ambient conditions
Ambient operating temperature and humidity: temperature from +5
O
From to +35
O
WITH; relative humidity
less than 85% (assuming the vents are not blocked). Do not install this device in poorly ventilated or damp places, or in places where it may be exposed to direct sunlight (or strong artificial light).
WARNING Before connecting your device to the network for the first time, please read the following section carefully. Line voltage varies by country and region. Make sure that the mains voltage in the area where this device will be used is correct (for example, 230 V or 120 V), which should be indicated on the rear panel.
If the power plug of this device does not fit into your outlet, the plug must be removed and another one installed. The plug on the power cord of this device should only be replaced by a qualified technician. Inserting a severed power plug into an electrical outlet may result in dangerous electric shock. To avoid such situations, the cut fork must be disposed of immediately. If you are not going to use the equipment for a long time (for example, going on vacation), then the power plug should be disconnected from the socket.
VENTILATION WARNINGS
When installing this unit, be sure to leave enough space on all sides to allow proper heat dissipation (at least 60 cm at the top, 10 cm at the back, and 30 cm at each side).
Attention!
Openings in the amplifier case are provided for ventilation, which is necessary to protect it from overheating and ensure reliable operation of the device. To prevent fire, do not block the ventilation openings with any objects (such as newspapers, tablecloths, curtains, etc.) or place the device on a thick carpet or bed.
This device complies with the Low Voltage Directive (73/23/EEC as amended by 93/68/EEC) and the Electromagnetic Emissions Directive (89/336/EEC as amended by 92/31/EEC and 93/68/EEC).
This device is intended for home use. If, when using the device for other purposes (for example, long-term use for commercial purposes in a restaurant, in a car or on a boat), it fails and requires repair, then the warranty will not apply (even during the warranty period), and The repair will be paid by the user.
pros
There are not many of them. However, if you choose between the previous model (08) and the new 09th Pioneer, the latter is the brother. It still has a number of advantages, and they are as follows:
- software support for FLAC format;
- extended radio range - from 65 to 80 megahertz;
- the cost is no more expensive than the 08 model.
ATTENTION! Now you can buy a completely new Pioneer MVH X580BT processor radio for only 2990 rubles! Don't believe me? Then follow the link and see for yourself! Read more"
Not that these are very big advantages. However, for some, support for high-quality FLAC audio format is very important, and the rest does not matter. If these people also do not want to save money, then it is impossible to imagine better radio tape recorders for them than this one.
WARNING The power switch on this unit...
Page 3
- Image
- Text
Warning
The power switch included on this product does not completely disconnect the product from AC power. Since the main means of disconnecting the device is the power cord, to completely disconnect it from electricity it is necessary to unplug the power cord from the outlet. Therefore, when installing the device, pay attention to the fact that in the event of any unusual situation, the power cord can be easily disconnected from the outlet. To prevent the device from catching fire, the power cord must also be unplugged from the outlet if you are leaving for a long time (for example, on vacation) and will not be using the device.
WARNINGS REGARDING THE POWER CORD
hold the power cord by the plug only. Do not pull the power plug from the outlet while holding the cord, and never touch the power cord with wet hands, as this may cause a short circuit or electric shock to the user. Do not place the device itself or any pieces of furniture on the power cord; Do not pinch the power cord. Do not tie the power cord in knots or bundle it with other cables. Power cords must be laid in such a way that they will not be stepped on. A damaged power cord may cause fire or electric shock to the user, so check the quality of the power cord from time to time. If you find any damage to it, contact your nearest PIONEER Authorized Service Center or your dealer to have the cord replaced.
If you want to get rid of this device, do not throw it away with your household waste. In accordance with the law, there is a special recycling system for used electronic equipment, which requires recycling, restoration and reuse of materials.
Private users in the 25 European Community countries, as well as Switzerland and Norway, can return used electronic devices to designated recycling centers or to the retailer free of charge (if you buy a similar new device).
In countries not mentioned above, you should contact your local authorities to find out how to properly dispose of your old electronics - this will ensure that your unwanted device is treated and refurbished and some materials are recycled to prevent potential negative impacts on your life. environment and human health.
Replacement and installation of the power plug on the power cord of this device should only be carried out by a service center specialist.
Attention: Molded Plug
This device comes with a convenient molded three-prong plug designed to ensure your safety. This plug has a 5 A fuse built into it. In the event that the fuse must be replaced, ensure that it is rated at 5A and that it is ASTA or BSI approved and complies with BS1362.
check the fuse body for ASTA marks
or BSI
.
If the power plug has a removable fuse cover, it must be returned to its place after replacing the fuse. If the fuse cover is lost, the plug cannot be used until you find a replacement cover. Such a cover can be purchased from your dealer. If the supplied molded mains plug does not fit into your socket, the fuse must be removed and the plug cut off and discarded. Inserting a cut power plug into an electrical outlet may result in dangerous electric shock.
When installing a new plug, you must follow the color coding of the wires shown below. If in any doubt, consult a qualified electrician. ATTENTION: the wires of the power plug are marked as follows:
Blue: neutral brown: phase
Since the colors of the power cord markings on this device may not match the colors of your power plug, proceed as follows:
The BLUE wire must be connected to the terminal marked N
or black.
The brown wire must be connected to the terminal marked L
or RED.
how to replace the fuse:
open the fuse niche using a screwdriver and replace the burnt
The fuse is good.
Minuses
Few changes compared to the previous model. In this regard, this pioneer is inferior to many radios from competing brands. And this is, perhaps, its main drawback, because it is not clear why to buy such a device if there are analogues that are more functional and comparable in price.
- the display is still insufficiently contrasty and single-line;
- You cannot completely turn off the radio;
- You will have to buy a separate adapter for the Euro chip and heat shrink.
The disadvantages are serious. There is also no SD card support. The amplifier is the same as the previous model. Same design, same sound, and pretty much everything else is the same. So upgrading the 08 to 09 makes no sense unless FLAC and a larger radio frequency range are very important.
Thank you for purchasing this Pi...
Page 4
- Image
- Text
Thank you for purchasing this Pioneer product!
In order to properly handle the purchased device, please read these instructions carefully. After you have read the instructions, keep them in a safe place - the instructions will be useful to you in the future to obtain the necessary information.
Content
Preparing to turn on
Key Features ………………………………5
equipment
………………………………………….5
battery installation
…………………………………6
amplifier installation
…………………………………6
Amplifier connection
cable connections……………………………..7
connecting audio components
………………….7
connecting speaker systems
…………………..8
connecting to a network
…………………………………9
Controls and displays
Front Panel ………………………………….. 10
remote control
………………….
11 Using the remote control
….. 11
display
…………………………………….. 11
Playing a signal
Using Direct Mode ……………………… 12
Using the Sound Retriever function
…………… 12
Using the tone and balance controls
……… 12
Playing other sources
……….
12 recording audio signal
…………………………….. 13
Connecting additional devices
Using the USB interface …………………… 14
connecting an additional amplifier
………….
15 Controlling other Pioneer components using the amplifier sensor
………………….. 16
Additional information
Troubleshooting …………………. 17
specifications
……………………….
18 amplifier care
…………………………….. 18
Preparing to turn on, Installing the amplifier, Installing the battery
Page 6
- Image
- Text
6
Preparing to turn on
Battery installation
Install a lithium battery (CR2025) into the remote control as shown below. The battery supplied with this amplifier is stored in the battery compartment (see point 3 below). If you notice a decrease in the range of the remote control, replace the battery in the same way.
1 To open the battery compartment, press
onto the latch in the direction of the arrow.
2
remove the battery compartment.
3
Remove the battery from the compartment.
If this is your first time, remove the protective film and then replace the battery. 4
install a new battery in the compartment
Make sure that the positive side is facing up when installing the battery.
Warning
When using lithium batteries, remember the following:
There is a danger of explosion if the battery is replaced incorrectly. Be sure to replace the battery only with the same or equivalent type recommended by the manufacturer. After replacement, the old battery must be disposed of immediately. Keep batteries away from children. If a battery has been swallowed, consult a doctor immediately. If used incorrectly, lithium batteries may cause a fire or cause chemical burns. do not disassemble the batteries, do not heat them above 100
O
C and do not throw them into the fire.
If you do not intend to use the battery for a month or more, remove it from the remote control.
·
·
·
·
·
When disposing of used batteries, please comply with government directives and regional regulations regarding environmental protection. Do not use or store batteries in direct sunlight or in hot areas, such as inside a car or near heating devices. Doing so may cause the battery to leak, overheat, explode, or cause a fire. it may also shorten battery life.
Amplifier installation
When installing this amplifier, it should be placed on a level, stable surface.
Do not install the amplifier in the following places: – on a color TV (this may cause distortion).
nyu image);
– near the cassette deck (or near a device that
emits a magnetic field) – this may affect sound quality;
– in direct sunlight; – in damp places; – in places with very low or very high temperatures
Roy;
– in places where the amplifier may be affected by vibrations
walkie-talkies and jolts;
– in very dusty places; – in places where the amplifier may be exposed to heat
any vapors or fats (for example, kitchen).
·
·
·
Exposure 2010s2 — 35,000 rub.
Sound 4
Design 4
Control 4
Quality/price 4
Advantages
- high quality handmade
— preamplifier output with a buffer stage operating in class A
Flaws
— demands on acoustics
- lack of clamps on the terminals
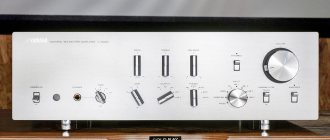
Design
UK company Exposure recently revamped its popular 2010 line with the release of a 'remastered' CD player, tuner and amplifier. There are practically no external changes - only the name of the series is missing on the facade, so that the consumer can combine devices of the 2010 and 3010 lines without fear of visual inconsistency. The “power” cascades are assembled on high-speed bipolar transistors, the inputs are selected via relays rather than mechanical switching, as before, and the selected source is indicated by an LED on the front panel (the silver device has blue LEDs, the black device has red LEDs). To reduce interference from the power supply, cascode circuits are used, and audiophile quality capacitors are installed in the amplification path.
Control
The remote control is an option, the amplifier can be purchased without it. Perhaps this is what should be done, replacing it with a third-party universal remote control that can hardly be called ergonomic. Eight rows of four identical buttons make up one field; work areas are indicated only by color.
Recommendations
We racked our brains for a long time about how to characterize the sound of this device, but we couldn’t come up with anything less vague than “peculiar.” In principle, this is a wonderful amplifier, capable of producing a truly open and transparent sound. But to do this, you need to choose the right source and acoustics for it. There are no problems with the first one - the device works perfectly in tandem with the 2010s2CD, but finding the right speakers will not be easy. However, there are many sound reproduction enthusiasts who are ready to buy such an amplifier just for the sake of long-term experiments in selecting the ideal pair of loudspeakers for it. At the same time, you need to remember about such a little thing as the lack of clamps on the terminals: speaker cables must be equipped with “bananas”.
Remote Control
The remote control cannot be called a model of ergonomics: it is difficult to find the right one among the identical small buttons, despite the color highlighting.
It is difficult to say what exactly caused such a sharp decrease in the level of high frequencies in the frequency response (the decline starts at 10 kHz). I would like to assume that this was done intentionally in order to avoid unnecessary distortions, but their level does not exceed the average value for the test. The amplifier is able to neutralize the excess highs that some bookshelf speakers suffer from, while their sensitivity can be ignored (the damping coefficient exceeds 100 units). The actual power exceeded the rated power by about 10%, and it practically does not decrease with increasing frequency. The level of channel separation exactly corresponds to the average value in the selection. Harmonic distortion remains low regardless of the input signal frequency.
Connecting an Amplifier, Connecting an Amplifier Chapter 2, Cable Connections
Connecting Audio Components
- Image
- Text
7
Amplifier connection
Chapter 2:
Amplifier connection
Cable connections
Be careful not to place cables on top of this unit (as shown in the illustration). If this occurs, the magnetic field produced by the device's transformers may create a background hum in the speaker systems.
Attention!
Before making any connections, turn off the amplifier and unplug the power cord from the outlet.
·
Connecting Audio Components
The number and type of connections depends on the components being connected. To connect a CD player, tape recorder, record player or other audio components, follow the steps below.
record player
amplifier
cassette deck, etc.
CD player, etc.
Characteristics
MVH-09UB is equipped with the same hardware as 08. There are some software changes. But this, again, only applies to radio and FLAC. Otherwise, the radio's parameters are no different from the previous model.
| Display | wide angle VA LCD, 12 characters |
| Equalizer | graphic, 5-way |
| Button backlight | green |
| Formats | FLAC, WMA, MP3, WAV |
| Connectors | RCA, AUX, USB |
| Power limit | 50 W x 4, MOSFET |
| Support | Android |
In terms of installation type and dimensions, this is 1 din. There is nothing special about the device’s parameters, they simply correspond to modern standards. At the same time, it is clearly inferior to advanced technologies in the budget segment, both in the number of functions and in overall quality of execution.
Amplifier connection, Speaker connection, Bare wire connection
Page 8
- Image
- Text
8
Amplifier connection
1 Connect the analog audio outputs of your CD player (or other component) to the CD input of this amplifier.
To connect, use a stereo RCA cable (“tulip”), as shown in the figure.
connect any other components in the same way (for example, iPod
1
docking station or port
tive audio player) to AUX
[auxiliary input] and
TUNER
[tuner].
2
Connect the analog outputs of your cash register
network deck (or other tape recorder) to the TAPE inputs (IN) of this amplifier. Then connect the audio inputs of the tape deck to the TAPE outputs (OUT) of this amplifier.
this will allow you to record from components connected to this amplifier.
To connect, use a stereo RCA cable (“tulip”), as shown in the figure. 3
For record players only:
Connect
the audio outputs of your record player to the PHONO inputs of this amplifier.
If your turntable has a ground wire, connect it to the amplifier's ground terminal. If your record player has line outputs (that is, it has a built-in preamplifier-corrector), then connect it to the AUX
.
Make sure the MM/MC
[moving magnet/coil] switch is in the correct position for the type of player you have. If the sound from your record player seems too loud and distorted, or too quiet, try changing the position of this switch.
Connecting speakers
Make sure that you have connected the right and left speakers to the appropriate amplifier output terminals. Also, make sure that the positive and negative (+/–) terminals on the amplifier match those of the speakers. You can use speaker systems with a nominal impedance of up to 16 ohms. Before connecting the amplifier to the network, make sure that all connections have been made.
·
·
·
·
left speaker system
Connect the speakers to the amplifier terminals as shown above.
The figure shows the connection of the left speaker system. Connect the right speaker system in the same way. You can use either bare wire or banana plugs (see below) to connect your speakers to the terminals.
Connection using bare wire
Make sure that the speaker cable you are going to connect is properly prepared with 10mm of each wire exposed and the individual wires twisted together (Figure A). To connect the terminal, unscrew the terminal nut a few turns until there is enough free space under the nut to install the bare wire (Fig. B). After installing the wire, tighten the terminal until the inserted wire is clamped tightly (Figure C).
Rice. A
Rice. B
Rice. C
Attention!
A description of how to connect the other end of the cable to the speaker systems can be found in the instructions for your speaker systems.
·
·
Note
1
iPod is a trademark of Apple Computer, Inc., registered in the US and other countries.
Amplifier connection, Network connection
Page 9
- Image
- Text
9
Amplifier connection
Warning
HAZARDOUS LIVE voltage present at the speaker terminals.
. To prevent electric shock when connecting or disconnecting speaker cables, unplug the power cord from the outlet before making any connections. Make sure that exposed speaker wires do not touch the rear panel - this may cause the amplifier to automatically turn off.
Network connection
All other connections must be completed before connecting the amplifier to the network.
Connect the power cord to the AC IN jack located on the rear panel of the amplifier, and plug the power cord into a power outlet.
·
·
·