This setting is safe for the audio system, but is not absolutely true for all audio systems. Further adjustments are made for the specific system and listener.
Setting up the radio depends on its specific model; here we will look at the settings that are available on almost any radio.
1. Setting up the radio: 1.1 Bass Boost - EVIL! Forget about him! Set it to 0 or OFF 1.2. Loudness - loudness compensation; in systems with external amplifiers, we first set the loudness compensation, then we coordinate the levels of the GU and amplifier, or do not use this function at all. If the GU and the external amplifier are matched in level and then turn on the loudness compensation, clipping may occur! 1.3. Equalizer - you can use it to compensate for shortcomings in the sound of the system; personally, I initially set it completely to 0, then, when identifying shortcomings in the sound, I adjust the sound over time. Here, too, when increasing certain frequencies on an external amplifier, clipping may occur, it is worth remembering. 1.4. Sound Retriever and other various “sound improvers” - As in the case of loudness compensation, they are set before the GU is coordinated with the amplifier, or we do not use it at all. 1.5. Radio crossover: If there is one, set it to - 1.5.1 HPF - Depends on the type of speakers, open the specification and look at how many Hz it plays and set the cutoff. Approximately 16 cm midbass from 80 Hz, 13 cm - 100-125 Hz. Mid 150-200 Hz. Once again, this is not the ultimate truth, it all depends on the specific speaker and how many watts will be supplied to it (the lower the cutoff, the less watts can be supplied to the speaker). The order of the filter is by ear (the higher the order of the filter, the less likely it is that the speaker will fail at high powers) 1.5.2 LPF - Depends on the type of acoustic design of the subwoofer. Approximately 60 - 80 Hz. The filter order is by ear. It is advisable to set the level to 0, and adjust the volume directly from the amplifier.
The amplifier's settings depend on whether it is equipped with filters. If HPF and LPF are set on the radio, then it is not necessary to set them on the amplifier; you can simply open the filter as much as possible. If there is no crossover in the radio, we set the cuts on the amplifier. Turn Bass Boost to 0
2. Setting up the amplifier for speakers: 2.1. Turn on HPF filter 2.2. We set the cut in the same way as described in paragraph 1.5.1 2.3 Set Gain (Level): - Turn on a well-known track. — We set the maximum volume on the radio (WITHOUT DISTORTION). This does not mean that you need to turn the volume up to maximum, for example: the pioneers have a maximum of 62 volume divisions, we set it somewhere around 45-50. Different radio models behave differently, at a bass club I tested it with a Pioneer DEH 80PRS oscilloscope, even at a volume of 62 without “improvers” it doesn’t clip. But it’s not a fact that your radio will behave the same way, so turn it up to about 80% of the maximum volume. — We begin to turn the Gain (Level) until we hear distortion in the sound, as soon as we hear it, we turn the Gain back a little. - Run other tracks and listen to see if there are any distortions on them, if there are, then turn down the Gain - Remember! The volume that you set on the radio when setting Gain is the maximum! No more twisting!
3. Setting up the amplifier for the subwoofer: 3.1 Turn on the LPF filter (if you are using a monoblock, you don’t need to turn anything on) 3.2 Set the cutoff in the same way as described in paragraph 1.5.2 3.3 Setting up the Subsonic (infra-low-pass filter). If you have a subwoofer designed like a Bass Reflex (FI), Quarter-Wave Resonator (QW), or Horn, we definitely use Subsonic. The filter is set 3-5 Hz below the box tuning frequency. 3.4 Gain is adjusted in the same way as in paragraph 2.3
The initial setup is complete, keep an eye on the speakers for the first time; minor adjustments to the settings may be required. Don't forget to warm up your speakers after purchase. Provide proper nutrition to avoid clipping! Follow the prosado
HPF / LPF (HPF / LPF)
Hight pass filter (HPF), also known as a high-pass filter (HPF), filters out (cuts off) low frequencies, leaving high ones.
When setting up a subwoofer amplifier, set the control to about 20 Hz to cut out infrasound and not waste energy, since you won't hear it anyway. For mid-range speakers, the HPF is set around 80 Hz to remove the low frequency range for which the speaker is not designed and will not be able to play it. If you have separate channels or even a separate amplifier for tweeters (tweeters), the HPF is set in the region of 3000 - 5000 Hz, depending on the model, so as not to burn them.
All figures given are approximate, to obtain more accurate and safe values, study the characteristics of your speakers!
Low pass filter (LPF), also known as a low pass filter (LPF), is the opposite of HPF and cuts off the upper frequencies, leaving the lower ones.
For subwoofers, it is set in the region of 50-80 Hz, depending on the type of design (ZYA, FI, etc.) in order to cut off frequencies for which the subwoofer is not intended. The same goes for midrange drivers, cut them around 1400-1600 Hz.
If possible, you can limit tweeters to 20,000 Hz, but this is not necessary.
Setting up an amplifier for a subwoofer
In order to get good and powerful bass sound, owners of passive subwoofers purchase a separate low-frequency amplifier. Some models are designed only to work with the low-frequency path, but many install a multi-channel unit that allows you to change for the better the sound of all speaker systems in the car.
ULFs designed to work with subwoofers have a number of adjustments that can be changed, adjusting the amplifier to a specific type of speaker and the configuration of the car interior. Factory settings are usually in the middle position, which is not always correct for reproducing low frequencies with a specific loudspeaker.
Gain Level
Gain (sensitivity) is often confused with volume, but this is not entirely correct.
Gain is an adjustment of the amplifier's input sensitivity to match the radio. But let’s not get into the weeds and consider this setting from the point of view of what is useful for the user.
Sometimes the Volts (V) value indicated on the regulator can be misleading. The fact is that sensitivity is measured in Volts. The smaller V, the higher the sensitivity, the louder the speaker will play and vice versa.
To begin with, it will be useful to watch a clear video about how gain works on an amplifier:
Adjusting gain by ear (method 1)
Having a good sub link, do not use an equalizer and various bass enhancers, forget about bassboost on the amplifier - so before adjusting the gain, make sure that all this is turned off!
Set the control to minimum and play music that you usually listen to. Turn up the volume of the radio by 3/4 of the maximum; if you hear distortions in the sound of the subwoofer earlier, stop and turn down the volume a couple of notches. Go to the amplifier. Have an assistant slowly turn up the gain control until new distortion appears, and when you hear it, stop the rotation and turn it down by 10%.
Adjusting gain by ear (method 2)
If you don’t trust your hearing and are afraid not to hear changes during time, then use a more accurate method - using sinuses.
If you are tuning a subwoofer, then use 40 Hz, if your case is tuned above 40 Hz or you have a closed box, then take 50 Hz (download sines in the Downloads section). To set the gain for the midbass amp, use 315 Hz.
Sine or tone (in our case) is a tone signal of a certain frequency, changes in the sound of which you can easily hear
Set the gain to minimum, turn on your sine and turn up the volume of the radio. When changing the sound of the tone signal, stop and turn it down a couple of notches (set the maximum volume limit to this value if your radio has such a function). Go to the amplifier. Similarly to the first method, add gain. When the sound changes, stop and turn it down 10%.
Adjusting Gain Using a Multimeter or Oscilloscope
Adjusting the gain level using instruments is a smart and precise adjustment. At the same time, neither the speaker nor your ears are strained. This setup is shown in detail in the video on our YouTube channel:
How to properly configure an amplifier in a car
Before setting up the sound amplifier in your car, you should definitely read the operating instructions and only then proceed to adjustments. Frequency tuning takes place directly in the car, as well as after the system is started. The main rule for the safe start of the equipment is to set the amplifier sensitivity control to minimum, and the volume of the sound source to the middle, and then gradually, by turning the amplifier control knob, achieve clear sound at maximum volume. Remember that rough and fine tuning of sound amplification equipment must be done with a reliable connection of all elements, including power supply, and output stage terminals.
Bassboost
Bassboost - increases the volume at a certain frequency, usually 40-45 Hz.
When using a bass boost, the chance of burning the subwoofer increases sharply, since clipping occurs much earlier. In most cases, bassboost is not needed and if you are a beginner, then just accept the rule “Don’t touch bassboost!”
Experienced people can use it to increase the frequency response shelf in order to draw out dips in certain frequencies, but these are already deep settings and the effect does not always justify the risk.
Review
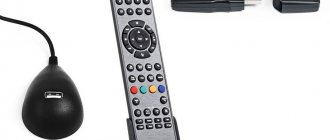
Is it worth buying world vision t62d? Of course it's worth it! This little crap with its ridiculous price will turn your ancient TV into a modern entertainment center. I bought it as a T2 and I didn’t even know that there was something else in it, but here is such a pleasant surprise.
If you also have doubts about the price, you will be reassured by the 1-year warranty card. Even if it burns out on the first day after the warranty expires, I think for that kind of money with such capabilities it won’t be a shame)).
If you have any questions, please ask. I'll tell you, I'll show you...
What to collect from?
You should carefully select components. There are many selection criteria other than the sound of certain brands. Be sure to take into account the dimensions depending on the intended location of the audio system. Just in case, select parts with at least two pairs of linear outputs. And look at the appearance: the design should be combined with the interior of the cabin.
Once you decide on the sound, pay attention to the place where you are going to put it. Dimensions and installation depth play a huge role when installing the system. The optimal choice is two-component speakers from a well-known brand.
Lately, door podiums have become quite popular. True, the “filling” of the door and its trim often take a long time to adjust to the purchased components.
Speakers aren't everything
The choice of a subwoofer is determined by the same criteria as acoustics: diameter, installation depth and sound feature. Therefore, the advice related to acoustics will also apply to the subwoofer.
An amplifier is an essential element of any audio system. Your choice should fall on a renowned company. These, as a rule, are made of more resistant materials and high-quality components, and can also withstand increased loads.
Red or blue?
Don't forget about the wires! Wires are divided into three types: acoustic, interconnect and power. Power ones are needed to connect the head unit and amplifier and the power source. There is an opinion that the more expensive the better. In our case, this is true only for wires of the highest price category. Daxx, Stinger, Belsis and Chernov wires perform well.
Sometimes a capacitor is added to the system to eliminate bass sag when there is insufficient power from the generator and battery. You may encounter such situations if, for example, you are going to participate in car audio competitions. Please note that for a power of 500W, 0.5F is enough. Focus on models with automation if you don’t want to bother with connections. If you are making a system “for yourself,” a capacitor is not needed.
Setting up a car amplifier and connecting an audio system
Setting up an auto amplifier - it is the competent setting of the amplifier that guarantees its high-quality operation. However, if you do not have certain knowledge, then setting up the device will be quite difficult. But if you have at least a little experience in working with musical equipment in a car, then the following tips may help you.
Sometimes there come times when you need to improve the sound quality of the audio system installed in your car or you have purchased a new amplifier. Now you need to understand how to correctly connect it to the head unit and speakers and, of course, configure it correctly to get high-quality sound.
Preliminary configuration of the car amplifier before initial switching on
To make it easier to perform the initial setup of the amplifier, it can be done before it is placed in the car, while knowing the design and purpose of the existing electronic elements of the audio system:
1. the GAIN input control knob is set to minimum;
2. the low-frequency filter LP, which is used to work in the subwoofer path, must be turned on in advance at 80 Hz, and the mid-pass filter set to 20-30 Hz, this is in the case of using a subwoofer made in a housing with a bass reflex;
3. the HP high-pass filter, intended for speakers installed in the doors or on the rear shelf, must first be set to the FULL position, and if the device is connected to 3-4-inch speakers installed in the dashboard, then the low-pass filter (High Pass Filter) must be turned on at 120 Hz;
4. When using the channel-by-channel acoustics switching mode, the HP high-frequency filter for tweeters and LP for mid-bass drivers must first be set to 4 kHz;
5. The position of the HiLow Level mode switch must be comparable to the connection option. If the amplifier will receive an audio signal from the speaker wires, then the control knob should be in the Hi Level position. The regulator is set to the Low Level position when the signal comes from the linear outputs of the car radio;
6. during the preliminary setup of the device, Bass Boost, as well as the equalizer, must be turned off;
Basically, on all amplifier designs, the controls on the panel are in a somewhat “recessed” position in order to exclude the possibility of accidentally changing the set parameters, and there are models in which the control panel is closed with a safety cover, which is easily removed if necessary.
Find out in advance what you need
Before purchasing components, be sure to determine the wiring diagram. It determines exactly what you need, as well as a theoretical price range. The following are the most common and convenient schemes.
- Head unit - front subwoofer - 4-channel amplifier for front and subwoofer.
Classic. Budget-friendly, easy to install and configure. It is also good because it saves space in the car. The disadvantages include the low power of the system, but this does not significantly affect the sound quality. - Head unit - front - rear - subwoofer - 5-channel amplifier for front, rear and subwoofer.
It is based on the previous scheme. It differs only in that it provides sound in the rear part of the cabin. The setup is more difficult than the first scheme, and it is not always possible to achieve the desired result. - Head unit - front - subwoofer - 2-channel amplifier to the front - 2-channel amplifier to the subwoofer.
Do you like powerful bass? Then this diagram is for you. We get more power by connecting a two-channel amplifier to a subwoofer with a bridge. - Head unit - front - subwoofer - 4-channel amplifier for the front - 2-channel amplifier for the subwoofer.
The most expensive of the presented schemes. And the best. Sound quality and power are achieved through channel-by-channel amplification.
DIY setup without a subwoofer
In this case, the speaker system consists of four speakers. In this option, the settings will be the simplest. With this design, the amplifier filters are disabled. All parameters are set to zero, and the crossover selector is set to the “Flat” position. With these settings, the speaker, amplifier and all other components will produce high-quality sound without distortion.
All that remains is to expose the head unit. This can be done by selecting from ready-made equalizer settings. The volume is turned up to 90 percent and the track starts. During the sound process, the gain is adjusted until the sound is loud and clear, without distortion. This is how you can set up a simple amplifier for the average music lover.
We collect
First, you should do the wiring. We select the cross-section of the power wire corresponding to the total power of the amplifier and head unit. We pull the plus and minus into the interior. Remember: wires passing through metal must be covered with a piece of plastic or rubber tubing to avoid a short circuit to ground.
The positive wire must be connected through a bulb with a fuse whose rating corresponds to the fuse on the amplifier. The flask must be positioned no further than 30 cm from the battery.
Run the power wires through the power distributor to the head unit and amplifier. They should be soldered to the head unit wiring harness, run the positive wire through the plug fuse. Protect the solder joint with heat shrink casing. Connect the block to the head unit, the interconnect wires to its linear outputs and install it in its original place according to the attached instructions. Crimp the ends of the power wire going to the amplifier with terminals.
Important!
It is better to run all wires separately from each other, although an intersection of 90 degrees is allowed.
Pay attention to the location
Place the high-frequency speakers on the lining of the windshield pillars, approximately at eye level and turn them towards the glass. So, they will work as a reflection, creating the width and height of the sound stage. To put it simply: we point the left speaker towards the passenger seat, the right one towards the driver’s seat.
When you're done connecting, double-check that everything is correct. After that, turn on the head unit and you can start setting up.
Connect the amplifier and install the subwoofer. If you have a sedan, then turn the sub towards the back of the passenger seats. If it’s a hatchback or station wagon, then go to the fifth door. Now you can connect the subwoofer!
Guitar-music historical magazine
Setting amplifier controls with master volume
Many amplifiers with a master volume control also have a number of other modern features, but others are very similar in performance to vintage-style amplifiers, only with an additional knob to adjust the output volume level (this design is described in more detail in Chapter 8). You can typically use these masters to achieve the low-volume, pseudo-high-gain tone or overdrive of vintage-style amps.
Here are some tricks for getting high-gain distortion from a not-too-evil amp at master volume:
- Reduce the preamp volume (also called Volume, Gain or Drive) and master volume to zero. Turn on the amplifier, then wait a minute for the amplifier to warm up before turning off standby mode and/or proceed to the next step.
- Turn the preamp volume (gain) to about 3 o'clock (three quarters).
- Gradually increase the master volume, playing the guitar a little with each step, until you reach an acceptable volume for the room.
- If you want a lighter overdrive, remove a little gain; if you want it harder, add more. The master volume should not change too dramatically when you adjust the gain without increasing the master volume.
- Adjust the EQ to taste, and note that the tone controls often behave very differently at high gain versus lower gain.
If, on the other hand, you want your master-volume-equipped amp to perform like a traditional or vintage amp, it's quite simple: turn the gain down to zero, then turn the master volume up as much as possible. Then gradually increase the gain to the desired level.
Setting up multi-channel (Lead/Rhytm) amplifier controls
Many multi-channel amps behave much like a vintage amp (clean channel) and a modern high-gain amp (lead channel) combined together. (In this case, I'm talking about amps with switchable channels for clean and overdrive, not just two vintage-style low-gain channels). While there are too many different engineering solutions for me to cover all the details here, getting multiple good sound options out of each channel is usually not as difficult as it might seem at first glance.
First of all, I recommend that you digest my advice in the previous sections, “Adjusting Vintage Style Amp Trims” and “Adjusting Master Volume Amp Trims,” and approach your rhythm channel (clean sound) and lead channel (overdrive/distortion) accordingly, as if they were these separate types of amplifiers.
Most foot-switchable multi-channel amps provide instant access to two (or more) of the gain levels you need most. These channels are traditionally considered clean and distortion, but they don't have to stay at the polar extremes of those sounds—on many amps they can reach various shades of gray if needed. For example, you might want the rhythm/clean channel to perform exactly as it would on a single-channel vintage amp, with excellent pickup sensitivity that balances the sound between clean and overdrive; the overdrive/distortion channel can then be tuned for more extreme gain beyond what a vintage style amp can provide. Alternatively, set the amp channels to a relatively clean sound or varying degrees of crunch if these are the basis of your sound. You can always achieve a heavier sound if necessary by driving these channels with a distortion pedal.
Your setup of the tone controls on a multi-channel amplifier depends primarily on whether the amplifier is equipped with independent equalizers for each channel or one common one. In the latter case, you'll clearly need to find EQ settings that work equally well with the gain and volume settings set for each channel - perhaps something of a compromise, but generally not too difficult to achieve from one channel to another and back until you achieve an acceptable sound on each of them. If your amps are equipped with independent equalizers, you can adjust the frequency balance of each to fine-tune the sound you're aiming for from your so-called rhythm and lead channels. However, you probably don't want your EQ settings to be so radically different that you end up sounding like two completely different guitarists when you switch channels. (Or maybe it's the other way around! It all depends on what your music requires).
Using effects with your amp
Ideally, your gadgets or rack effects and your amp work together as part of one seamless, organic tone generator. You can achieve this in several ways. I'll cover using effects in more detail in Chapter 15, but here I'll also give you an idea of how they relate directly to your amplifier.
How you connect your effects to your amp depends on two things:
- Type of effect used.
- What connection options are available to you depending on the functionality of your amplifier.
First of all, if your amp has an effects loop (insert), this is usually the place to place delay and or modulation effects (all covered in detail in Part IV) - think of them as something that creates space, and movement, that way , that your amp's gain and EQ feed your delay, reverb, tremolo, or whatever. If you don't have a gap, you'll obviously have to connect everything before the amp anyway.
If your insert has level controls, set them (according to your amp and effects manual) so that the send signal doesn't overload the effects input and cause them to introduce their own distortion. If this doesn't happen, you'll have to go through trial and error and perhaps discard the effect that distorts heavily in the loop, or move it into the circuit between the guitar and the amp input.
Most other effects are switched between the guitar and the amp input. Those gadgets whose work is based on gain (boost, overdrive, fuzz, distortion, compressor), as well as wah-wah and some others, should be used before the preamp, even if you have a gap. Gain-based effects are designed to interact with the amp and influence its own gain settings. That is, the sound of an overdrive connected to an amplifier set to a sterile clean sound differs from the sound with an amplifier set to crunch or the lead channel’s own distortion. Essentially, they work together to shape the gain level of a specific preamp channel. Experiment with gain-based add-ons with different gain/volume settings on your amp's preamp to see how the effects differ.
Basic amplifier care
There are many safe and easy tasks you can do yourself to keep your amp running smoothly and sounding great. As explained in the previous section “Caution! High voltage!" Do not attempt to carry out any internal maintenance or repair work yourself unless you are a qualified technician (in our case, you already know that!). But that doesn't stop you from successfully implementing many practical steps to keep your amp in tip-top shape.
Tube amplifiers contain a number of consumable components, which means they simply need to be replaced periodically. Such maintenance is usually not required even after several thousand hours of use, but for many great amps that are 30, 40 or 50 years old or more, there comes a time when it is time to perform maintenance and replace standard components, which can be done, as they say: “ on the knee" or in the field. I've seen so many guitarists sell off a great amp - one that they used to be over the moon with - simply because a relatively affordable tube set or original speaker was tired and sounded hollow or lost volume. By learning these simple and safe things, you can do a lot of it yourself and save yourself a lot of frustration and keep your amp sounding its best.
In addition to knowing how to keep your lamps in good working order and ensure their longevity, in many cases you can easily replace the actual lamps themselves, replace the speakers, and perform cleaning and minor maintenance to keep things running smoothly.
Replacing lamps
Lamps are parts with various internal components dependent on the purity of the vacuum, exposed to high temperatures and electrical voltages of several hundred volts during operation, so they inevitably burn out over time. Luckily, you can replace most bulbs yourself, and those that require technical assistance (see this section) usually don't charge too much for labor.
If you need to replace lamps, refer to Chapter 10 for a detailed overview of the different types, what they do, and how to replace them. But you should always follow the advice in your amplifier's owner's manual and replace like with like, except in cases (many of which are detailed in Chapter 10) where the different types serve as direct replacements for each other, and give you the ability to change the sound and the performance of your amplifier.
Note that the output tubes will likely need replacing more often than the preamp tubes (wearing out two or three times as often, or possibly more depending on how hard you drive the amp).
Many tubes can be replaced without the need for bias adjustment (balancing the tubes' no-load current to optimize their performance), although some require it. (To be covered below in the Fixed vs. Automatic offset section). Either way, check your owner's manual, or if you're unsure, contact the manufacturer or ask a qualified technician, but here's a quick guide:
- Preamp tubes in guitar amps never require bias adjustment when replaced (I'm sure this rule always applies, although some exotic designs may require it. But I've never encountered one myself). Simply remove the old lamp as described in Chapter 10, insert the new one and enjoy.
- Rectifier tubes also never require bias adjustment. Biasing is simply not a function of this type of lamp.
- Output tubes in auto-biased amplifiers generally do not require tuning. 99.9 percent of the time you can just take them out and put in a replacement. Prime examples of such amps are the Vox AC15 and AC30 and their clones and derivatives, tweed Deluxe style amps and many others.
- Output tubes in fixed bias amplifiers usually require bias adjustment when they are replaced. If the amplifier has an externally accessible bias adjustment point, you can follow the instructions using a probe and a multimeter (a meter for reading voltages and other electrical values) to safely set the bias yourself. If the bias adjustment is done internally, however, you will need to take the amplifier to a qualified repair technician.
Fixed offset vs automatic
Tube guitar amplifier output stages follow two basic designs: fixed bias and automatic. These definitions can be confusing because the bias in most fixed bias amplifiers are actually variable (so when properly described they are fixed bias regulated amplifiers), whereas the bias in auto amplifiers is set constant using a fixed resistor. The technical reasons behind their names involve complications that you don't need to worry about here; It's important to know which is which.
In addition to different requirements when replacing output tubes, fixed-bias and auto-bias amplifiers have slightly different sonic characters in a broad sense. Generally speaking, a fixed bias amp (Classic examples: Fender Bassman and Twin Reverb, Marshall Plexi and Mesa/Boogie Mark) have comparatively tighter lows and a tighter, punchier sound. Auto-biased amps (e.g. Vox AC15 and AC30, tweed Fender Deluxe, Matchless DC-30, etc.) have a softer response, especially at low frequencies, but are easier to overdrive with more harmonic overtones present. Neither is better than the other in an absolute sense, so your preference should be dictated by the character of the sound that best suits your playing style and what you like about a particular amp when you play it yourself. Many fixed bias amplifiers require adjustment when replacing output tubes. Auto-biased amplifiers usually do not require this; just plug in a new matched set of output tubes and play.
While you may be replacing tubes to get the best sound from your amp, keep in mind that in many cases it won't hit the mark until the tubes have been baked in for several hours, sometimes tens of hours. Brand new tubes can sometimes be a little cold and hard (meaning they don't deliver all the depth and volume) and often reach their full potential after they've been played for quite some time.
Preserving the viability of lamps
There are a few habits you can develop in your daily tube amp use that will help extend the life and maximize the performance of the tubes themselves. Please note that most of these relate to minimizing temperature changes (within reason) and vibration, which are the two main enemies of lamp survivability. Of course, tubes get very hot, that's their nature, and they also vibrate a little when exposed to the clatter of the loudspeaker system that the amp sits on (or in), but you can easily avoid unnecessary excesses in these extremes by following these tips:
- Allow the lamps to warm up sufficiently before playing as described in the previous “Turn It On!” section.
- Allow the tubes to cool completely before moving or shaking the amplifier.
- Avoid using wheels on the amplifier itself (wheels on larger speaker cabinets are no problem) and certainly don't roll it over uneven roads or sidewalks if you need to move it. A bumpy ride can damage lamps and other internal components.
- Never knock or drop lamps - this is obvious, but worth remembering!
- Always ensure that the part of the amplifier where the tubes are mounted has good ventilation, and never cover the back where the tubes are accessible or the ventilation slots at the top. Excessive heat build-up during use can quickly lead to premature failure. Never use the amplifier itself in a closed rack or small case. If you want to do this (for whatever reason), place the cabinet in a rack or case and connect the appropriate speaker cable to the amplifier located outside.
Perform basic care and cleaning
To avoid having to resort to cleaning, it would be a good idea to purchase a case that protects the amplifier from dust and dirt, or a soft case that will also help protect it from minor impacts if you plan to transport it from the club to the rehearsal space or to the studio and back. As with any consumer electronics, dust, dirt and moisture are the enemies of stable and trouble-free operation, and this is the first thing you can do, it is the best thing you can do to keep your amplifier's electronic components in good condition.
According to my warning “Caution! High Voltage!, internal clean is a job for a qualified repair technician, but in any case it will not be needed very often unless the amplifier has been in an inappropriate place for an extended period of time. But you can avoid excessive dust and cobwebs accumulating around the amplifier's innards by vacuuming regularly, being extremely careful not to suck up the speaker cone or rip out any wires. Do not bring the vacuum hose too close to them or lamps.
Wiping with a soft, slightly damp cloth can also help keep the amplifier's accessible recesses clean, but never touch the speaker cone, especially with anything wet. If excess dust has accumulated inside the speaker basket, you can often remove most of it by gently blowing the area (with your eyes closed, and don't inhale again until your head is back in fresh air!). In most cases, you can also clean the exterior with a slightly damp cloth, but avoid solvents or harsh cleaners, which may react with the vinyl, possibly melting or warping it.
Guitar amplifiers should never be stored in a damp, excessively warm, or excessively cold location, as these adverse environmental conditions can cause damage to the cabinet, speaker cones, and other important components.
Crunchy or sticky controls that make noise when turning do not need to be replaced. They can often be properly cleaned from the inside, although this is a job for a professional (see "Making Minor Repairs"). However, if your lamp sockets are crackling or coming loose, you can often clean them safely without going deep into the housing. Simply remove the lamp and spray the contacts with a suitable grease-free contact cleaner such as DeoxIT. Then immediately insert the lamp, gently rocking it in the socket to disperse the cleaner and improve the connection. If the tube still crackles when you drive the amp, then this is a job for a professional.
Replacing speakers
You should be able to do most speaker replacements yourself, as long as speaker access doesn't require removing the chassis or other critical amplifier components, which is sometimes the case in cramped amplifiers. Also note that if the wires from the amplifier output in the amplifier or from the input on the rear panel of the external cabinet are soldered to the speaker terminals, you will need to master the soldering technique in order to safely and safely make the replacement. For most amps and cabinets, the corresponding terminals are simply put on the speaker contacts without soldering, which any guitarist can easily handle.
If you are considering a speaker replacement to change the sound of your amplifier, or to replace a burned out or damaged speaker, first refer to the information on speaker types and characteristics in Chapter 11. Note that some amplifiers have speakers with four fasteners, while others have eight. , whereas some brands of speakers (Celestion, most notably) have only four mounting holes. You won't always be able to install a four-hole speaker on eight studs without some modification by a professional repair technician.
Follow these steps to safely and easily replace your speaker(s):
- Remove the rear walls of the amp or outboard cabinet to allow full access to the speaker basket and mountings. An electric screwdriver won't hurt if these panels are held in place with a lot of screws.
- Pay attention to the correct placement and orientation of any lamps that hang in the way of access to the speaker, remove them and set them aside. See Figure 12-2 showing the insides of a typical combo.
- Make a note of which strand of the wire is connected to which terminal of the speaker, positive (+) or negative (-), then disconnect the terminals by gently rocking them from side to side until they slide off. If soldering iron intervention is required, carefully cover the portion of the diffuser visible through the basket between the arms with a cloth or piece of cardboard to avoid solder splashing causing damage to the paper diffuser.
- Using the correct size screwdriver or wrench, carefully loosen the fasteners that secure the speaker to the front baffle, working in an X pattern, first removing one fastener and then moving to it on the opposite side of the speaker basket. Your amplifier may use four or eight screws or nuts for mounting.
- Once you've loosened and unscrewed all the fasteners, set them aside, carefully lift and remove the speaker (avoiding hitting the tubes that are still in the amp), and set it aside.
- Install the new speaker by properly lining up its holes with the studs or mounting holes of the replacement speaker, correctly lining up its mounting holes with the bolts or mounting holes in the chassis, and making sure that its pins are in the same orientation as the speaker you just removed. Gently tighten all the fasteners with your fingers, and after the fingertips are no longer strong enough, turn them another three-quarters or one turn using the appropriate tool. Over-tightening the speaker mount may warp or damage the basket.
- Connect the + and - wires of the speaker to the appropriate terminal. Install all removed lamps. Replace the back panels and place the amplifier in playing position. The speaker terminals should be marked with + and - symbols according to the wires. In some cases, the + terminal is marked with a color, often red.
Setting details
After connection, the installed system must be properly configured. Tuning means setting the cutoff frequencies for acoustics and subwoofer on the amplifier, setting the incoming and outgoing sensitivity. As well as setting up the sound processor, if available.
Imagine that the filters in the amplifier are better than those in the head unit. And set all settings on the head unit to 0.
- Set the filter for the subwoofer channel to “LPF”. Set the crossover cutoff frequency from 50 to 70 Hz.
- Front channel filter to “HPF” position. The frequency is also in the range of 50-70 Hz.
- Adjust the sensitivity as follows: on the amplifier set the setting to “0”, on the head unit increase the volume to the maximum value. Then turn the sensitivity control on the amplifier upward until noticeable distortion appears in the sound of the system. Turn it down and the sensitivity is adjusted.
Important!
If the bass is localized on the subwoofer, then it should be connected in antiphase: turn the phase adjustment knob 180 degrees. If it is not there, swap the “+” and “-” in the subwoofer connection.
Launch everything and listen. If, when you start the radio, you hear clicks in the subwoofer and crackling sounds in the speakers, then check the wiring and, if necessary, rewire.
How to connect?
Let's see how to connect an amplifier in a car:
- First, the subwoofer and other speakers of the speaker system are connected to the corresponding connectors on the amplifier.
- Next, the device is connected to the radio.
- The amplifier will then automatically distribute the signal. Some will go to the subwoofer, and some to the high- and mid-range speakers.