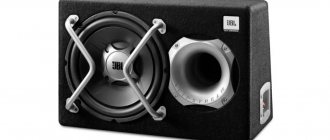
When making a homemade cabinet subwoofer for a car, the question always arises: how to calculate the cabinet for the subwoofer? First, if the volume is unknown, you need to calculate the volume of the box for the subwoofer and then, already knowing it, calculate the box for the subwoofer.
It can be said with some stretch that when the volume of the body is known, the shape of this body does not affect the sound. There are various programs for calculating a box for a subwoofer (a program for calculating a subwoofer box is “JBL SpeakerShop” or “Winisd beta.”), but you can simply do the calculation, knowing yourself that the volume is V=hx L x A (where h is the height , L - length, A - width).
For example, how to calculate a box for a subwoofer, if for a 12-inch subwoofer (305 mm), the recommended volume is 45 liters. The measured permissible height for the body in a car is 340 mm (h=340 mm), length 680 mm (L=680 mm), let's calculate the width.
The permissible height (h) for space in the car is h=340 mm=34 cm=0.34 m, and the permissible length L=680 mm=68 cm=0.68 m.
1 liter = 1•10−3 m³ 1 l = 0.001 m³ then V= 45 l = 0.045 m³
Don't forget that there is an internal and external volume, so you need to take into account the thickness of the material from which the subwoofer box is made.
If the box is made of MDF with a thickness of 2 mm (0.02 m), then we reduce the measured values of height and length by the thickness of the MDF on both sides and calculate the internal volume.
h = 0.34m -0.02 x 2= 0.3m; L = 0.68m – 0.04m = 0.64m.
In this case, you will have to calculate the subwoofer housing in parts, counting separately the volumes of “1” and “2” parts.
Subwoofer box calculation
So, you have decided on a subwoofer, selected an amplifier for it, chosen an acoustic design and decided to make the enclosure yourself. Before creating a drawing, you need to calculate the box for the subwoofer, that is, obtain the initial data. For a closed box, this is the volume; for a bass reflex - this is the volume of the case, the cross-sectional area of the port and its length; for a quarter-wave resonator - the length and cross-sectional area of the tunnel; for bandpasses - the volume of compartments, the area and length of the ports, the shape of the case. All these parameters need to be calculated and special programs are used for this. The basis for all calculations are the Thiel-Small parameters.
The point of properly calculating a subwoofer is to design a design in which the speaker will produce bass that suits your tastes and musical preferences. For example, for a closed box, the smoothness of the frequency response and sound character will depend on the volume of the cabinet, which you will need to select based on the characteristics of your subwoofer speaker; for a bass reflex, the tuning frequency and the hump of the frequency response depend on the volume of the housing, the volume of the port, its length, shape and cross-section, etc.
How the device works
Any bass reflex type speaker has a hole - a bass reflex.
This is often called an acoustic tunnel or port. Its operating principle is to change the phase of the sound vibration caused by the rear side of the diffuser by one hundred and eighty degrees. When resonance occurs in the box, the vibration amplitude of the diffuser reaches a minimum value. The volume of air and the resonance frequency to which the channel is tuned depend on the size and type of the bass reflex port. The volume of air in the channel begins to resonate and enhance frequency reproduction when the moment comes when the diffuser emits the frequency for which the bass reflex is designed.
The classic tunnel is circular in shape. But to increase the useful internal area, it is often given a slotted appearance. Refusal of the cylindrical shape of the tunnel makes it possible to reduce its length and reduce the noise that occurs when air is released.
If there are errors in the calculation of a slotted bass reflex, it is much more difficult to configure it than the classic type, since it is manufactured together with the speaker. The calculation itself is more complicated than for closed-type systems: in addition to the volume of the box, the adjustable resonance frequency is taken into account. The optimal dimensions are selected taking into account the amplitude-frequency characteristics of the speaker, namely its uniformity.
Programs for calculating the subwoofer enclosure
JBL speaker shop
A program for calculating the design of speakers and subwoofers in particular. The program is old and does not work with the latest operating systems, but nothing better has been invented so far, so you have to use small tricks to get it working. The program builds frequency response graphs, takes into account the transfer function of the cabin, takes into account the Thiel-Small parameters - that is, everything that is needed to correctly calculate the box for the subwoofer.
BassBox 6 Pro
The program for calculating subwoofers works on the basis of JBL speakershop, in the 5th version they even had the same interface - in the 6th it was changed. But the program works well and some may find it more convenient to work with it.
Bassport
A narrowly focused program designed to calculate bass reflex ports; the housing cannot be calculated in it . All attention is directed to the design of ports, taking into account air flows, shapes, distances to walls and partitions.
UniBox (Unified Box Model)
A very simple program that runs on Microsoft Windows Excel 2000 . Can simulate sound pressure level, speaker impedance curve, frequency response, etc.
What does the quality factor of a speaker affect?
Q in acoustic systems primarily affects the frequency response and impulse characteristics of the speakers. That is, this indicator largely determines the sound characteristics of the speakers. With a quality factor of 0.5, for example, the best impulse response can be achieved. With an indicator of 0.707, an even frequency response is obtained. Also when:
- Q factor 0.5-0.6 speakers produce audiophile bass;
- indices of 0.85-0.9, the bass becomes elastic and prominent;
- quality factor of 1.0, a “hump” with an amplitude of 1.5 dB appears in the cut, perceived by the human ear as a biting sound.
You may be interested in: Corporate state: definition, essence
With a further increase in the Q indicator, the “hump” in the sound grows and characteristic buzzing noises begin to emanate from the speakers.
Case volume and subwoofer port area
The basis for the calculation is the volume of the proposed hull, and the area of the port depends on it.
Any body contains some volume of air. So, a large number of factors influence the determination of the optimal size: this is the speaker stroke, resonant frequency, power, transfer function of the cabin, the housing setup itself, etc. Nevertheless, passing through the funnel of all these dependencies, some general results and ranges appear at the output, which are used to initially determine the volume. These ranges are tied to the area of the speaker diffuser, as one of the main parameters. They are given in cubic feet, these are the results of many experiences of AZ enthusiasts around the world, but it should be noted that the greatest contribution was, of course, made by American colleagues. Such ranges began to be formed on American forums from the beginning of 2000, general recommendations from different manufacturers are also involved here, and approximate values are derived, which have been tested in practice all this time and slightly adjusted.
If we convert it into liters that we understand, we get these numbers.
This is just a rough starting point for the calculations. Since there are a lot of dependencies, and different dynamics in the same volume will play differently. Also, the same body in different systems will also sound differently. So, to find the optimal volume, you need to take into account the main factors that influence the behavior of the subwoofer.
Read also: Alarm system with auto start leopard instructions
Calculation of the body of a closed box
The volume of the closed box affects the final resonant frequency and quality factor of the speaker. And this will determine how low the speaker will play and what the character of the sound will be.
How to navigate the presented range.
1) Look at the line of the calculated frequency response in the calculation program and select the expected sound graph that suits you.
2) Also focus on such a volume that the final quality factor is close to 0.7.
3) Consider power. If your amplifier is slightly smaller than the RMC of the subwoofer, the connection will accordingly be adjusted to the amplifier's rating. Move upward, but if the amplifier is set to the speaker rating or is simply equal to the declared power of the subwoofer, take the average value. If you are a very experienced AZ lover and have taken into account the rise in impedance, voltage reduction, etc. and set up a powerful amplifier higher than the declared speaker rating in order to squeeze the maximum out of the subwoofer, then reduce the volume.
The larger the volume of the box, the easier it is for the diffuser to move and the greater the efficiency, which is what is needed at relatively low power. A smaller volume has greater elasticity and will act as a kind of airbag for the speaker, which is needed at higher powers. This applies not only to the ZY but also to the FI, since a large volume at high power can lead to insufficient damping of the speaker at the tuning frequency or excessive travel at other frequencies.
For example, let's take 10 subs with an RMS of 300 W, and an amplifier of 250 W. In this case, focus on a volume of around 18-20 liters.
But don’t forget about the quality factor and approximate frequency response. It is among these parameters that a compromise must be sought.
Calculation of the bass reflex housing
In the case of volume, proceed in the same way as with ZY. Only instead of the quality factor, the dependence of the volume on the housing settings is added. The setting is the frequency at which the subwoofer will work most effectively and, accordingly, play louder.
The body tuning is chosen based on musical preferences. Roughly speaking, Low, srewed and all kinds of understated tracks are 27-33 Hz; rap, dubstep, etc. 30-37 Hz; jazz, rock instrumental, club music 40-45 Hz; and if there’s a little bit of everything, it’s 35-40 Hz.
As a general rule, the lower the setting, the greater the volume. This is due to the resonant frequency, and also gives less port extension when the tuning is lowered.
Aim for maximum volume for settings below 30 Hz and minimum volume for settings above 40 Hz.
Thus, when determining the volume in the presented ranges, look for a compromise between the tuning power and the shape of the frequency response.
For a bass reflex, you also need to determine the port area. In general, the main task is to make the port such that the speed in it does not exceed certain values, after which noise may appear or so that it does not lock the box. Or the port should not be too large to properly load the subwoofer.
There is a general recommendation of 12 – 16 inches per cubic foot. This is again an approximate range. And the area of the port depends, among other things, on the power of the subwoofer, and the higher the final power, the more the port is needed and vice versa. At low power, a large port is not needed. But that’s not all, you also need to take into account the shape of the port, its internal area, roughness, etc. As you can see, again everything goes much deeper and you may not be able to get out of the theory. Fortunately, there is a safe value - this is just the upper value of the recommendations of 16 square inches per 1 cubic foot of volume or 3.65 sq.cm. per 1 liter of volume for the gap. For a round port, you can use 3.2 3.65 sq.cm. per liter These values are guaranteed to give you a port that will work well in the vast majority of variables, even though you may make some assumptions and omit some dependencies.
In principle, with experience comes an understanding of where the port can be reduced, perhaps to save space or sometimes you need to properly load the bundle at low power. But these recommendations for 1 liter will not disappoint and this ratio can be applied almost always.
Option No. 2
First of all, guided by Fig. 1 and the table, it is necessary to make a “standard volume” - a sealed plywood box, all joints of which are carefully adjusted, glued and coated with plasticine to avoid air leaks.
rice. 1
| Speaker diffuser diameter, mm | Dimensions, mm | ||
| A | IN | WITH | |
| 200 | 255 | 220 | 170 |
| 250 | 360 | 220 | 220 |
| 300 | 360 | 220 | 270 |
| 375 | 510 | 220 | 335 |
Next, the natural resonance frequency of the loudspeaker located in free space is measured. To do this, it is suspended in the air away from large objects (furniture, walls, ceiling). The measurement diagram is shown in Fig. 2.
rice. 2
Here ZG is a calibrated sound generator, V is an alternating current tube voltmeter and R is a resistor with a resistance of 100–1000 ohms (at higher resistance values the measurement is more accurate).
By rotating the frequency adjustment knob of the sound generator in the range from 15-20 to 200-250 Hz, achieve the maximum deflection of the voltmeter needle. The frequency at which the deviation is maximum is the resonant frequency of the loudspeaker in free space Fв.
The next stage is to determine the resonant frequency of the loudspeaker Fв when it is operating at a “standard volume”. To do this, the loudspeaker is placed with a diffuser on the hole of a “standard volume” and pressed lightly to avoid air leaks at the junction of the surfaces. The method for determining the resonance frequency is the same, but in this case it will be 2–4 times higher.
rice. 3 fig. 4
Knowing these two frequencies, the dimensions of the bass reflex are found using nomograms. Depending on the diameter of the loudspeaker diffuser, select the nomogram shown in Fig. 3 (for diameter .200 mm), in Fig. 4 (for diameters 250 and 300 mm) or in Fig. 5 (for diameter 375 mm). Using the selected nomogram, the volume of the bass reflex is determined by connecting the points corresponding to the found frequencies on the “Resonant frequency” axes with a straight line.
Case size calculation
When the volume of the body is known, the shape of this body does not affect the sound. There are various programs for calculating a box for a subwoofer (a program for calculating a subwoofer box is “JBL SpeakerShop” or “Winisd beta.”), but you can simply do the calculation, knowing yourself that the volume is V=hx L x A (where h is the height , L - length, A - width).
For example, how to calculate a box for a subwoofer, if for a 12-inch subwoofer (305 mm), the recommended volume is 45 liters. The measured permissible height for the body in a car is 340 mm (h=340 mm), length 680 mm (L=680 mm), let's calculate the width. A=V/Lxh
Read also: How to install an armrest on a Polo sedan
The permissible height (h) for space in the car is h=340 mm=34 cm=0.34 m, and the permissible length L=680 mm=68 cm=0.68 m. 1 liter = 1•10−3 m³ 1 l = 0.001 m³ then V= 45 l = 0.045 m³.
Don't forget that there is an internal and external volume, so you need to take into account the thickness of the material from which the subwoofer box is made. If the box is made of MDF with a thickness of 2 mm (0.02 m), then we reduce the measured values of height and length by the thickness of the MDF on both sides and calculate the internal volume. h = 0.34m -0.02 x 2= 0.3m; L = 0.68m – 0.04m = 0.64m.
In addition, it is necessary to take into account when calculating the volume of internal struts used in the manufacture of the body. Suppose we use a beam with a thickness of 3 cm by 3 cm as spacers, then we get 4 bars with a length of 0.64 m (length L = 0.64 m) and 4 bars with a length of 0.24 m (the length obtained from the height “h” reduced by 3 cm on both sides 0.3 – 0.03 x 2 = 0.24). For now we will not take into account the internal struts on the sides. The volume that the spacers will have in this case is V=(0.03 x 0.03 x 0.64) x 4 +(0.03 x 0.03 x0.24) x4=0.003168 m³. Then we increase the volume of the box by the volume of the spacers. V= 0.048168 m³ A = V/L xh = 0.048168 m³ /0.3m x 0.64 = 0.2509m. If the volume is increased by the volume of the side struts, then A = 0.255 m. We want to make a subwoofer enclosure with a slightly inclined front wall, in this case the lengths of the side walls will change: if A = 0.255 m, then A = a + b / 2 = 0 .33 + 0.18 /2=0.255, that is, reduce the length “b” by the amount by which you increase the length “a”.
If you need to calculate the volume of a box for a subwoofer of complex shape! Then you can contact our Auto Studio to calculate and manufacture the body.
for example, the subwoofer housing is installed in a wing niche, and will have a complex geometric shape, repeating the geometry of the niche, while the rear part of the subwoofer housing has different shapes. In this case, you will have to calculate the subwoofer housing in parts, counting volumes “1” and “2” separately » parts.
See how to calculate a housing for a speaker
How the device works
Any bass reflex type speaker has a hole - a bass reflex. This is often called an acoustic tunnel or port. Its operating principle is to change the phase of the sound vibration caused by the rear side of the diffuser by one hundred and eighty degrees. When resonance occurs in the box, the vibration amplitude of the diffuser reaches a minimum value.
The volume of air and the resonance frequency to which the channel is tuned depend on the size and type of the bass reflex port. The volume of air in the channel begins to resonate and enhance frequency reproduction when the moment comes when the diffuser emits the frequency for which the bass reflex is designed.
The classic tunnel is circular in shape. But to increase the useful internal area, it is often given a slotted appearance. Refusal of the cylindrical shape of the tunnel makes it possible to reduce its length and reduce the noise that occurs when air is released.
If there are errors in the calculation of a slotted bass reflex, it is much more difficult to configure it than the classic type, since it is manufactured together with the speaker. The calculation itself is more complicated than for closed-type systems: in addition to the volume of the box, the adjustable resonance frequency is taken into account. The optimal dimensions are selected taking into account the amplitude-frequency characteristics of the speaker, namely its uniformity.
Making a box for a subwoofer with your own hands: step-by-step instructions
12-inch speaker for subwoofer Before you start designing and assembling the box, you need to decide on the choice of speaker. We recommend choosing 10-12 inch imported speakers, as they are most often used in car subwoofers and are best suited. We described in detail how to choose a speaker for a subwoofer in a previous article. The design of the box is also important: the quality and volume of low-frequency sound depends on it.
What types of subwoofer boxes are there?
There are several types of subwoofer boxes. The sound quality you get at the output directly depends on the design of the box. Below are the most popular types of subwoofers:
- A closed box is the easiest to manufacture and design; its name speaks for itself. The woofer is housed in a sealed wooden housing, which improves its acoustic performance. Making a subwoofer in a car with such a housing is quite simple, but it has the lowest efficiency.
- A 4th order bandpass is a type of subwoofer whose body is divided into chambers. The volumes of these chambers are different; in one of them there is a speaker, and in the second there is a bass reflex (air duct). One of the features of this type of subwoofer is the design's ability to limit the frequencies that the cone reproduces.
- The 6th order bandpass differs from the 4th order by the presence of another bass reflex and another camera. There are two types of 6th order bandpasses - the first has one bass reflex, and the second has two (one of them is common to both cameras). This type of box is the most difficult to design, but produces maximum efficiency.
- A bass reflex is a subwoofer with a special tube in the housing. It vents air and provides additional sound from the rear of the speaker. In terms of complexity in manufacturing and sound quality, this type is a cross between a closed box and a bandpass.
Find out the cost of the case!
If you want to get the highest quality sound, you can opt for bandpasses. But this type of design has many details that must be carefully designed and calculated. All this can be done using a special program WinlSD, which will not only determine the optimal size and volume of the subwoofer, but also create a 3D model of it, and also calculate the dimensions of all parts.
Unfortunately, this program requires at least minimal knowledge in this area and the average car enthusiast is unlikely to be able to do everything right the first time. Moreover, in order for the program to work correctly, it needs some speaker parameters, which are also not known to everyone. If you do not plan to take part in car audio competitions, we advise you to discard the bandpasses.
A bass reflex will be the most optimal solution for a homemade subwoofer. This type of box is good because the tube (bass reflex) allows you to better reproduce the lowest frequencies. In fact, this is an additional sound source that contributes to the sound of the subwoofer and increases efficiency.
QW Box Calculator
You've probably at least heard something about quarter-wave resonators. This type of enclosure is not so widely used in the construction of subwoofers and low-frequency sections of acoustic systems compared to, say, a bass reflex and a closed box. But why? After all, a quarter-wave oven provides undoubted fat advantages:
- gain in efficiency,
- excellent bass performance,
- low level of group delays.
In a word, “both loudly and efficiently.”
Perhaps because there are disadvantages:
- relatively large box volume,
- CV does not tolerate overloads,
- quite picky when choosing a speaker.
However, the last point also applies to the bass reflex.
Perhaps the widespread use of CV is also limited by the somewhat laborious nature of its calculations. Although the calculation itself is not that complicated, usually while you are designing a box, you have to go through several options, recalculating everything again each time. This is both tedious and time-consuming. And when you do something for a long time, you start making mistakes, and they are completely unacceptable when calculating the frequency factor.
There are two approaches to designing CV boxes:
- “maximalist”: we study theoretical issues for a long time using foreign sources (ours simply do not exist), we use the Hornresp program by David J. McBean, and then, using graph paper and a calculator, we painfully develop the details of the box;
- “minimalist”: we set the tuning frequency, and using the Quarter Wave Box Calculator program (let’s call it briefly: QW Box Calculator) we easily and quickly design a frequency wave box, completely forgetting about the evenings spent with a calculator, pencil and ruler. Now you only need a few minutes to design the CV housing!
The QW Box Calculator program is completely Russian-language. This is what the QW Box Calculator 2.4 window looks like:
As a result of the calculation, you receive a complete list of all parts and their dimensions. The overall dimensions of the box and its approximate weight are also displayed for reference.
This version supports three types of corner designs:
without decoration (simple corners)
gusset (45 degree inserts are glued into the corners from the inside)
radius (the corners from the inside are rounded with a radius equal to the width of the channel).
You select the desired corner design method, and the length of the channel is calculated taking into account the properties of this design. If calculated manually, this would be an additional headache.
QWB ox Calculator version 2 supports the following six types of housings:
Besides:
- a correction for the acoustic resistance of the outlet is automatically taken into account, not everyone knows about this effect, and almost no one takes it into account when manually calculating, but in vain;
- there is a Help System;
- saving/loading projects;
- printing;
- the number of screws for assembly is calculated;
- the minimum possible channel width is calculated.
And the calculated box can be drawn in three-dimensional form using the Google SketchUp program. We simply transfer the data to this program, and the box is automatically drawn, something like this:
The QW Box Calculator program is very easy to use, does not require resources, and pays off its price many times over.
To purchase the QW Box Calculato, click the "Proceed to Checkout" button directly below this line.
What materials do we need to assemble the subwoofer?
Multilayer plywood for the subwoofer box The material for making the subwoofer box must be strong, dense and well insulating sound. Multilayer plywood or chipboard is perfect for this. The main advantages of these materials are their affordable price and ease of processing. They are quite durable and provide good sound insulation. We will make a subwoofer from 30 mm thick multilayer plywood.
To make a subwoofer box we will need:
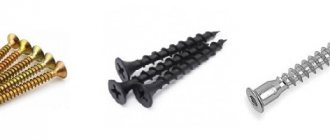
Wood screws (approximately 50-55 mm, 100 pieces) Soundproofing material (Shumka) Drill and screwdriver (or screwdriver) Jigsaw Liquid nails Sealant PVA glue Carpet, approximately 3 meters Terminal block
Subwoofer box drawings
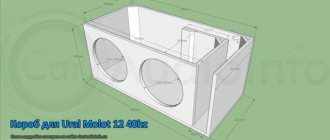
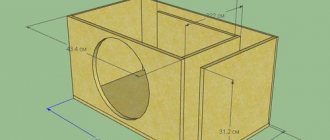
In this article we will make a box for a subwoofer with a 12-inch speaker. The recommended box volume for one 10-12 inch speaker is 40-50 liters. Calculating a box for a subwoofer is not difficult, here is an approximate diagram with the dimensions of the panels. Diagram and drawing of the box It is worth paying attention to the minimum distance from the walls of the case to the speaker. It, like the volume of the entire box, is calculated based on the inner surface.
Assembling a subwoofer box with your own hands
You can start assembling. We use a 12-inch Lanzar VW-124 speaker. 12-inch subwoofer speaker Its diameter is 30 cm, and the first thing you need to do is cut a hole for the speaker. The minimum distance from the center of the diffuser to the subwoofer wall is 20 cm. We measured 23 cm (20 cm + 3 cm plywood width) from the edge of the panel and cut a hole with a jigsaw. Next, we cut a hole for the bass reflex slot; in our example, it has a size of 35*5 cm.
Read also: OBD adapter for Android
Cut out the bass reflex slot and the hole for the speaker
Instead of a slot, you can use a classic air duct - a tube. Now we assemble the bass reflex slot and attach it to the front panel of the subwoofer. We go along the joints with liquid nails and tighten them with self-tapping screws. Assembling the bass reflex slot panels It is important to tighten the screws very tightly so as not to leave any voids. They will create resonant vibrations that will ruin the sound of the subwoofer.
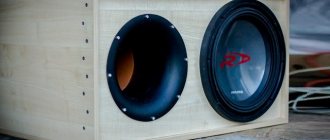
Next, we assemble the side walls of the box, having previously lubricated them with liquid nails, and tighten them tightly with self-tapping screws. Side walls of the box On the back cover of the box you need to cut a small hole for the terminal block. We connect all parts of the body. We make sure that we cut and fastened all the parts correctly. Box assembly Insert the speaker. Let's look and admire.
Interior decoration
Let's move on to the interior decoration of the box. The first thing you need to do is seal all the joints and cracks with epoxy glue or sealant. Next, using PVA glue, we glue soundproofing material onto the entire inner surface of the box. We cover the body with Shumka. We cover the body with Shumka. Now we cover the entire outer plane of the box with carpet, including the bass reflex slot. You can attach it with epoxy glue or using a furniture stapler. The box is covered with carpet. Next, we insert and screw the speaker tightly. The subwoofer is almost ready, all that remains is to stretch the wires from the speaker to the terminal block and connect the amplifier. Installed subwoofer with amplifier We bought an additional amplifier, but you can also make it yourself. This is quite difficult, as it requires knowledge and practice in the field of radio engineering. You can also use ready-made kits and circuits for radio amateurs, like Master-KIT, and assemble the amplifier yourself. The only requirement for the amplifier is that its maximum power must be less than the maximum power of the speaker.
Vas indicator
This parameter for speakers can be measured using two methods:
- additional mass;
- additional volume.
In the first case, measurements are made using some weights (10 grams for every inch of diffuser diameter). These could be, for example, weights from pharmacy scales or old coins whose denomination corresponds to their weight. The diffuser is loaded with such objects and its frequency is measured. Next, the necessary calculations are made using the formulas.
When using the additional volume method, the sound emitter is hermetically sealed in a special measuring box with the magnet facing outward. Next, the resonant frequency is measured and the electrical and mechanical quality factors of the speaker, as well as the total, are calculated. Then, taking into account the obtained data, Vas is determined using the formula.
You may be interested in: An astronomer is a scientist who studies astronomy
It is believed that the lower Vas, other things being equal, the more compact design can be used for the speaker. Typically, small values of this parameter at the same resonant frequency are the result of a combination of a heavy moving system and a rigid suspension.
Making a stealth subwoofer with your own hands
DIY stealth subwoofer Tired of carrying a huge box in the trunk? Then the stealth subwoofer is just made for you. This unique type of case is more practical than the classic box. It doesn't sit in a square box in the middle of the trunk and takes up less space. Often, stealth is installed in the inner part of the wing, sometimes in a niche instead of a spare wheel. The minimum volume of the box that requires a 10-12 inch speaker for normal operation is 18 liters.
To make a passive stealth subwoofer we will need:
subwoofer; protective grille and socket for connection to the amplifier; wire for connecting the speaker to the outlet; multilayer plywood or chipboard (thickness 20 mm); a small piece of fiberboard; epoxy adhesive; brush; fiberglass; mounting tape; polyethylene film; wood screws; drill, jigsaw.
Choosing a location to install the housing
After choosing the place where the stealth will be installed, we empty the trunk and begin manufacturing the body. You can remove the trunk trim where the subwoofer will be installed to place it even closer to the fender. First of all, lay a plastic film on the floor of the trunk. It performs two functions at once: it protects the trunk lining from epoxy glue and allows us to make a mount to which we will screw the bottom of the subwoofer. Next, we cover the inside of the wing with mounting tape in two layers. We cover the trunk with masking tape. We cut the fiberglass into small pieces, about 20x20 cm. We put pieces of fiberglass onto the masking tape and glue them with epoxy glue. It is better to overlap the fiberglass fabric so that there are no obvious joints and seams. Epoxy glue + fiberglass mat We sculpt layers of fiberglass on top of each other, simultaneously lubricating them with epoxy glue until the thickness of the sheet reaches 10 mm (about 4-5 layers). The thickness of the panel is approximately 1 cm. The material will harden in approximately 12 hours. To speed up the process, you can use a lamp. Now we cut out the bottom of the subwoofer and glue it to our body. The joint is treated with sealant or glued with epoxy resin. Gluing the bottom In this particular case, the shape needs to be adjusted to the trunk hinges so that our homemade subwoofer does not interfere with its closing. After we cut off all the excess, we cut out the side walls and the top cover from chipboard. We make the rounded part from plywood, we did it “by eye”.
Making the side, top and bottom walls of the box
To make it easier to give the plywood a rounded shape, you must first wet it, give it the desired shape, secure it and let it dry.
Chipboard sheets must be glued with epoxy glue or sealant, and then fastened with self-tapping screws. We also glue the fiberglass box using epoxy resin, and when it dries, we fasten it with self-tapping screws. Gluing and fastening the parts For better sealing, you can glue the seams again. We applied another layer of epoxy glue and pressed the structure with sand to help the glue adhere better. Sandbags for better grip Next we can measure the front panel and cut it out. Using a jigsaw, cut out a circle for the speaker. In order to securely attach the front panel to the body, you need to tighten it with self-tapping screws on all sides. That is, you need to install bars on the entire inside of the panel, at a distance slightly greater than the thickness of the plywood (in our case, we attached the bars at a distance of approximately 25 mm from the edge of the panel). Thanks to this, we will be able to secure the front part at the top, bottom, sides, and most importantly, securely attach it to the rounded element. Preparing the front panel Cut a hole in the end for the socket. Cutting a hole for the terminal block At the end, it was decided to add two more layers of fiberglass and epoxy glue to the curved part of the body for the stealth subwoofer.
We carry out the final assembly: install the socket and connect the speaker to it, but do not screw it yet. Then there are two options - paint the subwoofer, or cover it with carpet. Painting is a little more difficult, since you must first level the surface. For this we used universal putty.
Bass reflex differences
Every speaker has a resonant frequency. When working above this indicator, you get good sound, and below this, the pressure level drops by 12 dB per octave (frequencies are reduced by 2 times). The lower level of reproducibility is considered to be 6 dB. By installing the speaker in a box, the resonant purity increases due to the additional elasticity of the air. Increasing the resonant frequency pulls up and the lower limit. The less air in the box, the better the elasticity and the higher the performance.
You can make a “big box” without increasing its size. For this purpose, a material with damping properties
(cotton wool). The more of it there is in the box, the lower the frequency of the speaker. But when there is too much filler, it has the opposite effect. For inexperienced people, the quality of the box and its size are not important. In most cases, the column size is optimal.
A bass reflex is a pipe, not necessarily round, of a certain length, which has resonance. Thanks to the “second resonance”, the sound output of the speaker increases. The vibration frequency of the speaker in the box should be lower than in the normal state. Thus, the decline is compensated and the sound expands. These indicators for a bass reflex will be 24 dB higher than for a buried box. It extends the low end frequencies of the speaker.
To avoid barrel sound
, resonance indicators should not be higher than that of a closed box. And if the frequency is too low, the speaker's performance drops. This is the essence of adjusting the bass reflex in order to get a positive effect and not spoil the sound. And at home you can achieve good sound with an error of 5%.
Top 10 articles
- A simple and reliable do-it-yourself metal detector - 206,429 views.
- DIY microwave oven repair - 192,533 views.
- Charger from a computer power supply. — 186,982 views.
- Simple DIY metal detector - 185,864 views.
- Car chargers. Scheme. Principle of operation. — 161,904 views.
- A simple and reliable thermostat circuit for an incubator - 154,431 views.
- Simple automatic charger - 118,375 views.
- A variety of simple circuits on the NE555 - 117,725 views.
- DIY moonshine still - 110,649 views.
- How to change the USB connector yourself? — 103,658 views.
Bass reflex differences
Every speaker has a resonant frequency. When working above this indicator, you get good sound, and below this, the pressure level drops by 12 dB per octave (frequencies are reduced by 2 times). The lower level of reproducibility is considered to be 6 dB. By installing the speaker in a box, the resonant purity increases due to the additional elasticity of the air. Increasing the resonant frequency pulls up and the lower limit. The less air in the box, the better the elasticity and the higher the performance.
You can make a “big box” without increasing its size. For this purpose, a material with damping properties
(cotton wool). The more of it there is in the box, the lower the frequency of the speaker. But when there is too much filler, it has the opposite effect. For inexperienced people, the quality of the box and its size are not important. In most cases, the column size is optimal.
A bass reflex is a pipe, not necessarily round, of a certain length, which has resonance. Thanks to the “second resonance”, the sound output of the speaker increases. The vibration frequency of the speaker in the box should be lower than in the normal state. Thus, the decline is compensated and the sound expands. These indicators for a bass reflex will be 24 dB higher than for a buried box. It extends the low end frequencies of the speaker.
To avoid barrel sound
, resonance indicators should not be higher than that of a closed box. And if the frequency is too low, the speaker's performance drops. This is the essence of adjusting the bass reflex in order to get a positive effect and not spoil the sound. And at home you can achieve good sound with an error of 5%.
