Many car enthusiasts have thought about installing an audio amplifier in their car and thereby improving the sound quality in the car.
On our Radiochipi website we will tell you in more detail how to connect the amplifier yourself and save on the services of professionals. This work is not difficult to complete, so even an ordinary motorist who has never installed audio devices before can handle it.
For this work we will need:
- Fuse with bulb.
- Wire for powering the amplifier.
- Wire for connecting the amplifier to the head radio.
- Fasteners and plastic clamps.
To power the stereo audio amplifier, you will need to run a power cable from the battery. Calculate the minimum possible cross-section of the wire, which will avoid overloading and heating while listening to music in the car.
To correctly calculate the wire cross-section, you will need to take into account the maximum current consumed by the amplifier. In our particular case, the total amplifier power was 400 W. Remember to consider the total power across all channels. The efficiency of the amplifier in most cases does not exceed 85 percent, so it is necessary to add another 15 percent to the value of its total power, as a result we get 470 W. This is an indicator of the amplifier's current consumption from the vehicle's on-board network.
Having data on the supply voltage and amplifier power in hand, it is not difficult to calculate the voltage in the on-board network. In our case, we have a supply voltage of 14 Volts. We divide the total power indicator of 470 W by 14 Volts and get 33.6 Amperes. This is exactly the current that our amplifier will consume.
Based on the calculations obtained, we select the cross-section of the power wire. To do this, we will use a special table. For a power wire that must withstand a current of 33 Amperes, it is necessary to use a wire that complies with the international standard 15AWG with a cross-section of 1.6 millimeters square.
It is recommended that the positive and negative wires be led from the battery. At the same time, you can get a minus from any metal element of the body. You just need to ensure a high-quality connection, for which you use durable fasteners. We may also recommend that you use different colored positive and negative wires to ensure that your amplifier is correctly connected to the power supply.
Fuse
The choice of fuse used directly depends on the previously calculated value of the maximum current. For us this figure is 33 Amperes. Install the fuse in a transparent plastic flask. In rare cases, heavy-duty glass is used. Remember that the fuse size should be slightly higher than the maximum current. Currently, standard fuses with operating current values from 30 to 100 Amperes can be found on sale. We will use a 40 amp fuse.
The fuse in the bulb should be installed as close to the battery as possible. If the fuse is installed at a considerable distance from the radio, or the car owner completely neglects to install it, a short circuit may cause the wiring to catch fire, which is fraught with dire consequences.
Signal cable (interconnect)
The amplifier is connected to the radio using a signal cable. In this case, it is recommended to use high-quality interconnect cables, since the sound level and its detail directly depend on their quality. Pay attention to the insulation of the wire and the quality of the connectors. This way you can choose a high-quality cable, which will have a positive effect on the sound in the car.
We can recommend that you refrain from purchasing inexpensive signal cables, of which there are many on the market. For example, the widely advertised inexpensive cables from the Mystery company are of mediocre quality and therefore quickly fail, while the sound quality of the radio does not stand up to criticism.
Keep in mind that your amplifier can handle anywhere from two to five channels. You should familiarize yourself with the specification of your amplifier and, depending on this, choose a cable with a similar number of channels. Only after this can you lay the cable and make the connection. As a rule, there are no difficulties with this.
Turning on the amplifier
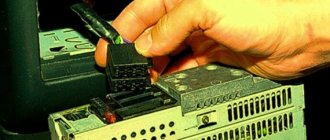
By applying 12 V voltage to the Remote input, you can connect an amplifier. Switching on can be done either with a button on the amplifier, or using the radio if it supports control of external devices. Note that control from the button is convenient in cases where a subwoofer is also connected to the amplifier. When controlled from the radio, the automation automatically turns the amplifier on and off when the radio is turned on and off.
To connect control from the radio, you need to connect a blue wire to the radio from the Remote output. If the amplifier is turned on by a button, it does not have to be located on the amplifier. This is often inconvenient when the amplifier is located in the trunk. You can easily make such an external button, one of the closing contacts of which is connected to the Remote output, and the second to the positive in the on-board network. We can recommend taking the plus from the cigarette lighter.
How does a cable affect sound quality?
What kind of lighting do you prefer?
Built-in Chandelier
So, about such a cable, we can safely quote V. Vysotsky: “It was as useful as milk from a goat, but there was no harm either.”
But in relation to acoustics, one should remember the catchphrase of doctors: “Vitamins enrich the patient’s urine and the pharmacist’s pocket.” All reasons a la “reduces the degree of sound distortion and the level of extraneous noise”, “are not subject to internal corrosion and their conductivity does not deteriorate over time” are intended for the inexperienced ear of a buyer willing to pay.
Once again: if the conductor is made of copper, then whether it is “monocrystalline” or “oxygen-free”, or both together, does not have any significant meaning for acoustic systems. All these advantages appear below the sensitivity zone of the human ear and the noise of conductors is several orders of magnitude lower than the noise level emitted by transistors and other radio components.
For speaker cables, the main thing is that they contain copper and that it does not rust like “Chinese” brass on plumbing fittings. As for “non-susceptibility to internal corrosion,” copper feels great even in river and sea water, so inside properly made insulation it will last a hundred years.
Wiring and connection
The wires to power the amplifier from the battery must be routed through the engine compartment and then through the interior to the place where the amplifier is installed. In most cases, you have to run the wires into the trunk, where the amplifier is located. To protect the wires from mechanical damage, we recommend using corrugated tubes. When laying, do not pinch the wires, and try to make maximum use of the available technical holes.
So, for example, through the engine compartment into the passenger compartment, wires can be routed through numerous technical holes and then laid inside the car. When passing through the technical hole, it is recommended to additionally protect the wires from chafing. To do this, you can use electrical tape or large-diameter rubber cambria.
The wires are connected as follows:
We initially connect the red positive wire to the amplifier. You will need a terminal block that has three contacts. The positive contact on the amplifier is labeled Batt or simply a + sign. We connect the black negative wire to the contact marked GND or the - icon.
Having connected the wires to the amplifier, you can begin connecting them to the battery. Accordingly, we connect the black wire directly to the minus on the battery, and initially connect the red plus to the fuse and only after that make the connection to the positive terminal on the battery.
Signal or, as they are also called, interconnect wires should initially be connected to the corresponding outputs of the radio and only then connected to the amplifier. On the radio, the outputs are marked as Front, that is, front speakers, and Rear, which means rear speakers. The white connector corresponds to the left channel, and the red connector corresponds to the right channel.
In the same way, observing the sides, the wire is connected to the amplifier. Just remember that you need to connect the control wire, for which the corresponding wire from the radio is connected to the Remote terminal directly or through the power button.
Operating principle of speaker wire
As a rule, speaker wires are passive elements of any audio system, and their task is to transmit the sound signal from the source to the speaker. The performance of any cable can be characterized using three indicators:
It should be noted that it is precisely due to such an indicator as the absence of resistance that an ideal signal transmission connection is obtained. When laying an acoustic cable to a subwoofer (see How to make a subwoofer: practical tips), it is important to remember the main rule: “the shorter the length of the wire, the more ideal the output sound.”
Note: this rule does not apply only to professional audio devices where thick cables are used to transmit the sound impulse.
The efficiency of sound signal transmission most often depends on the quality of the conductor. If the resistance of the speaker wire is less than 4-5%, the cable can be used to lay an audio system.
Advice. When choosing an acoustic cable, you need to pay attention not only to price, but also to resistance, cross-section and softness. In this case, you also need to pay attention to the cable core. If it is soft and elastic, then you can safely purchase the cable.
Advantages
Speaker wires for a subwoofer should have the following advantages:
- It is easy to bend, but the braid must remain intact.
- When transmitting an audio signal, the sound must be clear: the presence of interference indicates the use of poor-quality material for the conductor.
- Despite strong kinks and temperature changes, the cable must retain its soft properties.
- The speaker cable must be made in accordance with all GOST standards. To convince you, you can check the declared qualities using high voltage.
- A twisted wire made from several strands of copper should not oxidize or rust.
Expert opinion
It-Technology, Electrical power and electronics specialist
Ask questions to the “Specialist for modernization of energy generation systems”
How to extend the power cable - Car audio in all its manifestations - Bluesmobile Forum It is imperative to install a power fuse in the immediate vicinity of the battery at a distance not exceeding 30 cm; this measure will protect the power cable. Ask, I'm in touch!
Connecting speakers
Connecting the speakers to the amplifier is done using a bridge and linear connection circuit. With a linear connection scheme, each channel is routed to its own speaker. With bridge connection technology, the power from two channels is summed up. Note that a bridge circuit is used in cases where the system additionally uses a subwoofer.
The connection is made to the appropriate terminal block on the amplifier. On the amp, the channels are labeled CH1, CH2, CH3, and so on. Each channel has two contacts - negative and positive. The wires from the speakers are connected to the amplifier in full accordance with the polarity.
At this point, all work on connecting the amplifier to the car audio system is completely completed. All you have to do is configure both the sound amplifier itself and the radio.
Four connection diagrams for amplifier and acoustics
First scheme
The head unit has only one output to the rear or front. In this case, you need to connect only front or rear speakers. The tweeter can be connected to the mid-range speaker in parallel through a capacitor.
Second scheme
The head unit has two linear outputs for the rear and front. We connect front or rear speakers. The tweeter is connected to three-way speakers and a mid-range speaker for the front. It is advisable to connect everyone to their own channel.
Third scheme
The head unit has two linear outputs. Front or rear speakers and a subwoofer are connected. The tweeter is connected to the mid-frequency speaker. The acoustics are connected to their own channel, and the sub is connected to the two remaining channels in a bridged version.
Fourth scheme
There is only one line output. We connect a subwoofer and acoustics from the rear or front. Using RCA splitters we connect the second input on the amplifier. The sub is connected to free channels in the bridge.
Three connection diagrams for amplifier and acoustics
First scheme
The head unit has one output on the front or rear. You need to connect front or rear speakers. There is also a mid-range speaker and a tweeter. We connect the tweeter through a capacitor in parallel with the mid-range speaker.
Second scheme
There are two line outputs. It is necessary to connect the front and rear speakers. Pancakes are used at the rear, and tweeters are connected at the front. At the back, the pancakes are connected to their individual channels.
Third scheme
There are two linear outputs at once to the front and rear. Acoustics and subwoofer are connected. Rear or front speakers require the use of individual channels, and the sub is connected to the remaining channels.
Speaker wire cross-section
- The higher the voltage, the thicker the cable needed to connect the subwoofer.
- Also, cables with a thick cross-section can be used when the head unit is located far away from the speaker, because the further the sound source, the higher the resistance.
- Insulation also plays a big role in sound quality. That is, the thicker the insulation layer, the less likely it is to be damaged and the wires to oxidize, which means the sound will come from the speakers without any interference.
Note: It is not recommended to connect copper and aluminum alloy acoustic conductors as it will create heat between the two metals.
Grigory adored cars since childhood, and in his teens, when he independently connected the car radio in his father’s nine, he realized that cars would be his job, hobby, calling.