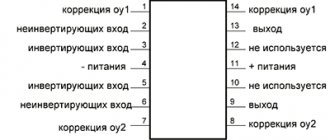
MAX660 connection diagram
There are 2 schemes for connecting max660, pursuing different goals:
. • Input voltage inverter Uout= -Uin
• Input voltage doubler Uout=2*Uin
The microcircuit is available in DIP8 and SO-8 packages. As can be seen from the presented diagrams, the range of input voltages according to the inverter circuit on the Max660 lies in the range from 1.5 to 5.5 volts, and according to the voltage doubler circuit it is 2.5-5.5 volts.
The conversion principle here is capacitive. And for normal operation, the microcircuit requires the presence of CAP+ and CAP- pins (pins 2 and 4), as well as capacitors with a capacity of 100uF or more at the output. The datasheet indicates a capacitance of 47 µF, but from their graphs it follows that it is better to install capacitors with a capacity of at least 100 µF. It is better to use 150-200 uF tantalum capacitors. It doesn't make much sense to use a larger capacity. The capacitors may not be tantalum, but they must have a low ESR in order to be able to deliver the required current very quickly.
The microcircuit can supply a current of 100mA to the load, which is very good. But the output voltage drop will be 0.65V, which is not so good. If a current greater than specified is required, you can connect two microcircuits in parallel. In this case, each microcircuit must have its own capacitance used for conversion, i.e. 100-200 µF, and the output capacitance is common and equal to the sum of the output capacitances of the individual converters, which is quite logical.
If you were too lazy to read a lot of letters, then you can listen to the smart guy by watching a short video:
MAX660 in power supply of audio circuits.
Operation of the dc-dc converter on the MAX660 is possible at two frequencies - 10 and 80 kHz. The first option is not interesting, since it lies in the audible frequency range.
The good news is that you can force the microcircuit to operate at a conversion frequency of 80 kHz by applying FC to the pin (pin 1). In this case, the datasheet guarantees a conversion frequency of at least 40 kHz, which is quite satisfactory for us.
Clock pulses can also be supplied from its own generator to the OSC leg (pin 7). A built-in capacitor with a capacity of 15 pF is connected to this pin. By connecting an external capacitor, you can reduce the frequency to the required value.
The beauty is that the microcircuit does not produce a lot of unnecessary noise along the power circuits, as everyone’s favorite mc34063 does.
The converter on this chip works great with a headphone amplifier based on the NE5532, according to the circuit from the article: High-quality op-amp headphone amplifier at a reasonable price , even though the NE5532 has a minimum supply voltage of ±5V.
Using the max 660 microcircuit, it is very convenient to make bipolar power supply from unipolar one. The downside is that if the battery is the power source, then as it discharges, both the positive and negative supply voltage drops. When using a lithium battery when fully charged, the power supply is ±4.2V, and when discharged ±3.2 volts.
Do you want a larger voltage range? - please, MAX865 to the studio
Negative voltage generation circuit graph principle
In electronic circuits, we often need to use negative voltage.
For example, when we use op-amps, we often need to set them to a negative voltage. Below is a simple example of 5V positive voltage to 5V negative voltage to explain its circuit. Usually, when I need to use negative voltage, I usually choose special ICs that generate negative voltage, but these ICs are more expensive, such as ICL7600, LT1054, etc. Oh, I almost forgot about MC34063. This chip is used most often. As for the negative voltage generation circuit of 34063, I will not mention it in the datasheet here. Please see us below MCUTwo types of negative pressure generating circuits commonly used in electronic circuits.
Many modern single-chip microcomputers are equipped with a PWM output. When we use a single-chip microcomputer, PWM is often not used. This is a good choice for creating negative pressure.
The above circuit is the simplest negative voltage generation circuit. It uses the least amount of originals, we only need to give it a square wave around 1 kHz, which is quite simple. It should be noted here that the generating capacity of this circuit is very small and the voltage drop after adding load is also relatively high.
The following circuit was produced for the reasons stated above:
Chip MAX865
Unlike the 660, the dc-dc converter on the MAX865 consists of two converters. Essentially these are boost and inverter converters in one package. The output of the microcircuit will be double positive and double negative voltage. A very convenient solution for powering a laptop with bipolar voltage.
The microcircuit is produced in a μMAX package - this is a surface-mount package with dimensions of 3x3 mm, not counting the pins. Which once again confirms that the chip was created for a portable device.
The input voltage range here is slightly expanded and lies between 1.5 and 6 volts. Accordingly, at the output it is possible to obtain bipolar power from unipolar voltage from ±3 to ±12V.
But the output current of the microcircuit is not so pleasing. The datasheet states that the microcircuit copes well with a load of up to 20 mA, although before reaching this current the output voltages begin to drop, which is clearly visible from the graph of the output voltage versus current shown below. However, the maximum output current is stated as 100mA, but this is a short-circuit current.
There is no choice of conversion frequency here, but the manufacturers tried to take the frequency beyond the audible range. The microcircuit operates at frequencies from 20 to 38 kHz. Apparently under load the frequency sags.
We get negative voltage
{ads2}Sometimes in amateur radio practice it is necessary to have, in addition to the main power source, which has a negative common wire, a second power source with a positive common wire, i.e. bipolar power supply, for example, to power an op-amp . To do this, you need an additional power source, the positive wire of which is connected to the common wire (negative) of your device. Everyone solves this problem in their own way, usually this is either an additional winding/rectifier of the transformer, or a separate power source altogether. I was too lazy to do this, so I made a negative power supply from a positive one using the inexpensive and widespread LM2576 .
So, we only need a few details:
- the LM2576 itself
- Two electrolytes for input and output
- Schottky diode at 1a , for example 1N5819
- Inductance approximately 100...300 µH 1a
- A pair of resistors if LM2576-adj
- 0.1 µF ceramic capacitors
- Perhaps also ceramics 0.1....0.01 µF , if your wiring turns out to be so unsuccessful that the circuit begins to self-excite and convert the consumed energy into heat.
As a result, you will get a negative voltage source with a common positive wire, capable of delivering a current of up to 700mA and a voltage in the range from 1.23V to about 20V with protection against overcurrent and overheating of the crystal.
Why 2576 ? Because I loved this chip for its reliability, low cost, simplicity and convenience.
You don’t need to invent anything, the datasheet on the LM2576 has all the necessary information, open: https://www.national.com/ds/LM/LM2576.pdf and find the circuit we need on page 18
In my opinion, they are drawn a little poorly, so we’ll make it green.
As you can see, this is an inverting converter, in the bourgeoisie, inverting buck-boost.
The switch is closed (a bipolar transistor, the collector of which is the 1st pin of LM2576 , the emitter is the 2nd pin), the energy is stored in the inductor core, then the switch opens, and the accumulated energy through the Schottky diode goes into the output electrolyte, the cycle is repeated until the circuit feedback will not give the command to slow down.
{ads1}
The feedback circuit ( OS ) consists of a divider R1, R2 for the adj version of the microcircuit, and for the version with a fixed output voltage, pin 4 is immediately placed on the anode of the diode. For the version with an internal divider, which we suddenly want to turn on for a higher output voltage, take into account that the resistance of the internal R2 is equal to:
3.3V R2 = 1.7k 5V, R2 = 3.1k 12V, R2 = 8.84k 15V, R2 = 11.3k
The output voltage, as usual, is calculated using the formula Uout = ((R2\R1)+1)*1.23, where 1.23 is the voltage of the reference voltage source.
For R2 = 2 kOhm , R1 = 240, the calculated result is 11.48 V , taking into account the error (in my case it turned out to be 11.4 V ).
For those who want to ask why the output is only 700mA , because the datasheet says the microcircuit provides 3a , I will answer in advance: according to the datasheet, the switch current is limited by the internal circuit at approximately 5.8a , and the peak switch current in our flyback converter is calculated by the formula:
If after such a calculation your brain did not annihilate into another dimension, then we will continue.
In short, so as not to spoil your brain, the peak flyback current can be roughly estimated using the formula: Ipeak = 5.5*(Pout)\Vin, where Pout is the output power. As you can see, the lower the input voltage, the greater the peak current, so I highly recommend not powering the circuit from a source less than 10V (the datasheet says that the minimum “drop” is 4.7V , i.e. with an output of 12.7V, the minimum input will be 8 volts , if less, then the output switch opens... and its DC load is throttled... with all the consequences)
Okay, enough of the fancy formulas, let's get to the point. I got a scarf measuring 15x34 mm, I drew it in a sprint like this:
Divider resistors 1206 , electrolytes with a diameter of 12...13mm , the inductor was wound on a T60 ring made of 52 material, without particularly thinking about the number of turns, I simply wound it into 4 cores with a 0.3...0.4mm until it was full, it turned out to be about 70.. 80 turns ( 200…250µH )
Well, then, as usual, off we go: fiberglass, iron, ferric chloride, soldering iron….
Finally, traditionally about efficiency:
Input 15V 410mA - 6.15W consumed
Output 11.4V 360mA - 4.1 Issued
no-load current about 20...30mA
Accordingly, efficiency = 67% , but for me personally it doesn’t matter anymore, as long as I don’t overthink the second winding, the second power supply unit.
{ads1}