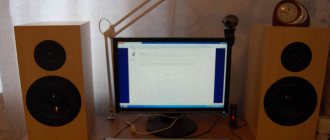
Recently, more and more often you can meet people who listen to music not through headphones, but through the use of Bluetooth speakers. This portable device is a housing in which, along with the speakers, there is a battery and a receiver that receives a signal from the phone via a Bluetooth channel.
Portable speakers have a pleasant sound and high volume; unfortunately, their purchase often involves significant financial expenses. Let's look at how to make a Bluetooth speaker with your own hands, while saving a decent amount of money.
Tools and materials
Remodeling will require a minimum set of tools:
- drill;
- Phillips screwdriver;
- scissors or nippers;
- thin soldering iron 30-40 watts;
Necessary materials for constructing Bluetooth speakers, in addition to speakers:
- 3.7V lithium-ion battery;
- bluetooth module BLK-MD-SPK-B (costs $10 on Ali);
- 3.5 mm jack;
- 3.5 mm plug;
- Wires, ideally - 4 different colors;
- Switch.
Additionally, you will need electrical tape, solder, soldering flux and hot glue (a good superglue will also work).
Portable Bluetooth speakers for 20 bucks and 30 minutes. We do it ourselves
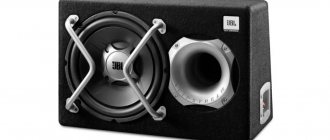
The idea of owning a portable Bluetooth speaker has haunted me for a long time. However, the price/quality ratio still did not reach a reasonable level, and still leaves much to be desired. There are excellent models on the market that deserve to be purchased, such as the JBL Voyager portable speaker. True, the price here is too high - about 220 US dollars. But you don’t really want to overpay just for a famous brand.
After all, in essence, all portable acoustics are ordinary multimedia acoustics + Bluetooth module + lithium-ion battery. And if you combine these components yourself, you can get a budget option that is quite good in quality.
Spring is in full swing. And the need for portable acoustics is now very relevant. After all, you can take it with you to a group of people on the street, or on a trip out of town for a picnic, or wherever you need mobility, but there is no outlet. In other words, you finally need to acquire such a gadget! But the desire to save money has not disappeared at all. Quite the contrary. This means it’s time to roll up your sleeves and do everything yourself. So, let’s define the goal - quickly, without much effort, from available parts, assemble inexpensive, high-quality portable acoustics that are not inferior to ready-made gadgets and are significantly lower in price. Let's get started.
Brief plan:
- Select multimedia acoustics.
- Select Bluetooth module.
- Select a lithium-ion battery (portable charger).
- Connect all this with blue electrical tape.
- Profit. Enjoy portable music with friends.
Selection of components.
1. One of the most important characteristics of portable speakers, in my opinion, is size and weight. Based on these mandatory criteria, we will look for the most popular and inexpensive model of multimedia acoustics. Ok, google) After analyzing the characteristics, the choice fell on the Sven 315 speakers. For a price of about 8 US dollars, we get very compact multimedia speakers with high-quality sound. A huge number of positive reviews confirm this. (https://market.yandex.by/product/6226111/reviews?hid=91107&track=tabs)
Admire, here they are (https://www.sven.fi/ru/catalog/multimedia_2.0/315.htm)
Specifications:
- Type 2.0
- Built-in amplifier
- Output power 5 W (2 x 2.5 W)
- Lower limit of frequency range 100 Hz
- Upper limit of frequency range 20,000 Hz
- Height 70 mm / Width 70 mm / Depth 65 mm
- USB powered
2. The next component is the Bluetooth module. A quick inspection of the sites www.dx.com and www.aliexpress.com found suitable modules for 6-7 US dollars (https://www.dx.com/s/bluetooth+audio+receiver+module). However, according to an ad on a local flea market website, there was suddenly an option that could be picked up tomorrow for $10. I didn’t really want to wait for packages from Chinese friends, so I bought what I had. My option (Bluetooth Music Receiver Adapter Dock Adapter Audio Stereo a2dp 30 pin)
This adapter is designed to connect to legacy docking stations with a 30-pin Apple connector. To pair newer i-gadgets (with a lightning connector) or Android gadgets via Bluetooth.
3. And the last component is the lithium-ion battery. Everything is simple here. Since our speakers are powered by a standard USB cable (5V), we take any portable charger with a USB output and a capacity no matter how much money you spare. (https://catalog.onliner.by/portablecharger/~fp[pcd_outputvoltag][0]=5v) Here, the larger the battery capacity, the longer the music plays.
Assembly.
First of all, we need to disassemble the SVEN 315. I used the video instructions.
Then we disassemble the Bluetooth module and remove the board. This is only needed for my specific 30-pin model (for boards ordered from https://www.dx.com/s/bluetooth+audio+receiver+module this will not be required).
Having disassembled the speaker, we shorten the audio input wire and solder it to the Bluetooth module. We also branch and solder the +5v power supply from USB.
We secure everything inside with thermoplastic glue so that nothing dangles.
After installation you can check it. We connect the speakers via USB to a portable charger. And we pair it with the phone.
That's all.
We have created excellent budget portable speakers with which you can safely go on a picnic with friends.
UPD. Demo:
Connecting the wireless module
The image shown shows a chip for assembling a Bluetooth speaker with your own hands using BLK-MD-SPK-B. Pins 3 to 5 will be used for audio output, 13 and 12 for power.
3 - Speaker common wire.
4 - Positive wire left.
5 - Positive wire right.
12 - Power (+).
13 — Power (-).
The contacts of the module that I used are very small, so I had to solder very carefully so as not to damage them. The soldered board can be mounted inside the structure.
Useful tips
There are a few basic tips to keep in mind when assembling.
- Don't forget about grounding.
- Polarity must be observed. Otherwise the device will fail.
- The wires that connect the elements should be made as short as possible, and they should not intersect each other.
- The housing must be sealed, since if there are unintended holes, they can vibrate, creating an unpleasant sound.
- All essential elements must be easily accessible.
- The components must be securely glued to avoid damage during transportation.
- To avoid short circuits, all elements should be checked for polarity when connected.
- The main elements that are responsible for adjustment and configuration (Bluetooth module, power switches, amplifier with gain control) should be placed so that control of their parameters is comfortable. It is also necessary to take into account the possibility of replacing one of the components without having to completely disassemble the entire device.
Subscribe to our Social networks
Battery connection
The next step is to attach 3 wires to the battery: a positive contact, a negative one and another wire to control the charge. All three will go to the 3.5 mm power connector, and the positive one will also go to the second contact on the power button.
Important! For charging, a constant voltage of 3.5-4 V and a charging current of at least 500 mA are suitable. You can use any suitable charger from an old mobile phone.
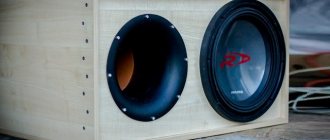
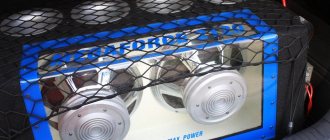
What can you assemble a column from?
Gaming headsets discarded after so many years of service also became a good “donor”. The membrane part of the headphones simply cannot last forever - over time it fails, and the voice coils burn out. However, the headphone housing can be used as part of a homemade Bluetooth speaker.
The housing of such devices, as a rule, has sufficient dimensions and allows you to place a speaker that reproduces sounds in a fairly impressive range. Even a homemade Bluetooth speaker from a broken old speaker has a right to life.
In addition to consumables, you should purchase a set of regular bolts, washers and nuts. You also need to purchase glue that can dry in a couple of seconds; it is better to take the universal “Moment-1”.
Don't forget the materials for the lower part, buy several plugs. Almost all the goods from the list above can be safely purchased in the same supermarket with a construction or plumbing department.
Functionality check
Once the assembly is complete, it's time to turn on bluetooth on your phone or other source and start searching for wireless equipment nearby. If you are asked for a password when connecting to a new gadget, use the standard four zeros. By the way, such a speaker can easily be connected to an Honor phone or other device.
That's all, you've made a fairly powerful Bluetooth speaker with your own hands, and then a new life begins without wires.
Speaker manufacturing
Video instructions for production
Materials and tools
We need these following parts and tools to make this Bluetooth speaker.
Materials
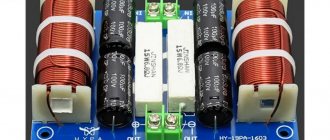
- Stereo amplifier module PAM8403;
- 3W stereo full range speaker – 2 pcs.;
- Micro USB charging module;
- Bluetooth module;
- 18650 li-On battery – 2 pcs;
- DC switch;
- Boost Converter;
- wires;
- Acrylic sheet 4 mm thick.
Tools
- Metal saw;
- Bor machine / Dremel (optional);
- soldering iron;
- Glue gun;
- Wire cutters and strippers;
- duct tape.
- Super glue.
- Marker.
- Crown.
- sandpaper or file
Sizing
They play an important role in the proper execution of the product.
Linear parameters are affected by:
- diameter of the speakers used (measured to the edge of the corrugated rim);
- number of dynamic emitters (mid-frequency, subwoofers and tweeters);
- specifics of speaker application (for an apartment, large auditorium, outdoors, etc.), etc.
The dimensions of a speaker with one set of emitters may vary. If 5-6 pcs. will be used. (3-4 mid-range, 1 high-frequency tweeter and subwoofer), the speaker should have a vertical orientation. But there are special cases when it is better to do it in horizontal scanning. The main determining factor is the total volume of the internal space of the bass reflex for all options with the same set of drivers.
A classic speaker is a body made of a material that has a certain degree of sound absorption.
Standard column shapes:
- cube;
- parallelogram;
- frustum.
Speakers are mounted on the inside of the outer panel (with the bell exiting outward). For proper sound transmission, the speaker housing must have a volume comparable to the size of the speakers and their power. There are various options for calculating it: from complex, multi-stage formulas to standard tabular values.
If a beginner in the radio business decides to make a speaker on his own, he can use the product parameters from the corresponding tables.
An example of a table for calculating simple phase inverters for 1 or 2 dynamic drivers:
| № | Speaker diameter without corrugation (in cm) and quantity (in pcs.) | Housing volume (internal), cm³ |
| 1. | 10 | 12500 |
| 2. | 12 | 18000 |
| 3. | 13 | 21125 |
| 4. | 16 | 32000 |
| 5. | 2 to 10 | 25000 |
| 6. | 2 to 12 | 36000 |
| 7. | 2 to 13 | 42250 |
| 8. | 1 in 12 and 1 in 10 | 30500 |
| 9. | 2 to 16 | 64000 |
The developers of the table indicate that the values are close. During manufacturing, it is possible to deviate slightly (up to 5-8%) from them in one direction or the other.
An example of calculating the linear dimensions of a speaker with 2 speakers 13 cm in diameter when they are positioned horizontally (one above the other):
- Distance between emitters (from edges): 8 cm.
- Distance from the outer rims to the edge of the front panel: 8 cm.
- Width: 13+8+8=29 cm.
- Height: 8+13+8+13+8=50 cm.
- The panel area is calculated: 29x50=1450 cm².
- Let's find out the depth of the hull. We divide the tabular volume indicator by the area of the front panel: 42250:1450=29 cm.
Dimensions for subwoofer speakers and cone inverters are calculated in a similar way.
How to make it yourself?
To properly manufacture and assemble a homemade housing for an audio playback system, you should first prepare everything you need:
- the material from which the box is to be made;
- tools for performing work;
- wires;
- speakers.
The process itself consists of a certain sequence of steps.
- Initially, the type of speakers for which the boxes are made is determined: tabletop, floorstanding, and others.
- Then drawings and diagrams are drawn up, the shape of the box is selected, and the size is calculated.
- On a plywood sheet, mark 4 squares measuring 35x35 cm.
- Smaller squares are marked inside the two blanks - 21x21 cm.
- The internal part is cut out and removed. A column is fitted into the resulting opening. If the cutout is not large enough to fit in, it will have to be widened.
- Next, the side walls are prepared.
Their parameters are:
- model depth – 7 cm;
- the length of one set of walls (4 pieces) is 35x35 cm;
- length of the second set (4 pieces) – 32x32 cm.
7. All workpieces are carefully cleaned and brought to identical sizes.
8. The joints of the connections are placed on liquid nails and secured with self-tapping screws.
9. During the manufacturing process of the structure, the inner part is covered with padding polyester or other vibration-absorbing material. This is necessary for woofers.
Models for computers
Speakers for computers are often made with one speaker. To assemble the model, veneer sheets of small thickness are selected. A hole for the speaker is cut out on the front panel. The bass reflex must be located at the rear of the housing. If we consider low-power models, the amplifier can be used without a resistor.
To adjust the speaker volume, special crossovers are used. These elements are allowed to be installed on a bass reflex. If we consider devices with a power of more than 100 W, then amplifiers can only be used with resistors. Some people select pulse diffusers for the model. At the end of the work, the terminal block is always installed.
Reduced alimony
It is much more difficult to achieve a change in the amount of alimony payments downward than to increase it, since serious reasons and evidence are needed. If the interested party is the payer, in order to change the amount of alimony, you need not only to collect all the necessary documents and competently draw up a claim, but also to start a trial and open a case to reduce the amount of alimony. In practice, alimony payers often face a number of problems: delays in cases to reduce the amount of alimony and insufficient evidence that can really confirm the unreasonability of the established amount of payment. The judiciary also has difficulty determining the correct amount and making a fair decision.
There are a number of reasons for reducing alimony.
- Confirmation that the payer has disability group I or II. An addition could be proof that he needs outside care.
- The debtor (payer) has other persons who are long-term or permanent dependents on his part, to whom he also pays alimony (other children, parents).
- If the payer’s income is so high that the rate of alimony paid significantly exceeds the subsistence level.
- In case of a significant reduction in income or other financial difficulties of the payer.
- When the child for whom child support must be paid is fully supported by the state.
- If the payments are intended for a sixteen-year-old child who is simultaneously engaged in labor or entrepreneurial activity, which is fully or partially capable of meeting his needs. The basis is applicable only if there are additional circumstances from the above list.
The high earnings of a guardian or trustee supporting a child or parent, a pension, as well as the presence of property that does not generate income are not acceptable grounds for reducing the amount of alimony.