Articles
- 2 Purchased or made yourself
- 3 Manufacturing
3.1 Building the building
- 3.2 Protecting and modifying the body
What is the best way to make a subwoofer box?
What is the best way to make a subwoofer box with your own hands? Readers often ask. Let's try to figure it out. This article was written precisely for this purpose. In addition, the reader will receive valuable instructions on how to make a cabinet for this speaker with their own hands. Having found out what would be the best material to make a subwoofer box from, you can safely proceed to the operation.
How to make a speaker cabinet
The idea of making speakers with your own hands can arise in several cases. For example, if you want to experiment with sound and achieve high-quality sound of your favorite music. You can find good-sounding speakers in electronics stores, but they are often very expensive. You can also make speakers yourself if you have a desire to make an extraordinary thing, one of a kind. Our article describes the process of creating acoustic speakers from old fire extinguishers - an original and non-standard idea.
First of all, we will need two identical old fire extinguishers, as well as speakers of suitable size and characteristics. You will also need soundproofing material, putty, a wire brush, sandpaper and paint.
How to make speakers with your own hands
- We disassemble old fire extinguishers and carefully remove old paint and rust from them using a wire brush and sandpaper.
- We select speakers to match the size and design of future speakers.
- We cut holes in both fire extinguishers to the size of the speakers.
- To prevent rattling and other extraneous sounds, we cover the inner surface of fire extinguishers with a layer of soundproofing material.
- We make a mount for the speakers and attach it to the fire extinguisher body.
- We carefully putty the joints between the fasteners and the body using automotive putty and rub them down.
- We cover the surfaces of fire extinguishers with a layer of primer and paint them with spray paint. In this case, scarlet color was chosen for greater effect, but you can also paint the speakers black or silver.
- After the paint has completely dried, you can assemble the speakers. Usually the paint dries within a couple of hours after painting.
Purchased or made yourself
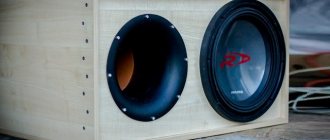
Making boxes for a subwoofer
Making a subwoofer box is a responsible process, but at the same time very interesting. Of course, you can always go to the store and buy a ready-made sub in a housing. But this is a matter for beginners. A professional always buys a subwoofer head separately and then makes the box with his own hands.
Note. The latter option is suitable not only for professionals, but also for people who are passionate about car audio and want to get the most out of the speaker. A subwoofer head placed in a homemade box will produce incredibly strong low-frequency sound.
Before we move on to the manufacturing process, let’s again dwell a little on the topic of purchased subwoofers complete with a housing. As has already become clear, there is no hope for quality here, but the price can attract a buyer. For some models of ready-made cases, the price is only 1 thousand rubles. Needless to say, the material of such a box cannot be expensive. The plywood is always thin, and the box itself cannot even boast of rigidity.
Note. A purchased subwoofer will not give you the right sound. And the same head, if you move it to another box you made yourself, you can connect it so that it sounds much stronger and of better quality.
DIY speaker housing
The modern market offers consumers a large number of options for speakers and acoustic systems. But the most convenient option to acquire an audio device is not always to buy it. There are situations when it is preferable to assemble the speaker housing yourself, especially since it is not difficult.
What can you make your own speaker housing from?
A fairly wide range of materials can be used as a material for creating speaker housings. The most popular of them is fiberboard. Less commonly used are ordinary wood, chipboard, plywood, MDF, and thick cardboard. Plastic and metal are also suitable for this, if you have the ability to process them. Description of each material:
Instructions: how to make a body?
After choosing the material, you need to decide on the dimensions of the case. If you have the “internals” for the speaker on hand (wires, speaker, etc.), it won’t hurt to choose a size so that everything fits, but is not too loose. Excess empty space inside the speaker housing can cause damage.
Classically, the electronics of the speakers consist of a rectangular parallelepiped of the optimal size, but it is not necessary to make this shape the final one: after the rough filling, the creator will still have the opportunity to add decorative details that will change the shape and appearance of the speaker.
After the measurements, the direct cutting of the primary material follows in order to obtain the necessary parts. Roughly speaking, you will need six plates, three pairs of different sizes, or all the same - it’s up to the creator to decide. Do not forget that the overlap between adjacent sheets should be equal to the thickness of the material.
After making all the necessary parts, all that remains is to connect them. The type of connection depends entirely on the preferences of the owner - it can be glue, nails, screws, construction staples, and anything else. You just need to leave one plane to place the electronics inside.
REFERENCE! Speakers will require stands to prevent communication between the actual sound device and the shelf, table or floor on which it sits.
Stands can be easily made from small weights intended for construction scales. These small, and most importantly, inexpensive items will fit perfectly into the interior and will cope with their task.
How to put content inside?
First you need to select the side that will be the “front”, and drill a hole in it for the speaker, then insert it into this hole and screw it (glue it, nail it, if desired). It is advisable to place the remaining insides so that none of the wires are bent or pressed, and small parts do not emit play. If the size was chosen correctly, everything will fit. The final step is to attach the last plate that will close the box.
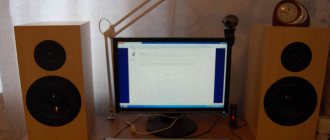
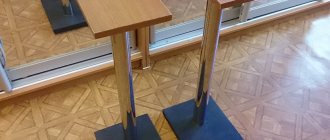
↑ Exterior trim and stands
Then the question arose with the external design. Various options were considered - veneering, painting. There was even an interesting idea of pasting yellow and red leaves. A kind of herbarium :) Ultimately, I used the simplest and, at the same time (to my taste), good-looking solution - liquid wallpaper. The stand for the speakers is made on the basis of former stools, the legs of which are made in the form of a dovetail. A chipboard ring surrounded by a golden threshold is screwed on top. Now I myself don’t really like these stands, and I’m looking for a more interesting solution. I would like to make something like the legs of a chess piece with a heavy base. For example, a barbell plate.
DIY housing for bluetooth speakers
We all like to listen to good music on quality devices. Nowadays, technology allows you to connect devices to listen to music in a completely contactless way, thanks to bluetooth. But such technologies are often accompanied by high costs, and this is not suitable for many. This article will help you make a Bluetooth speaker for listening to music with your own hands.
What to make a casing for bluetooth speakers from
The housing for a homemade speaker can be made of different materials, for example, plastic, thick cardboard, metal, wood. It is recommended to make the body from wood, since the material is available in any hardware store, is quite strong, and can be easily processed by hand.
Just purchase wooden plywood with an approximate thickness of two to three millimeters. Also, to create the body you will need a pencil, nails or hot glue. You will also need a regular or electric jigsaw and sandpaper. To create the system itself you will need:
- A speaker, preferably small in size.
- Bluetooth board.
- Smartphone battery.
- Amplifier.
- Switch.
- Activation button.
- USB charging connector.
- Wires.
How to make a case for a portable speaker with your own hands
In order to make this product, it is important to first fulfill the safety conditions. Put on safety glasses, protective gloves, and prepare your work area and materials for making a homemade product.
- The first step is to mark the main sides of your column on the plywood with a pencil. It is recommended to make the walls of the product small in size to save space and square in size for ease of execution. Also mark the grooves on the sides, thanks to which the walls will be attached.
- The next step is to cut out these walls with a jigsaw, and then go along their edges with sanding tape.
- After completing these steps, you need to determine the front, back and side walls. On the front wall, mark the hole for the speaker, and on the back wall, mark the holes for the connectors. Cut out the holes and sand them with sanding tape.
- Next, use a glue gun to connect all sides of the column except the top.
- After this, connect the wires to the Bluetooth board. Soldering locations are marked in the instructions for the board. In this way, solder the battery, connectors, amplifiers, start button and switches.
- Attach the speaker to the hole in the front wall, and the connectors, switches and start button to the back wall. Secure everything with hot glue so that nothing dangles.
- Secure the top cover and charge your homemade device using the connector and charger. If you wish, you can paint the column any color.
What can it be made from?
At home, the speaker body can be made from almost anything. In action are:
- housing from a failed car radio;
- the body of a glowing cube in which the backlight has burned out;
- the “egg” column is made of paper, folded into many layers and impregnated with glue (for example, epoxy);
- remnants of laminate or parquet - after re-flooring;
- Chipboard, MDF material, fiberboard, natural wood;
- for portable speakers, a PVC pipe (or polypropylene) of the largest diameter is suitable - like what is used to install an interfloor drainage channel for bathrooms throughout the house;
- plywood - be careful when sawing it: it easily chips and cracks, and bends over time.
TO MAKE THE SPEAKERS SOUND
High-quality sound speakers for home sound reinforcement equipment reproduce low-frequency signals with a frequency of 30-50 Hz, which corresponds to a sound wavelength of 7-10 m. To effectively radiate such vibrations, dynamic heads with a large diffuser diameter are needed (there are examples with a diameter of 400 mm).
However, in practice, “speakers” ranging in size from 200 to 300 mm are most often used. Their natural resonant frequency is 15-30 Hz. When a sound signal is applied to the head, its moving system oscillates, emitting in both directions sound vibrations that are equal in strength but opposite in phase, which are non-directional. The “speaker” housing is not able to isolate areas of air compression and rarefaction from one another. As a result, the sound pressure level at the listening point is low. This phenomenon is known in the art as an acoustic short circuit. This is eliminated by placing the acoustic emitter in a closed box (Fig. 1). (The symbols in the figures indicate: a - width, b - depth, c - height of the box, x - thickness of the material, (1 - thickness of the strip). Often one or even several holes are made in it, placing them in certain places in the body (Fig. 2). Such holes are called phase inverters, or bass reflectors. Their variety is a passive radiator (Fig. 3), which is an unconnected dynamic head. The location of the holes on the front panel of the speaker body is chosen so that the back radiation coincides with the front radiation, increasing thereby low-frequency sound pressure.
Important for acoustic speakers are their size, shape and materials from which they are made, internal “filling” and design of the front panel. Thus, the housing influences the technical parameters of the dynamic head installed in it and, above all, increases its own resonant frequency. An important role here is played by the diameter of the diffuser and the displacement of the housing. With an increase in its volume and a decrease in the size of the moving system, the resonant frequency changes slightly. If a head with a large diffuser is installed in a relatively small box, the resonant frequency will change noticeably - low frequencies are “cut off”, and as a result, the effective frequency range of the speaker is narrowed. In other words, an incorrectly selected housing can degrade the playback quality of even a very good dynamic head.
For effective head output at low frequencies, Bulgarian radio amateurs recommend choosing column volumes based on the data given in the table.
When using a bass reflex, certain requirements must also be met. The hole for it should be located at a distance of at least 60-80 mm from the woofer head and 40-50 mm from the rear wall of the housing. Sound-absorbing material is also placed at the same distance from the hole. It is better if the bass reflex is located under the woofer head.
Recommended sizes for bass reflex speakers depend on the volume of the speaker and the diameter of the head diffuser. So, with a head d 125 mm installed in a housing with an internal volume of B dm3, the bass reflex pipe has d 50 (46) mm and b = 60 mm. For a loudspeaker with a volume of 16 dm3, the diameter of the diffuser is 160 mm, you need a pipe d 50 mm and length 100 mm. Accordingly, for a head d 200 mm with a volume Y = 30 dm3, the pipe dimensions will be d 75 mm, b = 100 mm. The loudspeaker has d 300 mm, with N4 = 60 dm3 the pipe should have d 75 mm and b = 220 mm.
The shape of the cabinet, both internal and external, also affects the frequency response of the speaker. The most acceptable is spherical, and the most unsuitable is a cube, when the dynamic head is located in the geometric center of one of its sides. In a cylindrical body, the most favorable location of the head is transverse (Fig. 4a) rather than longitudinal (Fig. 46), although attaching it in the latter case is much simpler.
If the housing has the most common parallelepiped shape, it is best to install the low-frequency “speaker” asymmetrically relative to the sides of the reflective board (Fig. 1).
A type of parallelepiped-shaped column is shown in Figure 5.
A loudspeaker with a housing in the form of a triangular prism (Fig. 6) or a truncated pyramid (Fig. 7, 8) has good acoustic data.
Typically, speaker cabinets are made of wood: plywood, particle board (chipboard), oak, stained beech or pine, which have significant internal acoustic losses. The thicker the material, the stronger the walls and the possibility of resonant vibrations decreases. These parasitic oscillations usually act in antiphase with the direct emitted signal and lead to unpleasant changes in the timbre of the loudspeaker.
For a volume of 5-10 dm3 and a speaker power of 6-10 W, the thickness of the box walls is 8-10 mm, and for V = 40-60 dm3 and a power of 40-100 W - the rest are made of plywood or chipboard. However, with large dimensions of the case and significant power of the dynamic head, unwanted vibrations may still occur in it. To avoid them, the walls of the column are tightened with wooden slats with a cross-section of 40 X 40 mm or metal rods d 6-10 mm (Fig. 10).
Bass reflexes are made of plastic or metal (for example, duralumin) pipes with a wall thickness of at least 2 mm.
Minerals are also used as a material for building columns. Marble comes first. Thanks to its layered structure, it dampens sound well and therefore does not experience resonant vibrations. Marble is easy to process, but the disadvantage is that it is heavy and fragile.
The walls of the case are connected to each other using one of the methods shown in Figure 11. It is easier to make a box with removable front and rear panels.
First, cut out the side walls. Before assembly, it is necessary to glue and then nail with small nails restrictive mounting rails measuring 15X15 or 20X20 mm and the length indicated in Figure 12.
The walls of the body are glued together with Universal or S-200 glue and thin nails are driven in every 15-20 mm for greater reliability of fastening. The box will be even stronger if additional bars are glued into its corners (Fig. 13). Free spaces are filled with epoxy. Based on the covering assembled in this way, the dimensions of the front and rear panels are determined. They are made from coniferous wood. Based on the existing dynamic heads, the location of the holes for them is outlined (Fig. 14).
Speakers are often decorated with decorative frames made of wooden slats with a cross-section of 15x15 mm. The radio fabric is stretched over a reflective board and secured with buttons or furniture nails.
To reduce parasitic vibrations, they try to prevent direct connection of the base on which the head is mounted with the rest of the body. The same applies to fasteners - screws, nuts and washers.
The internal volume of the speaker is filled with some sound-absorbing material, for example glass wool. Its quantity is determined by measuring the resonant frequency. The filling of the body is considered normal if it has decreased by 10-12%. It has been experimentally established that this will require 30-40 g of glass wool or 10-15 g of polyester wool (yambolene) per 1 dm3. You can also use rags. Sound-absorbing material is placed in a thick fabric cover.
If the dimensions of the housing are correctly selected and it is carefully sealed, then when you gently press the diffuser of the low-frequency head, its moving system smoothly returns to its original position. The absence of such a phenomenon indicates the presence of acoustic losses, which reduce sound pressure at low frequencies by 1-2 dB.
Noticed a mistake? Select it and press Ctrl+Enter
to let us know.
What will be needed for production?
In addition to the material from which the housing is made, an active speaker requires:
- one broadband, or 2-3 more narrowband speakers;
- ready-made or homemade power supply;
- ready-made or homemade audio power amplifier;
- regular wire or cable;
- winding wire;
- plastic pipe of suitable diameter;
- rosin, solder and soldering flux;
- adhesive sealant;
- epoxy glue or furniture corners.
Tools needed:
- pliers;
- side cutters;
- flat and shaped screwdrivers (a set of screwdrivers is best);
- wood hacksaw;
- file or chisel;
- hand drill and set of drills.
READ MORE: Do-it-yourself children's house for a summer cottage: photos, drawings, step-by-step instructions
A screwdriver turned on at high speeds also performs the functions of a drill.
Homemade speakers: diagram, drawings
At first glance, making your own speakers is quite simple. However, this is misleading. First of all, it should be noted that the models are made with different elements. Depending on them, the device parameters and sound quality will be different.
There are special requirements for computer speakers. You can also make a model for your car or studio yourself. In this case, it is very important to follow the instructions. First of all, to assemble the speakers, you should consider the standard model diagram.
Speaker layout
The speaker circuit includes drivers, pads, diffuser and crossover. Powerful models use a special bass reflex. Amplifiers can be installed with field-effect or switching transistors. To improve sound quality, capacitors are used. The woofer is matched with the amplifier. The dynamic head must be attached to the seal.
Single speaker models
Single speaker speakers are very common. To assemble the model, you will first have to deal with the body. Plywood is often used for this purpose. At the end of the work it will have to be sheathed. However, the first step is to make the side posts. For this purpose you will have to use a jigsaw. The speaker for the column can be selected with low power.
The inside of the plywood is necessarily stitched with vibration-proof tape. After fixing the speaker, the seal is fixed. Glue is used for this purpose. Next, all that remains is to attach the diffuser. Some people make a separate shelf for it and fix it with stacking screws. To connect the speaker to the plug, a terminal block is installed. How to turn on speakers? For this purpose, a cable is used from the terminal block, which should lead to a power source.
Model drawing for two speakers
Speakers with two speakers can be made for home or car. If we consider the first option, then a pulse type diffuser will be required. First of all, durable plywood is selected for assembly. The next step is to cut out the bottom post. Models with legs are very rare. To cover the veneer, you can use regular varnish. There is no need to glue vibration isolation tape to the front pillar. The diffuser is mounted under the speaker. To make a hole in the panel, you need to use a jigsaw. The bass reflex is fixed at the rear wall. Some manufacture devices with horizontal speakers. In this case, the diffuser will be located at the top of the structure. Speaker wires are of the two-core type.
Devices with three speakers
Speakers (homemade) with three speakers are very rare. These devices are most suitable for multi-channel speaker systems. To assemble the model, first of all, sheets of plywood are selected. Some also recommend using veneers. However, models made of natural wood are quite expensive on the market. The speakers should be installed horizontally. The device will also require an amplifier.
Metal corners are used to secure it. To connect the plates you will need tightening screws. In some cases, the plates are secured with glue. Next, the model will have to be partially covered with leatherette. The next step is to install the terminal block. In order to fix it on the body, you will need to make a separate hole. It is also important to note that there are models with regulators. Microcircuits for them are used of the capacitor type. When the speakers produce noise, you need to change the diffuser.
Studio devices
Speaker drawings for studios assume the use of powerful speakers. The diffuser is most often used of the pulse type. Many experts recommend installing two amplifiers. For normal operation of the speaker system, a zener diode is required.
In order to assemble the speakers yourself, the housing is first made. Round holes are made on the front panel for the speakers. You will also need a separate output for the bass reflex. The design of the columns is quite different. Some people prefer to varnish the surface of the case. However, there are models covered in leather.
Models for computers
Speakers for computers are often made with one speaker. To assemble the model, veneer sheets of small thickness are selected. A hole for the speaker is cut out on the front panel. The bass reflex must be located at the rear of the housing. If we consider low-power models, the amplifier can be used without a resistor.
To adjust the speaker volume, special crossovers are used. These elements are allowed to be installed on a bass reflex. If we consider devices with a power of more than 100 W, then amplifiers can only be used with resistors. Some people select pulse diffusers for the model. At the end of the work, the terminal block is always installed.
Automotive modifications
Car speakers are available with two or three speakers. To assemble the model yourself, you will need sheets of plywood. In some cases, varnished veneer is used. To fix the speaker, you need to make a hole in the panel. The next step is to install the bass reflex. Some modifications are made with low-frequency cores. If we consider speakers (homemade) of low power, then the bass reflex can be installed without an amplifier.
In this case, a multi-channel crossover is used to control sound. Some specialists install terminal blocks behind the bass reflex. If we consider speakers with a power of more than 50 W, then the microcircuits are used for two amplifiers. The diffuser is installed as a standard pulse type. Before fastening the case together, it is important to take care of the vibration-proofing layer. For the terminal block, you need to make a separate hole on the plate. Some people believe that the body must be cleaned. The wires for the speakers are of the two-wire type.
Open-back speakers
Portable speakers with an open case are quite easy to make. Most often they are made with one speaker. Holes are made on the back panel of the device with a drill. The plates are directly connected with tightening screws. The diffuser for such devices is suitable for pulse type. Bass reflex units are often installed with one amplifier. If we consider powerful portable speakers, they use a resistor crossover. It is attached to the bass reflex. Many experts recommend installing speakers on a seal.
Devices with closed housing
Speakers (homemade) with a closed housing are considered the most common. Many experts believe that they are the best in sound quality. Bass reflex devices for devices are suitable for the operational type. The woofers are installed in the holes. For the purpose of assembling the case, ordinary sheets of plywood are suitable. It is also important to note that there are modifications with cores. If we consider high-power speakers, the terminal blocks are installed in the lower part of the housing. The design of the models is quite different.
20 W models
Assembling 20V speakers is quite simple. First of all, experts recommend preparing six sheets of veneer. They should be varnished at the end of the work. It makes more sense to start assembly by installing the speakers. The bass reflex is used as a pulse type. In some cases it is installed on pads. Experts also recommend using rubber seals.
Power supply to the speakers is provided through the terminal block. It is attached to the back panel. The bass reflex can be installed either with or without an amplifier. If we consider the first option, then the cores are selected of the phase type. In this case, the woofer does not need to be used. If we consider speakers without an amplifier, then they use a crossover. At the end of the work, it is important to clean the body and varnish it.
50 W devices
Speakers (homemade) rated at 50 W are suitable for ordinary acoustic players. In this case, the body can be made from ordinary plywood. Many experts also recommend using natural wood veneer. However, it is important to note that he is afraid of high humidity.
After choosing the material, you should work on the speakers. They must be installed next to the bass reflex. In this case, you cannot do without an amplifier. Many experts recommend selecting only low-frequency crossovers. If we consider modifications with a regulator, then they use a pulse diffuser. The terminal block in this case is installed last. You can always use leatherette to decorate the speakers. A simpler option is to varnish the surface.
Speakers with a power of 100 W
100 W speakers are suitable for powerful speaker systems. In this case, the bass reflex is taken only of the pulse type. It is also important to note that the amplifier is installed with a crossover. Many experts recommend using veneer to assemble the case. It is better to install the woofer on a pad.
Stages of creation work
To make a rectangular or cubic speaker with your own hands, you will need to properly manufacture the housing (box) in which the electronics are located. To make the body, follow the drawing.
- Mark and saw the board (possibly from lumber) into prefabricated edges from which the body is assembled.
- In the front wall for the speakers (and bass reflex, if the design provides for this), drill holes in circles. Knock out the fragment to be removed from the board drilled in a circle, process the edges with a file or grinder. Insert the speakers (and a piece of bass reflex pipe) to check how level they will sit there.
- Screw the speakers by their mounting loops to the front edge. Insert a piece of pipe instead of the bass reflex. Seal all cracks with sealant or Moment-1.
- Assemble the main part of the box: connect the top, bottom, side and back edges to each other using epoxy glue or corners. If corners of the crack are used, it is recommended to seal them with sealant or plasticine. Some perform sealing using Moment-1 or epoxy glue - in the latter case, the column will be “indestructible”.
- Follow steps 1-4 for the second column. It is more convenient and faster to produce both cases on the same days.
- When the main body is ready, cut out the seventh fragment of the body - the inner wall separating the power supply and amplifier from the acoustic (sound) compartment. The fact is that the re-reflection of sound from the abundance of sharp edges of parts worsens the performance of the speaker at low frequencies. The housing of the second speaker does not require a partition - it is passive and does not require a power supply. An option is possible when, instead of one stereo amplifier, each speaker uses its own mono amplifier. It’s up to you to decide whether to place a common (powerful) power supply in one of the speakers or to have a separate (less powerful) one for each of them.
READ MORE: Do-it-yourself dog house layout placement drawings manufacturing
Manufacturing of the body is completed. To mount the electronic component, do the following.
- Attach the amplifier and power supply to the internal partition.
- Connect the power supply and the amplifier to each other - power will be supplied to the amplifier's power supply input.
- Connect a speaker (if there is one) to one of the amplifier's outputs. For the second (passive speaker), drill a hole for the audio connector, connect this connector to the second channel of the stereo amplifier.
- Drill a hole for the audio input connector in the rear wall, connect the connector inserted into it to the amplifier input.
- Cut out a connector for 220 volt power in the back wall and mount this connector in it. Connect the network connector to the input of the power supply.
- Insulate all solder joints using caulk, hot glue, tape, or tape.
- If there are several speakers, you will need crossover filter coils and additional capacitors that form oscillatory circuits with the first ones. Three-way speakers with the help of a filter clearly distinguish between high, mid and low frequencies across different speakers.
To make a separation filter, do the following.
- Saw off a couple of pieces from a plastic pipe of the required diameter. You cannot use a metal-plastic pipe - it will turn the coil into a source of an electromagnetic field, in addition, recalculation and additional inductance measurements on a special multimeter will be required.
- Cut and grind the sides for the coils.
- “Sand” the pipe pieces in the gluing areas. Glue the coil frames using hot melt glue, Moment-1 or epoxy glue. Wait for the glue to dry and harden.
- Based on the description of the column diagram, wind the required number of turns of enamel wire of the appropriate diameter.
- Mount the coils on the bulkhead or back wall of the speaker. They are secured both with adhesive and with self-tapping screws with washers (each coil is held at three points by one of the edges). Central fastening using a self-tapping screw or bolt with a plastic/metal washer larger than the outer diameter of the pipe is also allowed. Such washers are used for hanging household appliances and cabinets on walls using through studs.
- Connect the coils to the capacitors - according to the diagram in the description. You should get a full-fledged bandpass filter.
This provides natural sound. The number of filters - for high, mid and low frequencies can be equal to the number of speakers (or the number of speakers in the column minus one, depending on the circuit).
From paper
Making a column from plain paper is not as easy as it seems. You will need glue containing a hardener - the layers of paper are impregnated with it. Epoxy is best suited for this - coils and printed circuit boards are often made from it (the material resembles getinax). Do the following.
- For a square column, mark and cut sheets of paper according to the template of each of the walls. In the sheets from which the front edge of the speaker is glued together, cut out holes for the speakers and the bass reflex output. For the back there are holes for audio connectors and a power socket.
- Dilute and apply some epoxy glue to the sheets that serve as the first layer. Glue two layers for each wall and leave them to dry.
- The next day, glue the third layers to each wall. Add one every day. The interval between stages can be reduced from one day to several hours to speed up the process. But in this case the quality may suffer. Repeat these steps until the thickness of the walls of the future column reaches at least 1.5 cm. Instead of paper, you can use thick cardboard.
Disadvantage - evenness and accuracy when gluing sheets is important, otherwise the structure will lead to the side. The advantage of the method is the use of paper from old magazines and newspapers, cardboard (except wavy cardboard, with voids inside).
A round body will speed up the process: a roll of paper is wound onto a piece of pipe with a wide clearance, soaking as it goes. Secure the starting winding line with tape. The development looks interesting, in which the role of a voice coil is played by a strip of metal foil, and the role of a diffuser is played by a sheet of paper. Do the following.
- Apply metal tape or double-sided tape with foil to a sheet of paper. Place the coils so that they do not touch.
- Bring the ends of the tape or foil to the sound source.
- Place a magnet under a sheet of paper, connect the gadget and turn on the music.
You won't get high volume - the amplifier in the gadget is too low in power. Mid and low frequencies will be added to the “rustling” sound. Powerful speakers use a multilayer design - an electrostatic membrane, designed for high amplifier power.
From a tire
A speaker made from a tire cannot be compared in terms of coordination and amplitude-frequency response with branded or homemade rectangular systems. The rigidity of the walls is insufficient - rubber and hard rubber dampen low frequencies due to excessive elasticity. A stereo music system needs a large speaker - its diameter should be fixed in the tire, but not fall inside. The other side of the tire is covered with plywood or a board made of other lumber, placing the power supply and amplifier on it.
A more advanced design will be the part of which on the speaker side is closed with a wooden ring cut from the same plywood. The speaker is not mounted on the tire itself, but on a plywood ring, which can be connected to the back, where the blank plywood wall is located, using long through-tapping screws or bolts.
From a Pringles can
https://www.youtube.com/video/6Fg9oRsjl9g
The simplest, but unusual option is to use aluminum, cardboard, plastic cans and glasses as speakers, making slits and inserting a smartphone into them. A more “advanced” option is to place a speaker of suitable diameter in a can of chips or a glass. The principle of any such speaker is based on the fact that the sound, reflected from the walls, acquires additional volume.
READ MORE: Ceramic air humidifier with battery - types, features of selection and application (90 photos)
From the bottle
Any plastic or glass bottle will do. It is safer to cut and drill plastic. For glass, you will need diamond drills and a crown, and the process itself is performed under water for safety reasons. Do the following.
- Using a hole saw, drill a hole in the bottle for the speaker.
- Drill mounting holes for self-tapping screws. The bass reflex will be either an open neck or additional holes drilled with a smaller diameter crown for a piece of plastic pipe.
- Fill the holes with sealant and install the speaker with pre-soldered wires. Tighten the screws. You cannot screw them “dry” into glass - the bottle will crack and shatter into pieces.
From headphones
A headphone column is an option in which, instead of a dynamic head, which is not designed for decent volume at a large distance from the listener, any modern speaker is used. The headphone space is sharply limited to accommodate the amplifier and power battery. In such a column, a piece of the same PVC pipe is used. However, when the column is passive, the process speeds up significantly. The step-by-step instructions are as follows.
- Disassemble the headphones and remove the heads with membranes.
- Insert speakers in their place. The speaker is chosen as thin and flat as possible.
- Connect the wires that previously supplied high-frequency voltage to the membrane heads.
- Secure the speakers using self-tapping screws.
- Close (if possible) the mesh inserts.
It is possible to turn headphones into speakers if they were initially large enough to completely cover your ears. If the speakers do not insert completely and do not close, then use an equivalent replacement made as follows.
- Remove the membrane heads from the headphones.
- Cut holes in the bottom of a plastic or cardboard glass, slightly smaller in diameter than the heads themselves.
- Insert and glue the membranes.
Such acoustics are more of a joke - they are not designed for professional use. For full-fledged speakers you need speakers. If it was not possible to insert small-sized speakers instead of headphone membranes, the cylindrical design that is already familiar to you will be suitable as a basis.
- On the back of the headphones, cut a hole into which the magnet on the back of the speaker will fit. The hole should be much larger than the magnet itself - only the side supporting structure will remain from the headphone body. The back (outer) wall of the earphone will be cut off entirely.
- Using hot glue or Moment-1, glue the earphone to the piece of PVC pipe you just made.
- Place the power supply (or lithium-ion battery with a charge controller) and the amplifier itself inside the pipe. The result is an active column.
- Similarly, make a base for another earphone and place the speaker in it. The result is a passive speaker. In stereo systems, only one of the speakers is active.
- Remove the audio cable from the passive speaker and solder a plug with a standard diameter of 3.5 mm to it.
- Insert the same connector into the active speaker to connect the passive one. Connect one of the amplifier's stereo outputs to it. The second is directly to the speaker of the active speaker.
- Insert another connector into the active speaker - to connect an external sound source (for example, a smartphone), connect it to the stereo input of the amplifier.
- Connect the power supply to the power input on the amplifier.
- Check that all parts and assemblies are securely fastened, close both columns with a plug.
Homemade designs
It is impossible to unequivocally answer the question: how to make a tool box with your own hands, since there are a huge number of options, unlimited by anything except your imagination. I would like to note that you can use old paper cases, bags, or make a complete box yourself. The material used is metal or wood.
Internal partitions are also made of wood or plastic. The lids are hung on hinges; it is necessary to provide a lock that will protect against accidental opening.
The finished box is painted or sheathed with available and suitable material, both outside and inside.
Devices with closed housing
Speakers (homemade) with a closed housing are considered the most common. Many experts believe that they are the best in sound quality. Bass reflex devices for devices are suitable for the operational type. The woofers are installed in the holes. For the purpose of assembling the case, ordinary sheets of plywood are suitable. It is also important to note that there are modifications with cores. If we consider high-power speakers, the terminal blocks are installed in the lower part of the housing. The design of the models is quite different.
Speaker crossover diagram
Crossovers are made based on measurements, here is a diagram.
We put everything together - we insert sound insulation, crossovers, cables, etc. We put on gaskets for the speakers, handles and cable entry. We install the speakers (here on hex screws with nuts).
BR (bass reflector) tunnels are made of PVC pipe, they have rounded exits so that they do not hum, ventilate them, then paint them black with a spray can, then press a black grille into the groove (preferably powder coated), glue strips of black felt on the grille supports so that they did not buzz and the assembly was completed.
As a result, the speakers sound very good. We had a combat test at a wedding, and everyone praised them very much for their sound and capabilities, no one even believed that these speakers were not store-bought!
The fourth type of case is called Big-Tower
It is very rare to find such a case as a home PC. It is noticeably larger than all the others, and its height reaches at least half a meter. This case can not only accommodate about five good video cards or hard drives, it is suitable for creating servers or a computer that controls other computers in the office. This case allows for good ventilation, which will prevent the computer from overheating. Thus, Big-Tower is ideal for the most advanced users who work in the field of IT technology and particularly demanding gamers.
The first point that you need to pay attention to when selecting or designing a case is whether the internal space is sufficient. It is necessary to determine whether you can place devices there for the necessary cooling of the system unit, installation of fans
It is necessary that air circulate freely inside the case, thereby ensuring the cooling of all parts. Pay attention to the power of the power supply unit (PSU) located in the case or purchased separately. It should be sufficient for the planned PC system. You should also pay attention to the location of the power supply in the case. With large power supplies, you need to think about cooling it. The power supply only needs to cool itself.
For optimal cooling and low noise levels, the power supply can be placed in the following configurations.
In the circuit, with the upper location of the power supply, we get the following advantages:
- Quite low noise level (19 dB) when installing a 430 W power supply, ARX FD1212-S2142E 12V 0.36A 2400 rpm fan;
- The temperature of the elements increases slightly (+3 degrees in the power supply unit and +1 degree in the case);
- Standard location;
- Free air outlet.
This design can be assembled approximately as in the photo below.
The SilverStonetek company has launched the production of cases with a bottom-mounted power supply.
The advantages of this design are:
- The power supply serves only to cool itself;
- There is no need to remake the power supply;
- Low center of gravity for PC case.
The disadvantages include: excessive fan noise and difficult air access to the power supply fan.
The material used to construct the enclosure is primarily aluminum or steel, although many homemade enclosures are made from wood or plexiglass. The advantages of an aluminum case include light weight and good heat dissipation. But such a case bends easily and scratches are common. The cost of aluminum cases is higher than steel ones. The steel body is more reliable and durable. All parts in such a case will be reliably protected. In addition, steel dampens vibrations better, which reduces the noise of the computer.
When considering different case designs, it is important to first determine what connectors and interfaces you will need now and in the future. Many of the options, such as a thermometer built into the speakers, you don't need, but others simply do.
Here you need to decide for yourself what design and construction to choose, based on the above. And don't forget about originality...
Tool storage
As a rule, tools take up the most space; you can build quite convenient, spacious and small storage systems for your garage with your own hands. It is inconvenient to store tools in closed drawers; you constantly have to look for the right item. The optimal solution is to install a metal mesh.
For most tools, a mesh with a 10 cm mesh made of 2 mm wire is suitable. It is inexpensive and can withstand fairly heavy loads. Mounted on the wall with anchors or other fastening elements, depending on the wall material.
Some rods need to be bitten off and bent into hooks. The latter will house hand tools. You can purchase individual hooks that install directly on the wall without a mesh.
The disadvantage of this solution is the installation time, since you will have to make separate holes for each hook. There are planks with several hooks at once, but it is still much easier and more practical to install a stack.
Part two: installation
So, we have prepared a wiring diagram. This is very important, since you should not cut holes for speakers in places where it is impossible to run a cable. It is necessary to find all intra-wall obstacles and pre-designate the diagram so that the process of laying wires is as simple and fast as possible.
To directly install the speakers, you will need a drill/screwdriver, drills, flexible rods, electrical tape, a plaster saw, an in-wall distribution box, a socket, an acoustic cable, a pencil, a level, wire strippers, and the speakers themselves. Get to work!
Modernization of finished buildings
The simplest version of a homemade product at all times was a modified finished product. All available industrial models that are not required in the basic version are suitable for this. The scope of modifications for each of them is different and depends on the requirements of the device, the capabilities and ambitions of the creator. For example, there are excellent alternatives to finished enclosures available today. It consists in the use of electrical boxes, panels and ducts. A variety of options for such products can be found in electrical goods stores. Branded production, excellent appearance, built-in sealed leads allow, with minimal modification, to obtain a housing that is often no worse than a specialized one. The most acceptable option of all those encountered are plastic boxes with a transparent lid for circuit breakers. They have a significant internal volume, allow you to make a window for the indicator and at the same time are able to reliably protect the structure from external influences.
| Box for circuit breakers |
Another good option could be an electrical plastic box. To obtain the housing, cut it to the required length and equip it with side covers
You just need to pay attention to the material of such a box, since some of them practically do not stick together with anything
Manufacturing instructions
Manufacturing a speaker is a multi-stage process, divided into plumbing and electrical installation work. A speaker for the home (or rather, for a PC or home theater) is made according to a pre-selected drawing. Choose a subwoofer option - mini or regular, the size of the box made at the beginning of work depends on this.
Housing assembly
To assemble the chassis, follow these steps:
- Saw a board made of chipboard, natural wood or MDF according to the drawing into its component elements.
- Prepare a rectangular hole for the cable channel labyrinth.
- Attach the corners or glue with epoxy glue the top, bottom, back and side edges. The result will be an incompletely assembled box with sufficient rigidity.
The speaker box is assembled.
Port
To build and install the port, do the following:
- cut out suitable pieces from the box that fit into the dimensions of the column;
- attach the elbow of the box at the point where the cable duct turns;
- check that the port (assembled cable box) fits the internal dimensions of the box;
- glue it with hot glue or sealant.
Speaker hole
The speaker requires a large, preferably perfectly round, hole to fit its outer diameter. Cut it so that the speaker fits freely into it. Most low-power “woofers” (up to 30 W) fit into an 8-inch hole diameter. If the subwoofer is assembled on the basis of a conventional rectangular or cubic speaker, then replace the front wall. Extra holes from additional speakers are not needed.
Processing the interior of the case
After installing a labyrinth channel that allows the speaker to produce maximum bass without “mumbling” at lower frequencies, the inside of the speaker is covered with damping material. It reduces the likelihood of resonance occurring over time. Mostly thick cloth, drapes folded in several layers, woolen fabric, or just a piece of old threadbare carpet are used as a damper. It absorbs excess sound waves, preventing them from being reflected several times, which would ultimately lead to loosening of the structure and the appearance of resonance.
An important part of the internal assembly is the layout, the placement of functional electronics. First, prepare the amplifier. Do the following.
- Make a printed circuit board according to its topology (track maps).
- Place the radio elements according to the wiring diagram (assembly drawing).
- Solder all the contacts of the legs of the parts with the tracks of the printed circuit board.
- Solder wires to the input, output and to power the assembled amplifier.
- Attach the amplifier heatsink to the main IC and place it in a secure location on the speaker, for example using screw stands. It is also permissible to place it on wooden pads - it will not heat up enough to burn the wood.
- If the speaker power reaches hundreds of watts, assemble additional amplifier stages. Their number is limited only by the free space inside the column.
But to cool all the radiators, you will need a powerful computer cooler, the air flow of which is directed to these radiators. Each transistor will need its own heat sink. In the old days, radio tubes were also used - now they are replaced by transistors and microcircuits. In addition, the level of linear distortion in radio tube amplifier stages is off scale.
The collector power dissipated by the transistor (its actual useful power) is only 1.5-2 times greater than the thermal power generated by semiconductor junctions when heated during intensive operation. To remove excess heat from the power elements, a radiator is needed.
Speakers with a power of 100 W
100 W speakers are suitable for powerful speaker systems. In this case, the bass reflex is taken only of the pulse type. It is also important to note that the amplifier is installed with a crossover. Many experts recommend using veneer to assemble the case. It is better to install the woofer on a pad.
Once you learn how to make speaker cabinets, you can create ones that match the sound quality you desire. The usual box design for two speakers involves a closed, ventilated housing. This article describes how to make a sealed enclosure that separates the sound waves from the front and back of the speakers for improved bass.
Previously, speakers were ordinary horn loudspeakers and did not have a housing as such. Everything changed when speakers with paper cones appeared in the 20s of the 20th century.
Manufacturers began making large cases that housed all the electronics. However, until the 50s, many audio equipment manufacturers did not completely close the speaker cabinets - the back remained open. This was due to the need to cool the electronic components of that time (tube equipment).
The purpose of a speaker enclosure is to control the acoustic environment and contain the speakers and other system components. Even then it was noticed that the housing can have a serious impact on the sound of the loudspeaker. Since the front and rear parts of the speaker emit sound with different phases, amplification or attenuation interference occurred, resulting in deterioration of the sound and the appearance of comb filtering effect.