As written in the technical specifications, the 6P3S electron tube is an output beam tetrode. It is used in ULF. Also used in high-frequency generators of transmitting devices. Installed in Soviet receivers of the highest and 1st class (inexpensive 6P6S was developed for devices of the 2nd and 3rd class) Equipped with an indirectly heated oxide cathode. Operating time 500 hours.
The history of this lamp began in 1935, when the American company RCA began producing the 6L6 lamp. During the Great Patriotic War, radio equipment was supplied to the Soviet Union from the United States under Lend-Lease. At the same time, the production of domestic analogues of American lamps began. At this time, there was no standard for the naming of electronic devices and clones of the American lamp were produced under the names 6L6, 6L6S, 6P3. After GOST 5461-50 was adopted in 1951, the final name 6P3S was approved.
Specifications
First, let's consider the values of the maximum permissible parameters 6P3S. They can be divided into the following parts: maximum voltage, power dissipation, leakage current and resistance. Here are their parameters:
- maximum voltage on the heater – 7 V ;
- the minimum potential difference across the heater is 5.7 V ;
- the greatest potential difference between the cathode and the heater is 200 V ;
- the maximum permissible potential difference at the anode is 400 V ;
- maximum potential difference on the 2nd grid – 300 V ;
- maximum possible power – 20.5 W ;
- the highest possible power allocated on the second grid is 2.75 W ;
- maximum permissible leakage current cathode - heater - 100 μA ;
- the highest possible resistance connected to the circuit of the second grid is 0.5 MOhm .
Now let's move on to considering the electrical characteristics. The scope and capabilities of the vacuum tube largely depend on them. Here are their meanings:
- filament voltage – 6.3 V ;
- potential difference at the anode – 250 V ;
- potential difference on the second grid – 250 V ;
- The bias potential difference on the 1st grid is -14 V ;
- filament current – 900 ± 60 mA ;
- current strength in the anode circuit – 72 ± 14 mA;
- the current strength in the circuit of the second grid is no more than 8 mA ;
- lamp slope - 6 ± 0.8 mA/V ;
- output power (potential difference acting on the 1st grid is 9.8 V, the resistance connected to the anode circuit is 2.5 kOhm) - 5.4 W ;
- output power (filament voltage 5.7 V) – at least 4 W ;
- internal resistance of the lamp - 22.5 kOhm ;
- gain kit – 13,5;
- capacitance: at the input – 11 ± 2 pF ;
- output – 8.2 ± 1.5 pF ;
- pass-through – no more than 1 pF .
6P3S transmitters and the decline of the era of romanticism
This publication completes the series of historical essays about the heroic era of the battle for short waves and the formation of tube radio electronics.
The heroes of my essays were romantics. Fyodor Lbov was not afraid of criminal prosecution for going on air, Ernst Krenkel risked his life in the Arctic, John Reinartz simply published his developments and did not patent them. They were truly fearless: they switched the anode circuits of transmitters with telegraph keys; they manually adjusted the frequency of the transmitter by compressing and stretching the coils under voltage; considered the working moment when the lamp “gasped” and exploded.
Life did not stand still. In preparation for World War II, the technological process for producing radio tubes was significantly improved. Schemes of simple and reliable HF transmitters using commercially produced lamps were developed. Shortwave romanticism was entering a stage of maturity.
On March 9, 1946, by a document signed by the Deputy Chairman of the Council of Ministers of the USSR V.M. Molotov, amateur radio returned to the legal field. Following this event, the Shortwave Amateur Radio Committee was created under the Central Committee of the Union of Osoaviakhim of the USSR, which was headed by Marshal of the Signal Corps I.T. Peresypkin (sic!). Engineer Vice Admiral A.I. was approved as deputies. Berg and Hero of the Soviet Union E.T. Krenkel.
Radio receivers confiscated during the war began to be returned to citizens. The issuance of permits to operate on air has resumed.
In May 1946, the first issue of Radio magazine was published, where Ernst Krenkel published an information message about the organization of the Central Radio Club (CRK), and Fyodor Lbov posted a note about R1FL. Also featured in the issue were Marshal Peresypkin, Admiral Berg, Academician Kapitsa, Papanin heroes, engineer Shaposhnikov and many more respected and noble people.
Since 1947, Gosenergoizdat began publishing books in the “Mass Radio Library” series. The next part of the essay is written based on issue 162 (Kazansky I.V. How to become a shortwave operator) with subsequent analysis of the circuit based on materials from issue 125 (Shulgin K.A. Design of amateur shortwave transmitters).
DANGEROUS! HIGH VOLTAGE!
USE OF RADIO FREQUENCY EQUIPMENT AND HIGH FREQUENCY DEVICES WITHOUT PERMISSION FOR THE USE OF RADIO FREQUENCIES RESULTS IN ADMINISTRATIVE LIABILITY.
In those distant times there were no transceivers or frequency synthesizers. A typical amateur radio station consisted of a separate receiver and transmitter.
To communicate with another radio amateur, you had to tune your transmitter to its frequency. And it wasn't easy! Having received the signals of another radio amateur on your receiver, you had to approximately set the transmission frequency on the transmitter scale (but it is not possible to set it exactly on the analogue scale), and then by adjusting the transmission frequency, achieve the reception of the signal from your transmitter to your receiver at the correspondent’s frequency.
Let's return to the 6P3S transmitters. The diagram below was published in 1952. It is extremely romantic: the anode voltage source is assembled on a kenotron, the master oscillator (MG) is used immediately as the final stage, and there is no ammeter in the anode circuits. Enjoy:
However, using this transmitter does not require heroism. When the case is closed, the chances of getting under voltage are minimal: the “inductive three-point” and the variable capacitor (VCA) in the master oscillator are connected to the cathode circuits, and the telegraph key is also connected there.
When the telegraph key is open, the oscillations of the generator are disrupted. When you press the key, the SG starts, and oscillations appear in the antenna circuit with the resonance frequency of the L1C4 circuit. R2C3 parallel to the key ensures a smooth start of the gas generator, which makes the output signal less “chirping”. The shape of the output signal when switching without the R2C3 chain is shown in graph a), with a chain - in graph b):
Based on the shape of the output signal, we see that when you press the key, an unmodulated carrier or CW (Continuous Wave) is broadcast.
The special charm of the design is given by the fact that “self-control”, i.e. The transmission frequency can only be adjusted using a signal that is already on the air! For comparison, I will give a much more practical diagram of a category III transmitter from Shulgin’s book:
The CG and the final stage are implemented using different lamps. The SG power supply circuits are stabilized. An ammeter is included in the anode circuits of the output lamp to control the current. The telegraph switch is connected to the cathode circuits of the output stage.
The SG in the circuit from Shulgin’s book is constantly switched on; determining the transmitter tuning frequency with the control receiver is not a problem. Shulgin’s circuit is much more convenient to use, much more stable in frequency and better in signal shape, but it already has two lamps.
In the 60s, there was practically no romance left in HF communications. Amateur radio communications has become a sporting discipline. The airwaves became crowded, and radio amateurs switched to communicating with single-sideband modulation types. Transceivers began to be widely used, and there was no longer a need to adjust the transmitter frequency.
The remnants of the romantics fiercely resisted technological progress and used amplitude modulation transmitters outside the legal framework.
Amplitude modulation of the signal is carried out using a modulator. Here is a block diagram of an AM transmitter from Shulgin’s book:
The AM modulator changes, based on a signal from the microphone: - either the supply voltage of the final stage (anode modulation), - or the offset on the grids of the final stage (grid modulation). The best results are obtained by modulating the control (first) or protective (third) grids. Anode modulation was in some ways simpler, but it did not provide grid quality either.
The most indestructible romantics used a tape recorder amplifier, radios or mobile radios as an anode modulator. In this case, the plus power to the output stage from the circuit in Kazansky’s book was supplied from the anode of the amplifier’s output tube. Compared to schemes with grid modulation, the signal quality suffered, but this did not stop true romantics. And the name of such products was romantic: “organ organ”!
From the author
I started my journey on the air in 1979 at a collective radio station.
We used the tube version of the UW3DI transceiver. They worked mainly with single sideband modulation (SSB). Everyone knew the telegraph, but they were not so interested in working. I was interested in development, construction and debugging. My comrades were more interested in diplomas and prizes in competitions. No romance...
Used sources
1. “Radio”, 1946, No. 1 2. Kazansky I.V. How to become a shortwave operator - M.: Gosenergoizdat, 1952 3. Shulgin K.A. Design of amateur shortwave transmitters - M.: Gosenergoizdat, 1951
Other publications in the series
1. Nizhny Novgorod radio laboratory and amateur radio communications on HF 2. Nizhny Novgorod radio laboratory and radio receivers on crystal detectors 3. Nizhny Novgorod radio laboratory and Losev’s “cristadin” 4. John Reinartz and his legendary radio receiver 5. 6P3S transmitters and the decline of the era of romanticism
Analogs
Modern industry does not produce analogues of 6P3S, but in old electronic devices you can find identical 6L6GB, 6CN5. There are also similar lamps 6L50V, EL35, 1540, EL39, 5932, 6L6G, 7581A, 5881.
Domestic manufacturers produced an identical electronic tube 6P3S-E, which was distinguished by high reliability and a long service life of 5000 hours, instead of 500 for a simple 6P3S.
There was also a generator electron tube G807, which had the same electronic system as in the 6P3S under consideration. In it, the anode insulation was made of ceramics and the cylinder was larger in size and, therefore, had greater power.
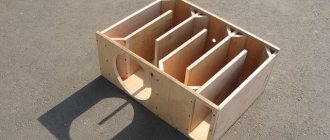
Power supply for a homemade tube amplifier.
I’ll start the assembly with the power supply and describe it at the same time. The heart of the power supply (and of the entire amplifier, probably) will be the TST-143 toroidal transformer, which I once (4 years ago) tore out of some tube generator right as it was being taken to a landfill. Unfortunately, I didn’t manage to do anything else. It’s a pity for such a generator, but maybe it was still working or could have been repaired... Okay, I digress. Here he is my security officer.
Of course, I found a diagram for it on the Internet.
The rectifier will be on a diode bridge with a filter on the inductor for anode power. And 12 volts to power the backlight and anode voltage delay circuit. This is the throttle I have.
Its inductance was 5 henry (according to the device), which is quite enough for good filtration. And the diode bridge was found like this.
Its name is BR1010. (10 amps 1000 volts). I'm starting to cut out the amplifier. I think it will be something like this.
I mark and cut holes in the PCB for the sockets for the light bulbs.
It's turning out pretty good as long as I like it.
Then I start to figure out how to arrange all the details on this PCB.
This way and that way. drilling sawing
Something began to emerge.
I found a fluoroplastic wire in old supplies and immediately all the alternatives and compromises regarding the wire for installation disappeared without a trace .
This is how the installation turned out. Everything seems to be “kosher”, the incandescence is intertwined, the ground is practically at one point. Should work.
It's time to fence in food. After checking and testing all the output windings of the trans, I soldered all the necessary wires to it and began installing it according to the accepted plan.
As you know, in our difficult amateur radio business, you can’t go anywhere without improvised materials: this is how the Kinder Surprise container came in handy.
And a Nescafe lid and an old CD
Next, I install the rectifier and power filter elements.
I tore out the capacitors from the boards of TVs and monitors. All containers are at least 400 volts (I know that I should have more, but I don’t want to buy them).
I bridge the bridge with containers (whatever were on hand, I’ll probably change them later)
It turns out to be a bit much, but oh well, it will sag under load
I use the standard power switch from the amplifier (clear and soft).
We're done with that. Well done
Backlight for tube amplifier housing.
To implement the backlight, an LED strip was purchased.
And installed in the housing as follows.
Now the glow of the amplifier will be visible during the daytime. To power the backlight, I will make a separate rectifier with a stabilizer on some KRKEN-like microcircuit (which I can find in the trash), from which I plan to power the anode voltage supply delay circuit.
Delay relay.
Having rummaged through the bins of my homeland, I found this completely untouched thing.
This is a radio time relay designer for a photo enlarger.
We collect, check, try on.
I set the response time to about 40 seconds, and replaced the variable resistor with a constant one. The matter is coming to an end. All that remains is to put everything together, install the face, indicators and regulators.
Regulators (input variables)
They say that sound quality can greatly depend on them. In short, I installed these
Dual 100 kOhm. since I have two of them, I decided to parallel the pins, thereby obtaining 50 kOhm and increased resistance to wheezing
Indicators.
I used standard indicators, with standard backlighting
I mercilessly copied the connection diagram from the original board and used it as well.
This is what I ended up with.
When checking the power, the amplifier demonstrated an output voltage of 10 volts of an undistorted sine wave with a frequency of 1000 Hz into a 4 ohm load (25 watts) equally across channels, which was pleasing
When listening, the sound was crystal clear without background and dust, as they say, but too monitory, or what? beautiful, but flat.
I naively believed that he would play without timbres, but...
The author of the article “homemade tube amplifier with your own hands” is Vyacheslav Tkachenko.
You may be interested in the following materials:
- Powerful homemade switching power supply for UMZCH
- A homemade charger for car batteries that does not need to be controlled!
- Smooth switch-off circuit
- Homemade converter for running a laptop from the car’s on-board network
List of literature that will not hurt.
GOST R 50671-94. metal bellows compensators for pipelines of power stations and heating networks. types, main parameters and general technical requirements
V.F.Vlasov.
Electrovacuum devices. Svyazizdat. Moscow. 1949
G.S. Tsykin.
Low frequency transformers. Calculation and design. Svyazizdat. Moscow. 1937
S.N.Krize.
Low frequency amplifiers. Svyazizdat. Moscow. 1948
R. Landy, D. Davis and A. Albrecht.
Radio engineer's handbook. Gosenergoizdat. M-L. 1961 Transformers of amplifying and measuring equipment. V.K.Kuznetsov, B.G.Orkin, Yu.S.Rusin. Energy. Leningrad. 1969
A.M.Broide, F.I.Tarasov.
Handbook of electrovacuum and semiconductor devices. Gosenergoizdat, MRB series. Rostov book publishing house. 1962 A.M. Bonch-Bruevich. The use of electron tubes in experimental physics. Ed. 3rd. State Publishing House of Technical and Theoretical Literature. Moscow. 1965
Receiving and amplifying lamps of increased reliability. Directory. "Soviet Radio". Moscow. 1962
Electrovacuum devices. Directory. Gosenergoizdat. M-L. 1956
Yu.A. Katsman.
Electronic tubes. "Graduate School". Moscow. 1979
B.B. Gurfinkel.
Receiving and amplifying electronic tubes. Gosenergoizdat. M-L. 1949
G.S. Veksler.
Power supply for special equipment (sound). "Vishchashkola". Kyiv. 1975
Tsykin G.S.
Amplifier devices. - Moscow, “Communication”, 1971
Catalog of electronic tubes. Brudna. J. Poustka.
Gosizdat tech. lit. Prague. 1957
In addition to the sources indicated here, of course, those given in articles NN 1 and 2 of the “Bulletin”. In the MRB series of the Energia publishing house, in 1997, G.S. Gendin’s book “High-quality tube audio frequency amplifiers” was just published. We recommend!
A. Belkanov, Vestnik A.R.A. No. 3