Subwoofer
with bass reflex: calculation, setup, typical mistakes
Theory and practice “on your fingers”
Australian Aboriginal music: didgeridoo, bass pipe.
Rice. 2 Correctly calculated and configured FI.
Rice. 3 Untuned bass reflex.
Rice. 4 Incorrect calculation of the bass reflex. Ragged bass.
Typical Chinese sub. Really filmed characterization.
For lovers of high efficiency, I recommend a horn loudspeaker: efficiency 15 - 20%
You've probably at least heard something about quarter-wave resonators. This type of enclosure is not so widely used in the construction of subwoofers and low-frequency sections of acoustic systems compared to, say, a bass reflex and a closed box. But why? After all, a quarter-wave oven provides undoubted fat advantages:
- gain in efficiency,
- excellent bass performance,
- low level of group delays.
In a word, “both loudly and efficiently.”
Perhaps because there are disadvantages:
- relatively large box volume,
- CV does not tolerate overloads,
- quite picky when choosing a speaker.
However, the last point also applies to the bass reflex.
Perhaps the widespread use of CV is also limited by the somewhat laborious nature of its calculations. Although the calculation itself is not that complicated, usually while you are designing a box, you have to go through several options, recalculating everything again each time. This is both tedious and time-consuming. And when you do something for a long time, you start making mistakes, and they are completely unacceptable when calculating the frequency factor. If you have a box and want to determine its settings, here is the link.
If you do not use various programs, then the CV box can be adjusted according to the following parameters:
Which frequency setting to choose.
| Frequency |
(Hz)
(opening) m.
(straight) m.
(narrowing) m.
1k2 - This port is like a horn...increases at the end, its dimensions are larger, but the efficiency is higher.
1k1 - This is the simplest port...direct! The table shows the port length.
2k1 - Tapering port, will save space; if calculated correctly, the difference from the two previous ones cannot be distinguished.
What is the required port area?
We choose the size of our speaker and the requirements from the case (maximum musicality or a compromise between volume and quality). For two speakers, the port area is 2 times larger.
| 30 | 31 | 32 | 33 | 34 | 35 | 36 | 37 | 38 | 39 | 40 | 41 | 42 | 43 | 44 | 45 | |
| 1k2 | ||||||||||||||||
| 3,25 | 3,15 | 3,06 | 2,97 | 2,87 | 2,78 | 2,71 | 2,64 | 2,58 | 2,51 | 2,44 | 2,39 | 2,33 | 2,28 | 2,22 | 2,17 | |
| 1 to 1 | ||||||||||||||||
| 2,86 | 2,78 | 2,70 | 2,62 | 2,54 | 2,46 | 2,40 | 2,34 | 2,27 | 2,21 | 2,15 | 2,10 | 2,05 | 2,00 | 1,96 | 1,91 | |
| 2k1 | ||||||||||||||||
| 2,46 | 2,39 | 2,32 | 2,25 | 2,18 | 2,11 | 2,06 | 2,00 | 1,95 | 1,89 | 1,84 | 1,80 | 1,76 | 1,72 | 1,68 | 1,64 | |
| Music preferences | "Nigga" | "All" | "Toot-Toot" | |||||||||||||
| Speaker Size (inches) | Effective diffuser area (cm^2) | Music building (cm^2) | Music Volume (cm^2) | Maximum volume (cm^2) |
| 4 | 50 | 50 | 75 | 100 |
| 5 | 75 | 75 | 110 | 150 |
| 6 | 125 | 125 | 180 | 250 |
| 8 | 200 | 200 | 300 | 400 |
| 10 | 310 | 310 | 465 | 600 |
| 12 | 480 | 480 | 720 | 950 |
| 13 | 600 | 600 | 900 | 1200 |
| 15 | 800 | 800 | 1200 | 1600 |
| 18 | 1200 | 1200 | 1800 | 2400 |
What kind of music is a bass reflex suitable for?
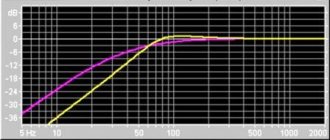
The bass reflex is distinguished by a powerful and voluminous bass , and the frequency response in the region of the tuning frequency has a hump (a significant increase in sound volume).
Example of bass reflex frequency response
Therefore, FI is suitable for music in which there is a lot of slow bass, where low frequencies are the basis of the compositions . Choose a bass reflex if you like dubstep, triphop, other slow electronic music, rap, R&B, etc.
Note: the bass reflex setting is the frequency at which the frequency response peaks, and is regulated by changing the length and area of the port, as well as the ratio of the port volume to the body volume.
Purpose, design and principle of operation of the CV box
The design of the HF box is aimed at modulating the sound flow. The effect of sound transmission and reflection is used. Thanks to the special housing design, sound harmonization is achieved. This is especially noticeable at low frequencies and when installing a subwoofer. With the appropriate dimensions, the HF box will make the bass sound quite loud, bright, but unusually deep.
Subwoofer box
Which speaker is suitable for a bass reflex
To choose a subwoofer for a bass reflex, you need to start from the Thiel-Small parameters (Fs, Qts, Vas). Usually this data is in the documents, but if you don’t have it, the parameters can be found on the Internet.
In order to understand whether the speaker is suitable for FI, carry out some simple calculations. Divide the Fs by the Qts and if the answer is between 60 and 100, then such a sub will be optimal for a bass reflex.
For example, the SUNDOWN AUDIO E-12 V3 speaker has Fs = 32.4 Hz, and Qts = 0.37.
Fs / Qts = 32.4 / 0.37 = 87.6 - such a subwoofer is quite suitable for FI.
If the value for your speaker is outside the 60-100 range, it may be worth finding a different design for it using this very useful plate. Please note that the table above does not prohibit the use of speaker enclosures that do not meet the Fs / Qts value. She shows options that will definitely work well.
First step: turning on the LPF filter
LPF (Low Pass Filter) is a low-pass filter that allows the speakers to play the bass specified during setup, while attenuating the presence of high sound frequencies. It can be located on the car's head unit or amplifier and is designated LPF or LP.
It must be turned on in the low frequency range 50-63 Hz. This parameter will be further adjusted after the settings of the remaining filters have been set. If the LPF filter is located both on the car radio panel and on the subwoofer amplifier, you only need to turn it on on one device. It would be rational to choose a radio, since adjustments on the amplifier are a little more difficult.
Types of bass reflexes
The bass reflex port is the main element of the body; it can be round (pipe) or rectangular (slit).
Round port (pipe)
It is impossible to say for sure which of these ports is better. They do what is more convenient or what they like best. The only point is that in sports (sound pressure competitions) pipes are used more often , since their use makes it easier to change the bass reflex setting by changing the length of the port.
Separately, it is worth noting this type as a passive radiator. A passive radiator (more correctly, a passive reflector) is the same bass reflex and the principle of its operation is the same. It is used in cases where the desired port for the FI does not suit the dimensions. A passive radiator uses a speaker without a magnetic system instead of a port .
Operating principle of a passive radiator
Closed box
This type of design is the simplest. A closed box for a subwoofer is easy to calculate and assemble. Its design is a box of several walls, most often 6.
Advantages of ZY:
- Simple calculation;
- Easy assembly;
- Small displacement of the finished box, and therefore compact;
- Good impulsive characteristics;
- Fast and clear bass. Plays club tracks well.
A closed box has only one drawback, but sometimes it is decisive. This type of design has a very low level of efficiency compared to other boxes. A closed box is not suitable for those who want high sound pressure.
However, it is suitable for fans of rock, club music, jazz and the like. If a person wants bass, but needs space in the trunk, then a closed box is an ideal option. A closed box will not play well if the wrong volume is selected. What volume of box is needed for this type of design was long ago decided by experienced people in car audio through calculations and experiments. The choice of volume will depend on the size of the subwoofer speaker.
The most common speaker sizes are: 6, 8, 10, 12, 15, 18 inches. But you can also find speakers of other sizes; as a rule, they are used very rarely in installations. Subwoofers with a diameter of 6 inches are produced by several companies and are also rarely found in installations. Mostly people choose speakers with a diameter of 8-18 inches. Some people indicate the diameter of the subwoofer speaker in centimeters, which is not entirely correct. In professional car audio, it is customary to express dimensions in inches.
Peculiarities
Materials
Requirements for materials and assembly are standard. The bass reflex box must be strong, sealed and not vibrate. Material - plywood or MDF from 18 mm. and thicker.
Please note that all wire entry channels, terminal blocks, etc. must be reliably sealed , internal partitions (port walls) must not have any gaps .
Rounding of the bass reflex port
If the slot port is long and has turns, then stagnation zones may appear in the corners; to avoid this, the bends are smoothed out - as a result, efficiency increases, since the resistance to air movement decreases . It is quite difficult to determine the improvement in quality by ear, but for the fight for a high result in sound pressure, this solution works.
Port smoothing options
The ends of the ports can open up, which can eliminate parasitic noise from air friction at the outlet, but this problem is not common. Also, due to the openings at both ends, the tuning of the port (bass reflex) is lowered, or its length is reduced. That is, for the same setup, a port with extensions at the ends will be shorter than a straight one and will take up less volume.
Operating principle
Motorists may be familiar with a resonator, another example of which is the CV box For example, it is used as a functional element of a muffler. In this case, the hollow structure has its own characteristics and another purpose.
From a technical point of view, a resonator is an oscillatory system that accumulates vibrations due to frequency resonance. Typically, the design involves “working” with a limited set of frequency characteristics. Depending on the design, resonators of cumulative and instantaneous action differ.
Homemade wooden box
The storage resonator accumulates external energy by reducing the frequency of internal oscillations. In a mathematical context, any resonator design whose oscillation frequency is greater than the oscillation frequency of the external influence is cumulative. This happens whether the diameter is 10 or 12 inches, but you need to choose a different volume.
Instantaneous action implies the correspondence of the internal oscillatory force in period to external oscillations. Such resonators increase the sound power due to thermal absorption of the surrounding space, shifting the frequency at the input power - changes due to an increase in the playback interval.
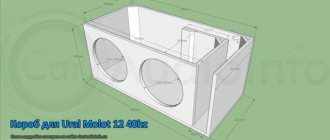
The common CV box has a rectangular shape with partitions resembling a caterpillar in arrangement. The appearance will depend on the speaker and its features, size – 10″ or 12 inches. At the moment, you can find drawing diagrams for any frequency device and make a resonator at no extra cost. It will differ slightly from the brand name.
Example of a 10″ resonator
Example of a 35 liter HF box for a URAL speaker
Cumulative FM box for 15-inch speaker
Drawing of a 12″ HF box with a 35 Hz setting
Scheme 15″
You can make a resonator in a mini version. This solution is shown in the figure.
Drawing of a CV box for 12″
To obtain drawings of 10, 12 and 15″ HF boxes, you can use a search engine or our resonator database or calculation program. The easiest way is to search by type of speaker and required volume. For example, a 12″ CV box can be implemented in several versions, depending on the technical features described and demonstrated below.
Features of setting up a system of several subwoofers.
Now let's turn our attention to setting up the bass section of a movie theater consisting of several subwoofers. There are some peculiarities here. Let's move on to them.
1. Use identical subwoofers
If you want to avoid wasting a lot of time spent on manipulations when setting up a link of 2 or more subwoofers, use the same devices. Only twin subwoofers can have the most similar characteristics of all components and the resulting sound, which is essential to obtain a predictable effect of uniform bass coverage of the entire listening area.
2. Place subwoofers as recommended
We are talking about the practices of the most optimal placement of multiple subwoofers in a room, discussed in detail in the corresponding section of our article.
3. Make sure all subwoofers are playing the same "melody"
Believe me, it will be extremely problematic to set up an array of subwoofers that reproduce different signals. Once again, make sure that the LPF on each of the subwoofers is turned off or turned to the maximum value so as not to interfere with the bass management system of the AV receiver/processor. The phase settings should also be identical. As a rule, the switch or phase control should be left in the “Normal” or “0” position. If the receiver/processor has only one output from the preamp to the subwoofer, it's time to use Y-signal splitters. If the receiver has and uses several subwoofer outputs, make sure that the bass management for each of them is configured correctly and outputs the same signal (“Both” or “LFE+Main”) to all outputs. In short, you need to make sure that each subwoofer receives a mono signal from all speakers designated "Small" plus the LFE channel signal. Some receivers/processors (in particular, some models from Denon) support a stereo subwoofer configuration, the use of which for our purposes will only introduce a destructive component. Make sure it is not enabled (Mono mode is selected).
4. Equalize the volume of all subwoofers
It is very important to set the same sound volume on all existing subwoofers. If this is neglected, you risk ending up with poor integration, and even overload during loud moments if some subwoofers are set louder than others. This will cause distortion at lower volume levels relative to what your system is actually capable of. The correct way to match the level of all subwoofers is to use the pink noise generator built into the receiver/processor and measure it with a sound level meter in the “C-weighted” mode. Measure the level of each subwoofer individually, physically turning off all others during measurements. Measurements must be taken at the same distance relative to each of the subwoofers. And if you are really pressed for time, you can measure the level in the near field of the subwoofer by placing a sound level meter or measuring microphone on the floor at a distance of 10 cm from the wall of the device where the emitter is located.
Example of measuring microphone placement in the near field
If the subwoofer is a bass reflex subwoofer, the microphone should be placed halfway between the center of the speaker and the bass reflex port (already on a tripod). This technique becomes very problematic to implement if the subwoofer has several speakers, which is why we recommend taking measurements at a point equidistant from all devices, and this point will not necessarily be in the listening area. Once you have aligned the volume of all subwoofers relative to each other, it’s time to move on to equalizing the volume of the subwoofer section relative to the front speakers or center channel.
Measure the level for the front LR and C channels and the subwoofer array at at least two points (primary and secondary listening positions, for example, the first and second rows of a movie theater). Record your results in a table so that you can more accurately make the necessary adjustments. It's a really good idea to measure at least two points and calibrate the levels so that the difference is no more than 1-2 dB, this way you will get the most correct SPL coverage throughout the entire listening area. Even THX recommends taking your time when taking measurements. Make time for your experiments with RTA and SPL meters, and with plenty of reserve. THX recommends taking each measurement for at least 20 seconds. Some professional calibrators take up to a full minute for each measurement. This will provide you with a guaranteed correct result. Why? Because pink noise is not always uniform at low frequencies. Noise is by definition random. The longer the instrument measures the noise and calculates the average, the less likely it is to experience SPL measurement errors due to the natural heterogeneity of pink noise. Spend as much time as you need to take good measured measurements - it will be worth it in the end.
5. Take measurements of the initial frequency response
Before moving on to automatic calibration or active equalization, it is necessary to understand what we will start from initially. Getting maximum integration between your theater's front speakers and your subwoofers is critical. An alternative point of view is that the most important thing is the correct integration of the center channel and subwoofers. If you mostly watch movies and listen to multi-channel music, this is probably what you should do. However, as practice shows, a person is much more susceptible to incorrect reproduction of music by the front stereo pair than to accurately determining whether there is perfect coordination between the center channel and subwoofers during the instant action scenes of a movie. If you prefer listening to 2-channel music programs, prioritize calibrating the subwoofers relative to the front LR channels. If you watch movies more often than listen to music, feel free to calibrate the subwoofers relative to the center channel speakers.
Connect the output of your RTA to a free pair of stereo line inputs on the receiver/processor, place the device or its measurement microphone at the main listening point at the level of a seated person's head, and let the fun begin! Set up the meter to measure from 10 to 200 Hz and at 60 dB volume levels so we can see exactly what's happening at low frequencies in your system. Don't forget to make sure that you have a measurement resolution of at least 1/12 dB/oct available. A lower resolution will not allow you to clearly see the real state of affairs.
Frequency response measurement process in full swing
Once you have your initial frequency response graph, capture it and then try playing with the following parameters and see if you get any measurable improvements (smoother graph, fewer humps and dips):
- Main speaker size: Large / Small (Large should only be considered if it has given a real improvement in the frequency response graph, and your speakers are able to play all the necessary low frequencies at the reference volume level (105 dB at the listening point), without overload or distortion) ;
- Crossover frequency of the main speakers;
- Distance to subwoofer (delay);
- Subwoofer phase.
It is not recommended to move the crossover frequency value further than 20 Hz from the often optimal and recommended THX of 80 Hz. It was also noticed that some receivers/processors tend to cut the LFE channel if you set the cutoff frequencies below 80 Hz. If you set the crossover frequency much higher than 80 Hz, a problem with localizing the subwoofers may arise, especially if some of them are located close to the listening area. If you have small satellites, 100 Hz will likely be the optimal crossover frequency. The stereo effect at frequencies below 150 Hz is extremely weak, and depending on the sensitivity, distortion and natural roll-off frequency of the main speakers, setting the crossover at a frequency of 100 Hz can create the most complete sound. The key to success in this business is experimentation. If your satellites are so small that they require the crossover frequency to be set too high, you should consider replacing those speakers or placing the subwoofers as far away from the listening area as possible to mitigate localization issues.
Again, in most cases it is recommended to leave all satellites in Small mode. This will allow for better integration between them and your subwoofers, as well as greater dynamic range from the main speakers, which no longer have to carry the heavy load of low-frequency reproduction. In addition, this will entail a reduction in the amount of distortion in the speakers themselves and the amplifiers that serve them.
Subwoofer distance is an extremely important setting in achieving maximum integration of subwoofers with each other and with the main speakers. If each subwoofer is connected to a dedicated preamp output, measure and set the correct distance for each. If all subwoofers are ideally installed in a rectangular cinema room, a single delay (distance) value will be suitable for them. Moreover, it is recommended to maximize the effect of leveling standing waves.
However, if your current setup is less than ideal, you may need to play around with the delay settings for each subwoofer individually. In such cases, try to calculate the average distance from the listening area to a group of subwoofers sitting on the same line output. For example, if you have one subwoofer at 3 meters and the second at a distance of 2.5 meters, the average result will be 2.75. This is the value of the delay in the receiver/processor to start with. Most likely, it will be adjusted upward due to the presence of a natural delay in the subwoofer digital amplifier path. We can get the ideal delay value by measuring SPL (LCR + subwoofer) at the crossover frequency: change the delay, measure - and so on until the SPL is maximum.
MiniDSP UMIK-1 and Dayton Audio OmniMic measurement microphones for use in PC-based RTAs
Once you've finally achieved the best measurable result for your primary listening position, repeat the entire process for the next most important seat in the room. Try to find a combination of settings that produces the best sound from both points. You can continue further, but as a rule of thumb, if you have done your best in the first two cases (for example, in the center of the first and second rows), other places will also benefit from this. Again, the more correctly you were able to position the subwoofers during installation, the less body movements and additional adjustments you will have to make to achieve a stable and even frequency response graph for all seats.
6. Engage the equalizer or automatic calibration system
Now that we already have an acceptable result of integrating all our subwoofers with the main speakers, it’s time to put the finishing touches on the picture and push the frequency response graph into an even narrower framework. The recommendations below are based on using the Audyssey MultEQ Pro autocalibration system with an external measurement microphone and software, but for the most part they will be valid for most other similar systems, because they all work on similar principles.
So:
- Install the measuring microphone at the height of the listener's head at the listening position, using a microphone stand and pointing the microphone straight up;
- Avoid microphone installation locations where there will be obstacles blocking the direct sound from the speakers. In particular, tilt the backs of theater seats so that they do not interfere with direct sound from the rear speakers;
- Measurements should be taken at points located around and close to the main listening area;
- Avoid the most extreme side places. It is important to measure in a specific area between the most frequently used listening positions;
- Double the number of measurements at the two most important listening locations. This will allow Audyssey to give more weight to these measurements in the final picture;
- Adjust the bass management, delay, and crossover frequency settings after calibration is complete.
The last point is quite important, because... Auto-calibration quite often makes mistakes in setting the speaker type (Large instead of the recommended Small) and in choosing the optimal crossover frequency (underestimates it). In this case, delays are determined, as a rule, quite accurately.
Audyssey based system calibration video tutorial
Any automatic calibration system must be checked by subsequent measurement of the resulting frequency response and comparing it with the original graph. It got better - great! It got worse - we return to the starting point, check the correctness of our body movements when activating the auto-calibration system, and do it again. And so on until it gets better.
7. Listen and make adjustments
Even the best and most accurate measurements in the world cannot guarantee excellent sound in the end. Now is the time to sit down and listen with your own ears to the fruits of your labor. Play music you know with intense bass lines. Listen to it in two-channel mode + subwoofers in all the main places in the listening area and try to understand how it sounds. Then listen to music in multi-channel mode (initially multi-channel recordings and 2-channel through the ProLogic decoder). In most cases, the bass will seem more pronounced when moving from 2-channel mode to 5.1/7.1 matrix. Ensure you get satisfying bass in all modes throughout your listening area. Feel free to turn up or down the subwoofer level a couple dB if you prefer. Experiment and tweak the bass management settings (and speaker size and crossover frequencies) to ensure that your optimal settings, based on measurements, sound similar—optimally.
You can relax a little and listen to your favorite records
When you have achieved linearity in the low-frequency range, you often feel the urge to turn up the subwoofer's volume by a couple of dB. It is much more comfortable to listen to sound with elevated low frequencies when you have a flat frequency response than when it contains pronounced modal humps that make the bass booming and unnatural. So don't be afraid to tune your subs a couple dB higher than your main speakers once you've achieved overall linearity in the sound. In some cases, you may even need to raise/lower the level of one specific subwoofer. Most often this concerns the subwoofer located closest to the listening area.
If you are not happy with the sound with Auto Calibration enabled, turn it off or try calibration again and see/listen if you got better results this time. Simply put, you don’t need to focus on the calibration results if they don’t suit you by ear. Fine tuning is usually still necessary to get the best sound, but there's no denying the strong correlation between great sound and great measurement results.

