When extraneous noise appears during a conversation on Skype or another voice messenger, the comfort of communication suffers. Most often, this occurs due to users turning up the volume of the microphone too much or amplifying it, which can cause various noises, background sound, crackling, whistling, etc. In this article we will describe what to do in Windows 10 if the microphone is noisy.
First you need to do the following:
- If you have a desktop personal computer, try connecting the microphone to a different connector. Typically system units have them both at the front and at the back.
- Test the device on another computer, if possible.
Types of background noise
Microphone noise can be defined as “unwanted sound.” Basically, the duration and level of background sounds determine the characteristics of the noise.
There are 3 main types:
- Broadband (or continuous wave) - when acoustic energy is distributed over a wide range of frequencies as it is picked up by a microphone. This category includes hissing, buzzing, and static noise.
- Narrowband is limited to a narrow range of frequencies. Has a constant level, usually caused by improper grounding and poorly shielded cables connecting microphones. This is any unwanted signal that remains persistent over time.
- Pulse includes sharp sounds such as clicks and pops. Has high frequency and short duration.
- Electric usually comes from the technology used to record the sound.
- Irregular - conversations, traffic, thunder and rain.
If there is electrical noise, make sure that the recording equipment is connected to the same power strip. Microphone cables should be kept away from electrical cables.
Irregular noise is very difficult to remove because it is made from many random sounds that vary in frequency and volume.
In other cases, the problem may be caused by an inappropriate audio card driver. System sound settings also need to be adjusted. However, first of all, it is recommended to reconnect the microphone to a different connector (for example, on the rear panel of the system unit) and test it on another computer.
Additional reasons for noise when recording or talking
The microphone may be noisy for the following reasons:
- Poor contact. You need to check not only the USB ports and sockets, but also the sound card. At the junctions, areas of oxidation are sometimes found.
- Poor connection quality. When Internet packets are lost, the recording “stutters.” Hissing may occur. Sometimes interlocutors complain that the voice becomes slurred, like a robotic one. To rule out this reason, check the quality of your connection using Ping and measure the speed. Sometimes, to fix the problem, it is enough to restart the router and PC.
- Using outdated drivers. The software facilitates the correct interaction between the operating system and hardware. If the driver is missing or outdated, the microphone will not work properly. Often a complete absence of signal is detected.
- Electromagnetic waves. They are produced by third party devices. Waves create interference. To remedy the situation, move electrical appliances as far away as possible. In rare cases, noise may even arise from the system unit.
- Incorrect settings. If you unsuccessfully experimented with the system parameters, the microphone will make noise in all programs: in messengers, when recording video, in browsers, etc. If problems arise with only one application, it is recommended to check its internal settings.
Image by Mel Maryns from Pixabay.com.
Additionally, the quality of the device is important, since the microphone can produce noise due to poor assembly, low-cost components, etc. Manufacturers reduce the cost of products by simplifying designs, so it is recommended to buy models in the mid-price segment or more expensive.
Damaged cable
If the cable is damaged, the microphone will, at best, work with noise and periodically fade out; at worst, it will completely fail. In most cases, the integrity of the wire is compromised in an area that is frequently bent. For example, near a plug or branch point. Sometimes the problem area can be found by visual inspection, but often you have to call the cable. This can be done, for example, using a light bulb and a battery.
If the cause of the breakdown is a damaged wire, it can be partially replaced using a soldering iron.
Noises from household appliances
Household appliances are a source of not only electromagnetic waves, but also noise. For example, the volume of a washing machine can reach 89 dB. The noise level during a quiet conversation is 50 dB. Regardless of the settings and quality of the microphone, loud sound will be transmitted to the interlocutor. The only way to solve this problem is to change the location.
Troubleshooting
The first stage is to entrust the search for the problem to a system tool. In the latest version of the OS, it copes with the tasks much better. There are two ways to carry out diagnostics.
Via Control Panel
- Open the Control Panel using the “Run” window (Win + I – command control – Enter).
- In the list, find the “Troubleshooting” section and open it by clicking the left mouse button.
- Go to the “Hardware and Sound” subsection.
- Select “Sound Recording”.
- A new window will open - click the “Next” button.
- The system will start searching for the problem.
- Select a device from the list and click “Next”.
- The tool may or may not identify the problem. If an issue is detected, you must follow the on-screen prompts to correct the error.
- After the process completes successfully, close the window.
Through the context menu of “Speakers”
- Right-click on the “Speakers” icon, which is located on the taskbar on the right. Select “Troubleshooting...”.
- The tool will start looking for the problem and, if it can, fix it itself.
Basic Tips for Recording Sound Clearly
Before diving into the software's features, you should follow some basic guidelines for clearer audio recording. Here are some quick tips:
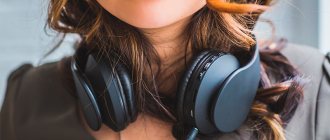
- Wear headphones: If your microphone picks up noise from your speakers, wear headphones to eliminate echo.
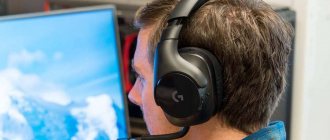
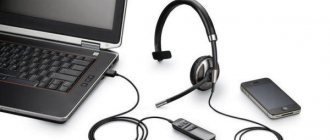
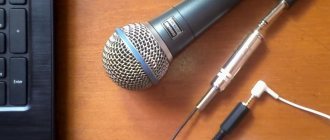
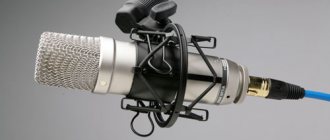
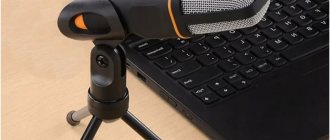
- Use a dedicated microphone or headset: Many laptops have fairly poor quality built-in microphones. Of course they work, but that's all that can be said about them. Try connecting a dedicated microphone or headset to your computer.
- Eliminate or step away from background noise: Close windows, move away from vents, go into less noisy rooms, close applications that make your laptop fans whir, move the microphone further away from your mouth so other people can't hear you breathe, and generally think about yourself. how you can avoid noise. Try trading in that noisy mechanical keyboard for one that's quieter during calls. You can also mute your call while you're not talking.
Standard microphone settings
The next step is to remove the software amplification of the digital audio signal:
- Right-click on the “Speakers” icon and select the “Sound Options” menu item.
- Open the companion option "Sound Control Panel."
- In the new window, go to the “Recording” tab. Select the device with the cursor and call up its properties.
- On the Levels tab, set the volume to 100% and the microphone gain to 0 dB. It is better to select the value experimentally (it can be at the level of 10 dB).
- Go to the “Listen” tab, check the box of the same name - you need to speak into the microphone to check the settings.
- In the “Advanced” tab, set the bit depth and sampling frequency to 16 bits, 48000 Hz. The higher the frequency, the more hissing is heard.
- When you are satisfied with everything, you need to uncheck the “Listen to...” item, apply and save the changes.
Method 4: Disable Listen on This Device feature
Oddly enough, turning on the “Listen to this device” function most often causes problems with the microphone. Users simply forget that this technology reproduces sound directly from a microphone to headphones or speakers, which is why a split voice or noise appears. In the same properties window, open the “Listen” tab and make sure that this function is disabled. Otherwise, you will need to uncheck the box and apply the changes.
Driver setup
You should also try updating the software:
- Open Device Manager by right-clicking on the Start icon and selecting the tool of the same name from the menu.
- Expand the “Audio inputs and outputs” section, double-click on the desired device.
- In the window that opens, go to the “Driver” tab and click the “Update” button.
- You can perform either an automatic driver search by the system or a manual one. But in the latter case, you must first download the driver yourself from the official resource.
Update Realtek High Defenition Audio in the same way.
If this does not help, it is recommended to reinstall the driver:
- Right-click on the device name and select “Delete”. Confirm action.
- Restart your computer for the changes to take effect. After restarting, the system will try to reinstall the driver.
- If this could not, find and download the appropriate microphone driver on the official website of the PC manufacturer and install it through the “Update” option.
Reinstall Realtek High Defenition Audio in the same way.
Method 2: Manage Built-in Enhancements
If the instruction turned out to be ineffective, do not rush to leave the already open menu, because there are several more items in it that may have an impact. Open the “Enhancements” tab and see which effects are checked. If noise reduction and echo reduction are disabled, try enabling these filters and then test their effect. It is better to deactivate other improvements related to sound effects, since they do not always work as intended by the developers.
Special programs
Many audio card manufacturers produce utilities for adjusting sound. For Realtek, this is Realtek Audio Control, it can be downloaded from the Microsoft web resource.
The utility itself is very simple and understandable. In the “Microphone” tab, select the appropriate effect, adjust the volume and gain. You can also activate the option to eliminate acoustic echo, set the bit depth and sampling frequency.
Here you should try different parameters and see how the sound changes, whether the noise becomes less audible.
It is also worth highlighting third-party applications for noise reduction:
- Voicemeeter.
- NoiseGator.
- SoliCall.
- Andrea PC Audio Software;
- Samson Sound Deck;
- Krisp.
Recommendations
To ensure that the equipment works for a long time and properly, listen to the following operating recommendations.
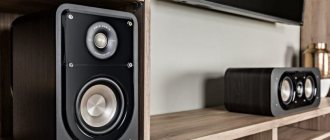
- Surround, clear and loud sound is only possible when using high quality equipment. You shouldn't demand much from cheap acoustics.
- Transport speakers carefully by packing equipment using boxes, foam, bubble wrap, and other options.
- Update your driver regularly.
- Acoustic equipment quickly becomes unusable due to high humidity.
- Make sure that the cables are not under too much tension.
To learn about the reasons why speakers hum, see the following video.
Noise Canceling Accessories
Some accessories help eliminate background noise:
- The preamp makes it easier to transition between the microphone and other equipment.
- A laptop power adapter does a great job of reducing static noise, especially if you are using multiple sections of recording equipment.
- Shock Mounts – Mounting them on the microphone stand will reduce background noise caused by shake and vibration.
- The wind shield fits over the head of the microphone and cuts out unwanted wind noise and heavy breathing.
For smartphones and tablets
Many modern smartphones have built-in noise reduction systems. In addition to the main microphone, they have additional ones, whose function is to record extraneous sounds. Then the system subtracts them from the stream of the main microphone, and the interlocutors clearly hear your voice. Thanks to this, you can talk on the phone even while standing in the wind.
Communication services themselves usually have a built-in noise reduction system - for example, Google Meet and Zoom have this function. Apparently, this is why there is no serious demand for special noise filtering solutions for mobile devices, but we still managed to find a couple of interesting services.
For Android and iOS: Noise Wall - Block Noise
This application masks extraneous sounds using artificial noise. We talked about the use of white, pink and other types of noise in a separate post. Let us briefly recall: special noises can displace external sounds for the listener.
Feelings from experiments with Noise Wall are mixed. Ambient sounds really cannot break through the “wall” of noise. However, sometimes you have to turn the application volume up to almost maximum to do this. Therefore, with prolonged use, the generated noise can begin to annoy no less than sounds from neighbors or from the street. On the other hand, Noise Wall copes with its task, and this service is still worth trying.
Usage: To launch, just open the application after downloading. Among the additional settings, Noise Wall offers a choice of four types of noise and a timer to turn off. Unfortunately, the application interface is currently only available in English.
Price: the application is free (Android and iOS), but to use it without advertising, you will have to buy the Pro version for 169 rubles.
For Android: Safe Headphones - Hear Background Noises
The Safe Headphones app does not dampen surrounding sounds, but rather enhances them. During tests, a person's soft speech could be heard over an energetic track blaring in the headphones. This “superpower” can come in handy in situations where you need to hear important information, such as an announcement about your flight at the airport.
If you turn off the music, Safe Headphones turns your Android smartphone into a kind of hearing aid, amplifying surrounding sounds.
Usage: the application interface is only partially translated into Russian, but is quite concise. There is a switch, a button to activate the background noise filter, and a volume control.
Price: Safe Headphones - Hear Background Noises is free to use if you don't mind the ads in the app. The developers are asking 590 rubles to disable it.
Echo suppression in Discord
You can eliminate interference that occurs when using a microphone in this program using the built-in tools.
To do this, perform the following actions:
- Open the application, click on the settings icon. Go to the “Voice and Video” section. Here you can configure the parameters of sound and image transmission during communication.
- Go to the “Echo Cancellation” tab and move the slider to the right. They say something into the microphone and evaluate the sound quality.
If it is not possible to eliminate echo in a program in this way, use the tools built into the operating system.