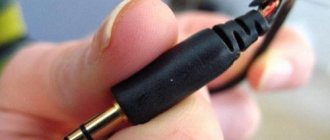
While playing a vinyl record, the following process occurs. The turntable spins the record at a certain speed, and the tonearm (lever) holds the cartridge over the grooves. At the end of the cartridge is a cantilever that supports the needle. The tip, made of diamond or sapphire, is attached to the cantilever and moves along the grooves, reading information from each side to produce a stereo signal.
And when interference occurs during playback, the user is looking for an answer to the question of how to replace the needle on a vinyl player.
Why do pickup needles wear out?
If we look at the needle through a magnifying glass, we see a device in the shape of a pointed cone attached to a cantilever. The needles or probes vary in profile, from conical in some designs to fine ellipses in more expensive models, but the tip itself retains the cone shape. It allows the needle to be equally spaced in the groove and read information from both sides.
The movement of the cartridge causes wear on the needle. When to change the pickup stylus , the distorted sound during playback will tell you. You will find styli for different models of turntables here. It is impossible to prevent this process, because it is the result of listening to records. But there are several preventive measures.
How to prevent needle wear
To extend the shelf life of the pickup stylus, you should pay attention to several points during tuning:
- aligning the cartridge so that the needle sits evenly and tracks in the groove;
- anti-slip, for example, using the Anti-Skate system, which will provide
- higher productivity;
- tracking weight, with more weight the stylus will forcefully contact the record, which will accelerate wear, the cartridge suspension will be subject to stress and can lead to the body hitting the record.
Taking into account the settings, it is possible to significantly extend the life of the pickup stylus.
It is important to keep the grooves clean. Cleaning the records will help here, as well as applying a cleaning agent to the needle, which should be done regularly.
The service life of the needle varies from 150-200 to 1000 hours of operation and depends on the manufacturer and materials used. On average, the needle will need to be replaced every three to five years.
To prevent wear and tear, some users practice counting the time the cartridges were used, such as how many records were played in an evening, to make a rough estimate.
When is it time to change the needle?
To determine needle wear, perform a simple diagnostic test.
- Inspect the needle with a magnifying glass - signs of wear will include uneven edges or bends in the head, and black spots may be due to overuse or lack of care and can be removed by cleaning.
- Play a record whose sound you know well and pay attention to the sound quality - hiss and interference where there was none before, or the sound is muffled or distorted, indicating that it is time to change the needle.
- A needle that slips or pops out also requires urgent replacement, otherwise the records may be damaged.
- On a used record player, replace the needles before their expiration date expires, this will guarantee the safety of the recordings.
If the pickup stylus needs to be replaced, you have several options to choose from. Replacement probes are suitable for moving magnet cartridges. Sometimes the cartridge needs to be replaced if it is damaged, but this device can last for many decades.
Changing the pickup of a vinyl player, article. Portal “www.hifinews.ru”
Perhaps none of the Hi-Fi devices can compare in terms of the breadth of tuning possibilities and individual settings with a vinyl disc player.
Save and read later -
In fact, the design of a turntable is more mechanical than electronic, and its proper adjustment is absolutely necessary for proper operation. Even more interesting is fine-tuning the player, or replacing its various functional parts (of course, provided by the manufacturer), which will improve the sound quality of the device.
Note that high-end turntables are often supplied without a cartridge at all (and some even without a tonearm), and users themselves are given the opportunity to purchase and install the “missing” elements. However, turntables of the most popular middle class usually already have a sound pickup installed, but its quality, as a rule, does not allow the full potential of such a player to be revealed. For them, in most cases, such a replacement will be the most relevant. As for inexpensive models of turntables, not all of them have pickups that can be changed, and in cases where such a possibility is provided, such a replacement will not always be justified by higher sound quality. However, here too the need for such work may arise - for example, if the standard head fails.
We change it ourselves
So, it’s decided - we’ll change the pickup head in our turntable! As an example, we will take the popular model of the Thorens TD309 turntable, which is standardly equipped with a good AT-95 B pickup. However, as the experience of many music lovers has shown, replacing it with a more expensive and high-quality model raises the sound of the Thorens TD309 at least one step up. Worth a try!
First, we set up a workplace. We place the turntable on an empty desk - the shelf for the player in the Hi-Fi rack is not suitable for this purpose, since it will require a significantly larger working area. A prerequisite is good lighting, since we will have to deal with rather small details.
Let's check the tools. We will need a pair of screwdrivers of different sizes (the best are the so-called “sentry” ones, with a rotating upper platform), an angled hex key. Of course, its size must match the slot on the screws that we have to unscrew. We will also need pliers with narrow and thin jaws, or mounting tweezers.
Please note that all work on replacing pickups must be carried out without haste and as carefully as possible. It's important to remember that you're dealing with some of the most delicate machinery in the world of hi-fi audio. The most fragile element of a pickup is, of course, the stylus. In most head models, it is closed with a removable cap; do not remove it until all work on installing the pickup is completed. At the same time, you can safely handle the pickup body. So, let’s unpack our pickup (the Benz ACE doesn’t have a protective cover, so we’ll be extremely careful), and remove the screws securing the head. The pickup comes with a lot of useful things (liquid level, screws of various sizes), we will try not to lose all this.
So, we have already dismantled the old head, and now it’s time to install a new one. First, we remove the holder - on the Thorens TP92 tonearm it is secured with one hex head screw. Carefully unscrew the screw and disconnect the holder. Then we screw the head to the holder with suitable screws from the pickup delivery kit, and mount the holder in place. Please note that all screws used to secure pickups and tonearm structural elements are made from high-quality steel with high precision. They have a soft working stroke, and if you have to exert significant effort to tighten or unscrew them, then you are doing something wrong.
After we have fixed the pickup on the tonearm, we connect the input conductors. There are four contacts on the back of the head; the terminals of the conductors coming out of the tonearm tube must be connected to them. This model uses color coding of the contacts, but in some cases it can also be symbolic - then the letters L and R indicate, respectively, the left and right channels, and the signs + (or Hot) and - signal and ground.
Of course, the wire and the connected contact must be the same color. For this work we will need tweezers or pliers with very thin jaws. We alternately place each mini-plug that ends the conductors onto the corresponding color contact of the pickup. The plug must be inserted “all the way”, so that the tip of the contact is visible on the opposite side.
Here, too, you don’t need to put in much effort; everything needs to be done smoothly and without strong pressure. In some cases, you may notice that the plug you put on the contact wobbles a little from side to side, which can cause the electrical connection between them to become unreliable. To fix this, remove the plug and carefully (carefully!), with a little force, squeeze it from the sides with tweezers. As a rule, these plugs are a piece of thin metal rolled into a tube, and as a result its diameter should decrease slightly. Then we put the plug back on the contact and check the reliability of its fixation.
So, the head is installed and connected. Now is the time to start setting up the pickup and tonearm, as described in the instructions for the vinyl player. And only after all the adjustments have been made (and also after spending some time on the initial running-in of the head), you will be able to evaluate the increased sound quality of your player. We are sure that it will not disappoint you!
Prepared based on materials from the portal “www.hifinews.ru”, October 2012
www.hifinews.ru
This article was read 16,178 times
The article is included in the sections:
Useful tips
How to change the needle on a vinyl record player
Just a few decades ago, every vinyl record owner knew how to install a stylus on a turntable using a lever to move the stylus - the tonearm - and a headshell - a metal case that holds the cartridge with the stylus. This process does not require special skills.
Replacing the needle (stylus) occurs in the following order:
- Turn off the player and, holding the case with one hand, carefully grab and pull out the old needle with the other. Sometimes the stylus may be built into the cartridge, in which case you will have to replace the entire cartridge.
- On the body of the needle, look for letters and numbers that indicate the model number. This will make it easier to find the right needle, and you can order it online.
- You can also try a different model of stylus if it is compatible with your turntable, and ask how often to change the stylus on that model of turntable.
- While holding the body with one hand, insert the needle with the other hand, taper down, and press it into the socket until it clicks, after which you can listen to the recordings. Some modern devices may not make a clicking sound.
Proper setup, keeping it clean, and keeping track of usage will help prevent stylus wear. Always be interested in new accessories, for example, if you need a cartridge, you will find it here, and types of cartridges to keep your turntable in working shape.
Dismantling the old part
Be sure to monitor the correct position of the stylus during the repair process.
So, the most vulnerable element of the pickup is the stylus (needle). Don't forget that many pickup head models are closed with a special removable cap. Do not remove it under any circumstances until the end of the procedure.
But you can and should take hold of the body of the pickup itself. First, carefully holding the body, remove the screws that secure the head, and then remove the head itself. By the way, a good manufacturer often includes very useful and important parts with pickups - a liquid level, which helps to clearly adjust the position of the player relative to a particular surface; screws of different sizes (including spare ones); mini screwdriver and other accessories. Don't lose it all - each of the spare parts will definitely come in handy.